


RuifcNunes
-
Posts
0 -
Joined
-
Last visited
-
Days Won
3
Content Type
Store
Calendar
Forums
Gallery
Downloads
Posts posted by RuifcNunes
-
-
On 4/21/2024 at 8:39 PM, dr_broon said:
I've been looking around for some photos of the brackets for the standard fog lights, but had no luck.
This diagram is for the parts (again for the standard ones, not the big fogs), but should give a bit of an idea.
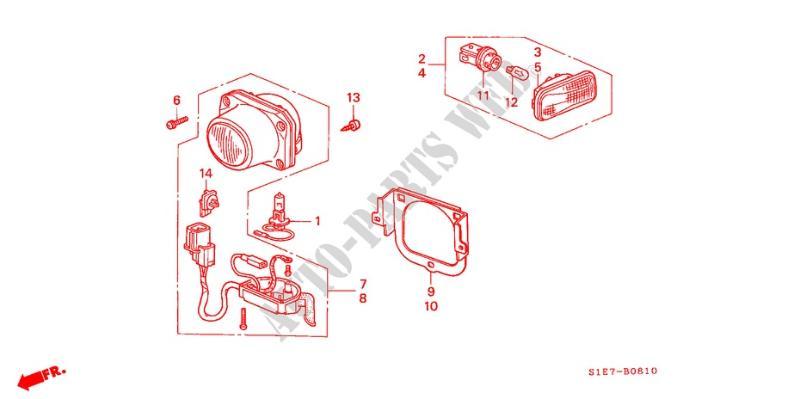
Part 10 is the bracket.. From memory the 2 tabs at the sides are where the bracket screws to the bumper.
Hey, thanks for the help.
The number 10 bracket does look like it would fit my bumper. However the brackets that came with the fog lights doesn't fit the bumper.
Maybe I need that bracket to connect to the bumper and the ones I've got now will then connect to that?
-
On 4/16/2024 at 6:53 PM, SirPaperbag said:
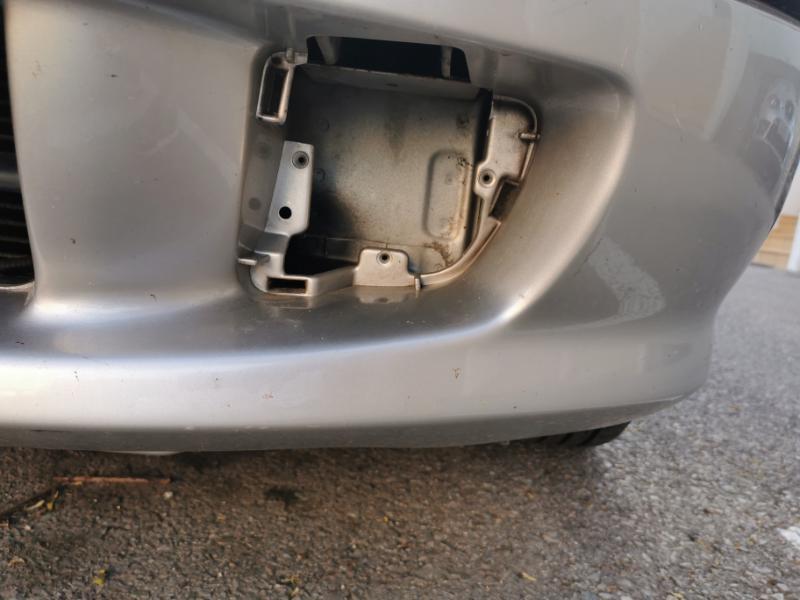
It seems you might be missing some kind of plastic cowling / housing that would go around the fogs inside of the bumper hole.
And I can only speak for pre-facelift models here, but the OEM fogs would be attached from the backside of the bumper where there are a bunch of sturdy mounting points for the screws to bite into.
That's the part I'm talking about, btw - that plastic trim around the projector.
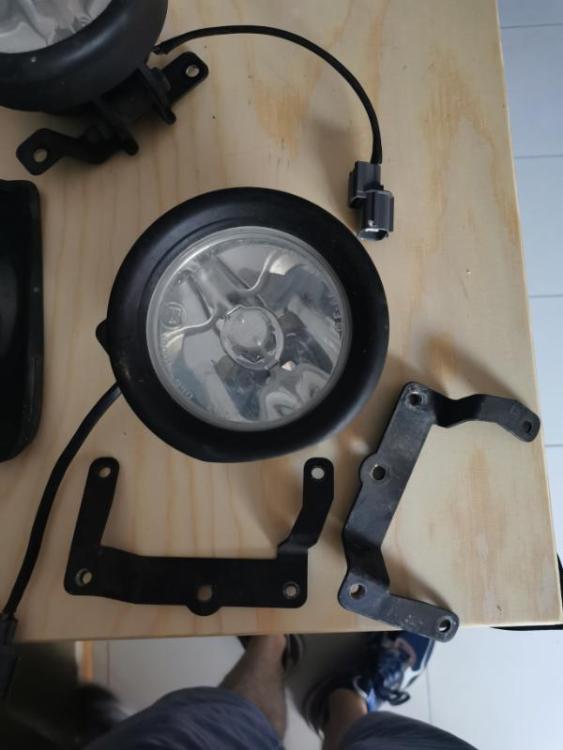
I do have the plastic cowling of the version without fog lights, however In believe that the cowling doesn't affect the assembly. My problem is that the metal brackets of the fog lights don't match the holes in the bumper. I must be missing something else..
-
Hi there,
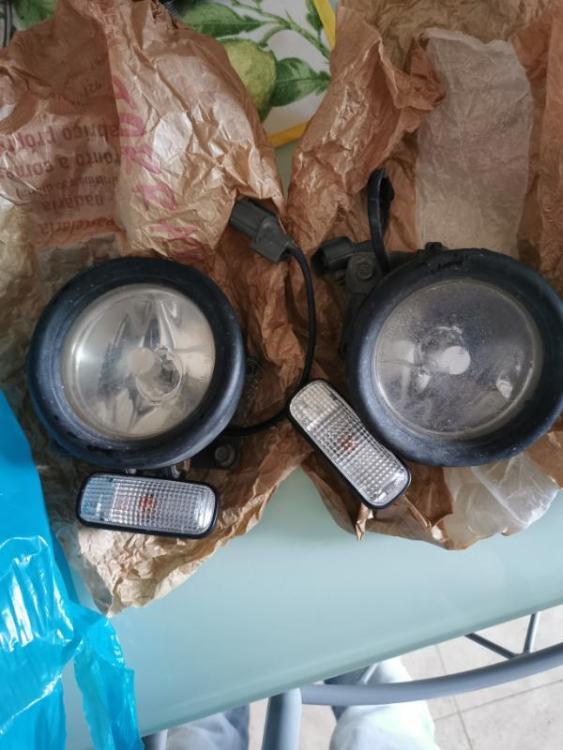
Recently got a nice pair of oem Bosch Big Fog Lights for my aerodeck. However, can't seem to understand how they attach to the bumper. Has anyone got some photos of how they are assembled to the car for me to check what am I missing?
-
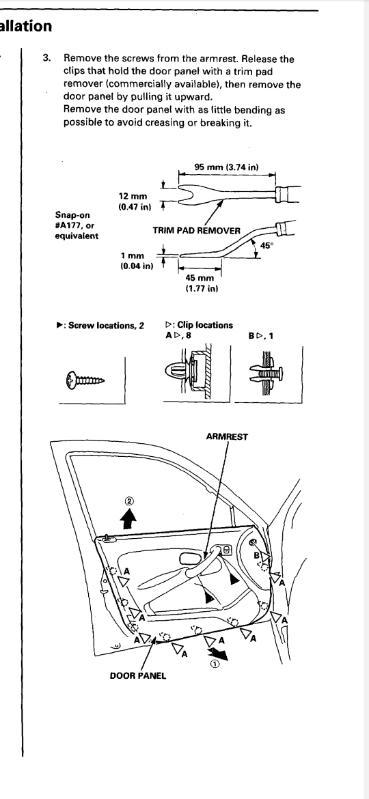
Hey there, I am currently needing to remove both front door panels of my aerodeck to resolve issues regarding the door lock and the glass support.
I would like to get some clips beforehand just in case some get broken.
Does anyone know where

-
7 hours ago, KiNK43 said:
I don't specifically, but seems to be various types on eBay for example.
Best to measure the diameter you need and have a look


There are some that look like the oem ones, it's just strange since the diameter is 63 mm and it seems like there aren't any with that diameter. Also the surface isn't flat, is convex so I am not sure if the sticker will be able to stick properly.. I guess I'll have to give it a try
-
 1
1
-
-
12 hours ago, KiNK43 said:
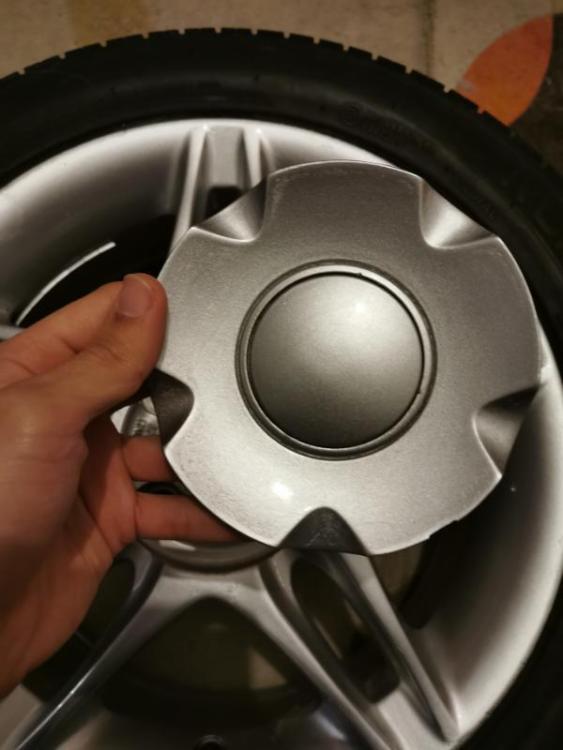
Hi I believe what you are missing is a gel type sticker with the honda logo. They must have been removed in the past.
Now that you mention it I believe you are right. By looking at photos it has always seemed to me that it came with a 3D Honda logo, but looking more carefully it is definitely a sticker. Do you now if anyone sells these?
-
Hi guys,
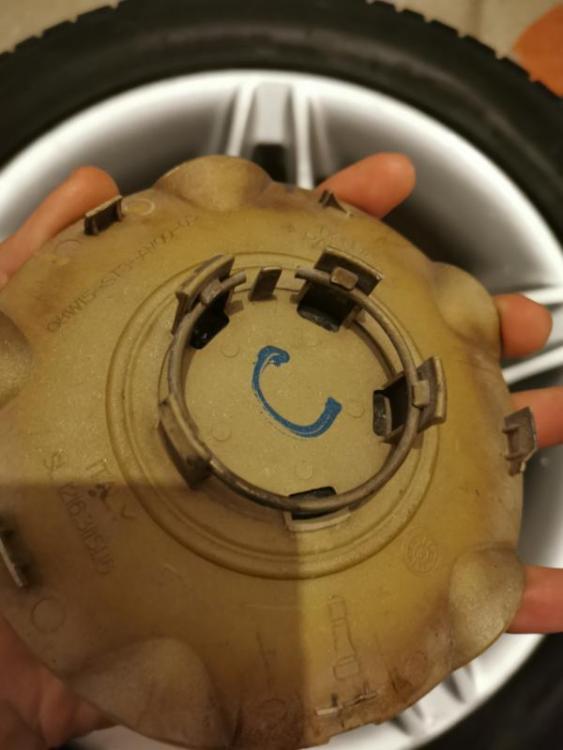
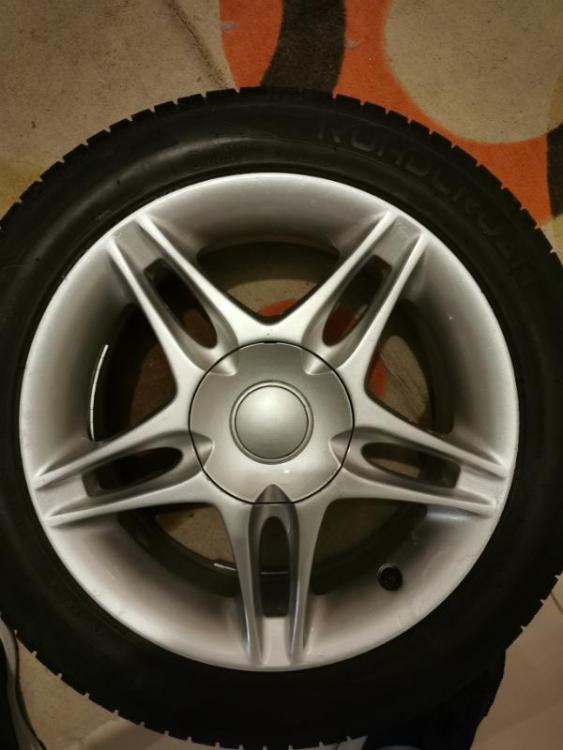
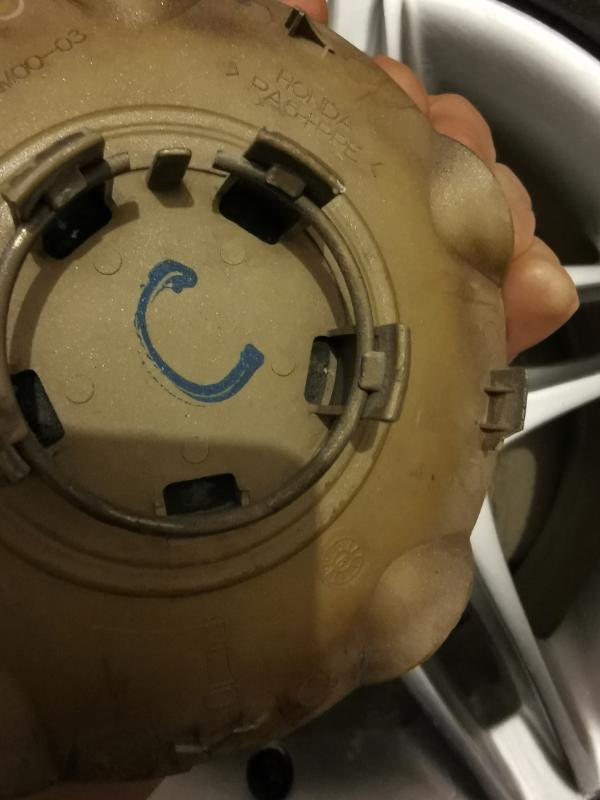
Recently managed to acquire the wheels I was looking for my aerodeck ("Civic Jordan" 15 inch with 4x100 pcd).
Although they came complete with the lug nut cover, the center cap on these is missing the chrome Honda badge it usually comes with. I thought that the center cap was removable but it doesn't seem so, since it has no pins or anything. I can't find any information on how are these center caps assembled, and would like to know if any of you has these wheels in order to show me how are the oem center caps and how they fit on the wheel.
The photos attached show my center caps.Thanks

-
Hey!
My wiper motor is quite noisy. Tried lubricating the linkage but it doesn't get any better. Has anyone had a similar issue?
-
On 10/19/2022 at 9:38 PM, dan1 said:
Hi Rui,
Once the rubber cover is removed the textured part twists off anticlockwise. Ive attached a photo to show. Can be really stiff if they havent been removed in a while.
Cheers, Dan

I had only opened one of my fog lights because it was the worse condition one, but now I am trying to open the other one an it's impossible. Can't rotate the part no matter what I do. Did you just use brute force or do you have any tip?
-
I'm going to try to treat the rust and see if they still have good metal underneath it. I was thinking of nickel plating them and then polish the best I could.
What thin foil tape? Do you have any pictures or something? Always open to new ideas..
-
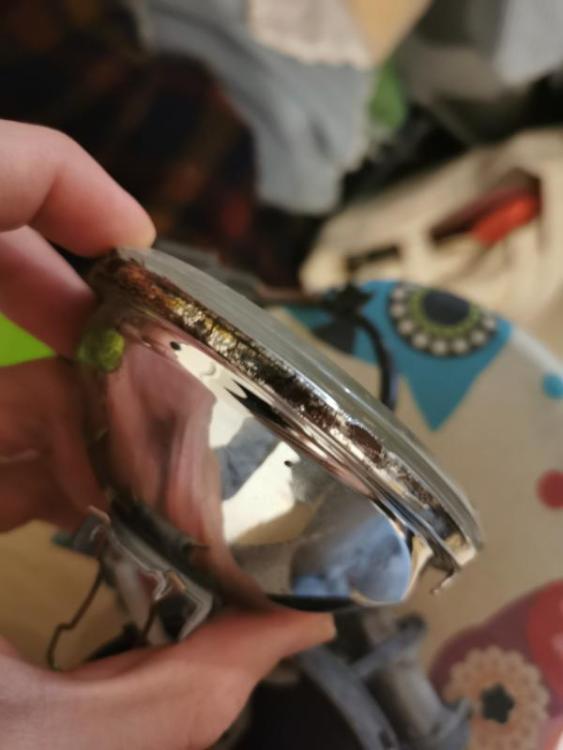
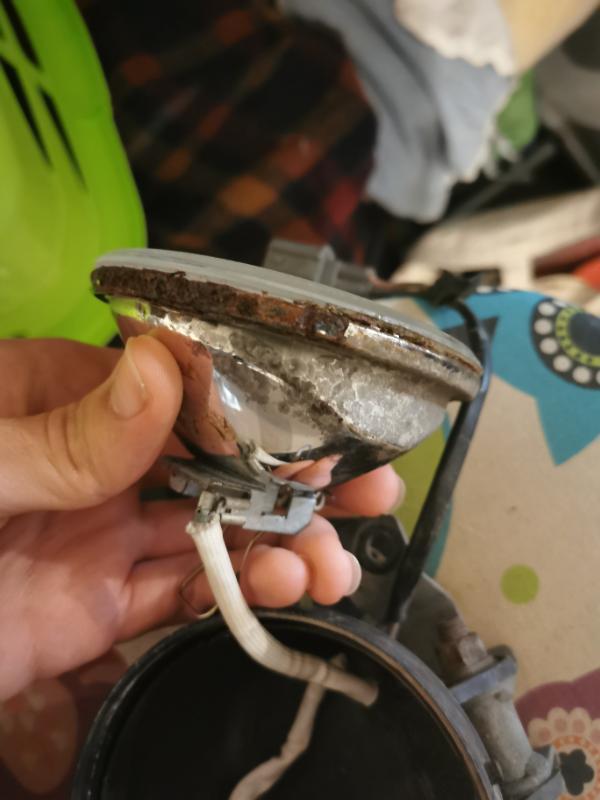
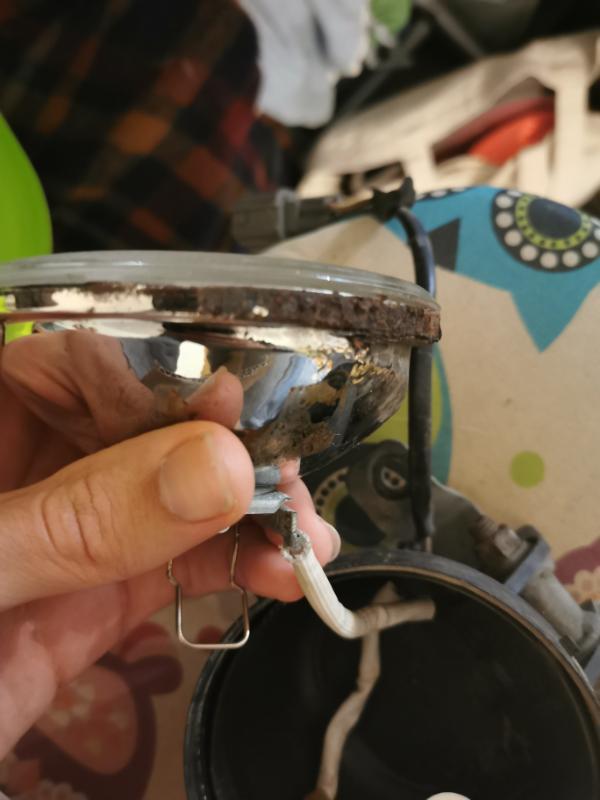
This is what I found when I opened mine, always thought that the reflector would be made of plastic but..


-
57 minutes ago, dan1 said:
I cant take any credit, it was this guy that found them, got some close up images of the lights aswell:
Really nice, very similar to mine, but I wish I had those wheels..
Thanks for the help!
-
19 minutes ago, dan1 said:
I would imagine heat would help but i dont know of any tricks or anyone whose done it before.
If its beyond saving you can still get replacement lamps on ebay, but theyre not bosch and ship from the US: https://www.ebay.co.uk/itm/392038428811?mkcid=16&mkevt=1&mkrid=711-127632-2357-0&ssspo=1ouKfcuWQBO&sssrc=2349624&ssuid=d-k9ZEaNTZm&var=&widget_ver=artemis&media=COPY
Theres someone on here who has ordered a pair but i cant remember who it was - had a aerodeck though
Really cool find! I'll try to repair the Bosch ones first, but if they end up being impossible to repair I'll definitely order a pair of those.
-
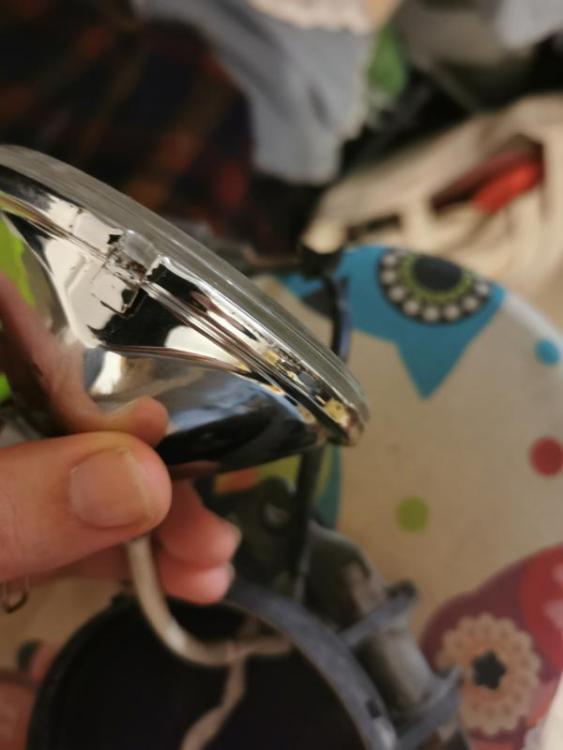
I've managed to get to that part and removing the housing and glass from the plastic cover, however I discovered that the chrome housing is actually metal an it's very rusted. I don't know if it is recoverable.
To remove the glass I have to apply heat to weaken any sort of seal or is there any "trick"?
-
Thanks for the help, I will have a look. These are OEM manufactured by Bosch.
-
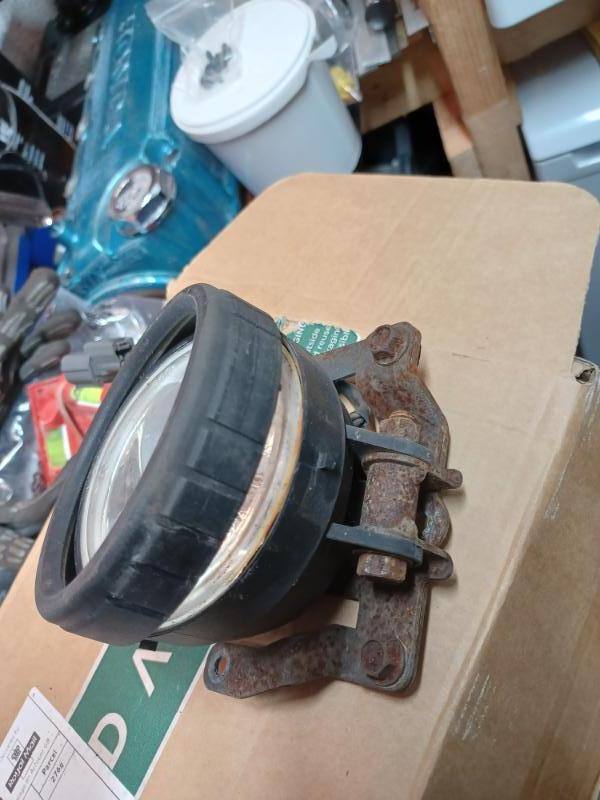
Hi,
I've managed to find these fog lights that seem quite rare and I was hunting for a while.
However I am happy with the find, they require some repairs and I can't seem to find a way to open them, not even to change a bulb. So, I was wondering if anyone here knows their way around these fog lights that could help me.
PS: Ignore the side markers on the attached photo.
Best Regards,
Rui Nunes
-
1
-
-
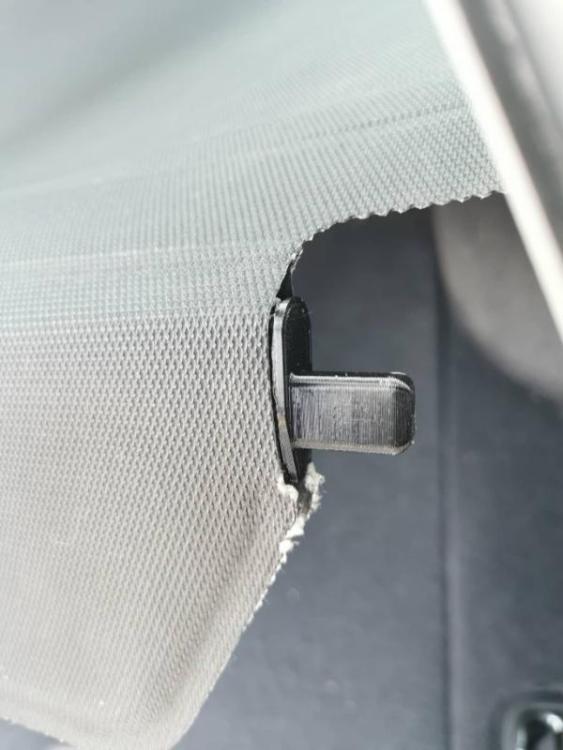
There was a plastic piece in there that acted as a bumpstop for the spring and it was broken. I 3d printed a replacement part for that.
Also I had one of the small palstic pieces that hold the cover open broken, and also printed a replacement for that. Everything is working fine.
For now I won't be doing anything more to it, i'll use my time to sort other things out, but if anyone ends up running into any problems with the cover I'm happy to help.Here is a photo of one of the replacement pieces I've printed, the other I didn't take a photo and now it's in there ahah...
-
2
-
-
I forgot to take pictures so the explanation might be a bit vague, but i'll try my best to make it clear.
On the cargo cover ends there is a hole where between two ribs that mount on the car. If you take a peek in the hole you will see a hollow round tube that has small pin going through it. That pin is what keeps everything closed, so you need to remove it.
In order to do it I banged on it on the other side so that the tube became exposed on the end I wanted to remove, and then with a hammer and a small bit removed the pin.
You might need help from another person to compress the end or the tube may not become exposed.I'm thinking disassemble it again in order to do a tutorial video and develop a rebuild kit with my 3d printer, do you think it's worth it? Don't know if many people experience problems with their cover..
-
2
-
-
On 10/1/2022 at 10:20 PM, dr_broon said:
Hi Rui, welcome to the site.
I'm not sure I remember anyone ever taking one apart to be honest. I wouldn't be surprised if the plastic end caps snap on when it's assembled in the factory.
Hi, just wanted to let you know that it is actually possible to open them up and repair them. I've managed to do it after a lot of try and error.
-
1
-
-
Unfortunately you are probably right.. Thanks for the input!
-
Hi, I have bought an civic mb9 a few weeks ago, and the cargo cover is damaged. Bothe sides are supposed to have a pring mechanism in order to remove the cover from the car, but one side just moves freely without any tension. You can clearly hear that there is something broken in there, and the shaft isn't fixed on the side that has no tension, so it moves when you pull the "curtain". I'm trying to figure out how can I disassemble it on order to try and repair thebroken interior parts with my 3d printer, however, I can't figure how you can remove the plastic ends, there are no screws, no latches, nothing. It's a bit frustrating, I hope any of you can give me some info on how to do it or if it is even possible...
Thanks in advance,
Rui


Bosch Big Fog Lights - Help with assembly
in SOS! Help!!
Posted
Thanks a lot! This was exactly what I needed!
Turns out that I needed to slightly cut the bumper.
This forum is so awesome! 😁😁