


Aerokek
-
Posts
76 -
Joined
-
Last visited
-
Days Won
21
Content Type
Store
Calendar
Forums
Gallery
Downloads
Posts posted by Aerokek
-
-
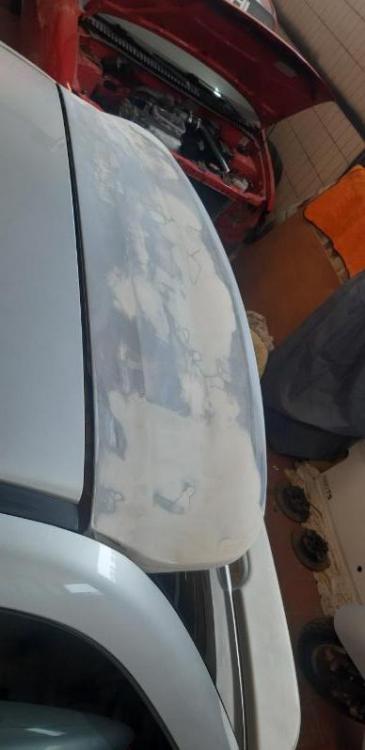
The taillights have been in hold for a while, it's something I've got stuck on and is maybe a little bit above my knowledge and mastery. Also having to reorder parts and such is just kind of a pain. I'll finish them some day though. In the meantime I did something wild:
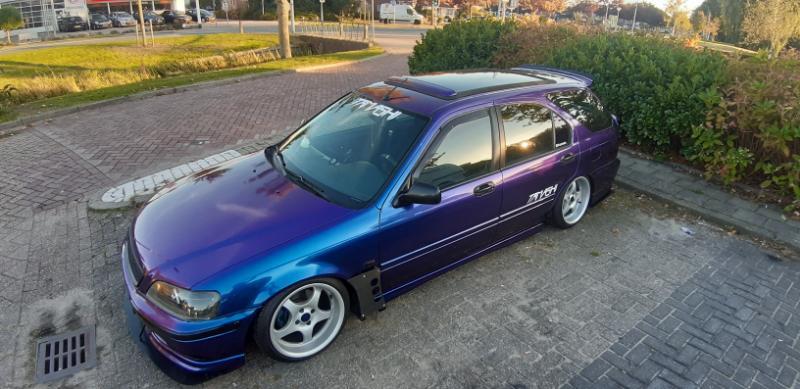
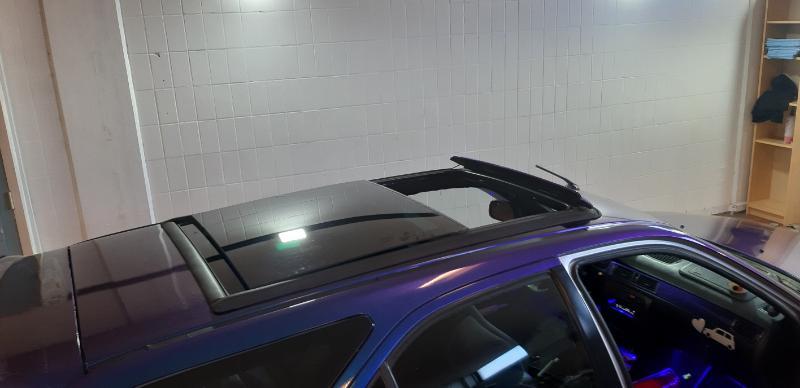
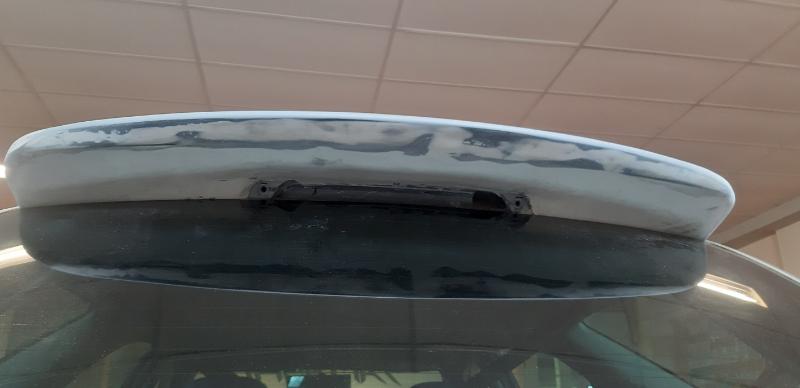
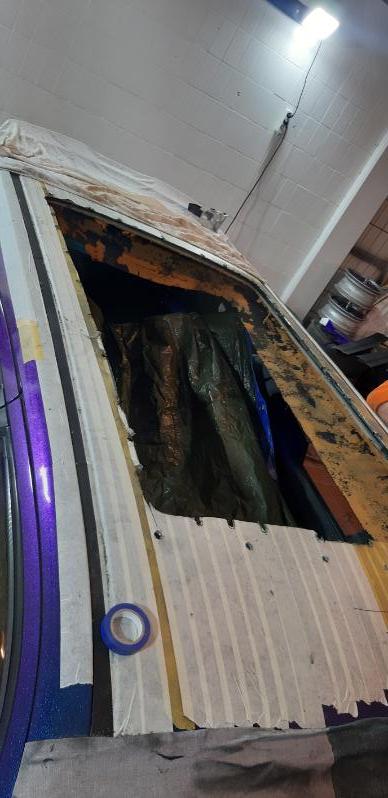
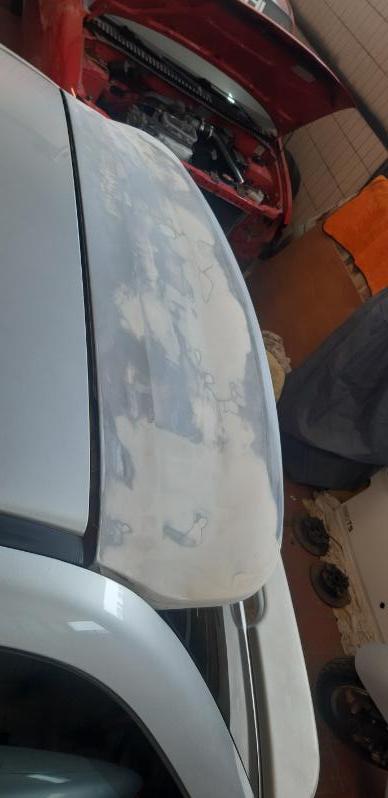
I fitted a panoramic glass sun roof! AND IT'S THE TITS.
It's been a long time since I've been this excited over a mod and it's a refreshing feeling. It fits great, works great and it passed the leak test. So far all that is left to do is tidy up the roofliner a little more and make a little cover for the motor that drives the glass panel back and forth.
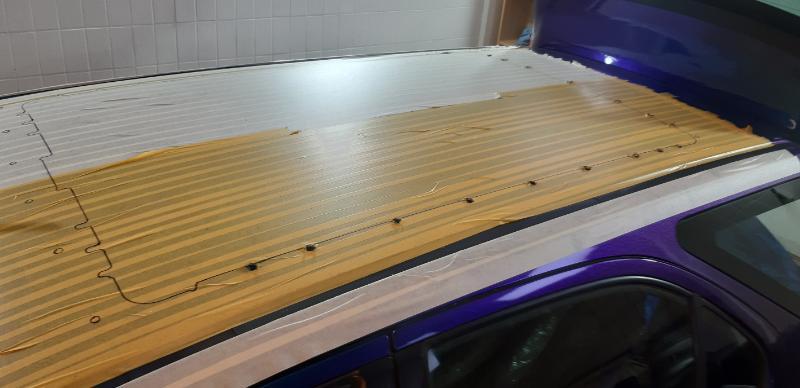
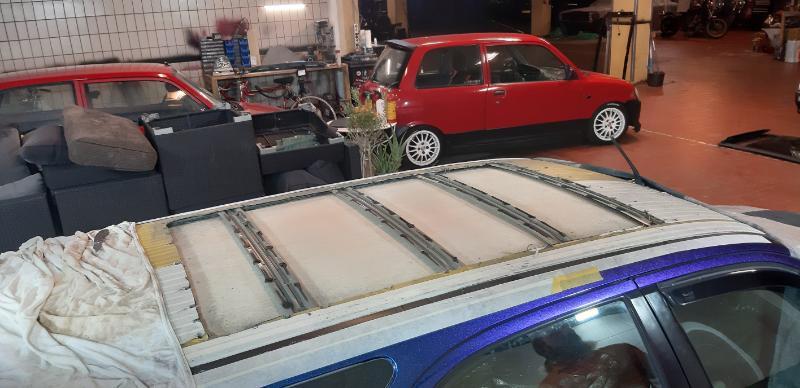

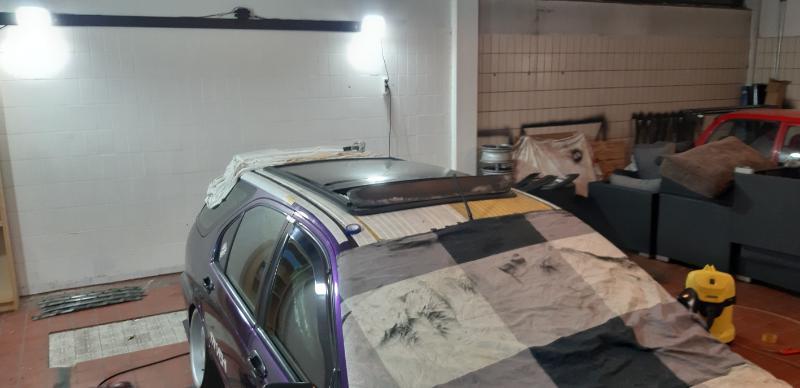
The process itself was surprisingly easy, it just takes some balls and faith haha. Super stoked with this, I can't wait for next summer ;)
-
 3
3
-
-
Hey all, been a while!
Since I'm quite busy with work and prepping for vacation I figured, why not stress myself out some more,
I had been wanting to do this for a loooong time, suddenly, the idea just popped back into my head and I said f*ck it, let's try!
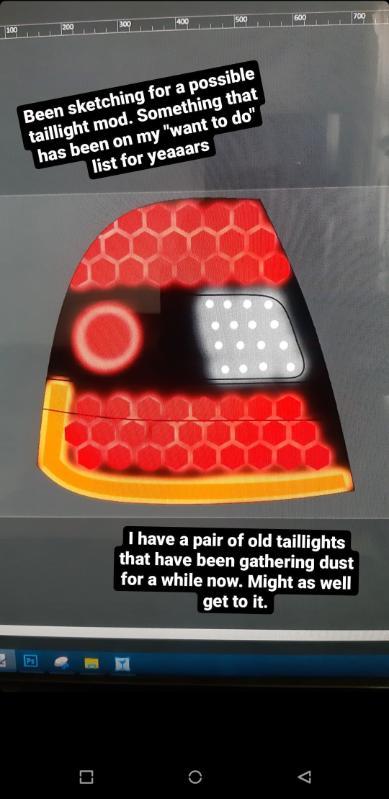
I started by sketching up what i had in mind:
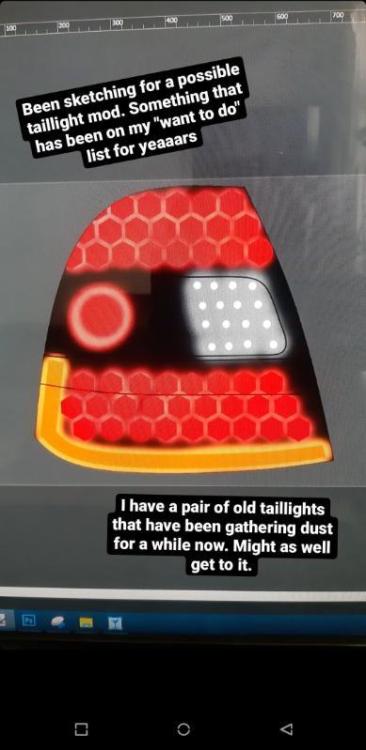
Usually it takes me a little longer to figure things out but this time I just put on my dancing shoes and sent it.
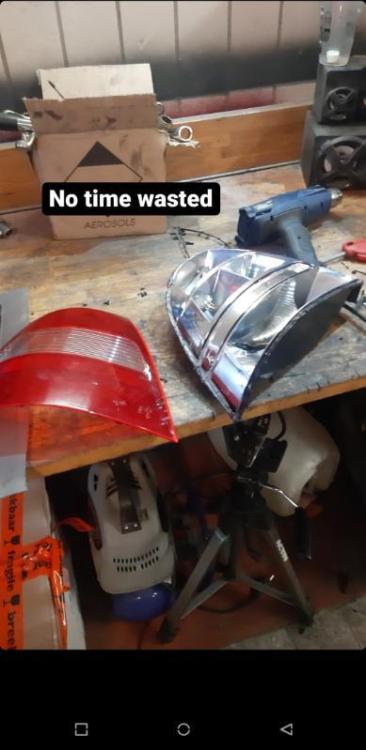
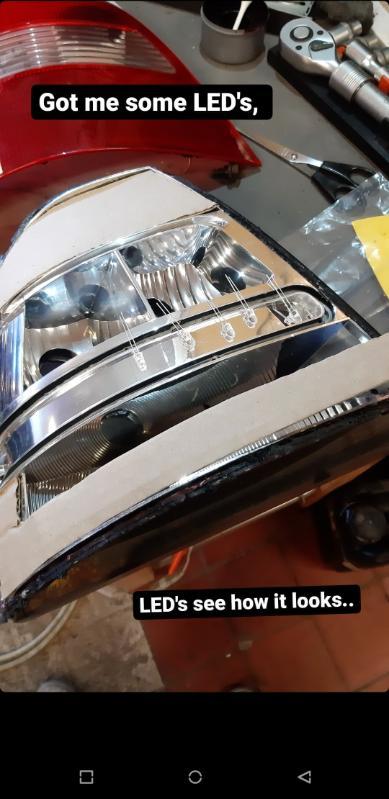
Got straight to cutting up one of the spare tails I had lying around that were collecting dust for years now
I started with making cardboard templates for the translucent plastic I was going to use, make sure it all fits. I did change the layout from the original idea a little bit.

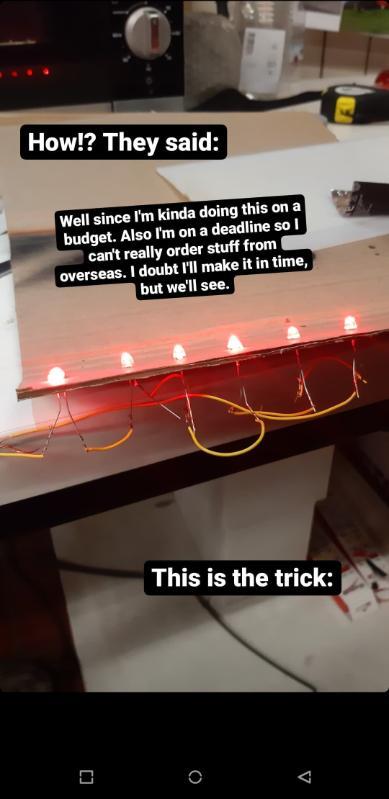
Bought some regular "bright" LED's, figured i'd string them up in series and power them with 12 volts, (each LED uses about 2 volts, so having six of them evens the voltage out nicely.)

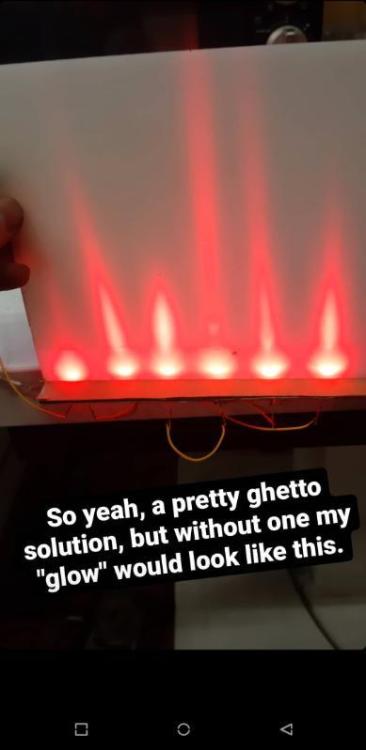
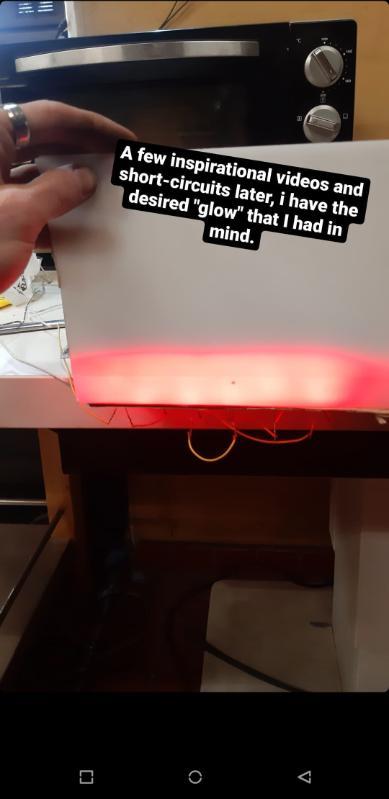
The next challenge was getting the "glow" I had in mind.

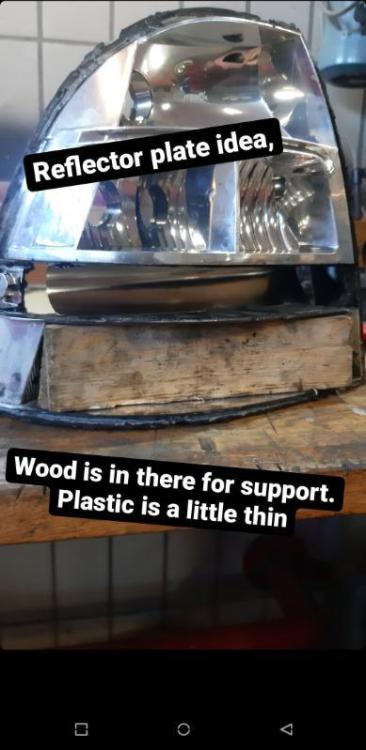
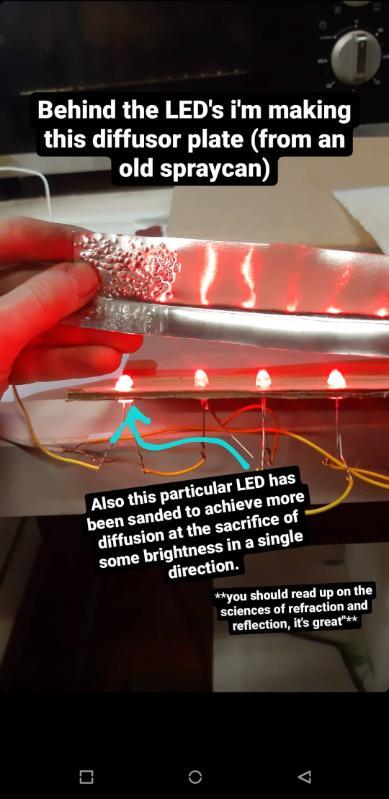
I made this testing base from cardboard and stuck the LED's in, then I made a little reflector plate from a piece of spraycan (ghetto as hell, i know. But it's spraycan, not spraycannot!)

Also sanding down the LED's made them give off a more diffuse light. I later sanded down all of them, you'll see why.
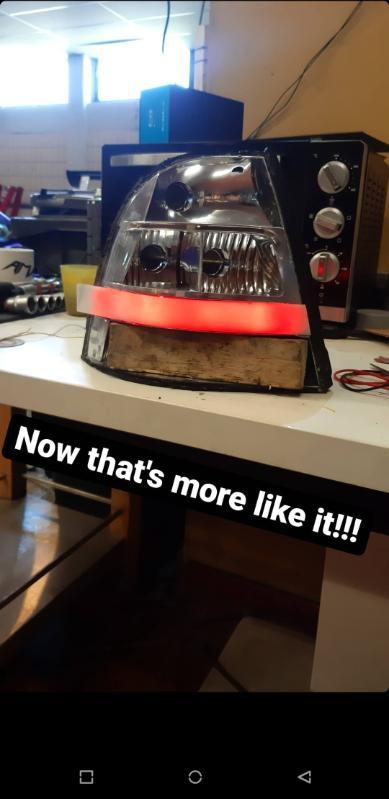
Okay so now the electronics were partially figured out, and I had a good idea of what I wanted to do. Time to get hacky.
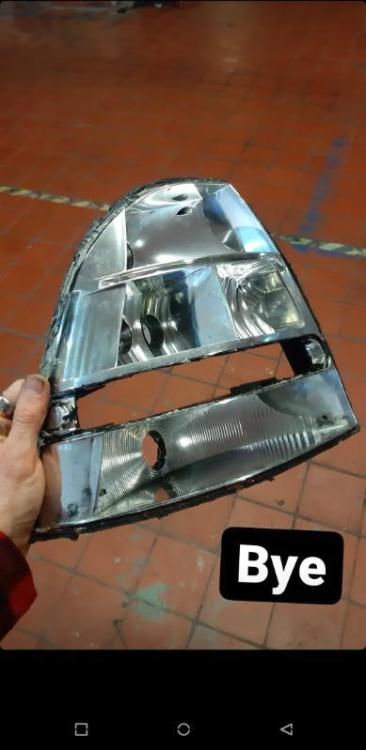
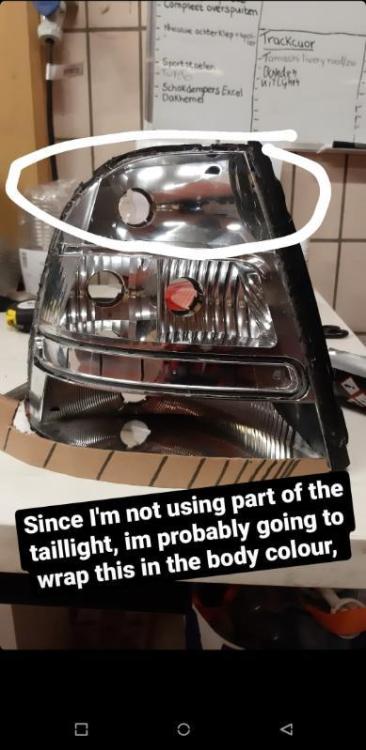
Cut away the material where the reflector used to sit. Don't need that!
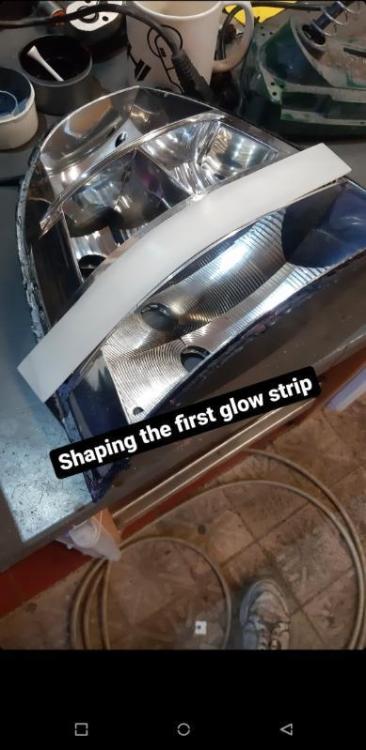
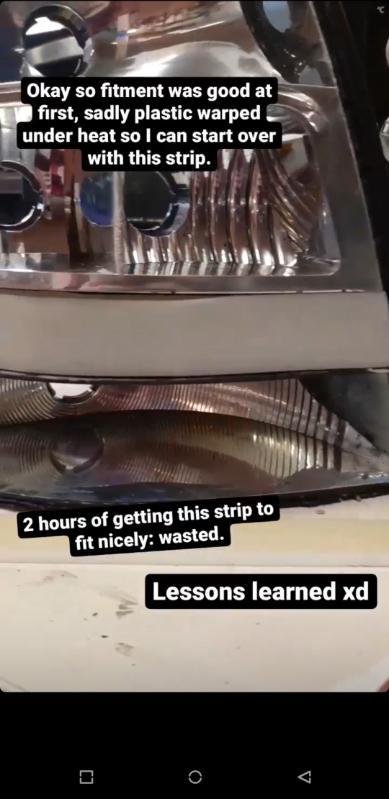
Cut out some translucent plastic and started bending it with some heat. (It's alot harder than it initially sounds, getting the right shape without the plastic warping all over the place is quite difficult.
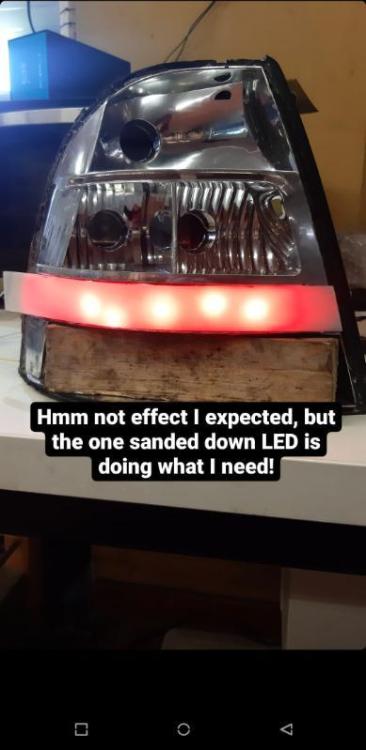
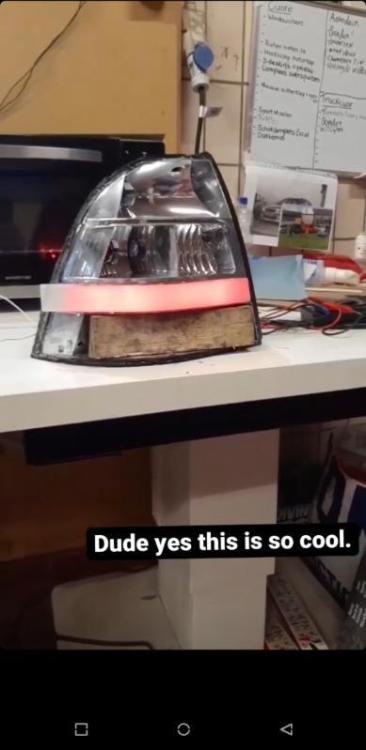
Here I noticed that sanding the LED's down and using the reflector plate created the desired glow. Sanded them all down.

Almost there! I really want a nice, even spread of light. This will be achieved by moving the LED's further back into the housing.
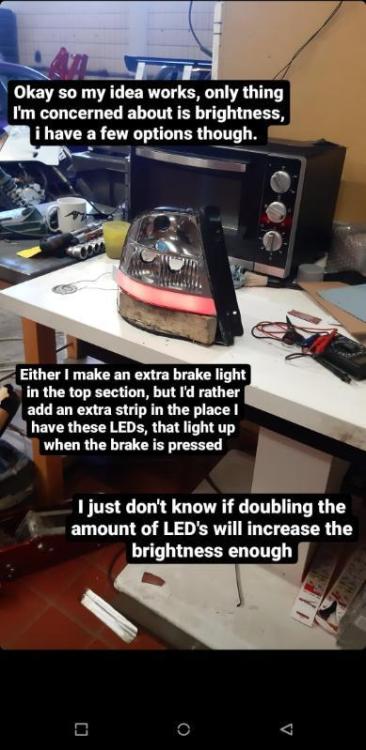
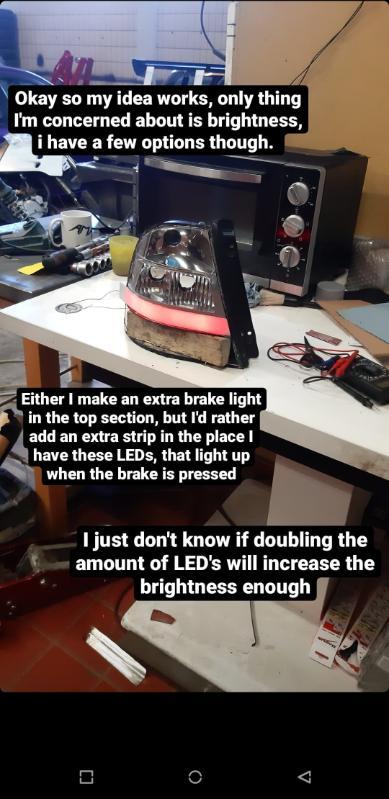
This is the main thing right now, these leds are not bright enough. I want to use this strip as a brakelight as well, so the idea is to undervolt the LED's when lit normally, and when pressing the brake pedal we will have the LED's at their normal working voltage to increase brightness. I will be using brighter LED's for this, still scavenging the internet for something a little more beefy.
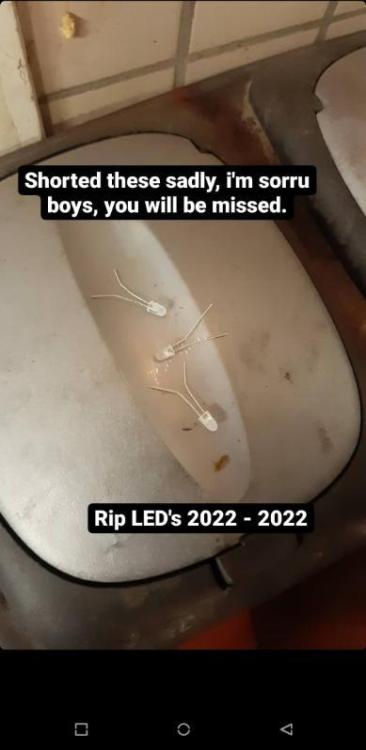
Of course sacrifices had to be made in the name science. Poor fella's...
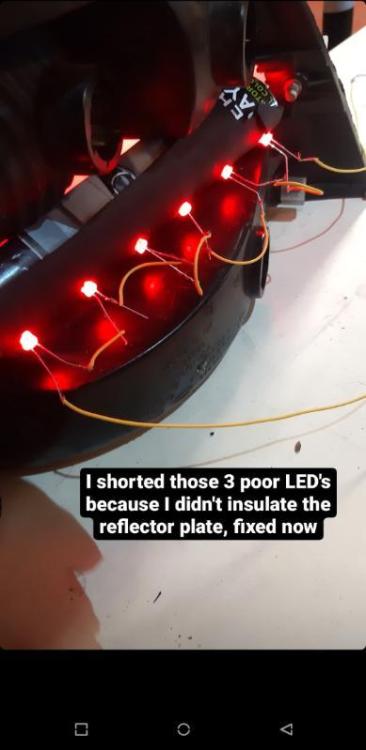
Put some rubber material around the metal reflector plate, this will avoid short circuits.

More sacrifices... made a new one!

This one fit even better!
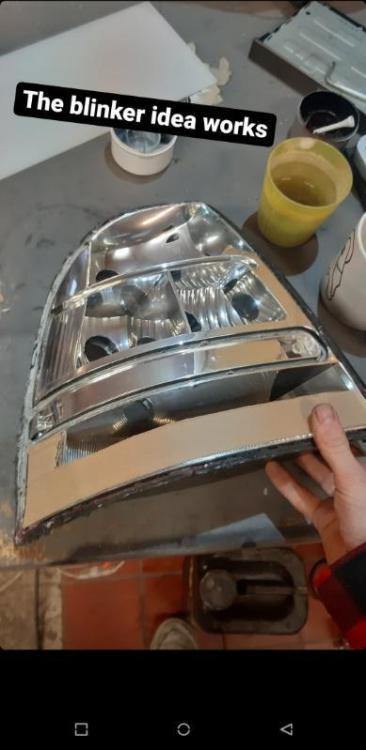
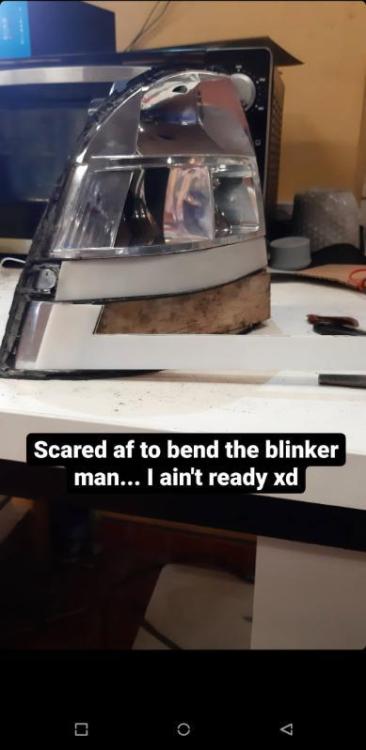
Now, let's focus on the blinkers:
Cut the shape once more, since I had warped the other one I was a bit more careful (these take so incredibly long to get right with all the cutting, bending, filing and sanding)
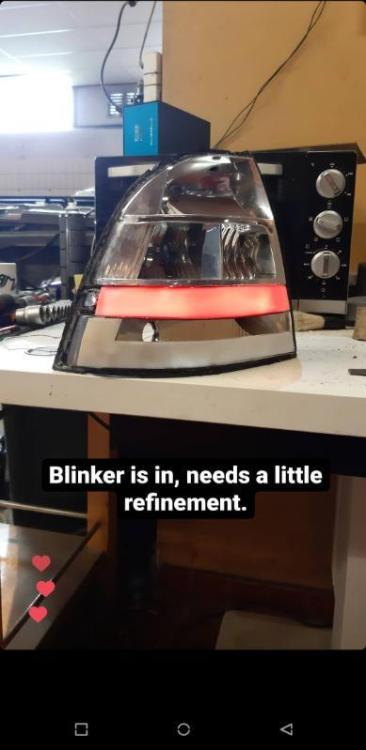
Finally managed to get it into a good shape. This was the progress after about 2 days, i have some more ideas that I don't have pictures of yet, but I'll show you all soon!
-
1
-
-
always good seeing your ride @koen_valk! thanks for coming that day, hope we can do a meet again sometime soon ;)
-
I'll try and get some new people over here! Marvin, a buddy of mine already joined :) @TheRedAerodeck
-
1
-
-
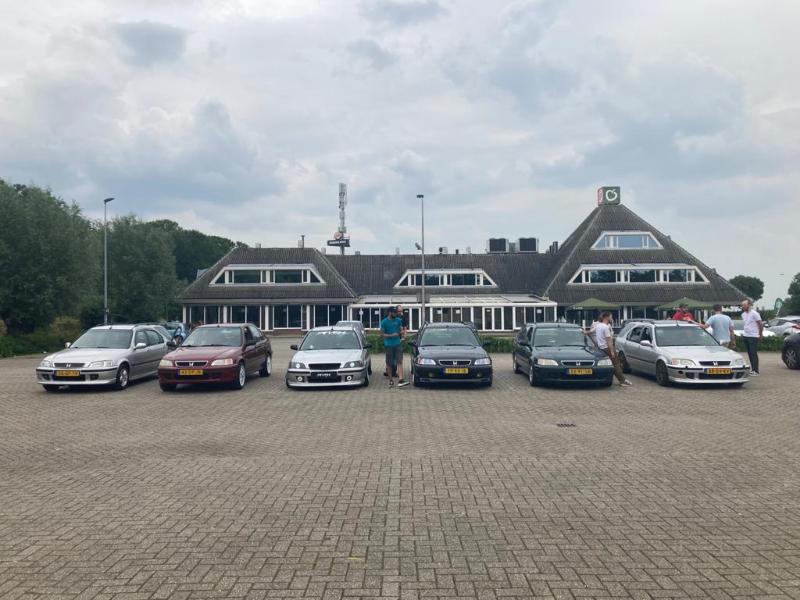
A few months ago, me and a couple M series acquintances got more into starting a real group for M series in The Netherlands. A whatsapp chatgroup has been set up and today we had the "first" "real" meeting! Got to see some nice M's from all over the country.
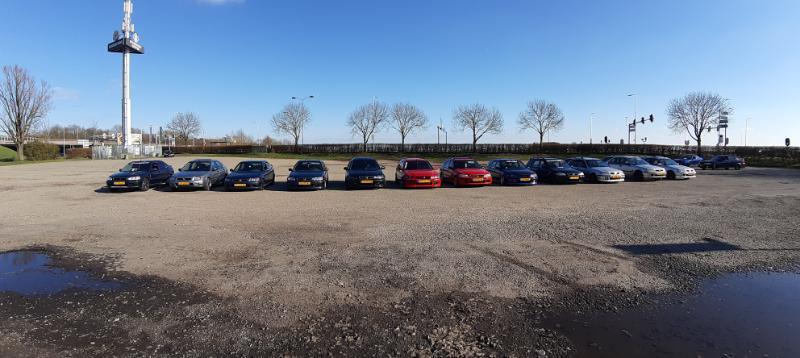
Enough attendance for a car that is considered a dying breed here. It's a good feeling to know that these are being cared for well :)
-
3
-
-
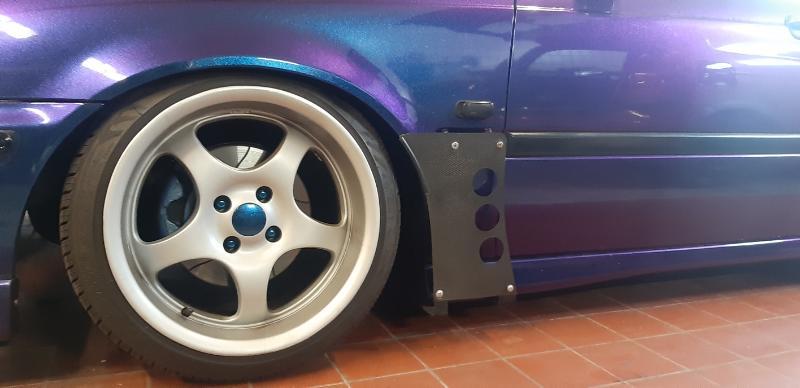
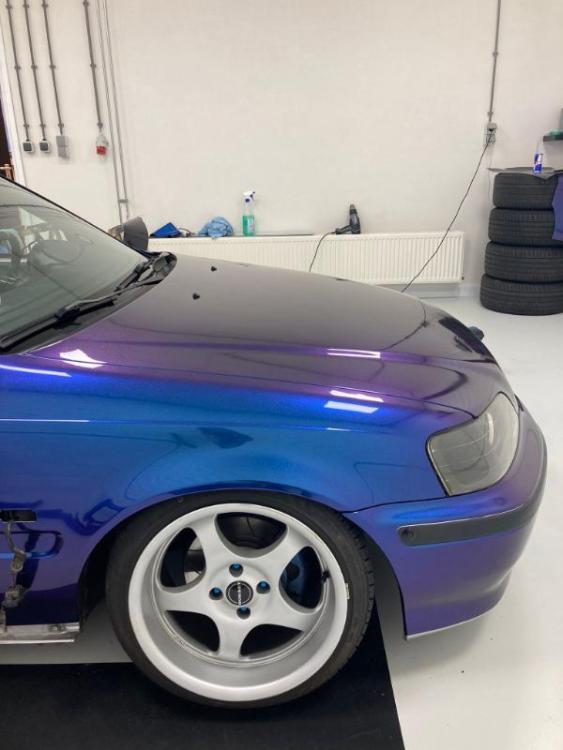
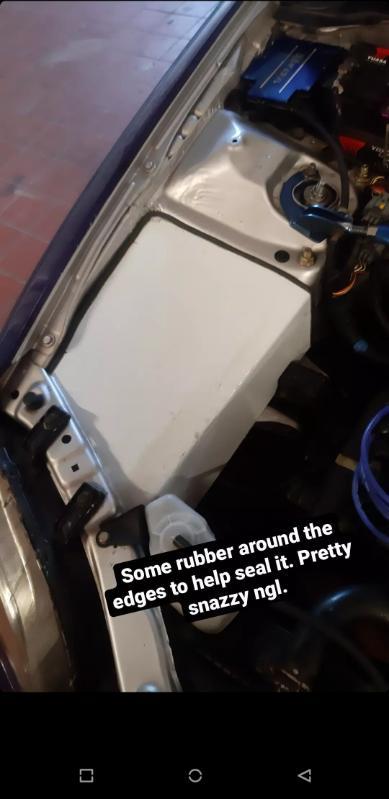
Made a cover for the other side as well. And introduced a carbonfibre fender bit. Not really functional but it adds some variance to the car. The plan is to convert the rear spoiler to carbon fibre at some point as well, and have some more bits at the rear in CF too to keep the motive going.

-
1
-
-
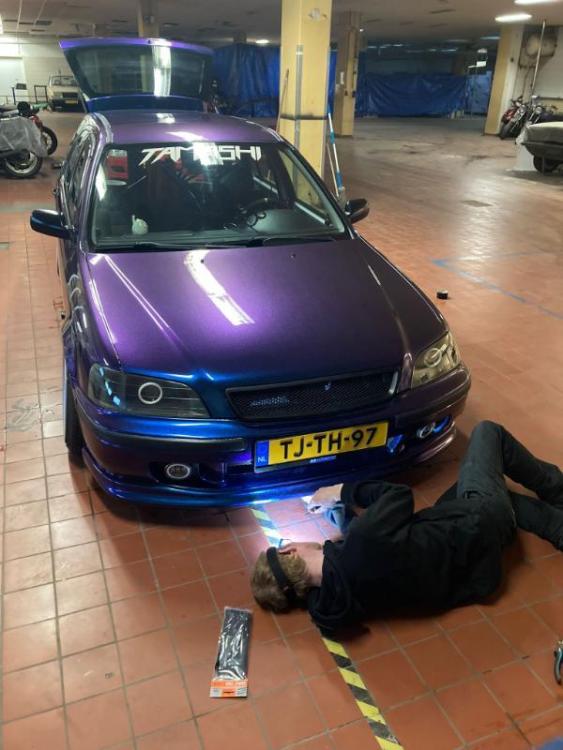
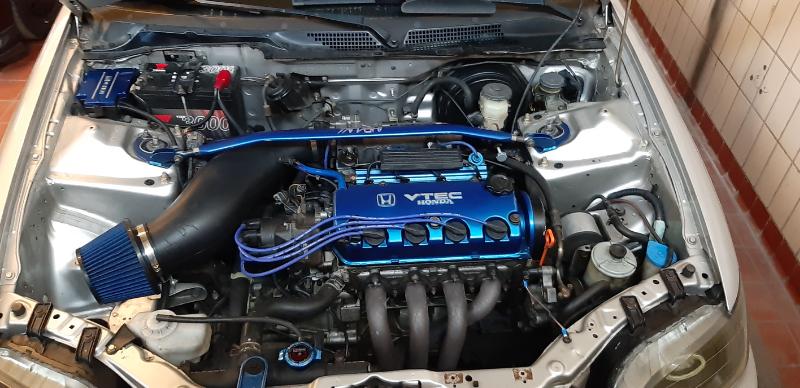
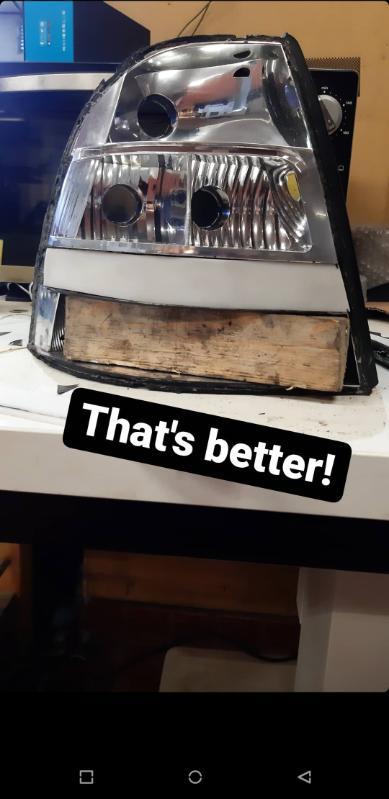
Finished up the piping today, wrapped the airbox in the same colour as the car. Just needs a filter now.
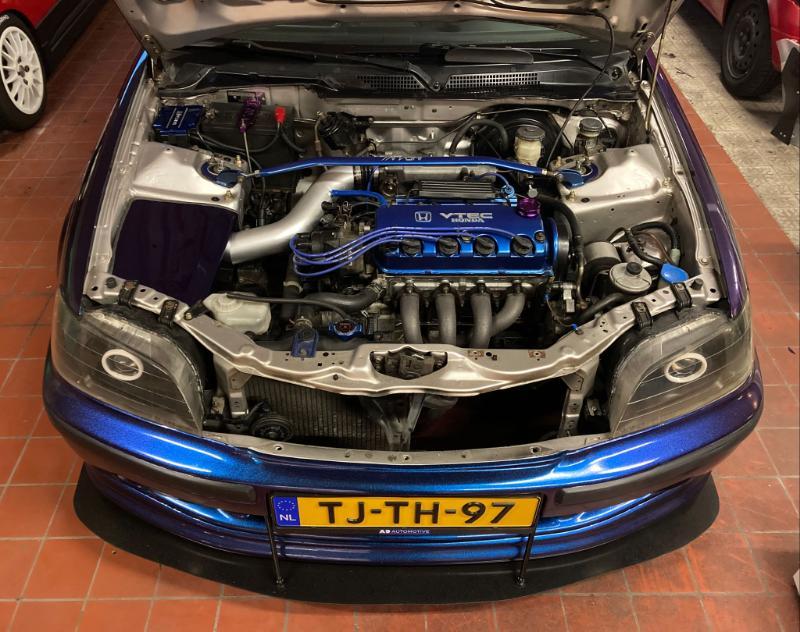
I really like this clean look, I might try making covers like this for the other side as well to hide the PS pump and screenwash reservoir.
-
3
-
-
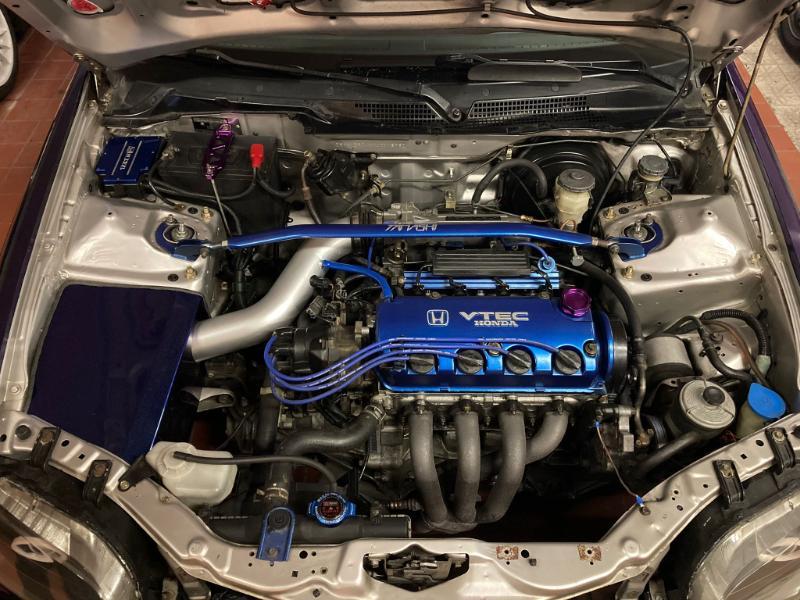
Hello everyone, still adding details to the car here and there. I've remade the splitter and today I was fiddling with a custom airbox / heatshield. Also found some VTI skirts!!
Used a sheet of bent metal and cut to size for the airbox, will probably finish tomorrow. My buds Joshua and Pascal still had some piping laying around which they were kind enough to trade for that terrible whale p***s ;)


-
2
-
-
On 11/7/2021 at 2:49 PM, Mickg said:
It was very intensive trying to get one , seem pretty hard to get now
Really wish i had the know how and funds to make molds of the rear valance and rear spoier to reproduce them
Definitely something im going yo look into over the winter even if the rear valance is done in 3 sections the side and middle and just bond it all together maybe
I think the whole community is waiting on someone to make molds of these parts. It could be a literal goldmine if some decides to start reproducing these.
-
-
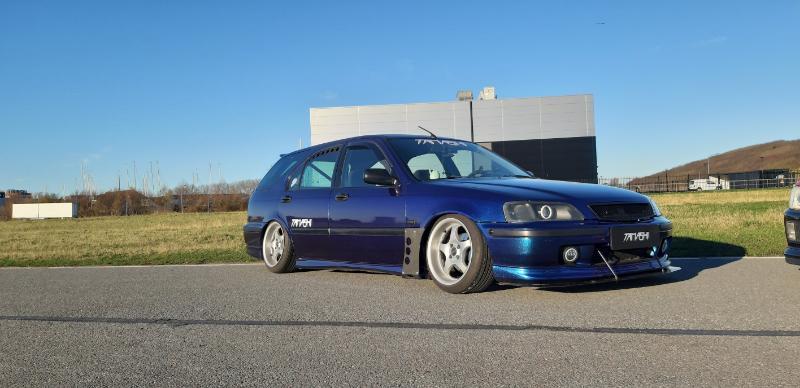
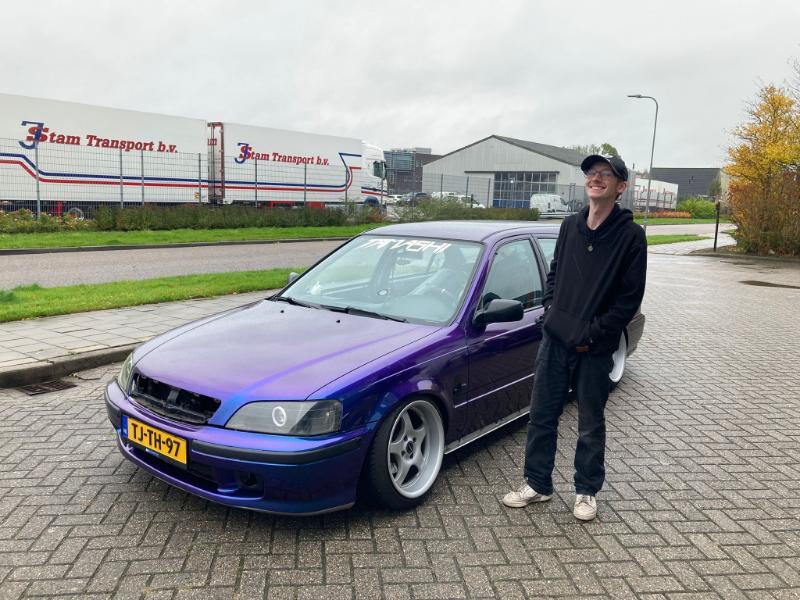
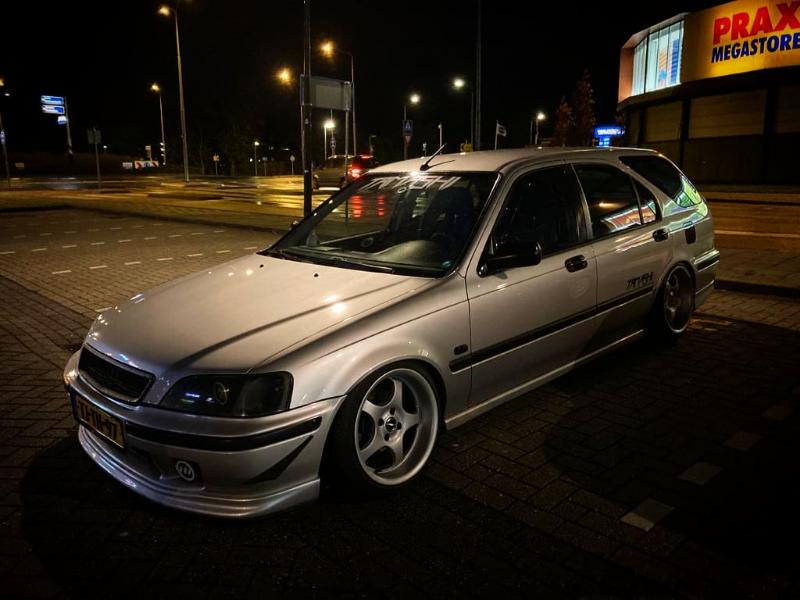
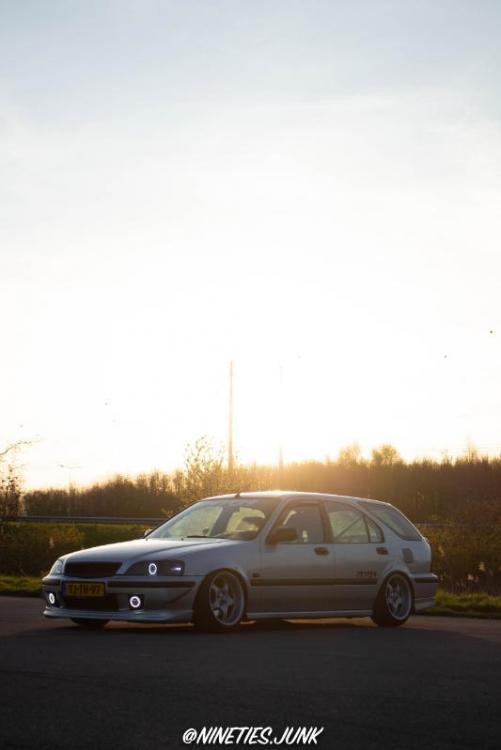
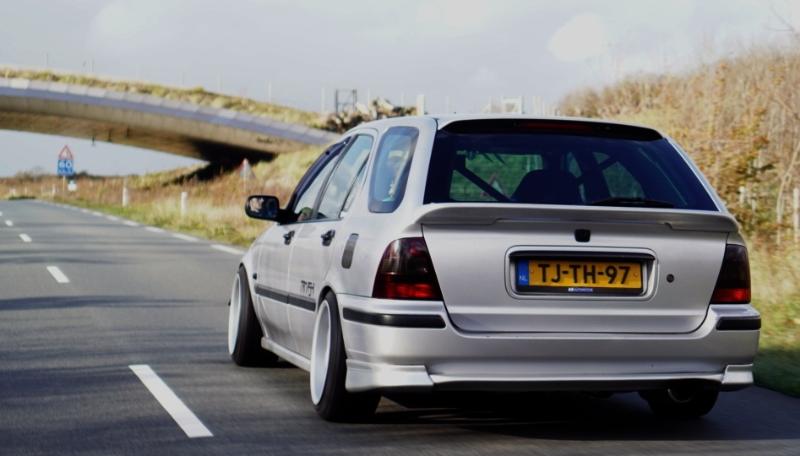
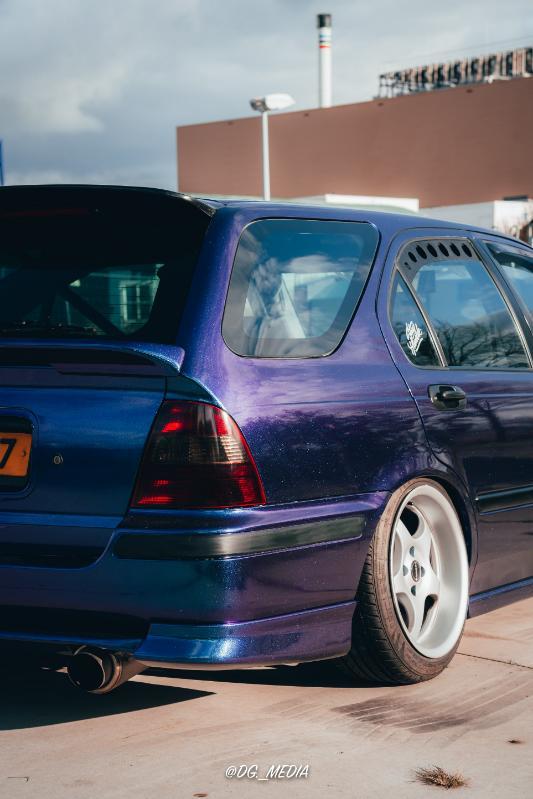
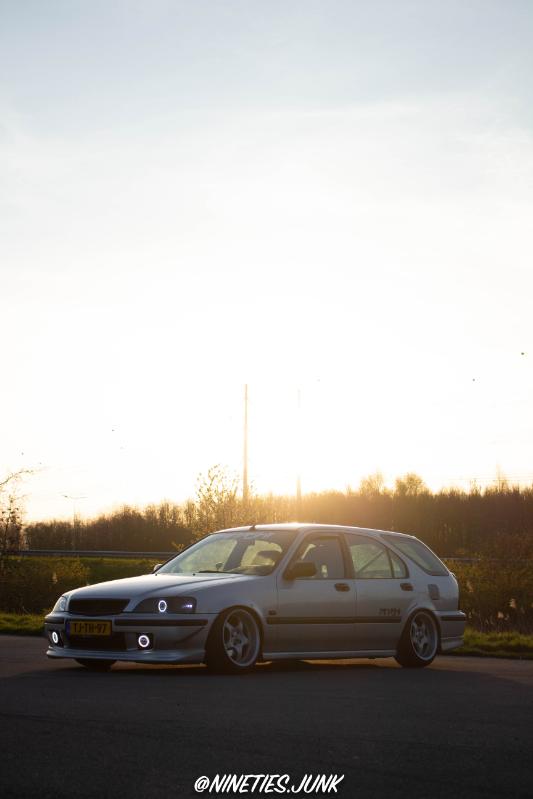
went for pictures yesterday!!

there's more to check out on my instagram page, (aerokek) since Civic5 won't let my upload any pictures that are greater than 4.4 something MB, I hope you guys enjoy this picture though. wish you could all see it in the flesh, cause it looks even better up close and personal :)
-
2
-
-
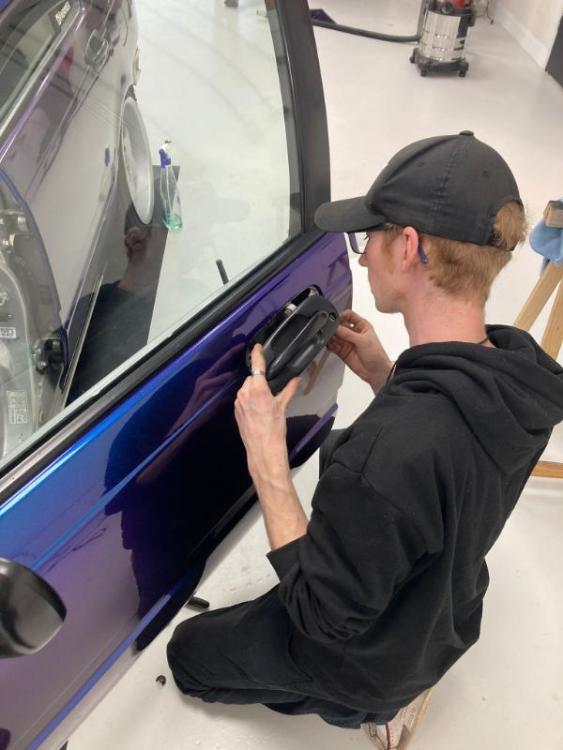
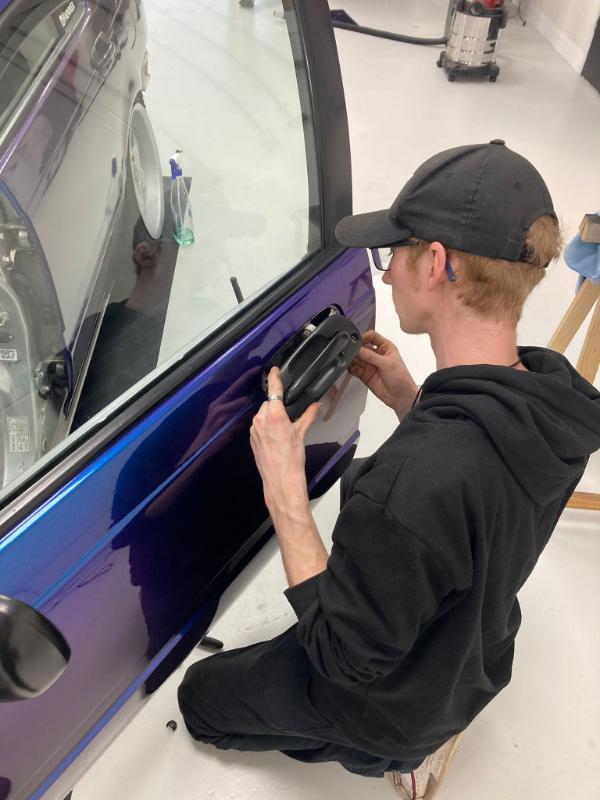
23 hours ago, KiNK43 said:
Looks incredible can't get my head round how they wrap bumpers etc.
They use inlays, basically they cut smaller pieces of vinyl and wrap those in the more cramped corners and such.
-
1
-
-
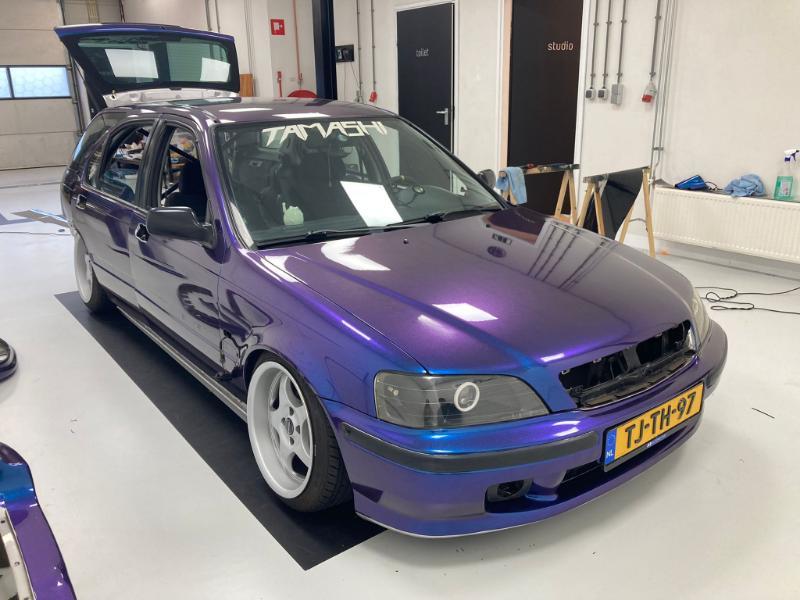
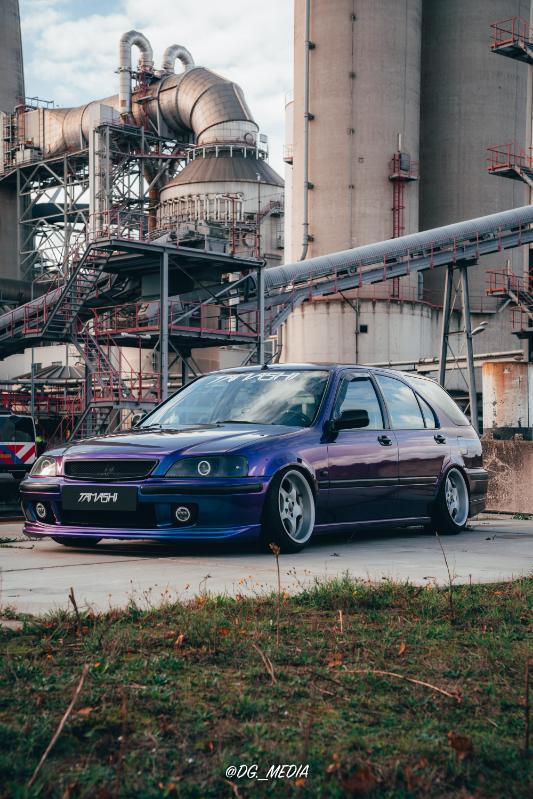
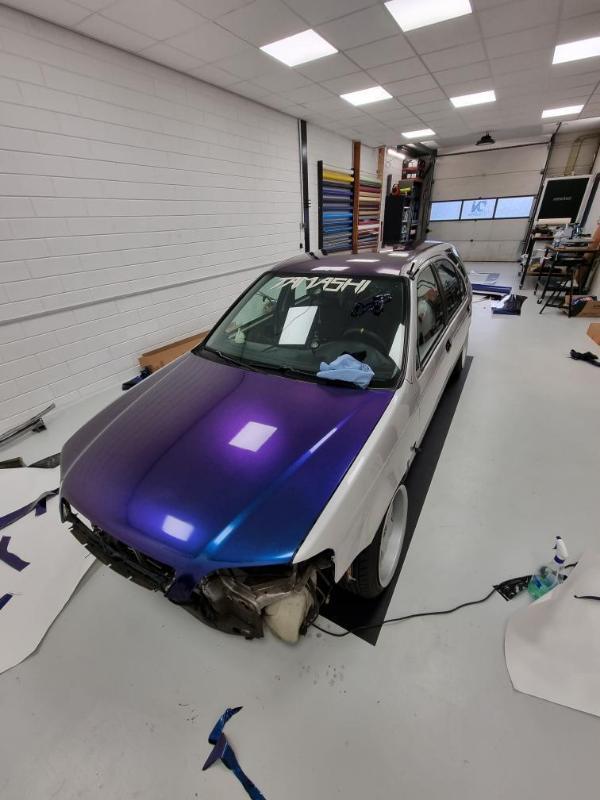
Hi, so here's the time for the big reveal!
I decided to have my car wrapped in a glossy metallic blue/purple colorflip vinyl!
Last week after tearing her down, I brought the car in, and the specialist got to work!

a week later the car was finished and we were out to pick it up again
time to put everything back together!
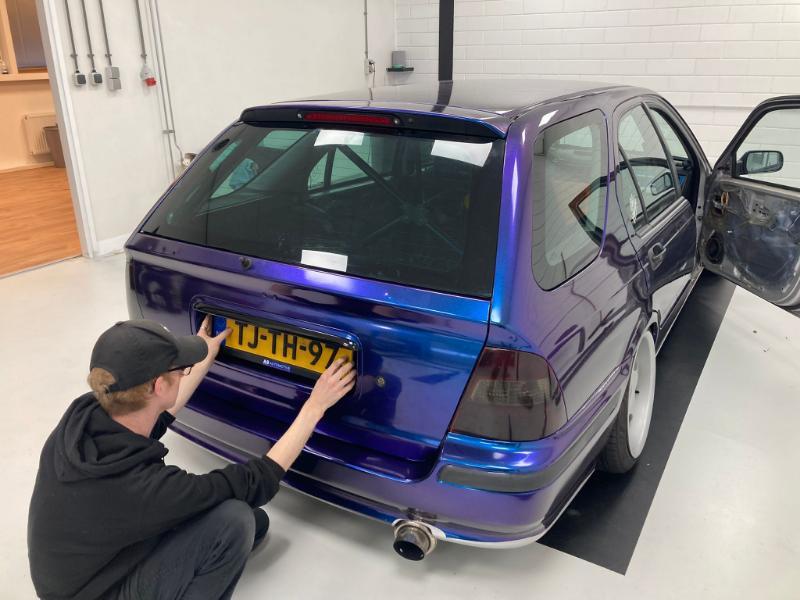
The "I'm never going to financially recover from this." face :D
then rushed the car back home to continue putting everything back
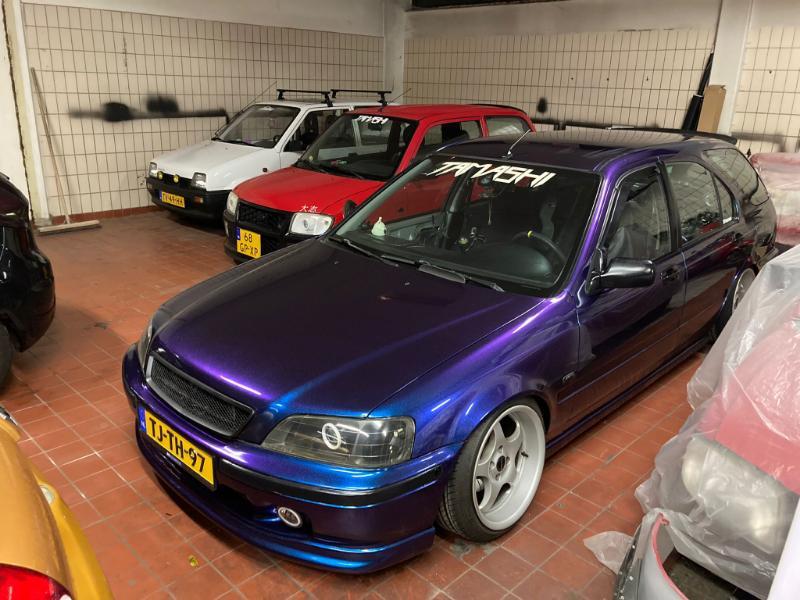
there's still some stuff to do and minor issues with the wrap that have to be fixed. but overall it looks super nice and this is the exact colour I wanted to go for so yay!
Im having some professional photographs taken soon, can't wait to share those with you when they are done!
-
3
-
-
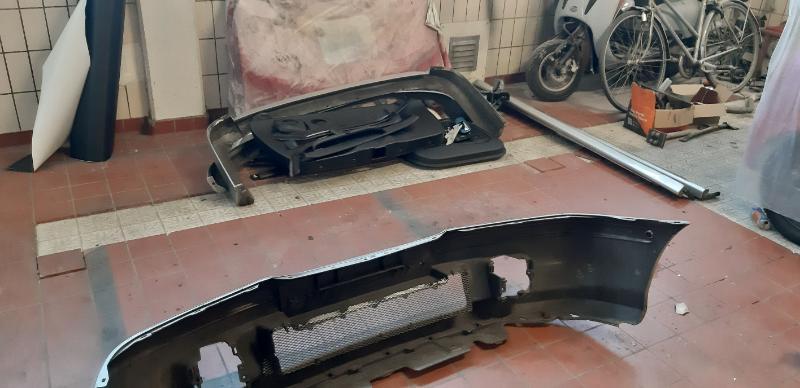
Had a little giggle on instagram, telling people I had discovered a massive rusthole and was dissassembling the car and parting it out. Sad story bla bla bla, Let this go for sometime.. many people were concerned but in reality, I was taking off all the parts in preparation for something BIG. Unfortunately, I can't tell you lovely forum crawlers yet, but I'm so excited to show you when it's finished!
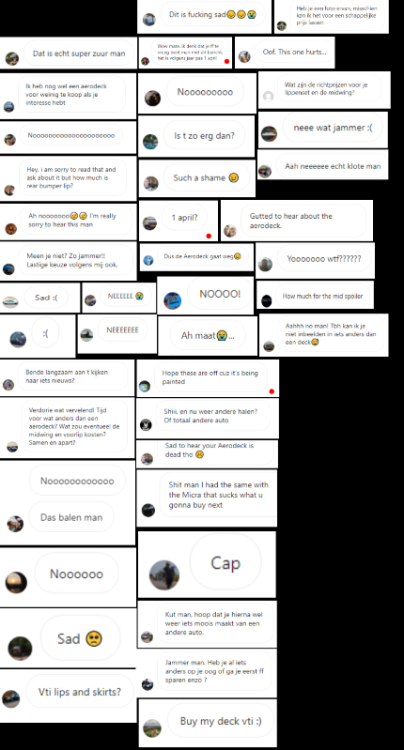
these are some of the reactions, lots of ppl cared and wanted to help out, which was very heartwarming.
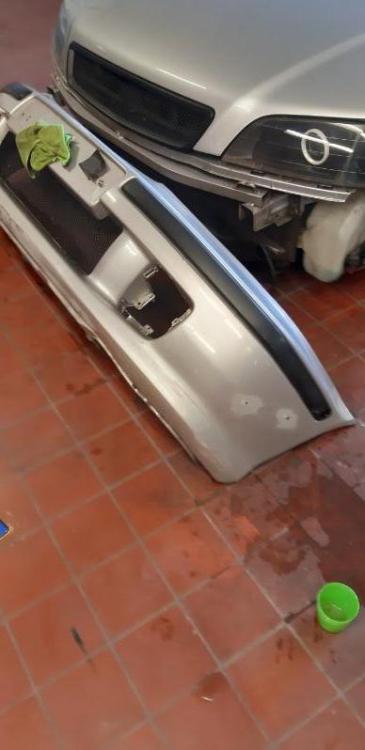
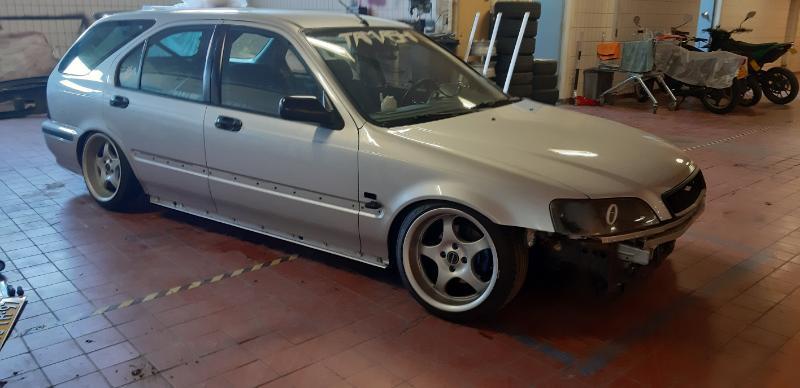
In reality, this is what the car looks like right now. Hopefully dropping her off next wednesday, I'm so excited :)
-
1
-
-
Today I figured I'd have a go at dent removal, some dents in my door were really bothering me, and considering I want to have the car wrapped at some point, it would be nice to get all the dents out first.
A friend of mine was kind enough to let me borrow his kit for a few days. Hoping to purchase my own kit soon as well cause I need to practice more. The dents arent removed completely, but there is a definite improvement!
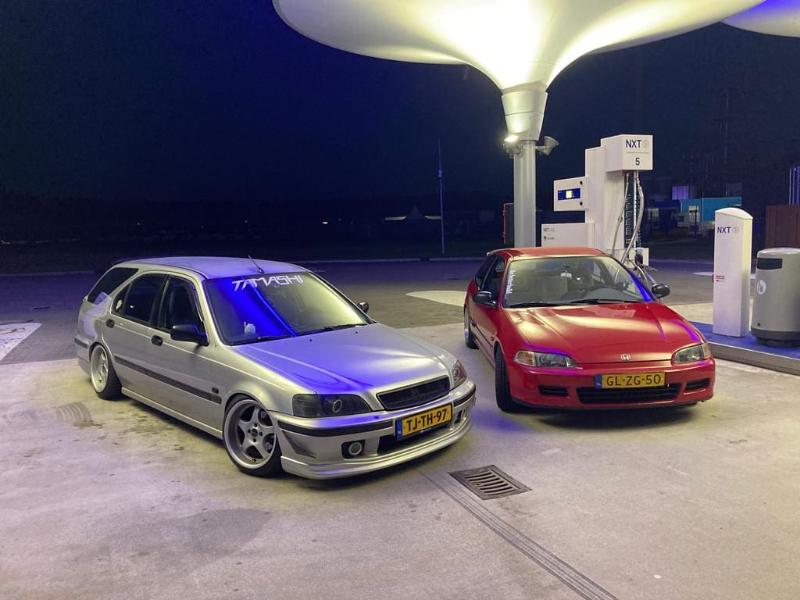
Me and a fellow MB driver here in the Netherlands have started organising our own MA, MB, MC meetings. Sadly not a lot of people could come because of other plans or car related issues. But there were some, (of course the M series arent very common in The Netherlands) a lot of people elsewhere were also interested. So we hope to see more people next time!
Also, here are some pictures of the meeting we went to last night, it's nice to have this car out and about again, really enjoy all the confused faces and thumbs up ;)

-
4
-
-
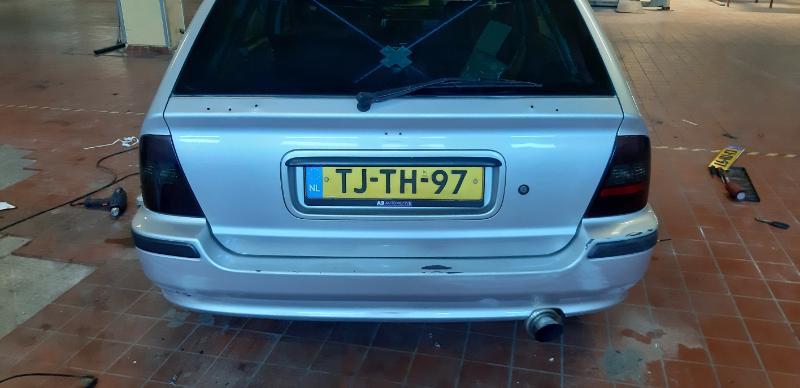
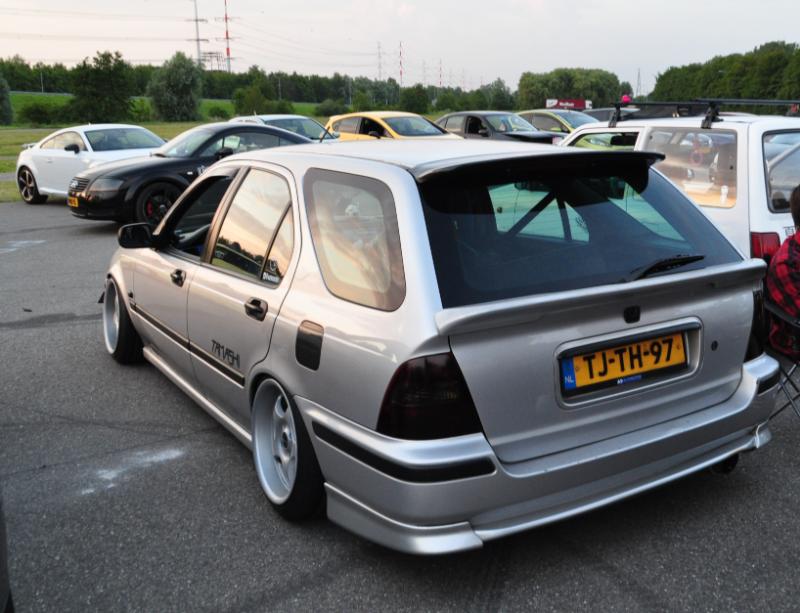
Now for another serious issue, I had a fairly large rust hole starting to get bigger in my left rear fender. I wanted to have this done by a professional next winter, wanting to enjoy the car this summer as much as I could.
But, since I have a welding machine at my disposal, and a day off, I decided to try and do it myself!
I started by cutting around the rust hole. Making sure I take everything out
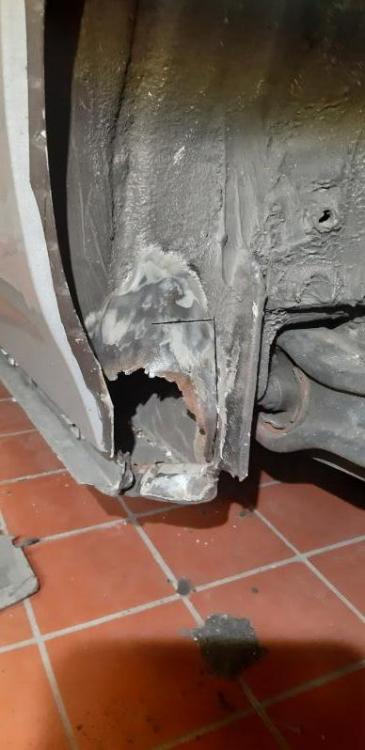
Once all the metal was removed, I grinded and sanded everything clean till there was no more rust to be seen.
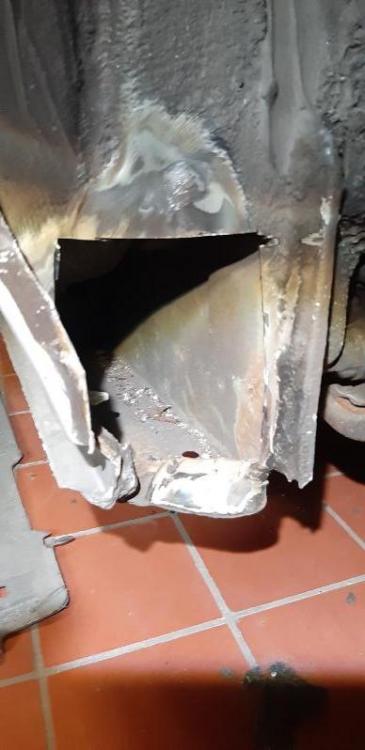
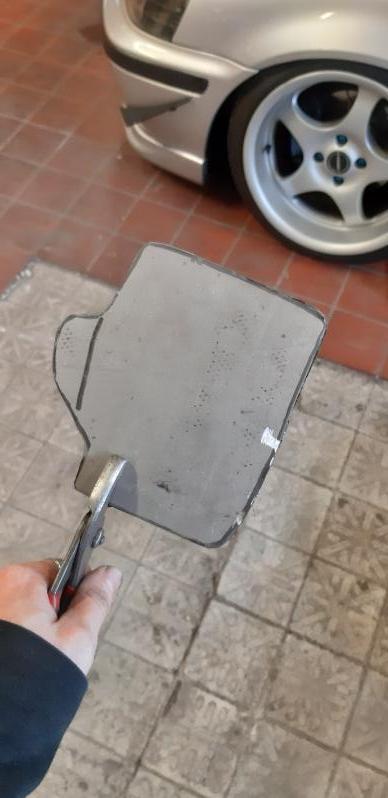
Got around to making the metal plate that fits in there. This was harder than expected since there where some complicated bends and shapes to reproduce.

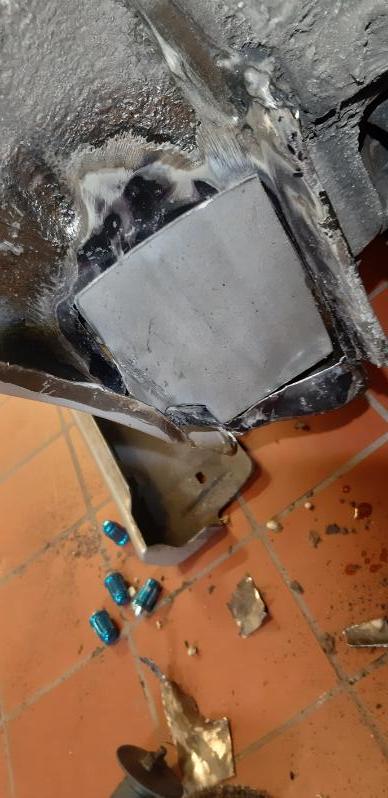
A few hours later i got a plate that fit almost perfectly. Just had to make some small adjustments and got to welding things together!

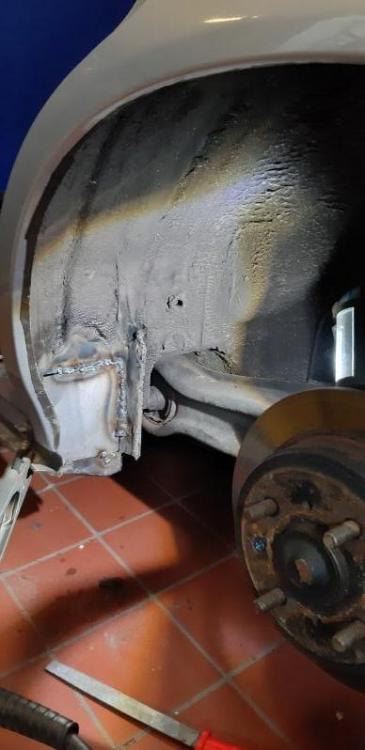
Ground the excess welding off to make everything nice and flush
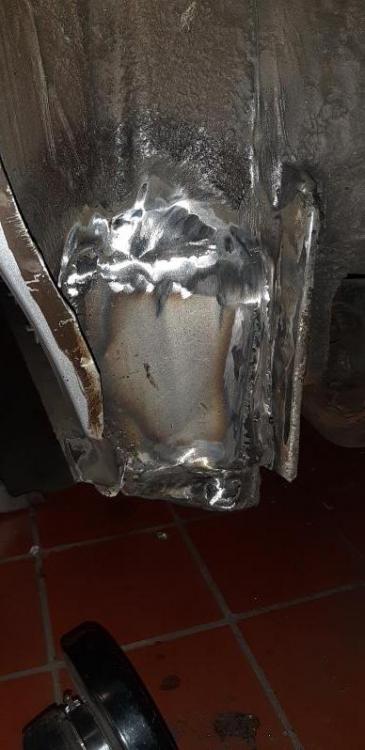
The welds werent pretty, but the penetration was good and I only had one little pinhole left when I was done with welding and grinding.
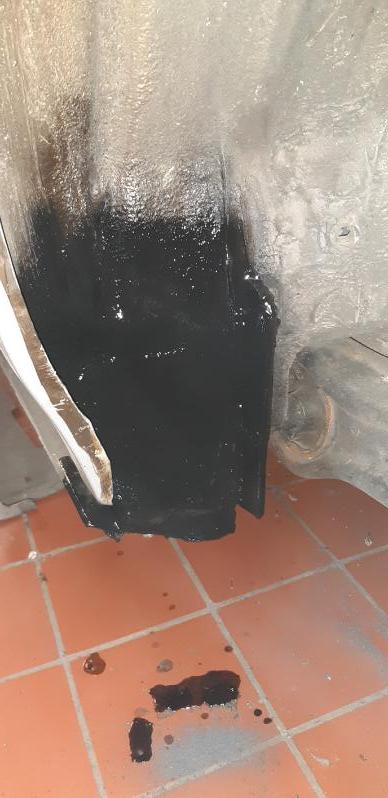
Sealed everything off with tectyl, managed to get on the inside of the chassis as well with some cavity wax and a tube, through a small drainage hole.

It still looks a bit weird in the pictures, but a few layers of sealant later it looked quite nice, and will probably hold up for a good couple of years. Saves me 300 euros at the welder :)
-
1
-
-
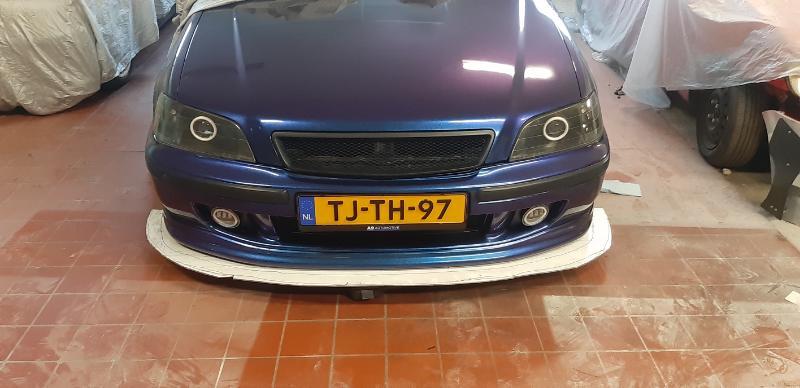
Recently had alignment done, she drives okay now! Quite stiff but I'm getting used to it. Roads are good here so its not too much of a hassle.
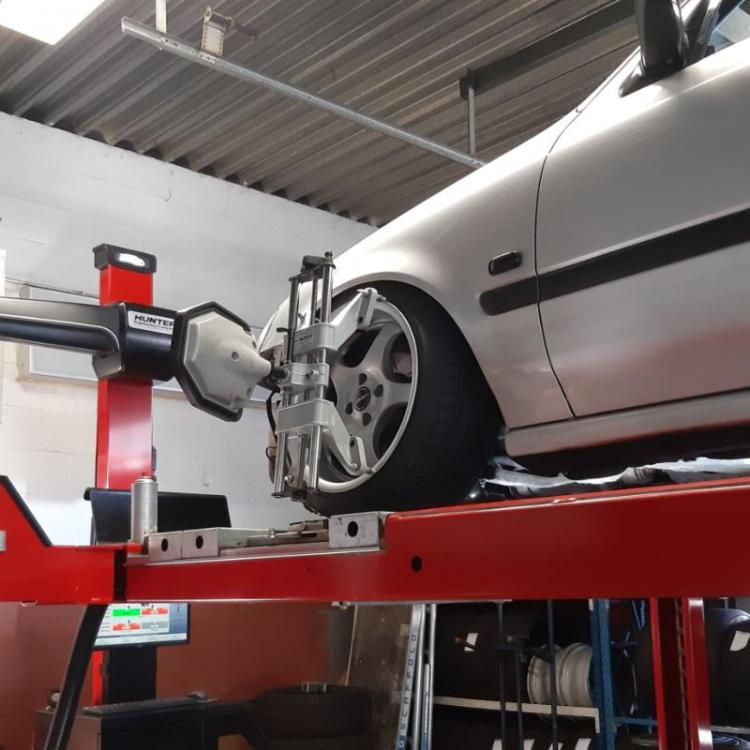
Also found a new honda friend who really liked the aerodeck and wants one for himself now ;)
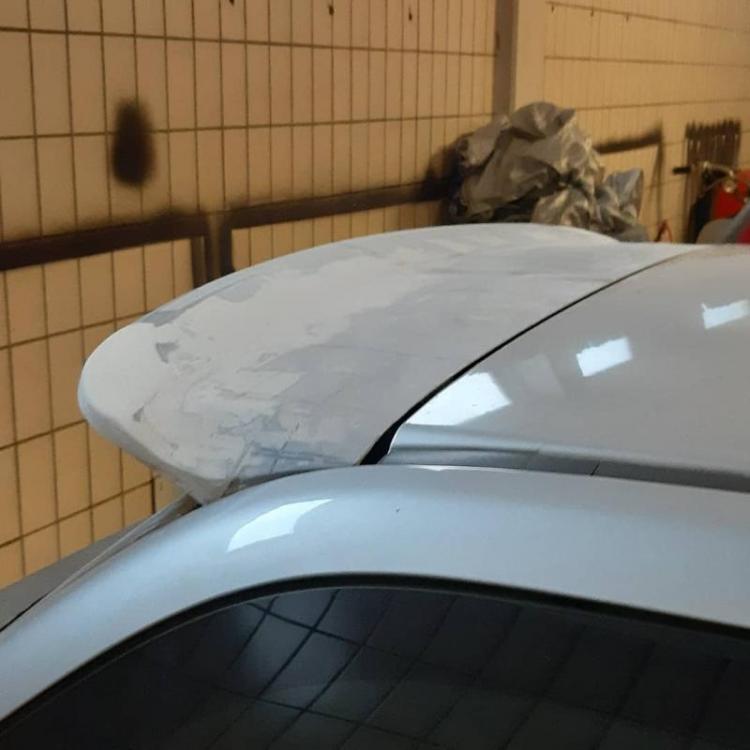
Spoiler is on, paint is bad but it looks alright for now. Want to have it paint matched someday but first we'll need some more coin for that.
Also swapped out the old angel eyes for new ones. Lots brighter now dont have any good pictures available right now but I'll make some later!
-
1
-
-
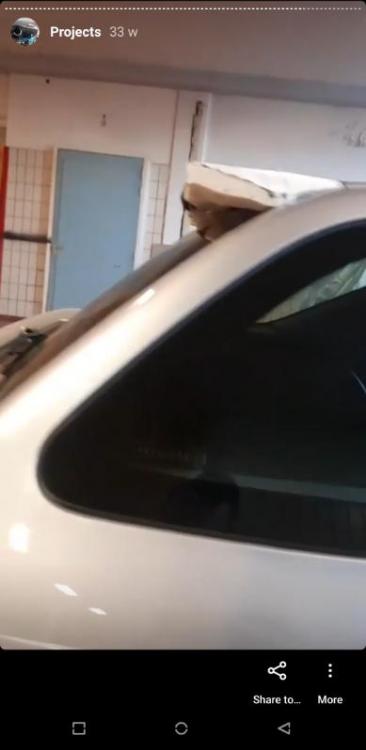
Started with a little experiments a few months ago, just something to keep me busy in between jobs etc.
Started out with an extra stock lid that goes on top of the trunk. Added a piece of plastic to lengthen it, melted it to shape and filled it with expanding foam
This was still super experimental, started to cut the foam to shape but to start over since I wasnt satisfied with the basic shape.

Also the third brake light position wasnt much to my liking. So back to the drawing board!

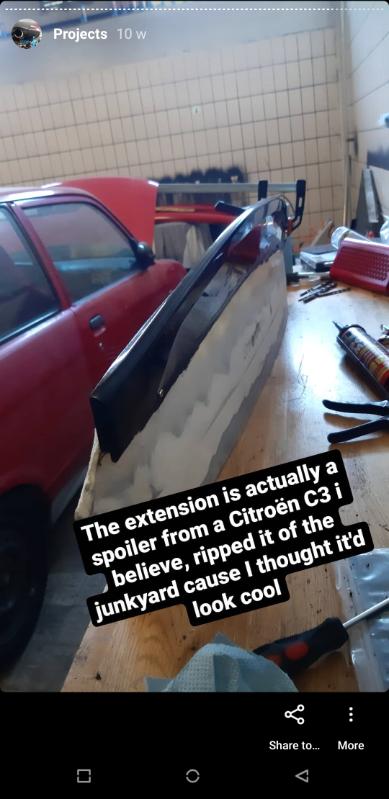
Felt it was too short to, so I extended it using a Citroen C3 rear wing thingy.


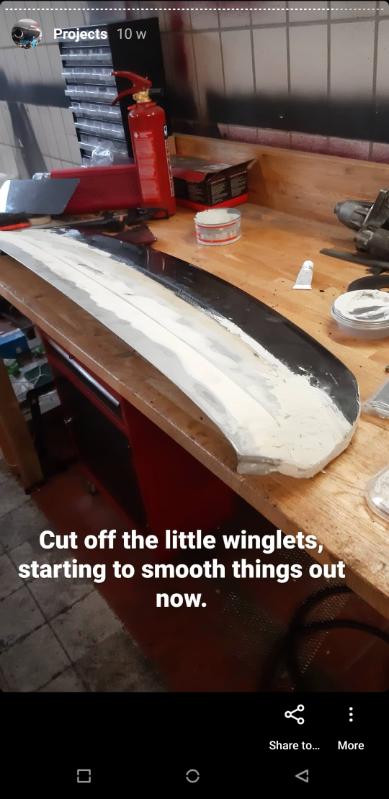
This was long enough, so I was off to shaping and smoothing
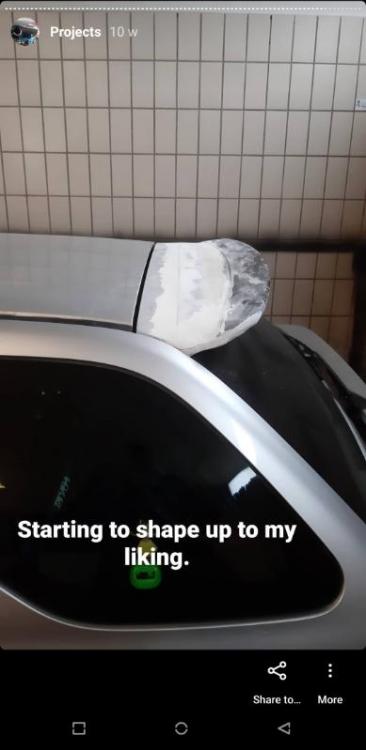

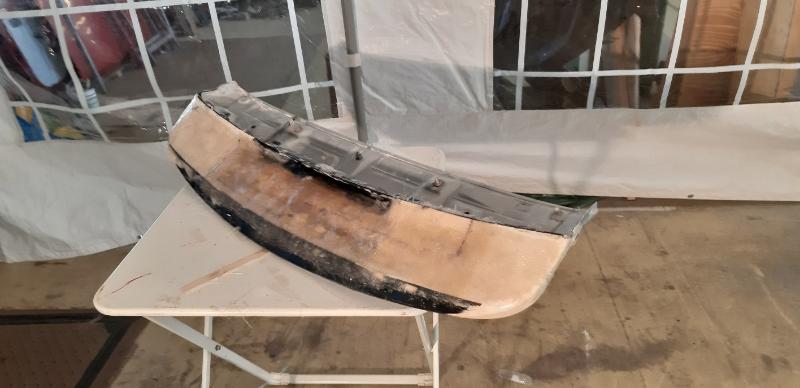
filled everything up, fill, sand, repeat.
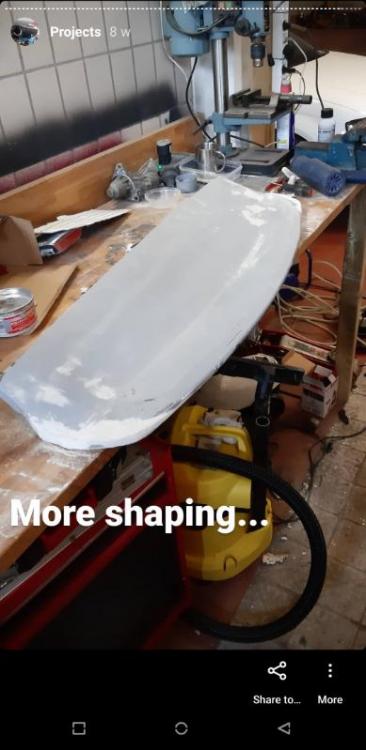

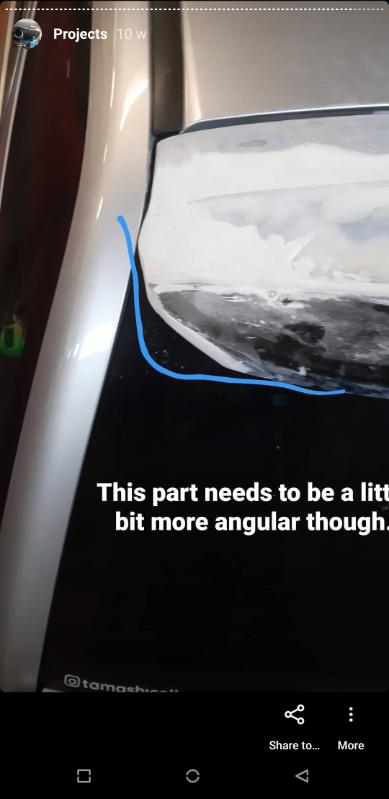
sprayed some primer on it, more sanding. Tried to use lines to get it as closely symmetrical as I could.
Now I needed to fill in the underside too, I've kept the third brake light in its original location. Used foam and glassfibre to create a strong base.
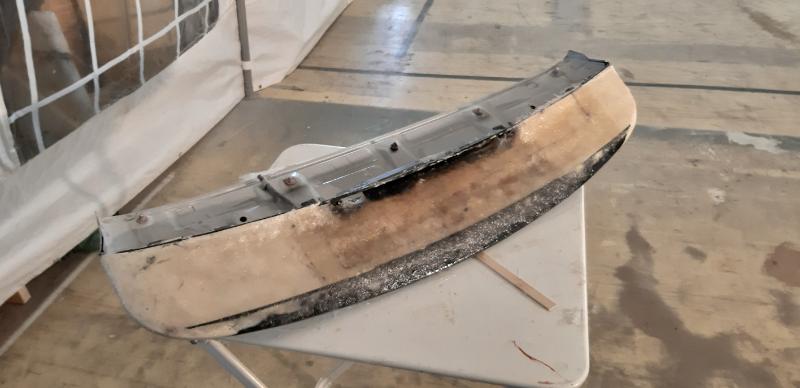
Again, loads of sanding and filling to get everything nice and smooth.
Almost there! Have to figure out a way to shape the surrounding filler to fit the third brakelight nicely.
-
3
-
-
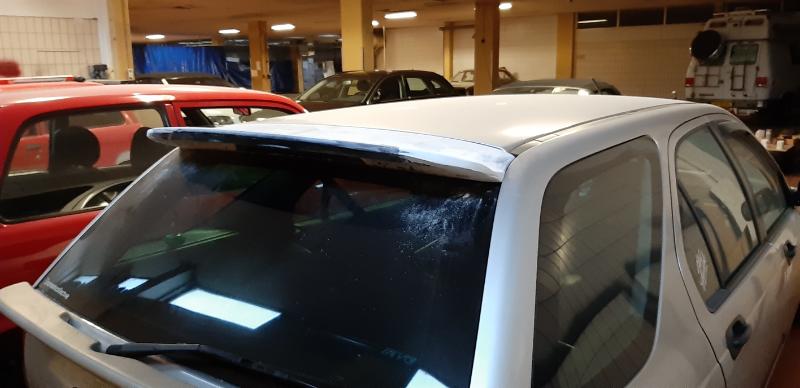
almost done, last step is getting everything aligned!

-
1
-
-
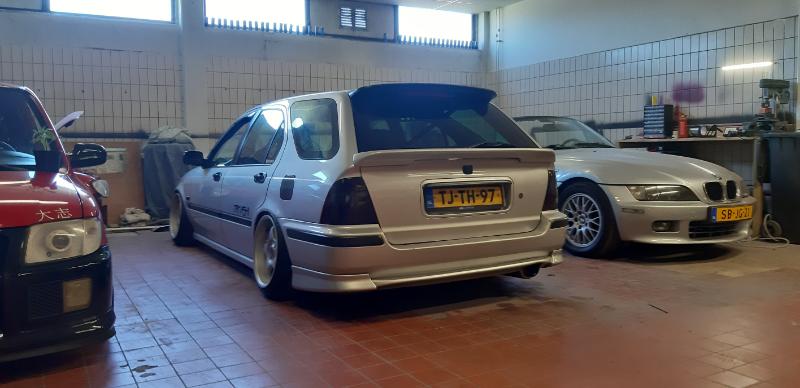
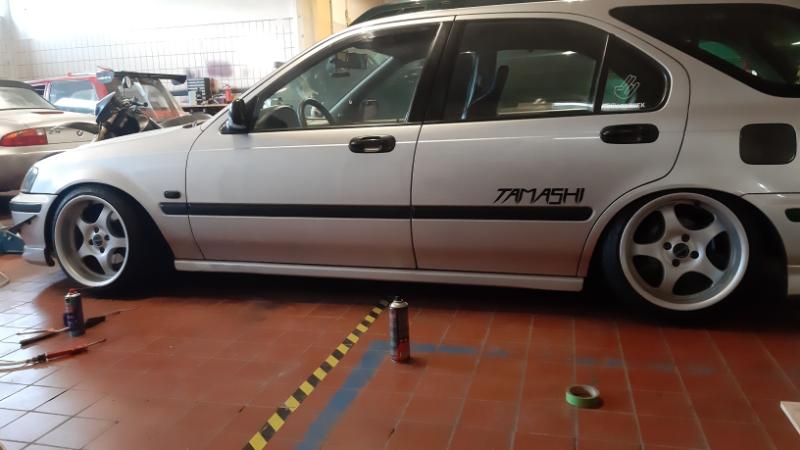
Getting to the point where I can say that the car is "finished".
I'm working on to get her as flush as possible, which was the initial idea when I got the new borbet wheels. The rear is close to perfection, but the front needs dropforks since my coilovers are maxed out. Waiting on those and hope to install soon. Here's how she sits right now
-
2
-
-
2 hours ago, dr_broon said:
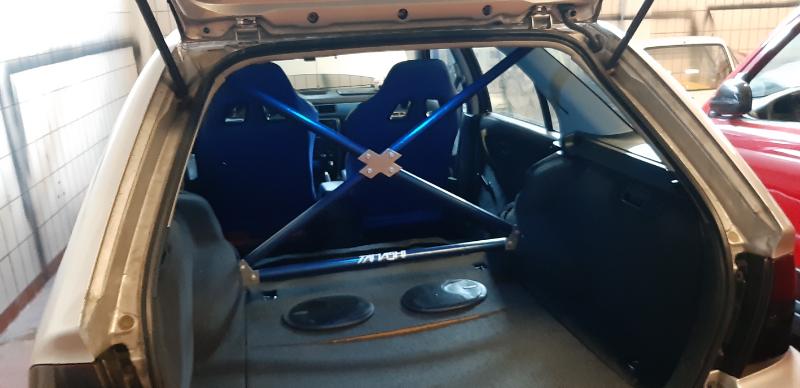
Good to hear! I like the look of that x brace - where are the top mounting points?
The engine bay is looking well tidy.
")
Thanks!
The brace hooks up to the mounting points for the dog guard. There are two holes behind the two plastic caps in the roof trim, it just bolts into that ;)
-
1
-
-
Hi guys, sorry for being away for a while, Hinata is still driving and passed MOT just a few days ago, about to put everything back together. I want to go about an inch lower, but first I'll have to reweld some pieces of the exhaust since it's hanging quite low and is pressing on the bottom of the chassis, once thats done I'll finally get to my desired fitment and the car will be "finished"
The new motor is still running like a champ, I did have to install a new starter after many years of duty. Makes a lot more lively noise now ;)
Also working on custom roof ducktail spoiler, first time trying something like this so lots to learn!
Also got some cool new mods for the engine bay, and an upgraded strutbar in the trunk

-
2
-
-
Had some pictures taken last week, she's getting so close to how I want her to be. Fitted this really cool crossbar strut in the back, more form than function but hey it looks alright. Also got some new engine bay goodies that I'll show off soon!


-
2
-
-
Good luck on your build! looks ace already!
-
1
-


Civic Aerodeck MB9 (Hinata)
in Honda Civic MA/MB/MC
Posted
Yeah it's a shame that wintertime is coming, but it does feel really nice! Have been getting a bunch of positive reactions :)
the roof is from a Renault Twingo, usually people with older cars go for the canvas roof, but some where sold with an electric glass one. I chose the latter for a more modern, sophisticated look.