


DeLaSoul
-
Posts
443 -
Joined
-
Last visited
-
Days Won
30
Content Type
Store
Calendar
Forums
Gallery
Downloads
Posts posted by DeLaSoul
-
-
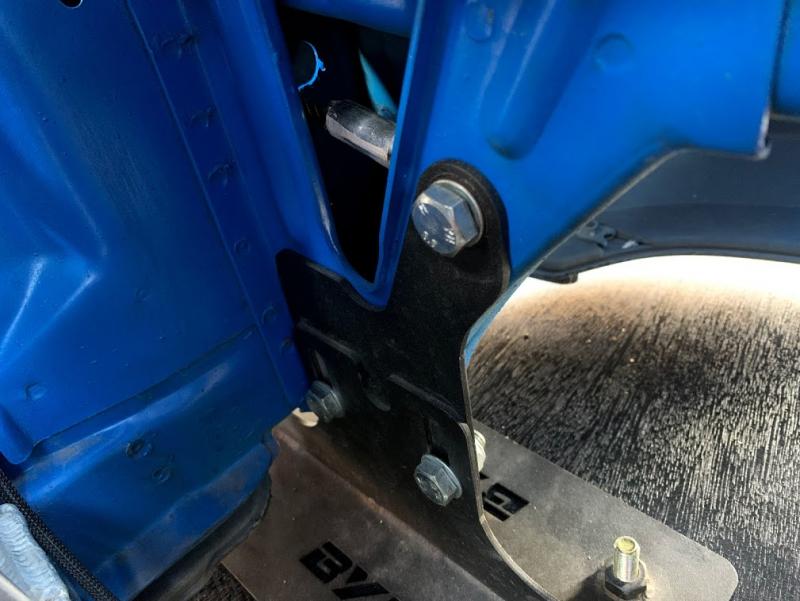
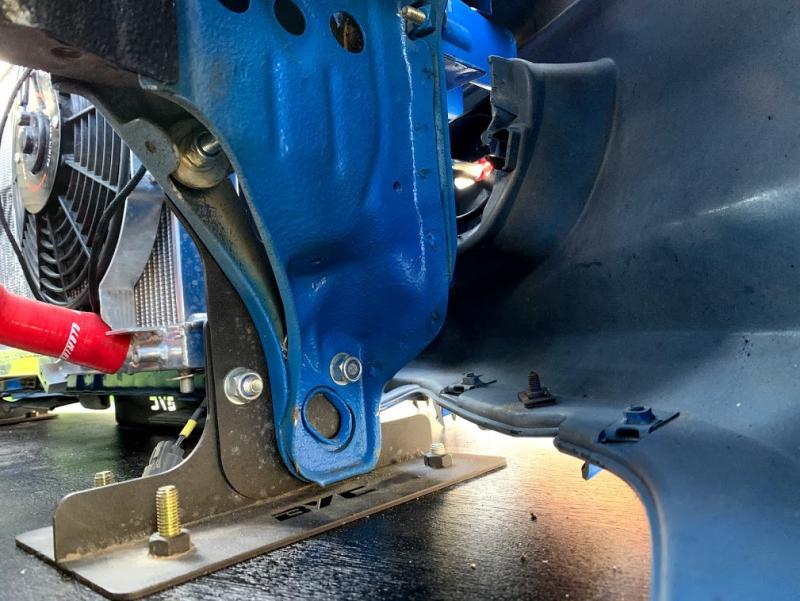
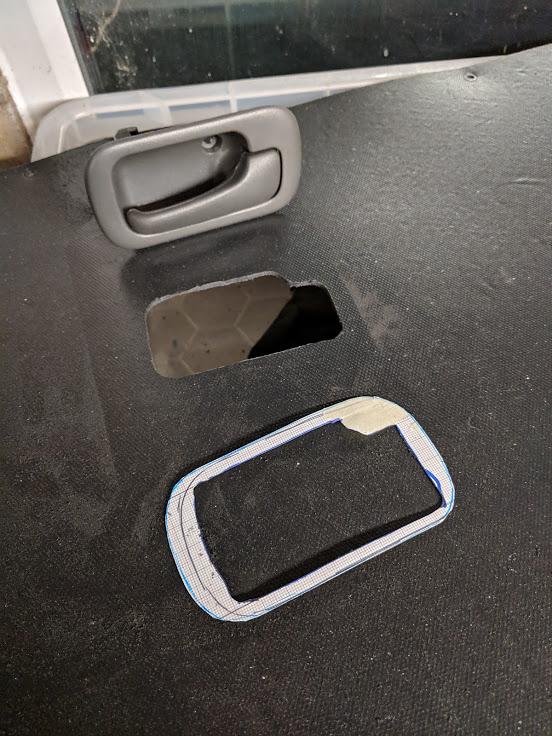
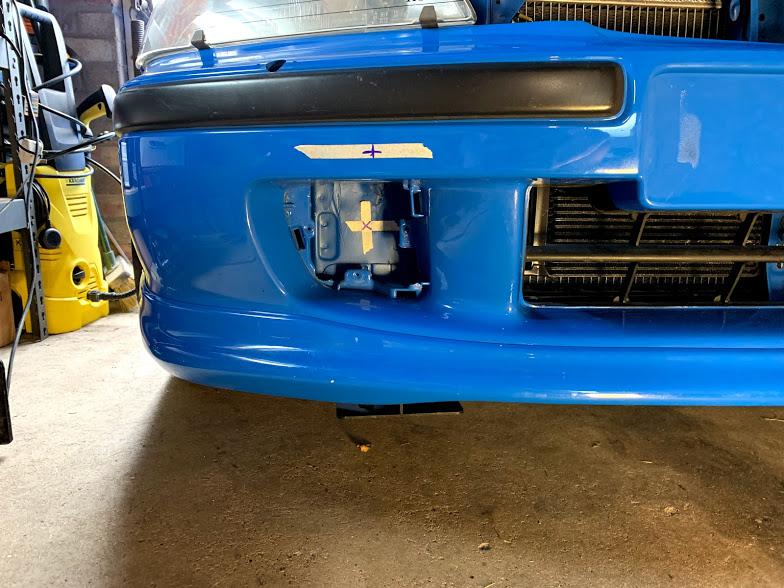
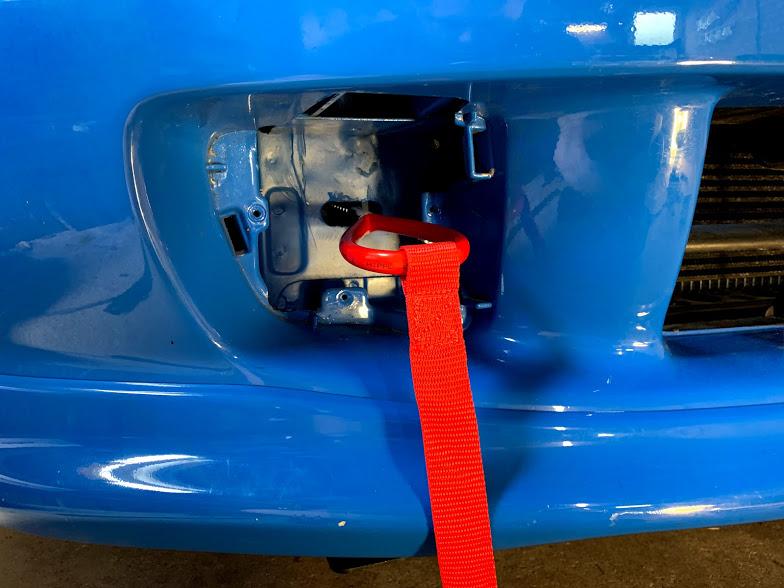
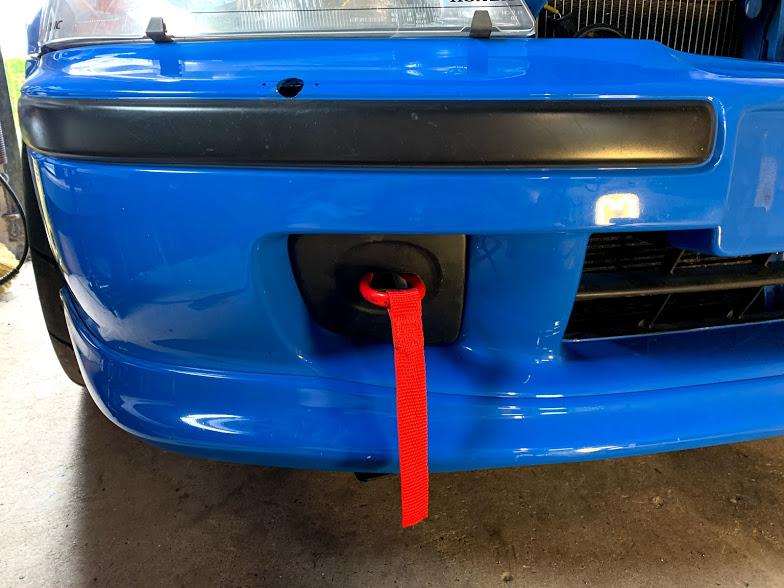
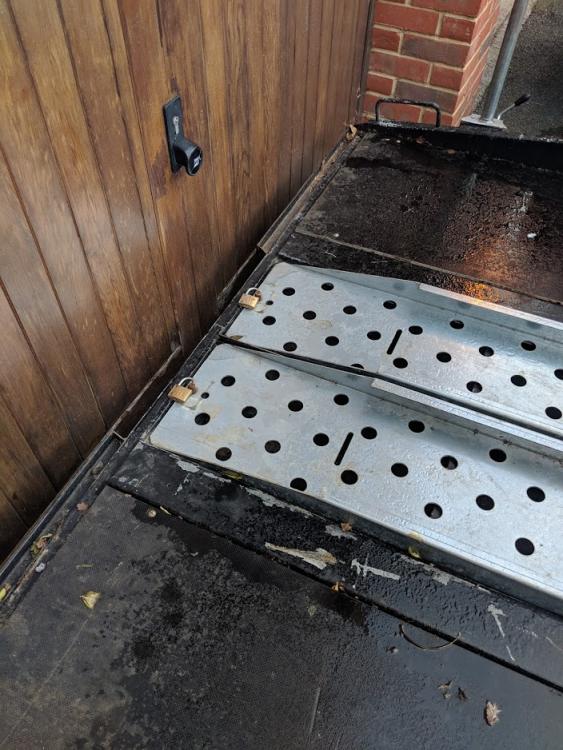
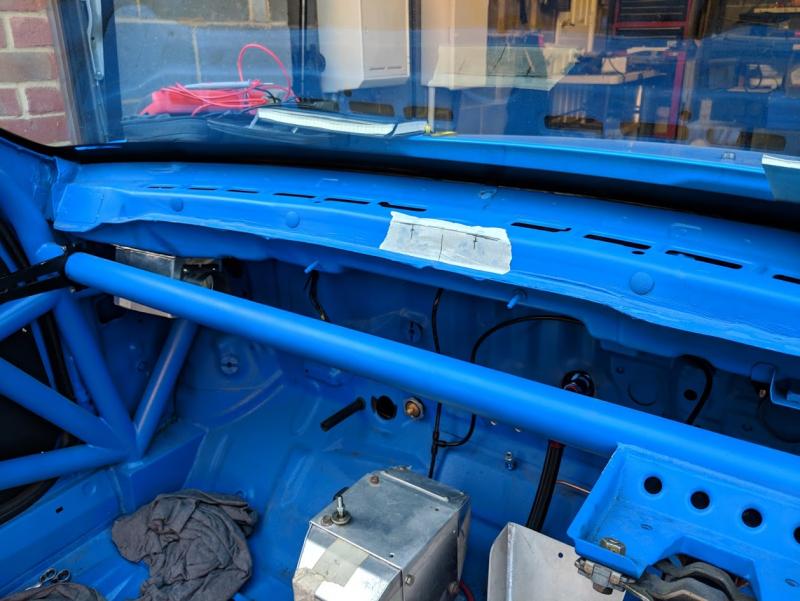
To mount the front tow straps, I put a hole through the front cross member to get the strap through
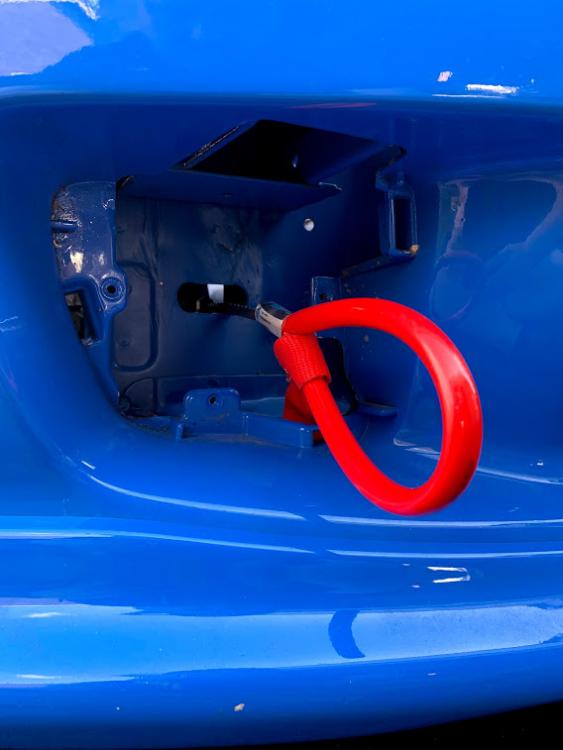
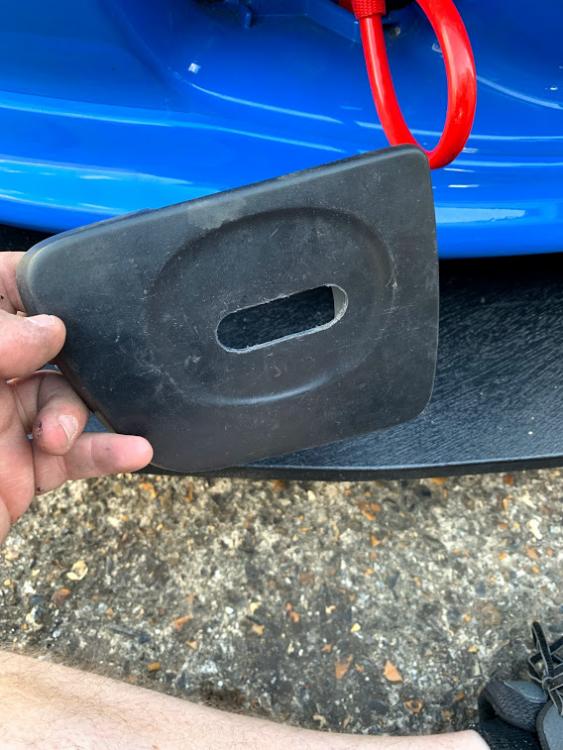
Made a matching hole in a set of fog light covers
I used the top bolt from the BYC splitter mounts and put a nut on the back
-
13 hours ago, Vtisgilman said:
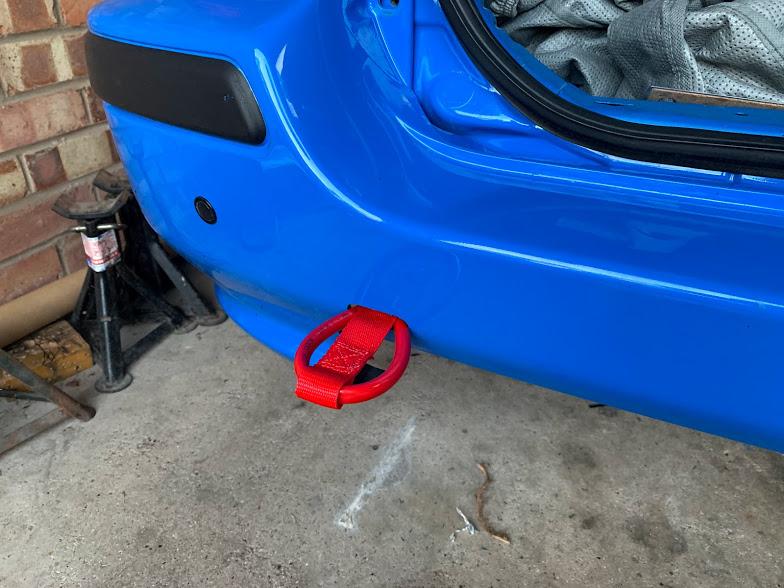
Good progress being made here. How did you attach the MSA tow loops? I need to fit them to my track car but nothing looks strong enough. Especially at the back
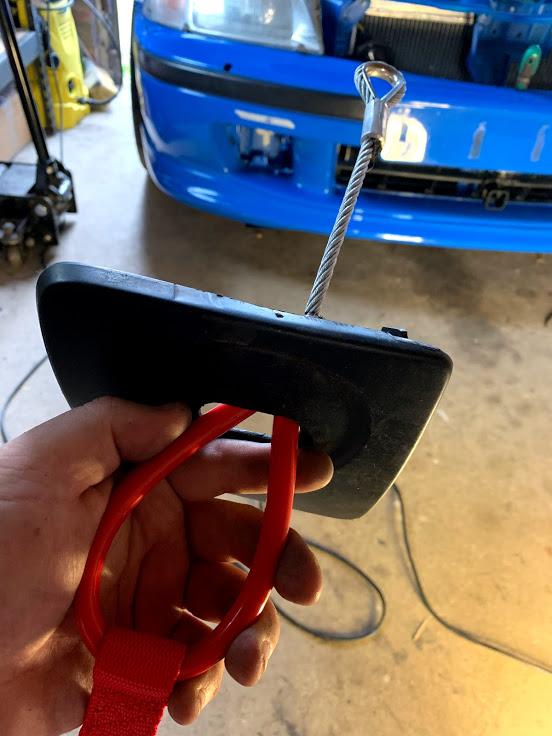
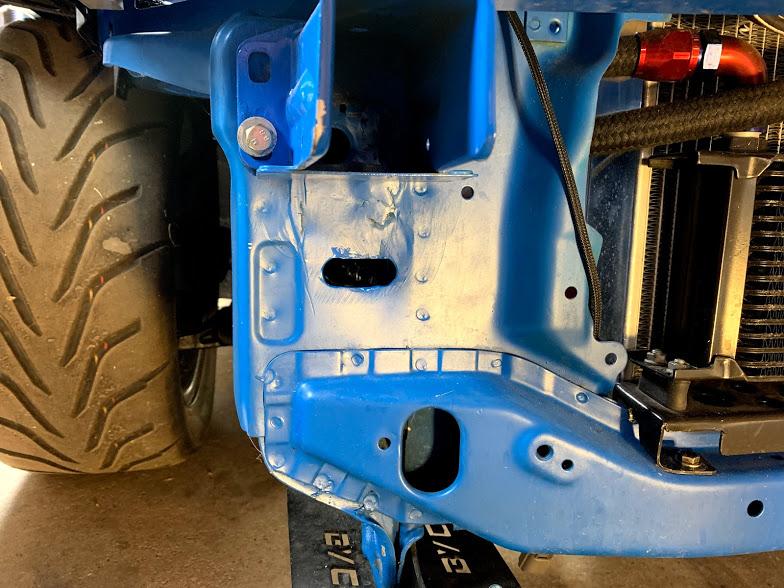
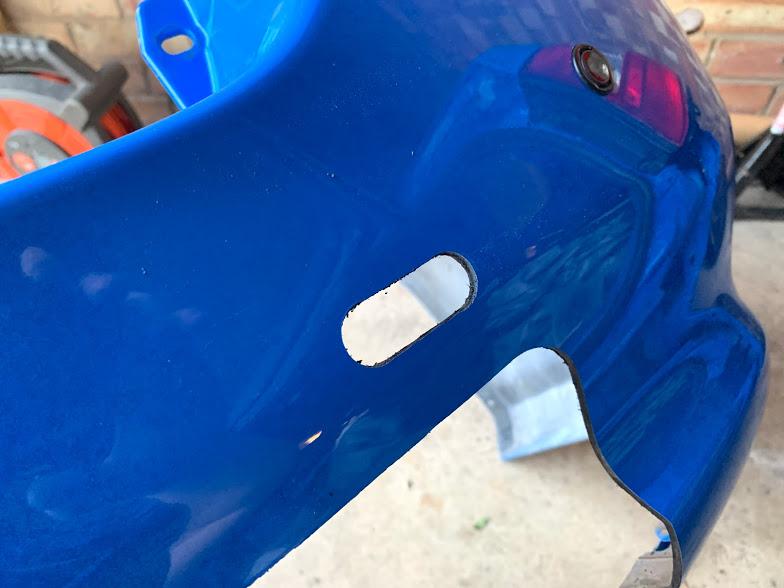
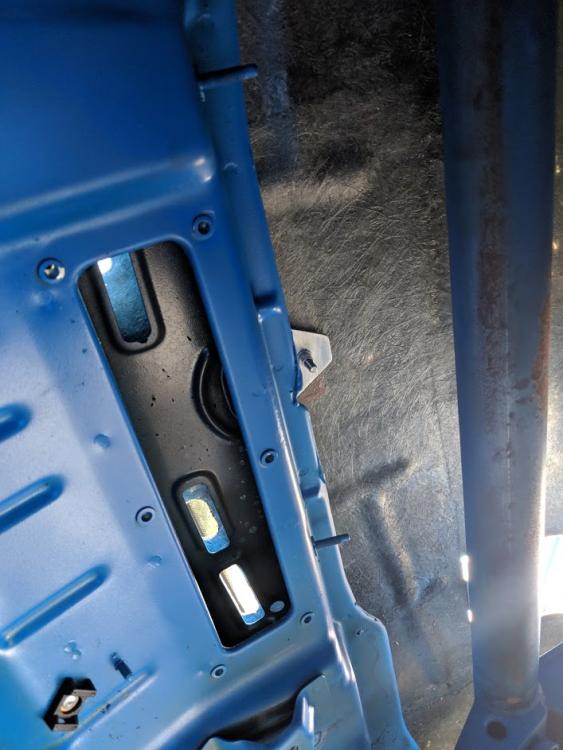
@Vtisgilman In the front I decided to remove the fog light and cut the slot through the slam panel so I could get to the inside of the towing bracket. The photos show the slot but not the bolt. On mine, it's one of the splitter mount bolts. I'll try and take a better picture tomorrow.
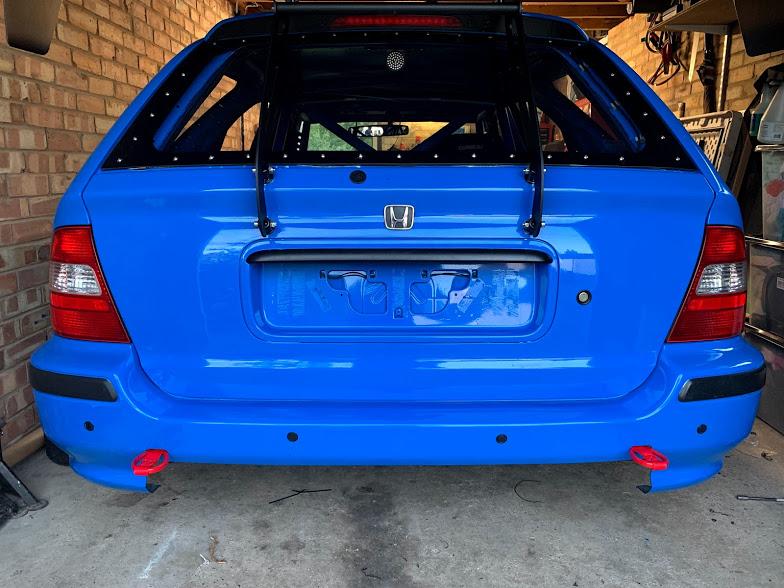
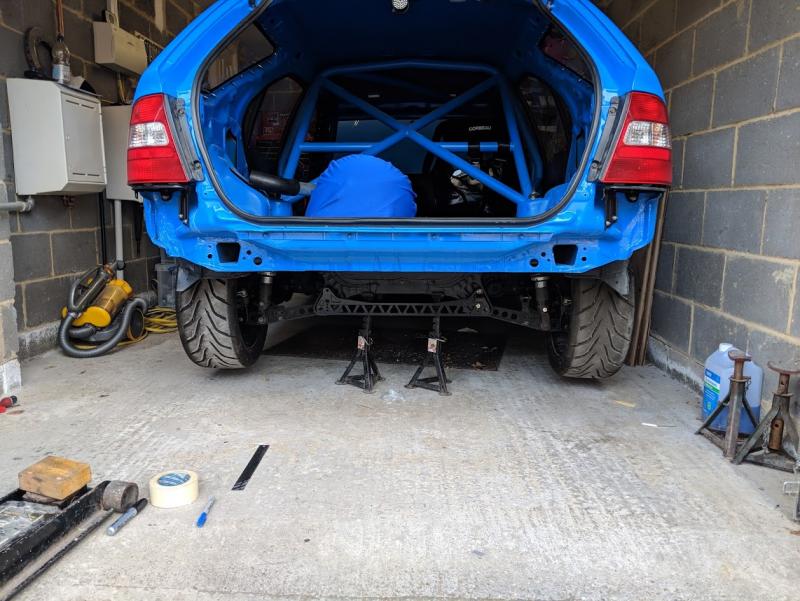
In the rear, I'm going to make a simple frame the goes back to where the tow bar would have mounted down the chassis rails. I'll put in a cross piece so I can mount the diffuser off it so it actually works.
-
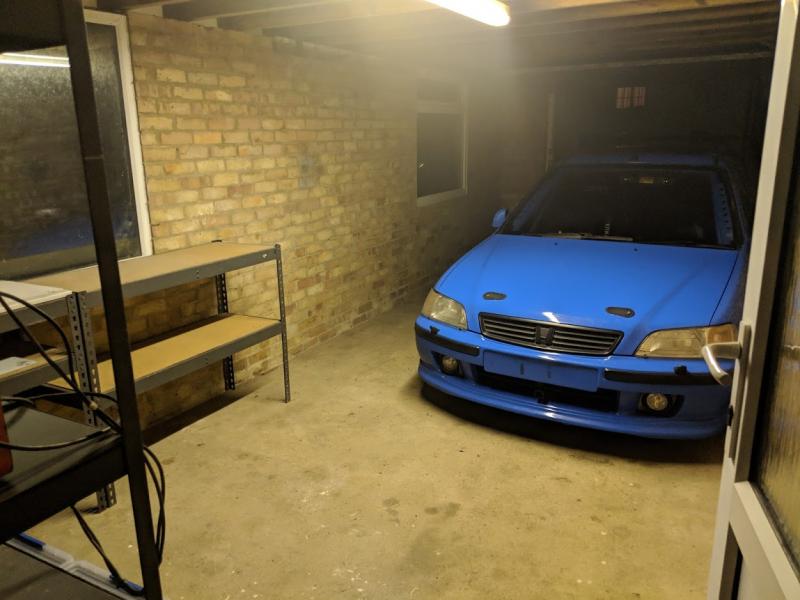
Okay, lets me see where I left off. Moved into the new house and setup the garage
Fitted door handles:
These could be better, need to build more support in the door, may not fit them.
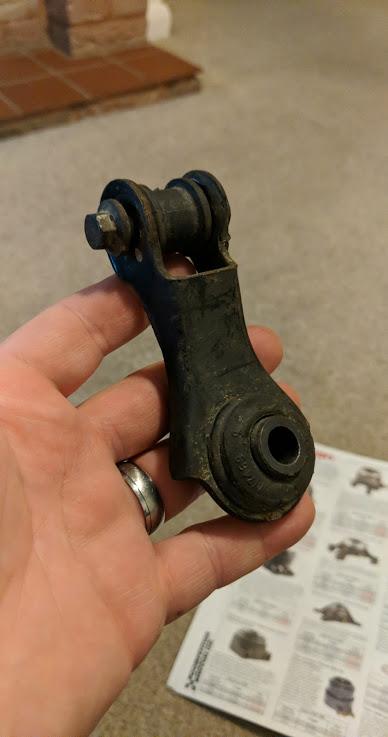
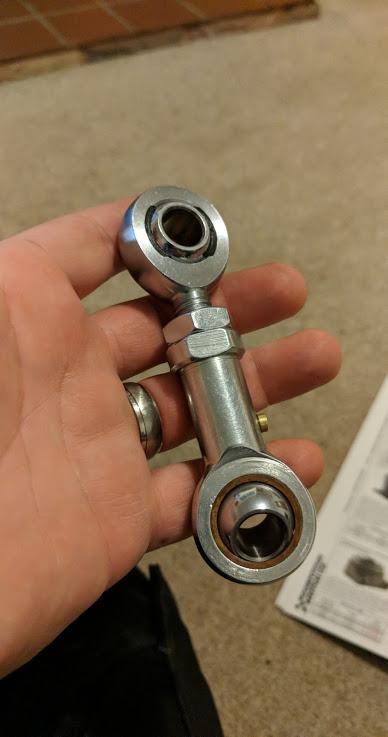
Finally after all these years made the rear drop links. Old vs new
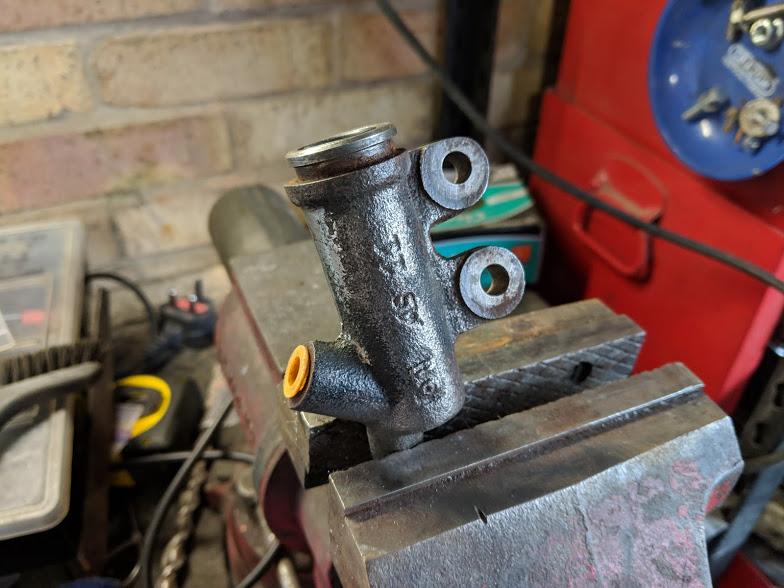
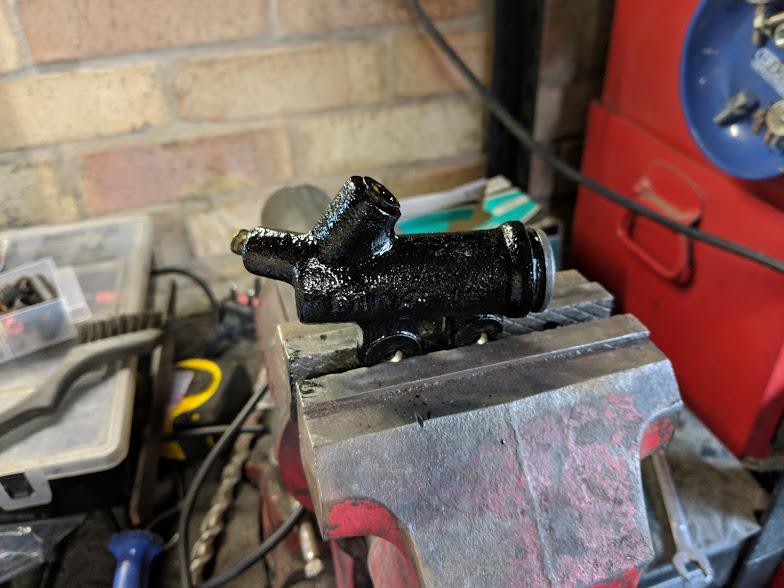
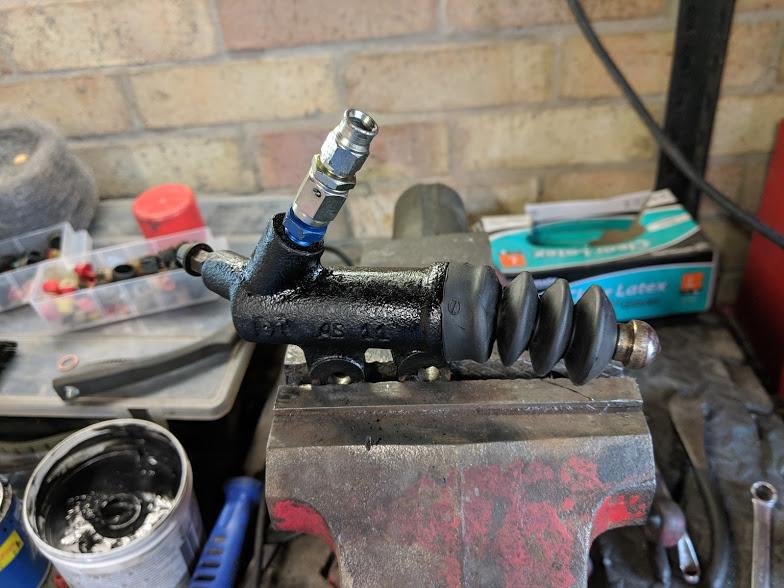
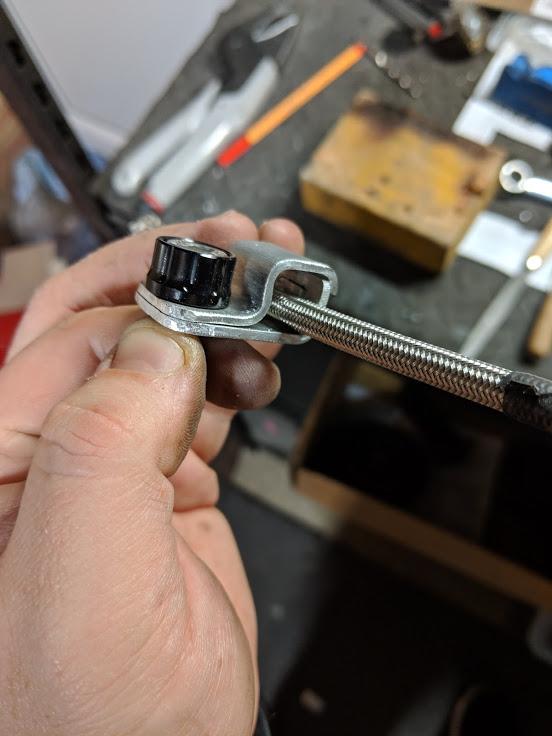
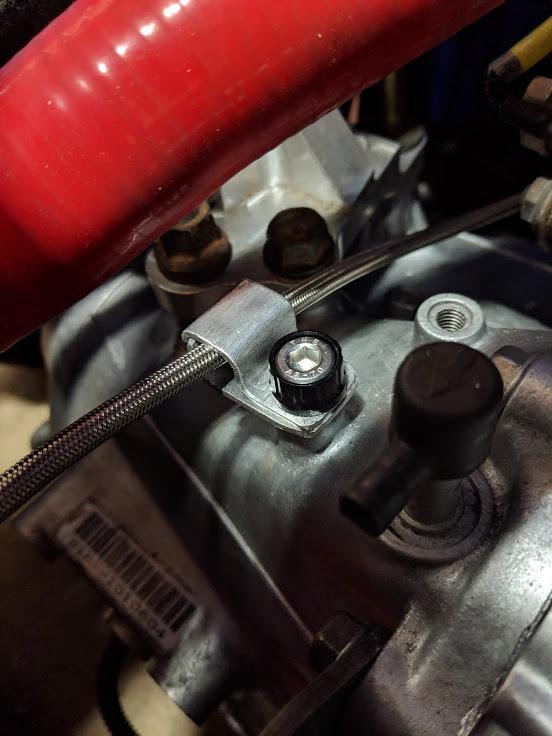
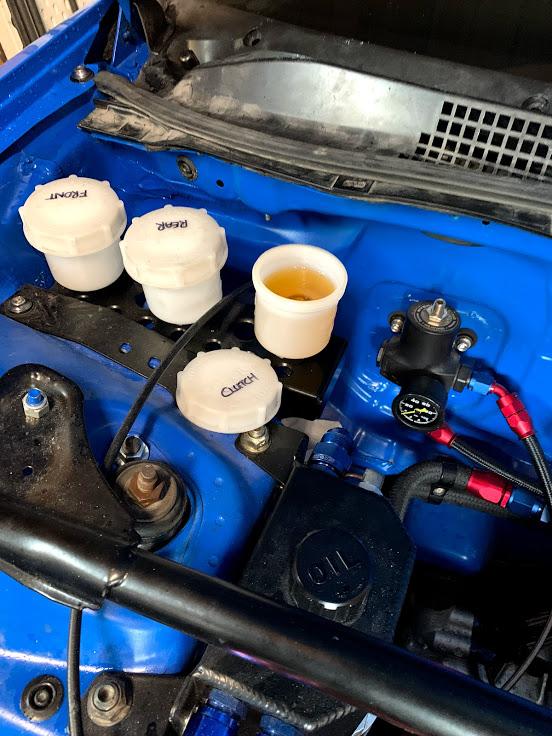
Refurbished the clutch slave cylinder and made the braided lines and brackets to hold it

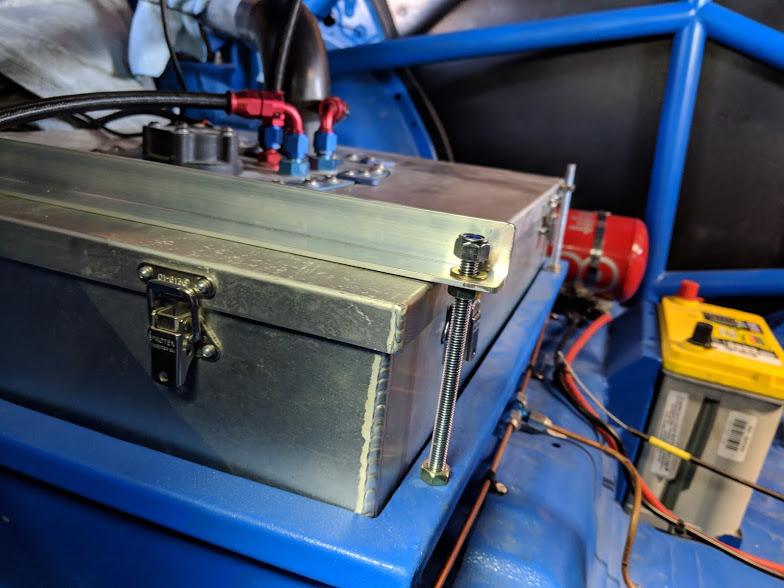
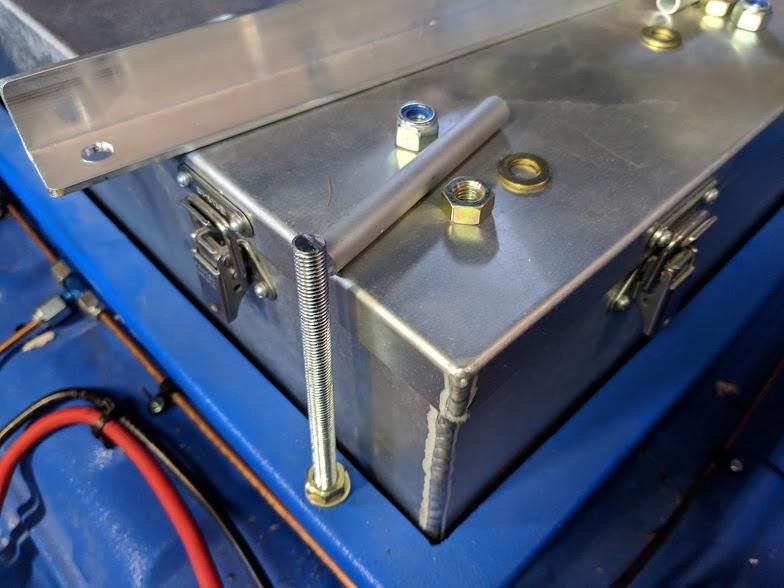
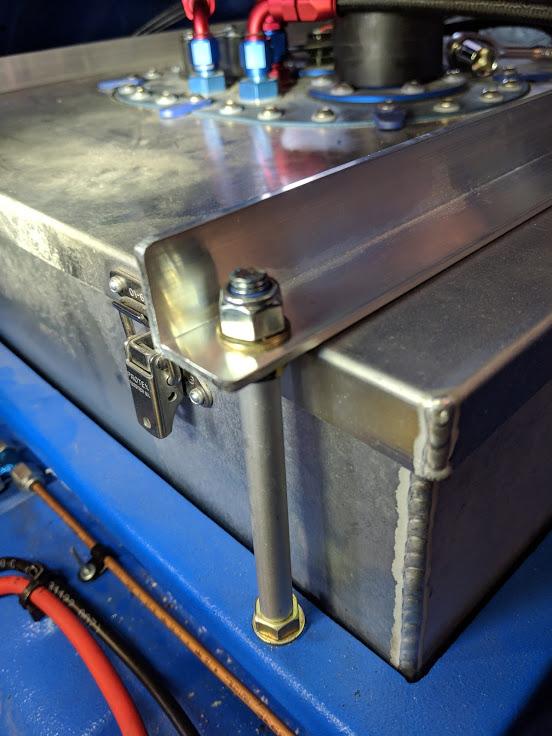
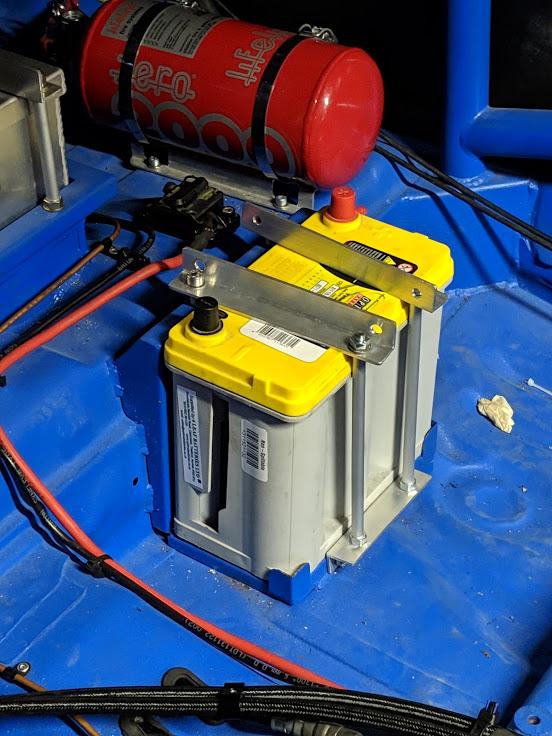
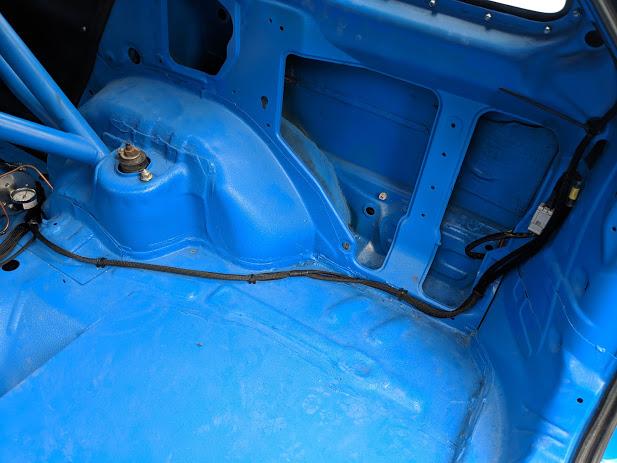
Fuel tank and battery tie downs
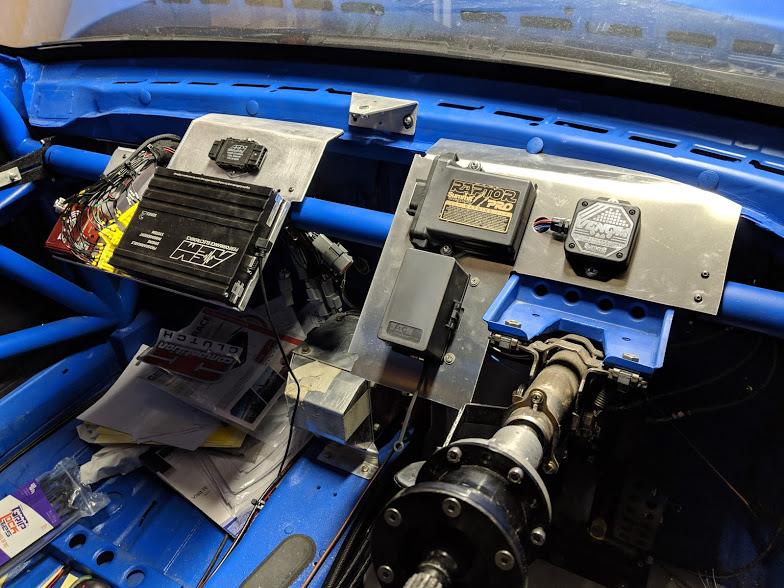
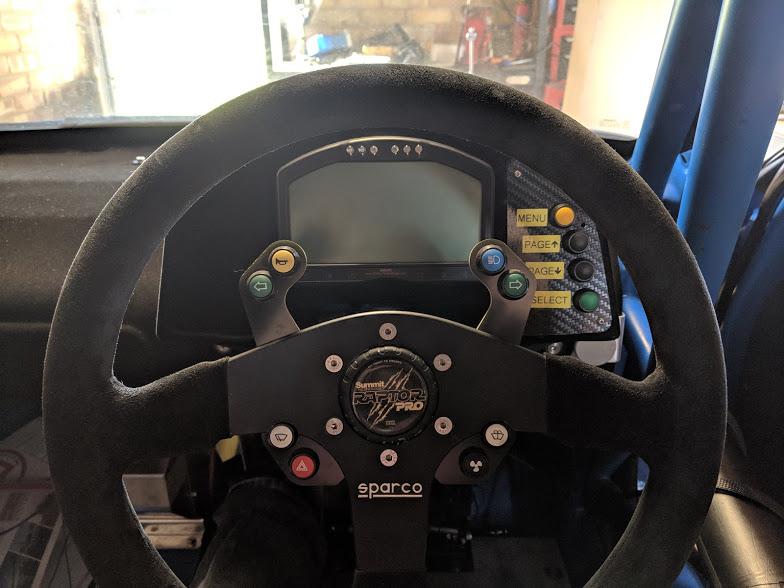
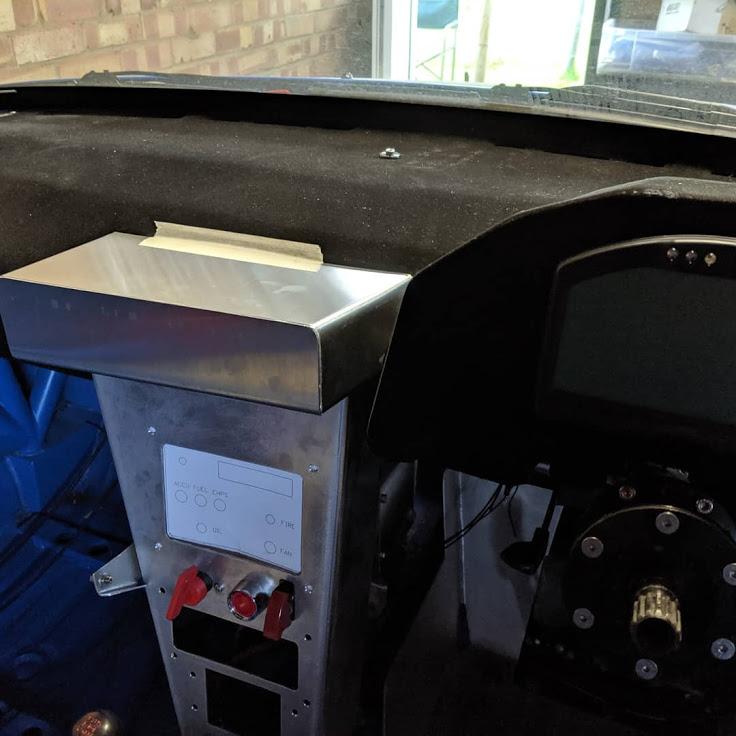
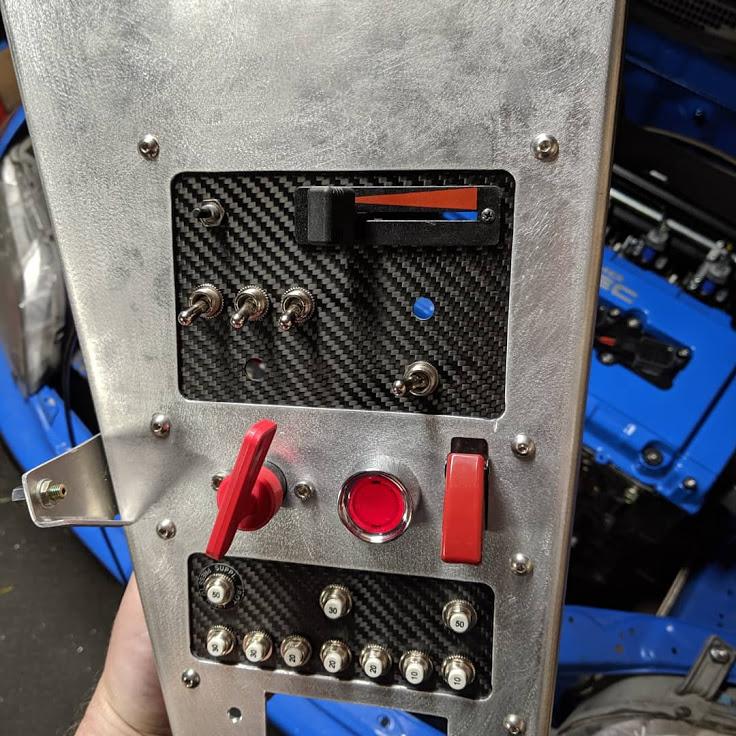
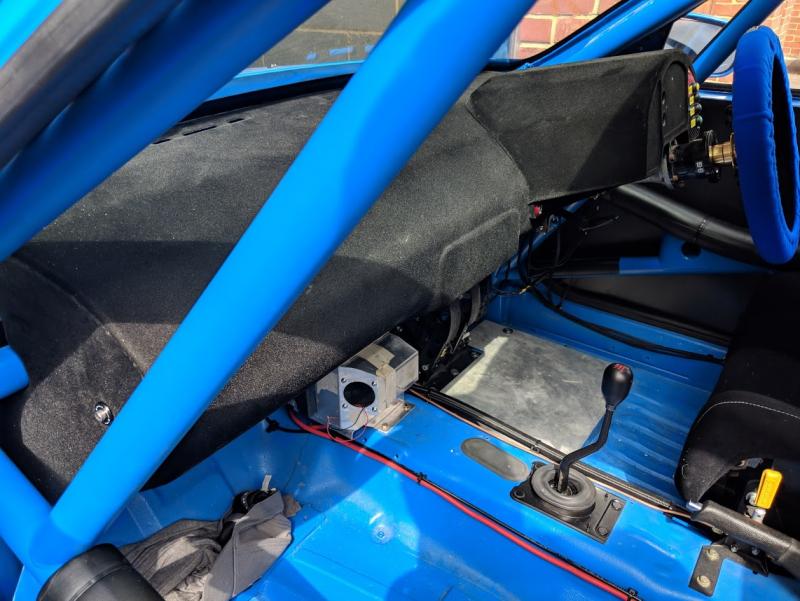
ECU and wireless steering wheel controls mounted under the dashboard
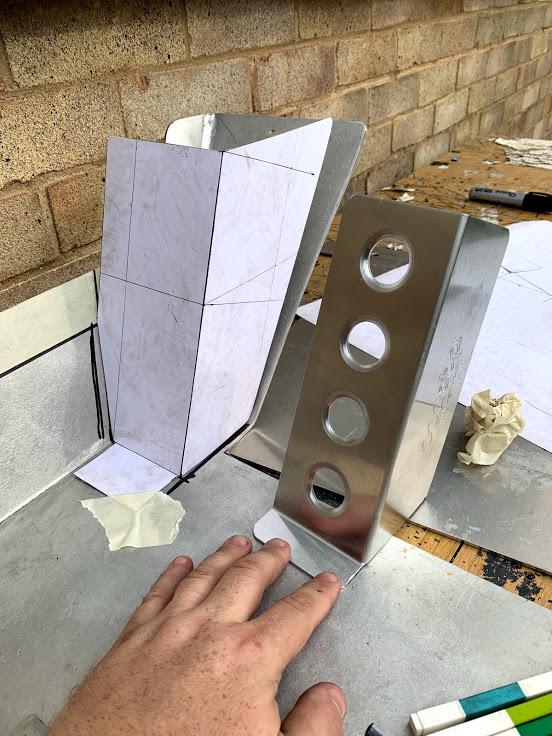
Fabricated a new centre console

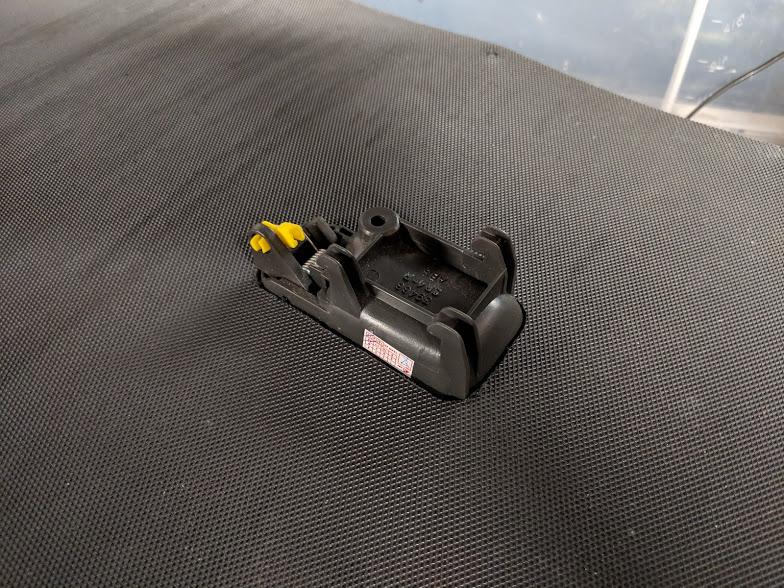
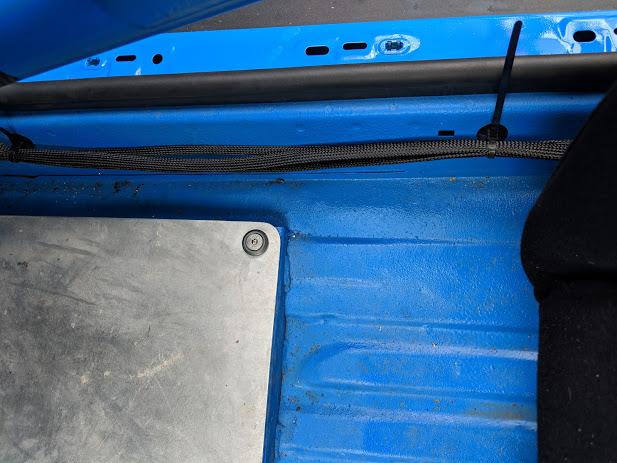
MSA Tow straps front and rear
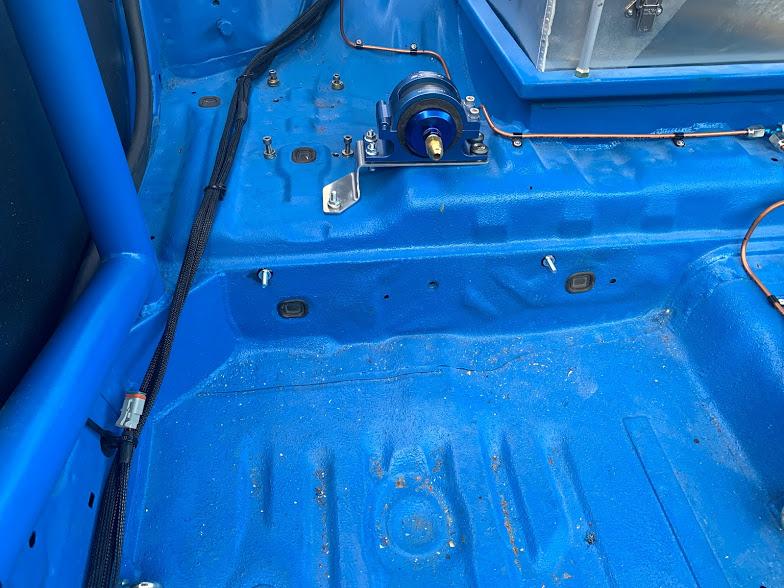
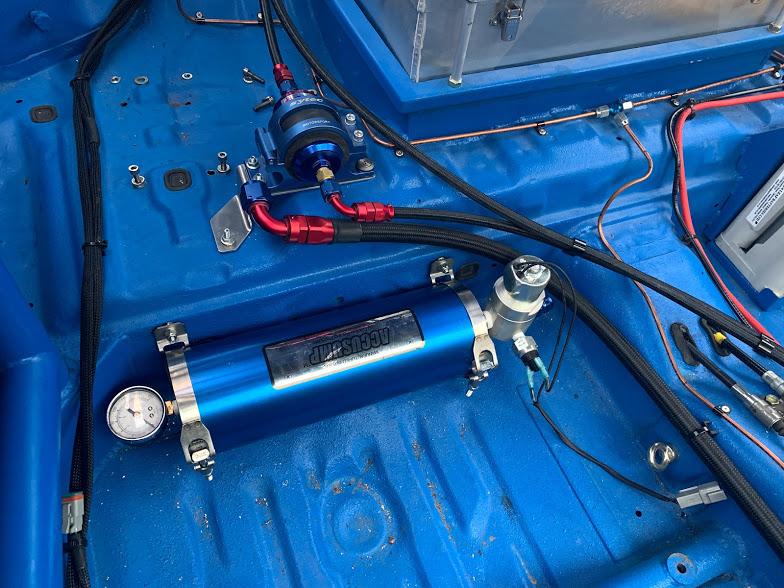
Moved the Accusump to the rear footwell so it's lower down

Roll bars and Polyflex bushes
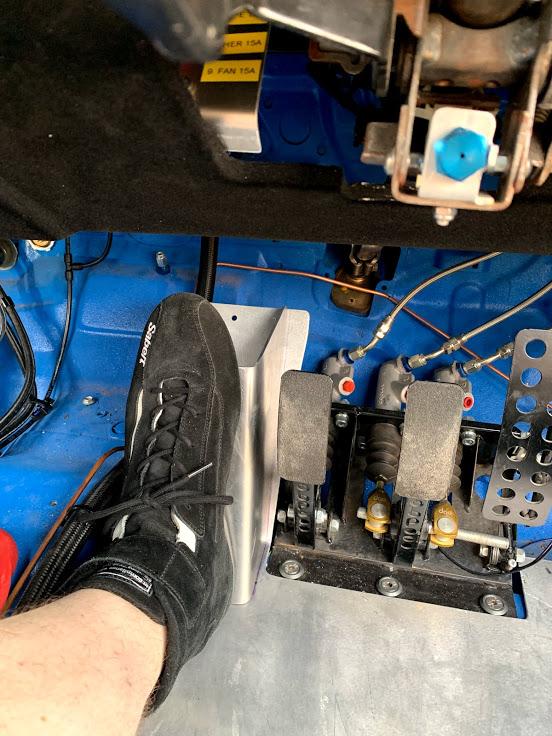
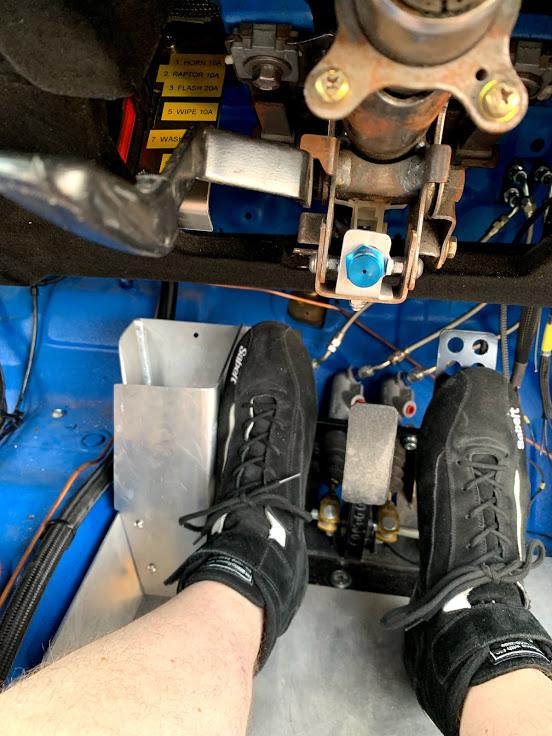
Foot rest on the floor plate

Clutch fluid and clutch setup
Added a cable pull guide for the electrical kill switch, now means the pull cable is tucked away instead of in the passenger footwell

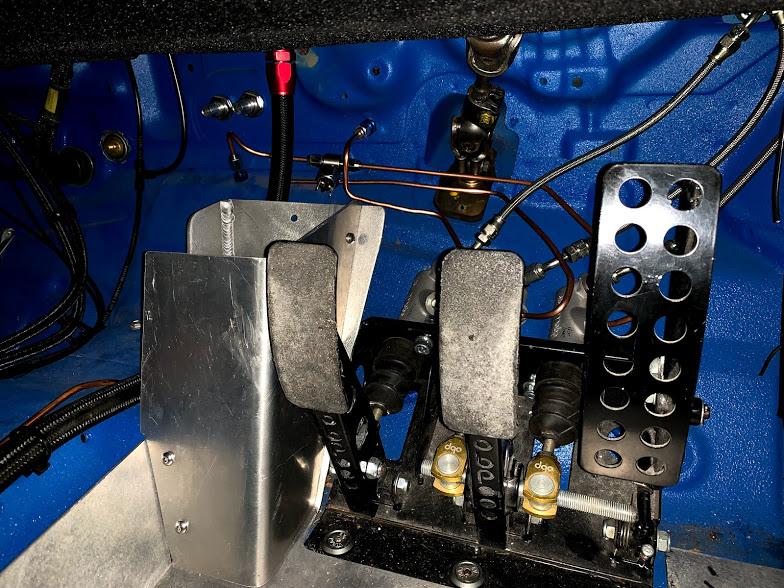
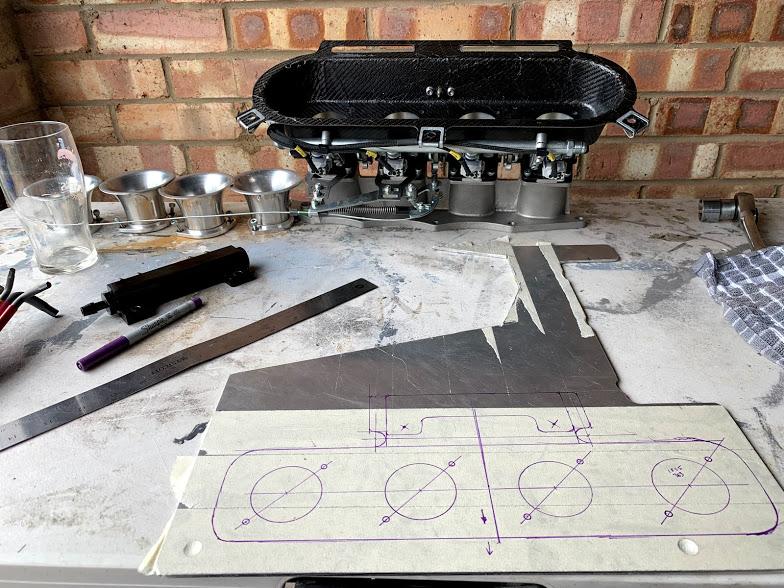
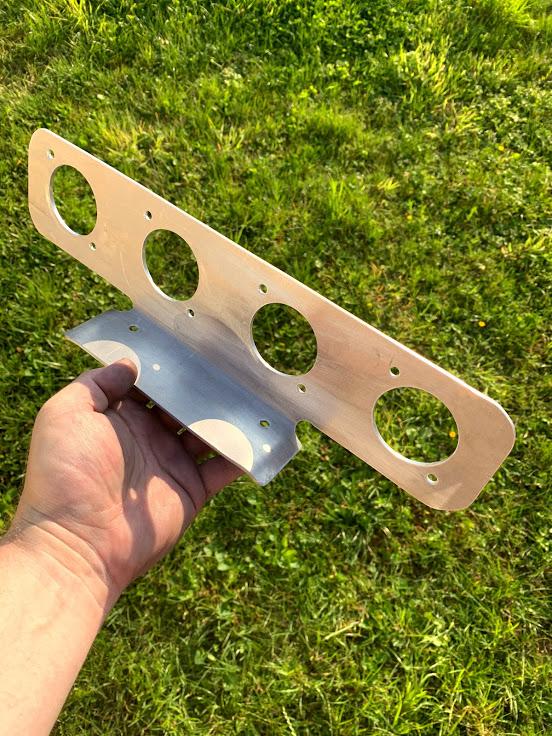
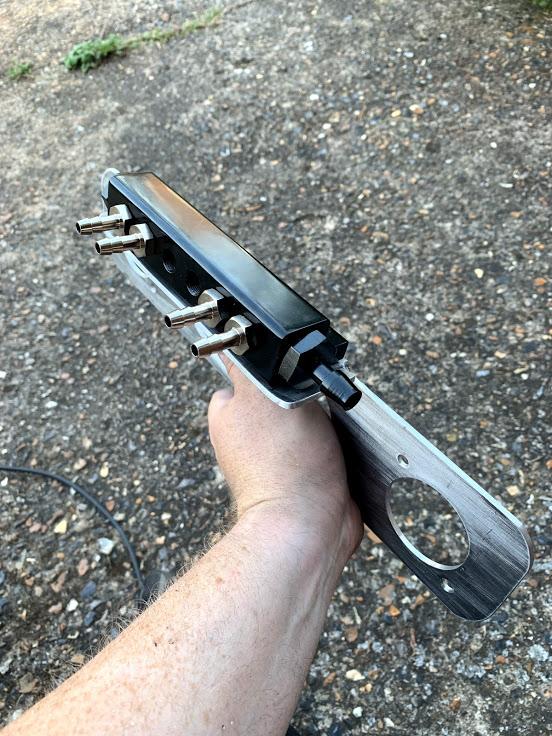
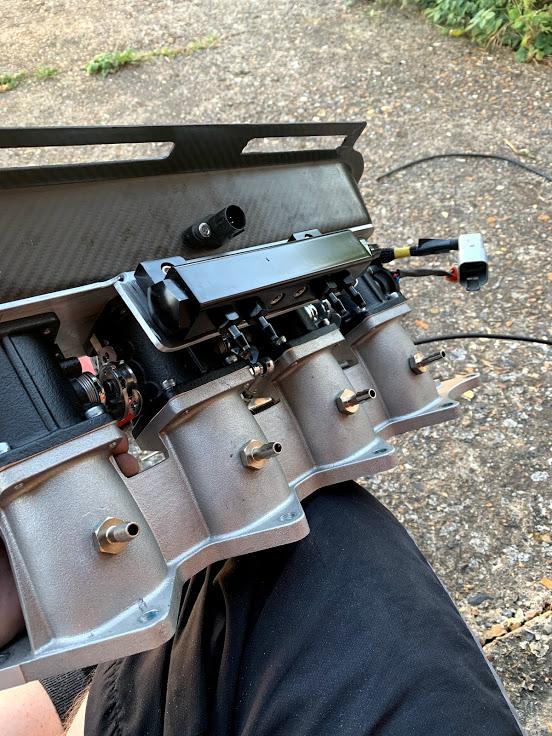
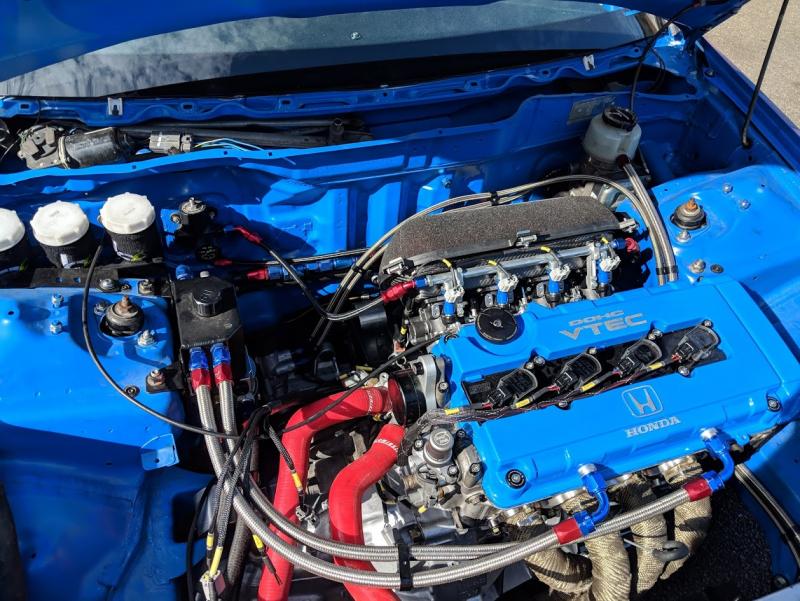
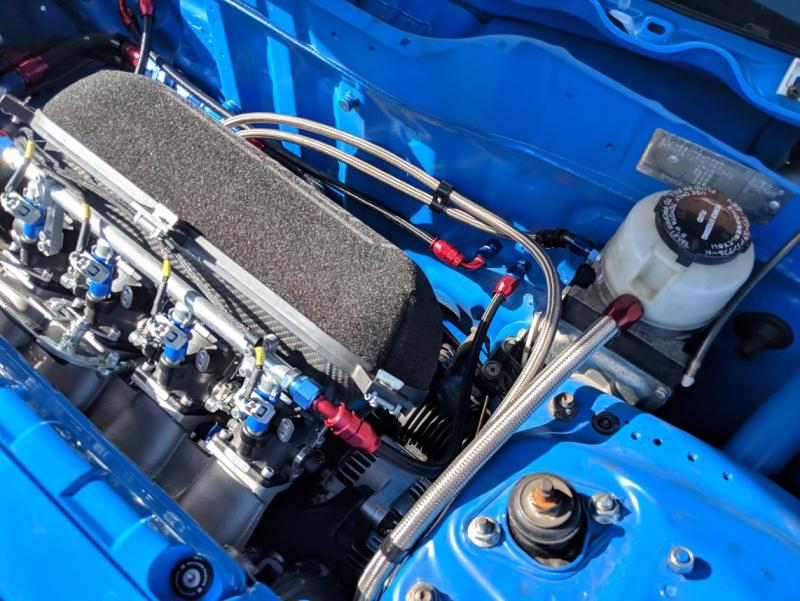
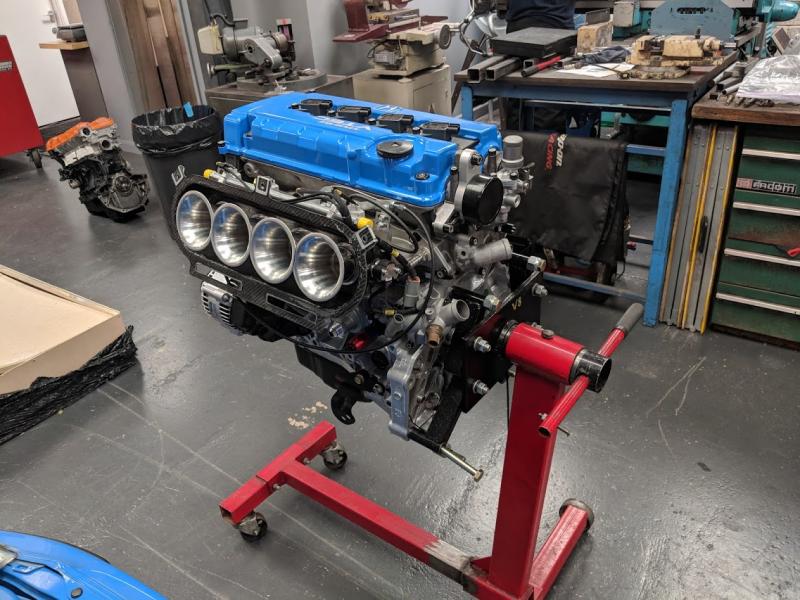
Finally some work on the throttle bodies, added a much better bracket for the MAP collector block and connected hoses
Lots of small jobs but done over the last few months
")
-
 2
2
-
-
On 7/9/2019 at 8:01 PM, Vtisgilman said:
Any more news on this build? Not seen an update for ages.
Sorry yes lots of little jobs, need to post some updates. I’m on Instagram now as well which I try and update. Find me under delasoul_99
-
1
-
-
On 1/9/2019 at 11:42 PM, Blackwolf said:
Hi guys I know this has probably been asked before l somewhere but where would I get the polycarbonate or such like for my mb would like the drivers and passengers windows to have the sliders in them
thanks
For the MB, search for the Rover MG ZS window kits, there are plenty about. Plastic4Performance made the kit for my Aerodeck so can do the MB side windows, not sure they carry the rear screen (if you want that as well). You have to retain the rear door quarter lights to secure the rear windows.
-
 1
1
-
-
On 12/13/2018 at 8:25 PM, dmrichards said:
How did everything go with the house move?
Garage looks a good size. When I eventually get a house a good garage and drive will be high on the list!
Will let you know Thursday, should be all done by then!
The one thing I've struggled to find is a house with a sensible garage, the older houses seem better. Estate agents never seem to take measurements of garages so I've ended up taking a tape measure to each one or pacing it out!
-
1 hour ago, dr_broon said:
Good stuff as always mate.
That HD wax looks like good stuff. Does it go on nice?
The garage at the new pad looks ace! Proper man cave!

Wax goes on very easily, I was expecting it to be tougher to apply to be honest. It rained on the drive up and the water literally flew off!
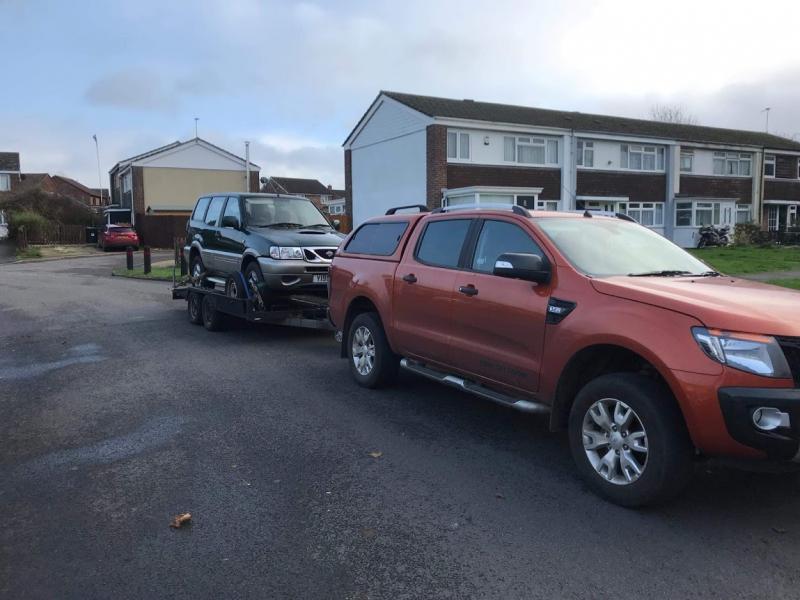
Forgot that I also have my truck back which was fun to tow on my trailer - went well though Luckily the Nissan was able to drop off the back with no issue until we could cut the locks off to load the Aerodeck
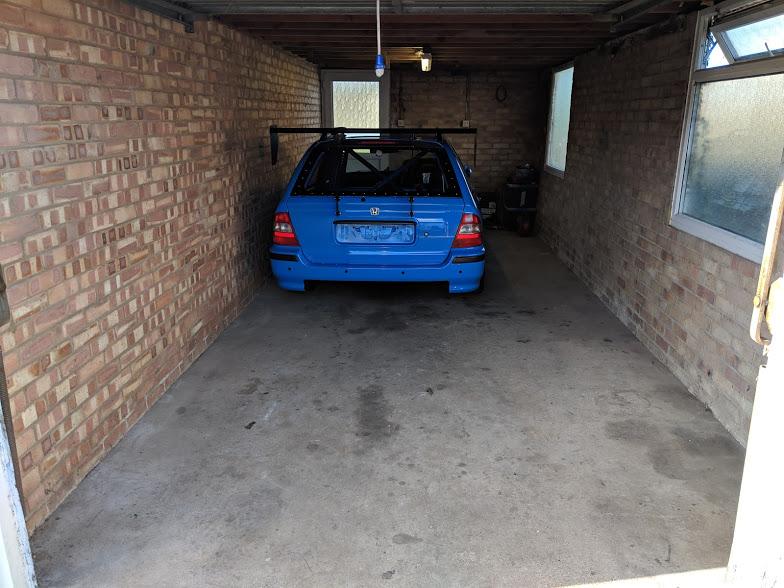
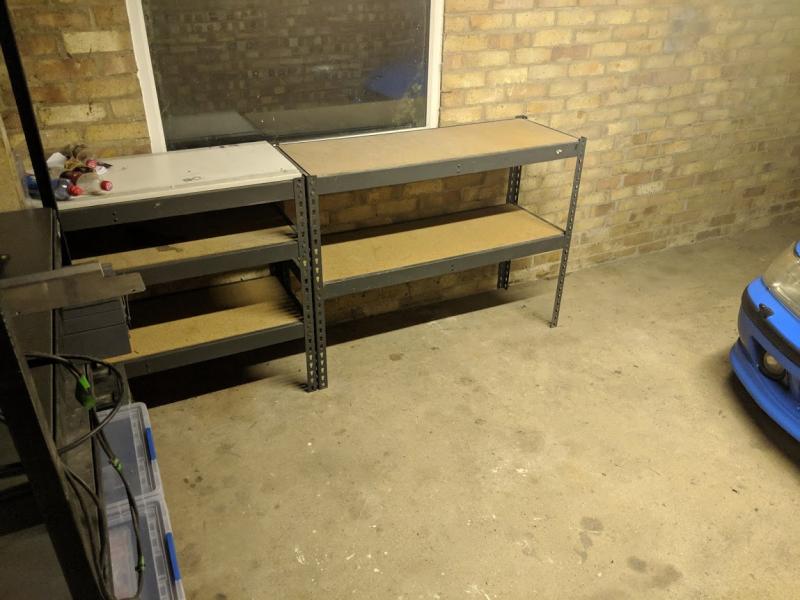
Happy with the garage, loads more room and a door to the garden so I can get in and out without disturbing the neighbours is also a bonus! Started to lay it out last night (tools are at the old house). Excuse the rubbish on the shelf, cleaned out the truck at the same time as moving in!
Loads of room down the side and in front of the car!

-
3
-
-
Small update, I've been away in NZ several times with work and now home and moving house.
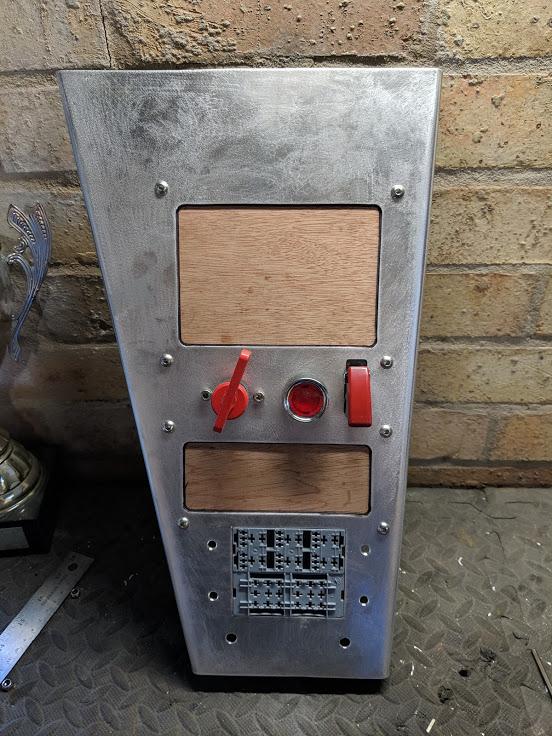
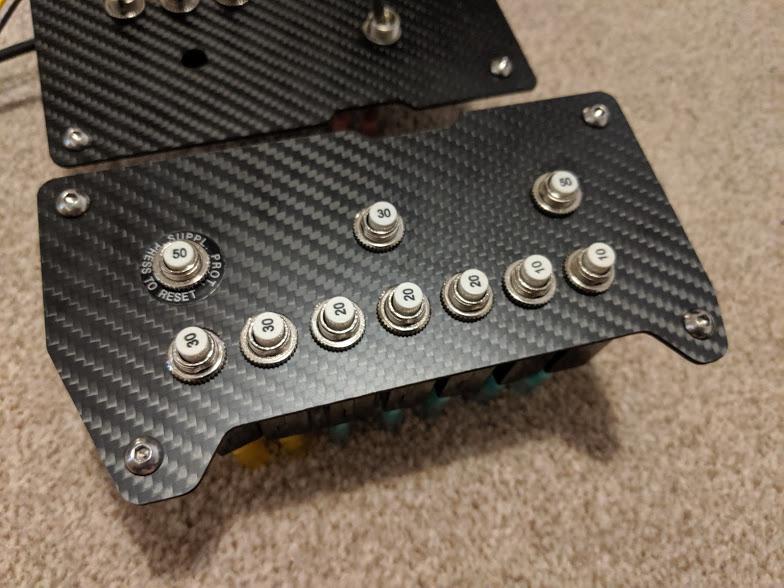
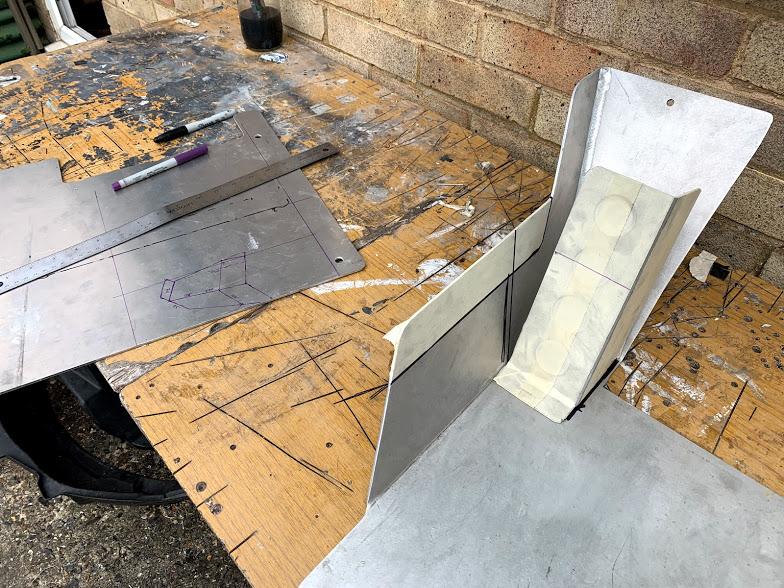
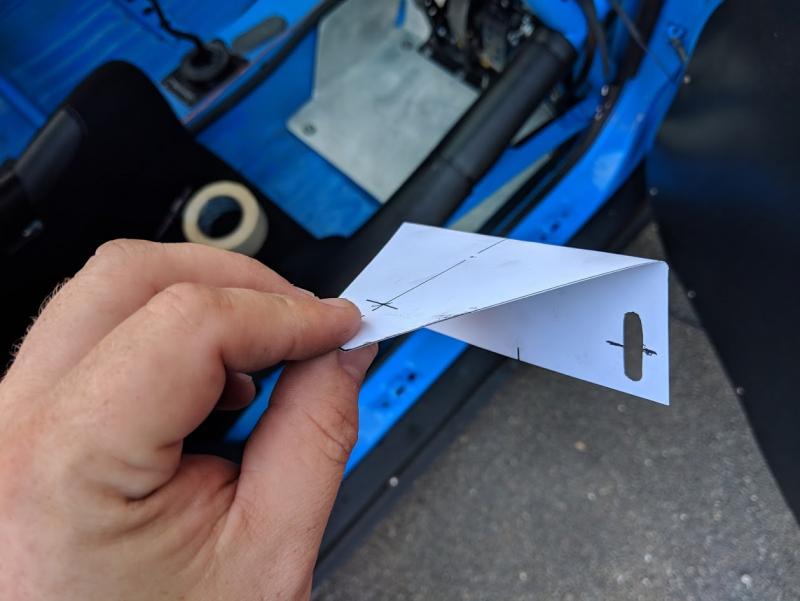
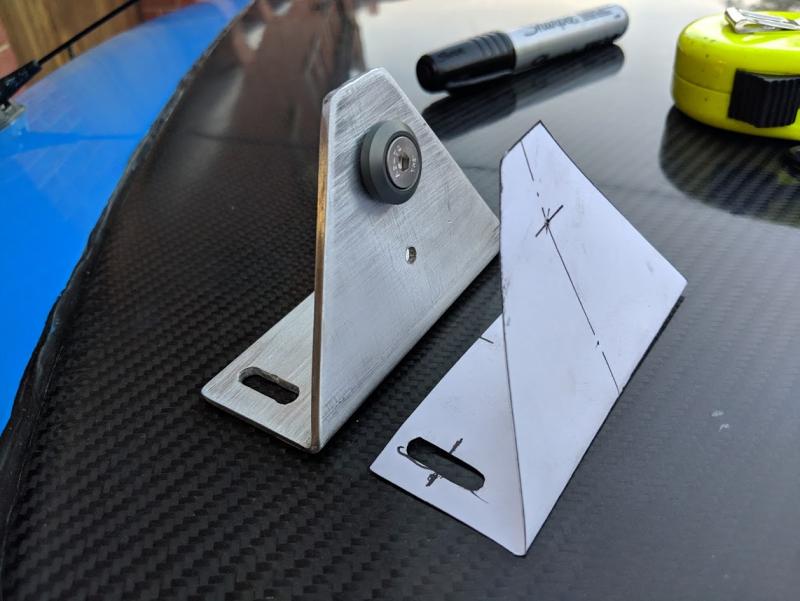
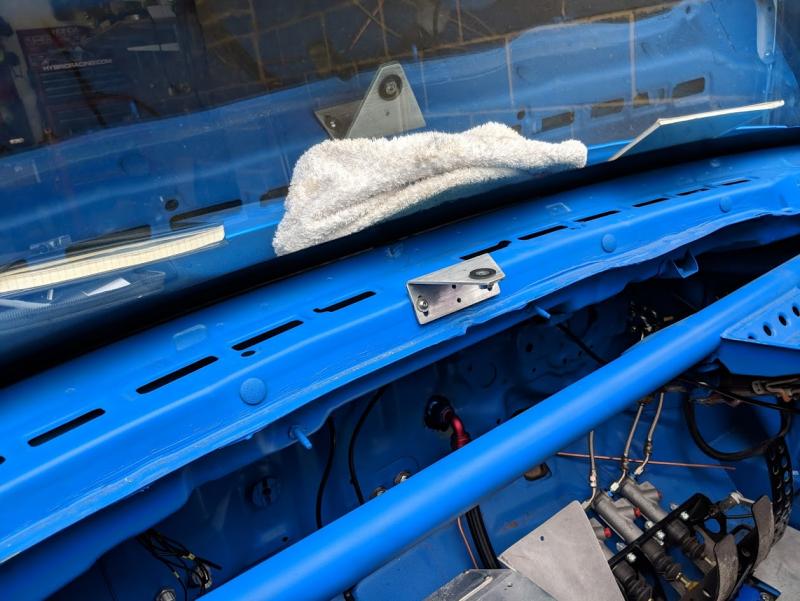
Started to make a new centre console mould tool. Old centre console was good, but with the harness done up tight I couldn't reach the switches so started again!
Cardboard and paper model to test fit, then wooden former.
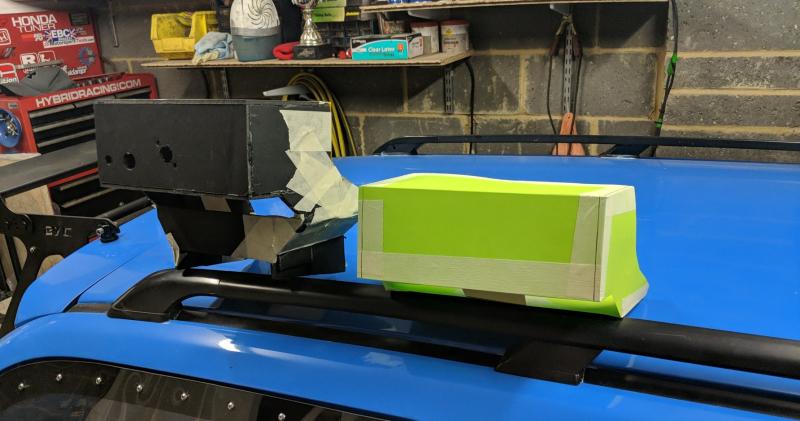
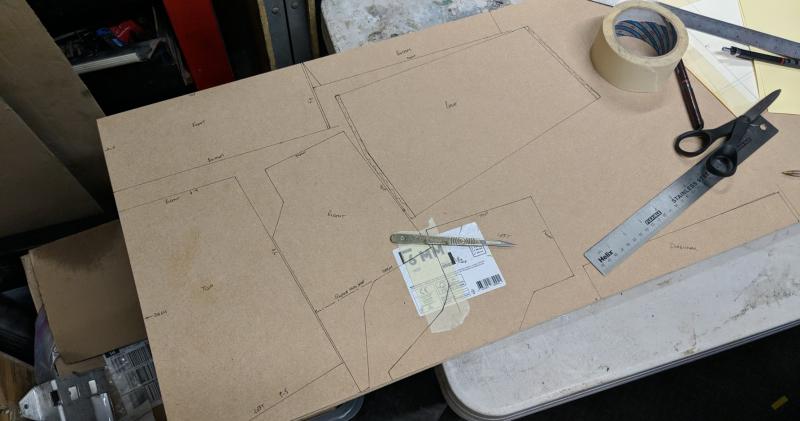
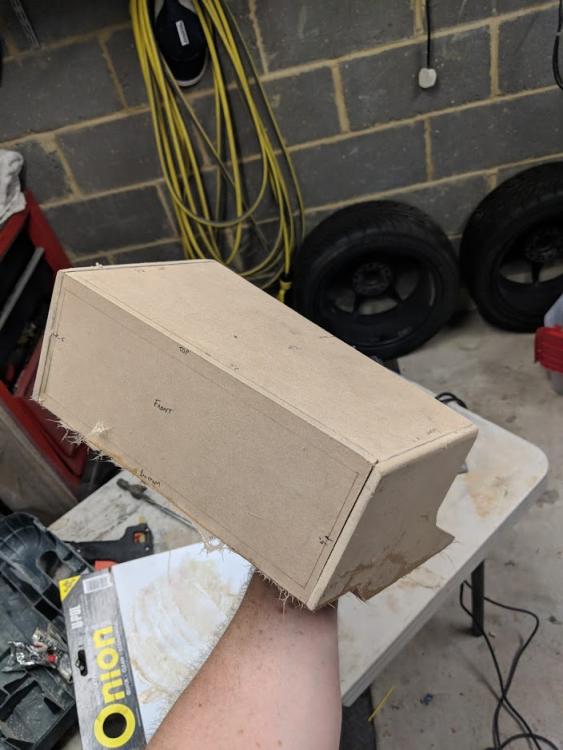
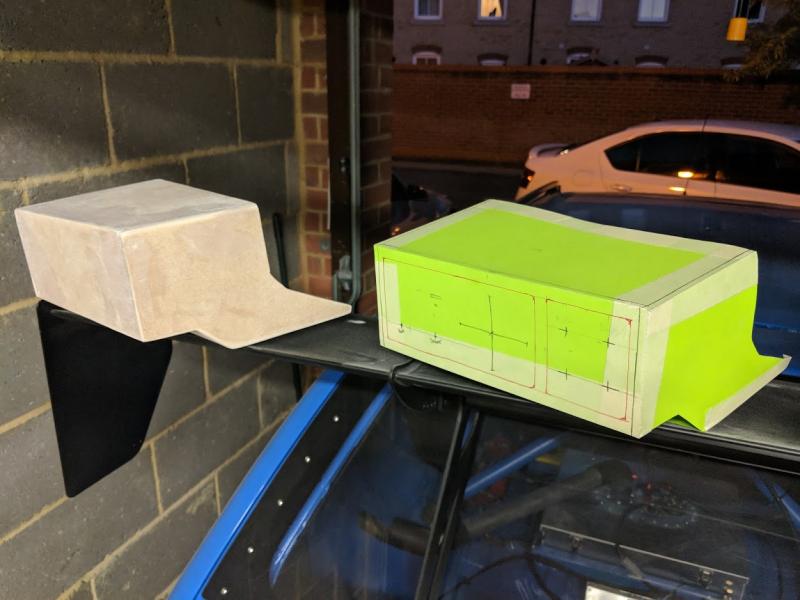
Just got to take a fibre glass mould from it next.
Next, preparation to move house with a wash and wax.
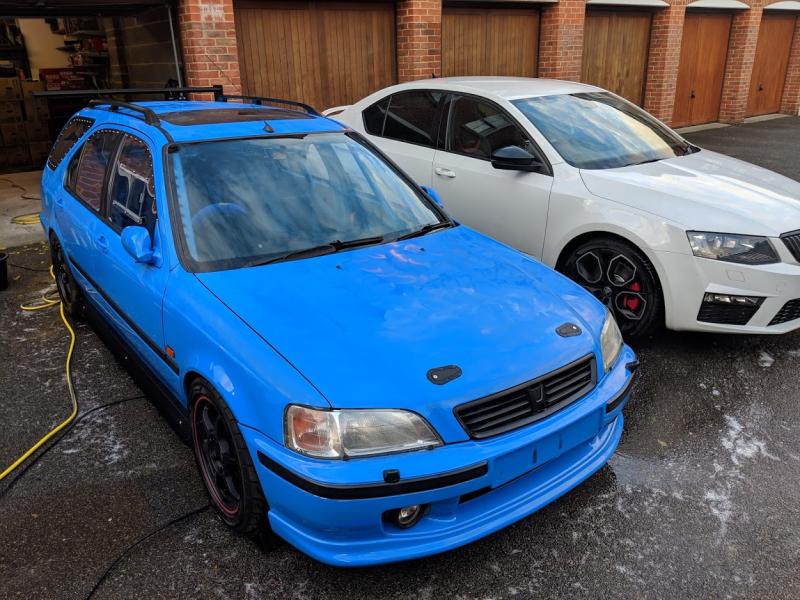
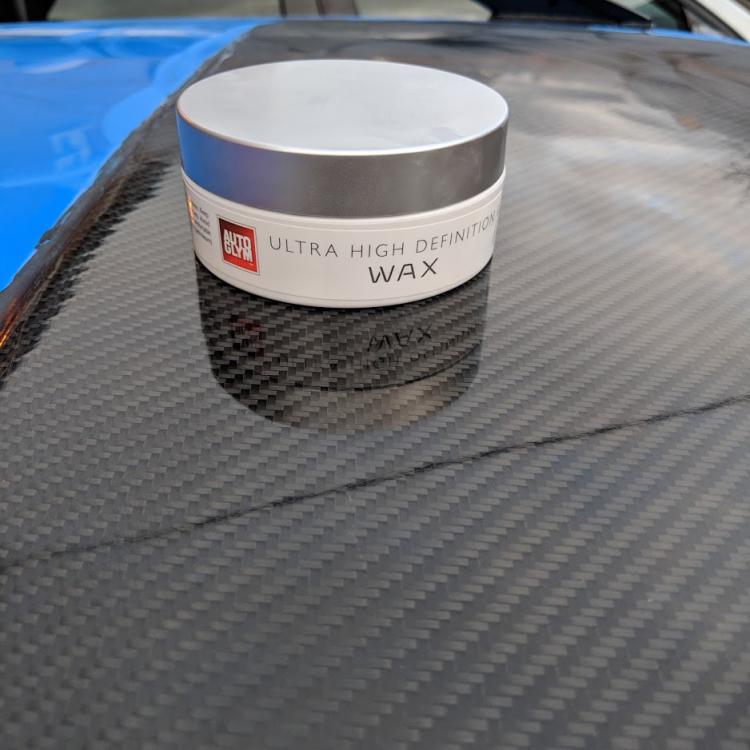
Even the carbon came up nice!
Friend brought the trailer up to move the car, but forgot the keys to the locks! Had to cut them off early in the morning which must have upset the neighbours!
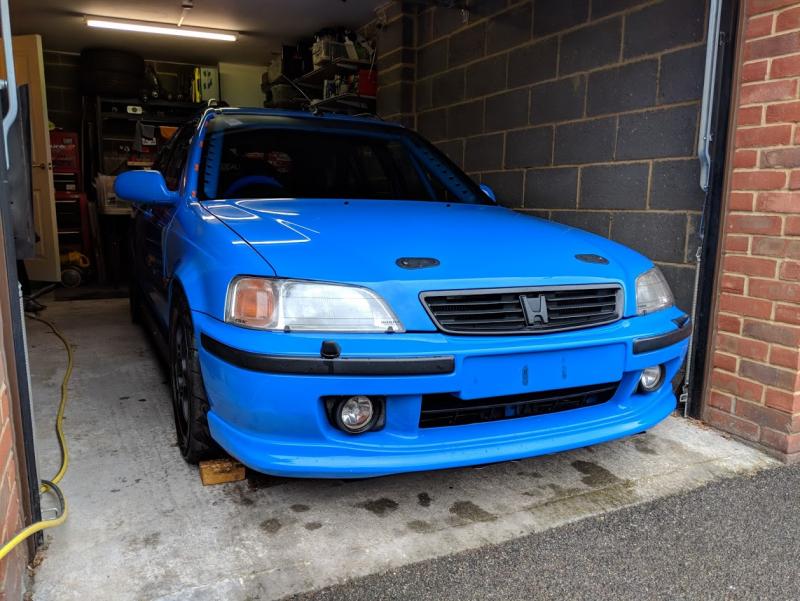
Car is moved now to it's new home, slightly bigger garage with more light!
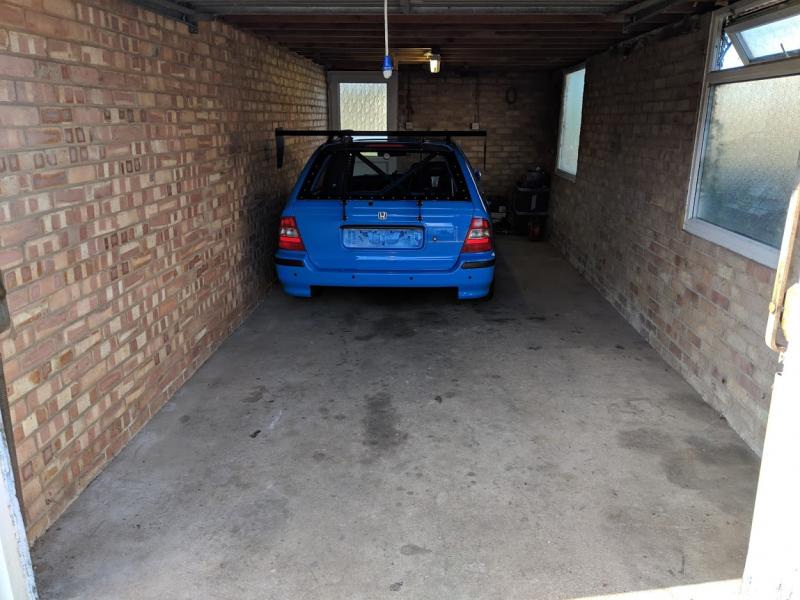
Little bit nicer than what I had!
-
1
-
-
Quick update, been away in New Zealand with work for a few weeks so no solid progress on the car but parts arrived while i was away so I got a few small jobs done on Sunday.
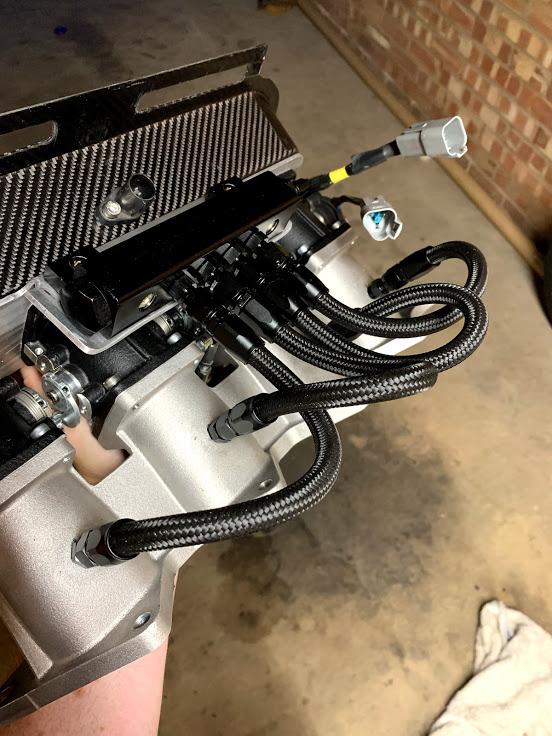
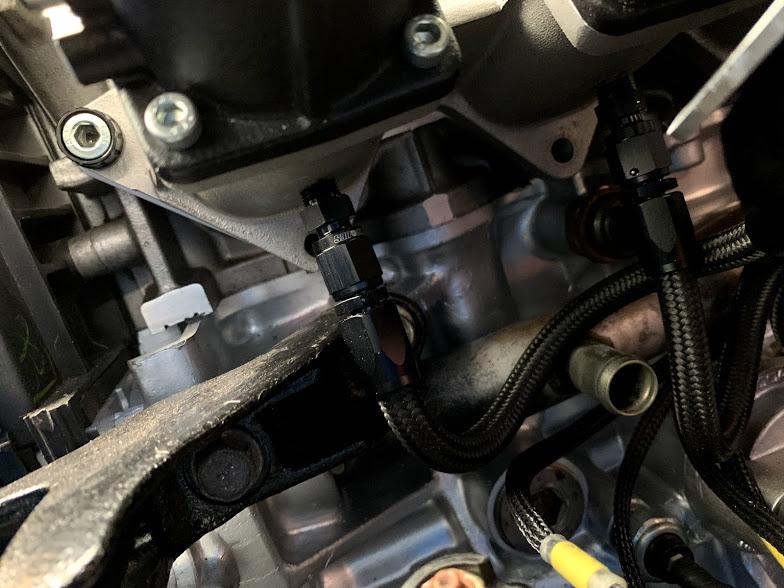
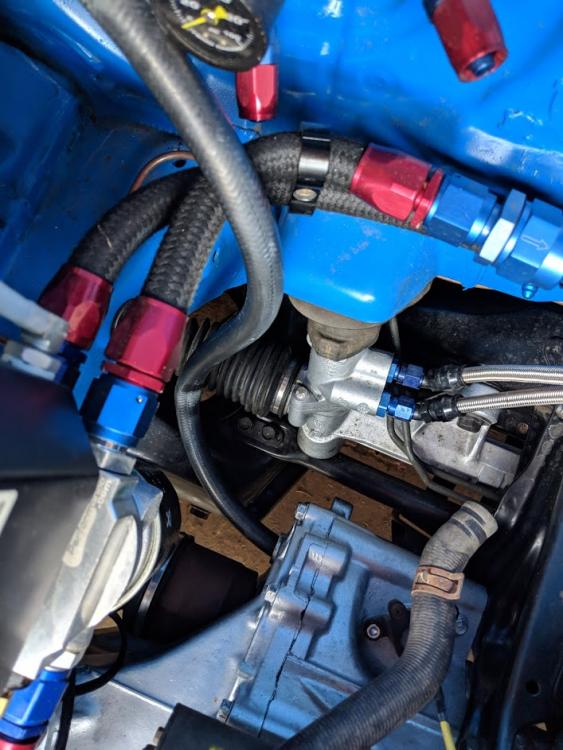
Fuel System - finally bought all the fittings and hose to do the fuel system. Spent about 2 hours routing and plumbing it in but will need a bit more work. At least all the hoses are now cut to length.
Fuel pickup, to filter (which will have a top cover), to the bulkhead. Return is attached and back to tank. Finally the vent is sent straight up to the cage, looped back and needs a bulkhead fitting putting in to vent to the outside of the car in a "dead air zone"
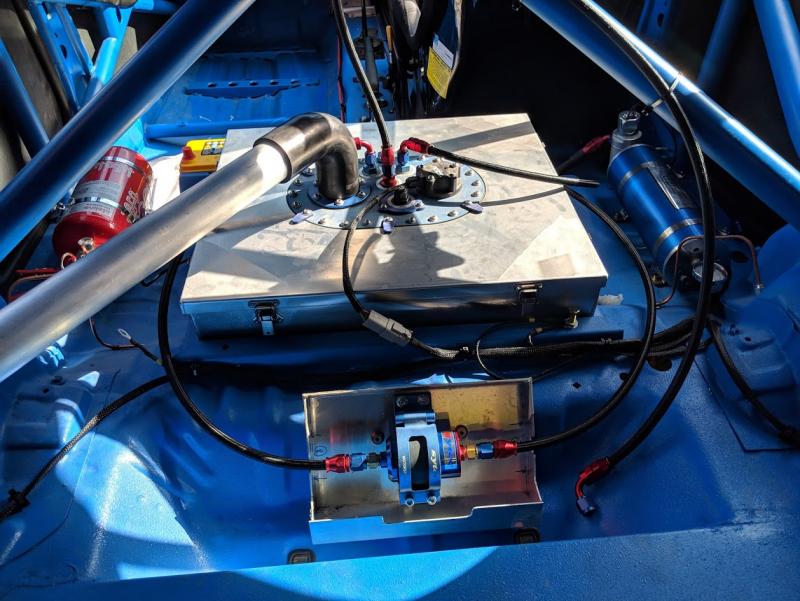
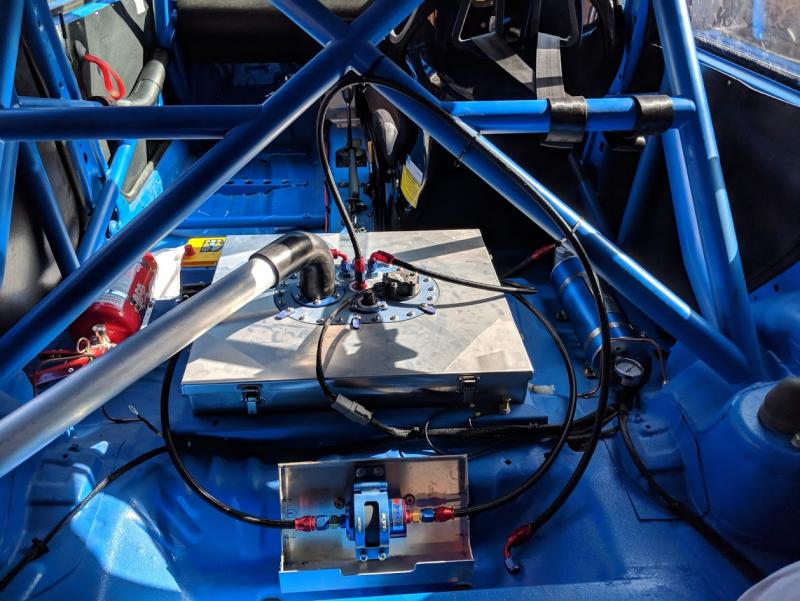
Fuel lines from the rail to the fuel pressure regulator and then back along the bulkhead. Excuse the wiring, need to tidy up the routing
-
4
-
-
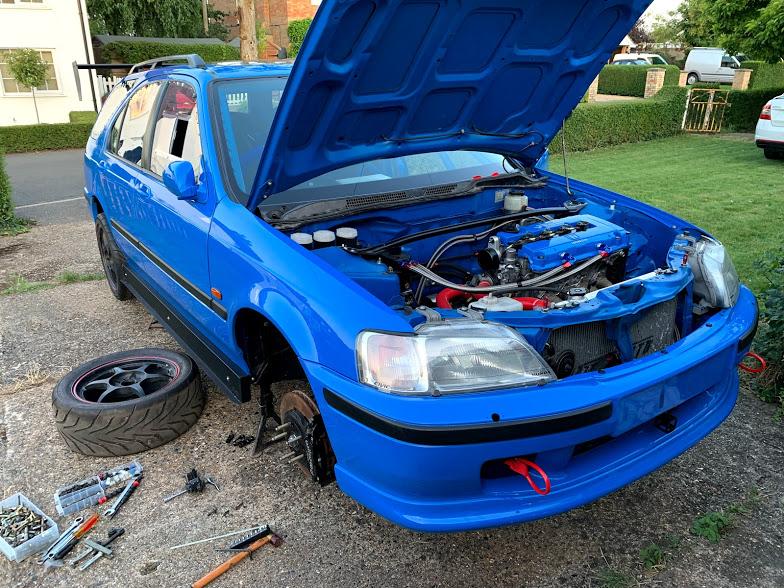
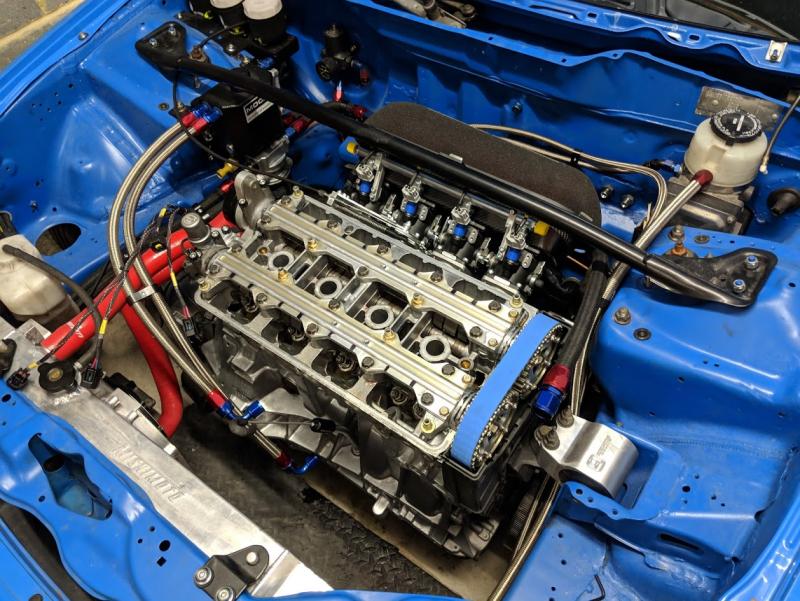
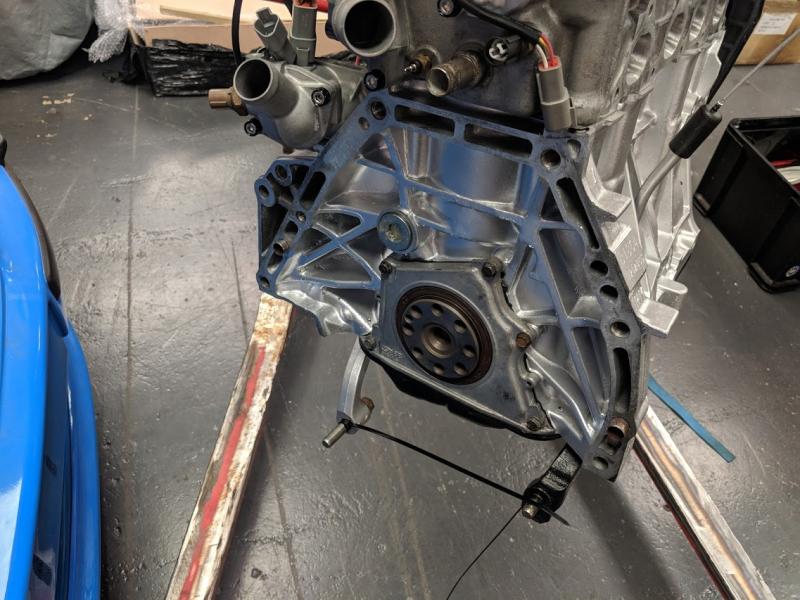
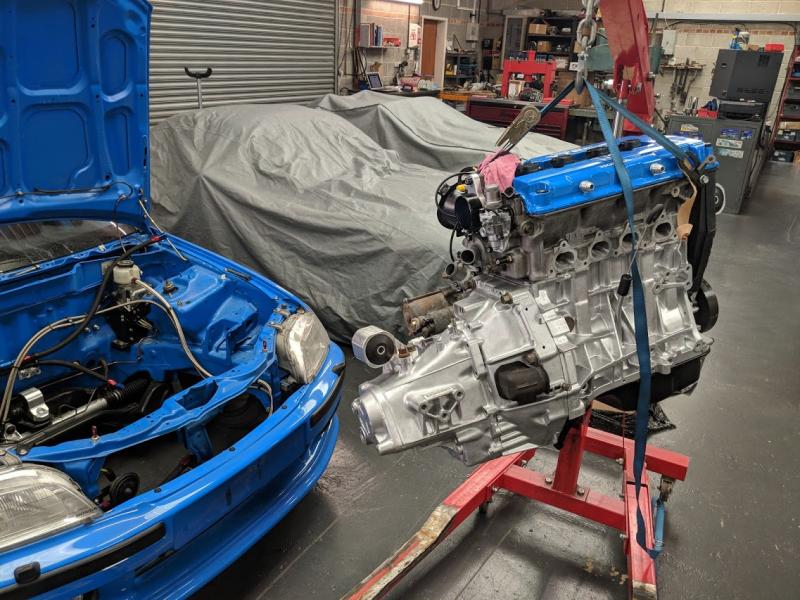
Managed a few small jobs in the bay - I want to be able to turn over the engine to get some oil pressure
Firstly, exhaust manifold in so radiator out. Luckily Hond-R supplied the correct rear bracket for this manifold from a H22 Prelude engine.
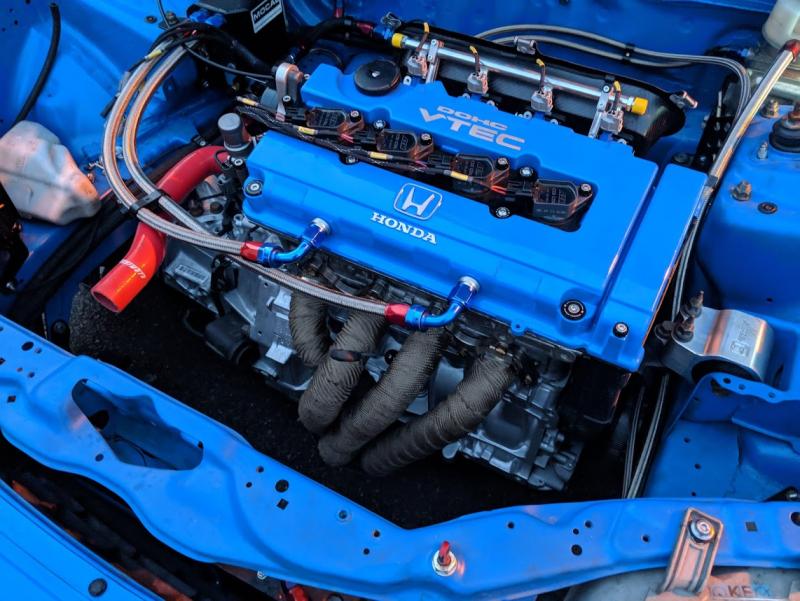
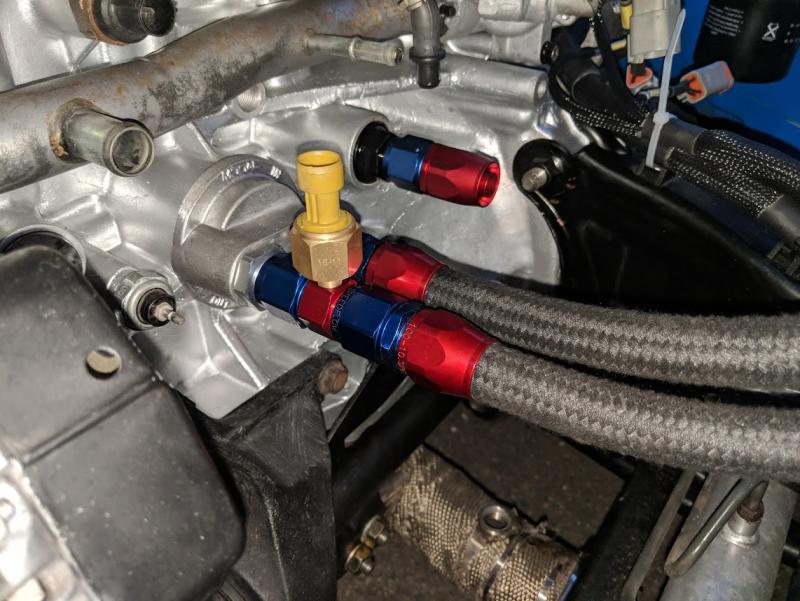
Bottom of the image below shows the bolts holding the rear part of the manifold in place. Struggling to decide how to mount the oil temp and pressure sensors. Here I've used an adapter for the oil line to mount 1/8" NPT sensors into AN10 fluid lines. This will work for pressure sensors but not temperature sensors. Thinking of mounting the temp sensor on the remote oil filter housing so it can see the oil temp when it goes to the oil cooler. Need to also run a breather hose back the catch can from the back of the block but need another AN10 fitting to mount the other end to the tank
-
13 hours ago, Chandler said:
how come you filled it up from there? the gearbox i mean? i usually fill it up from the breather on top of the gearbox.
takes slightly longer but you can see the fluid come out of the filling hole a lot easier
also liking your updates mate
That's the normal filling point. Going slow for the last half litre wasn't too bad and easy to get the level. I've seen people fill up by taking out the Speedo sensor and drive before now. It's what ever is easier for you I guess
-
14 hours ago, VTIDanny said:
fair play to your misses mate! mines pregnant so cant really help with much atm haha, nothing better than taking pride in your own work
That's awesome, can't wait to have kids of my own but not just yet.
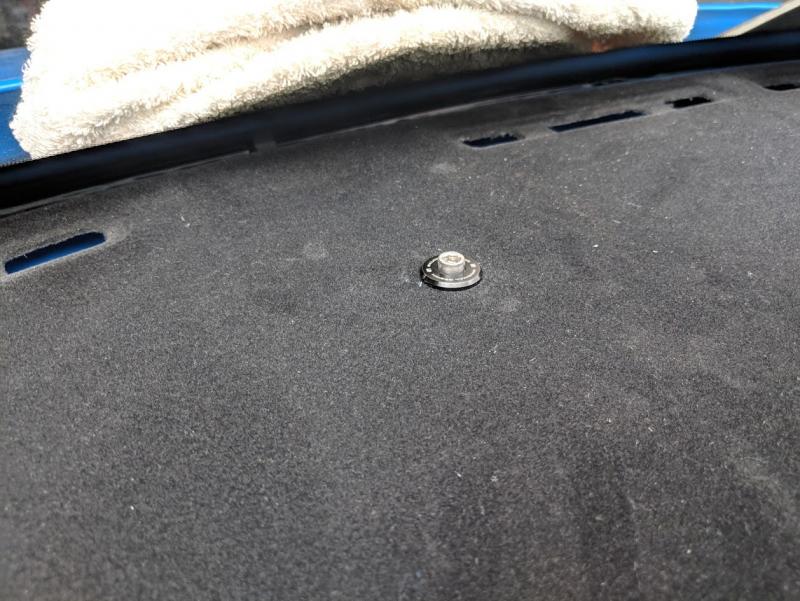
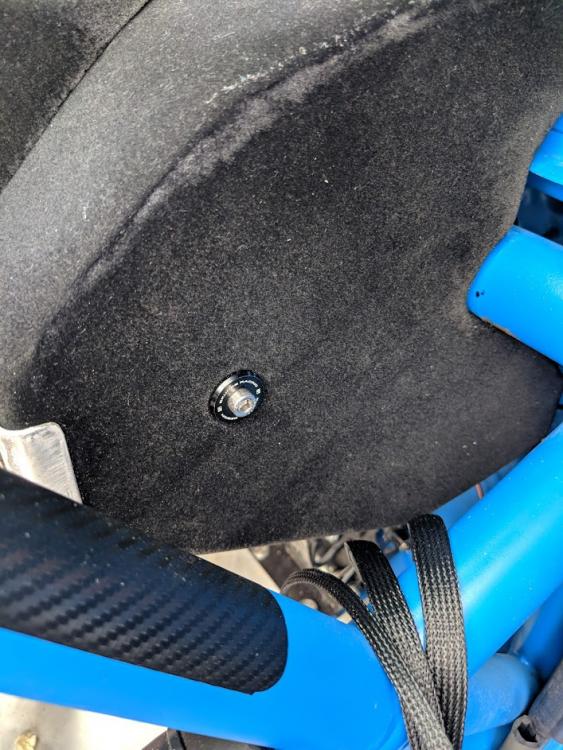
Few small updates in the last few days, like securing the dashboard a little better and started properly assembling the suspension.
Dash out and plan to mount a center point to bolt it down
Mount can be moved up and down to meet the daahboard
View from the underside with the dashboard back in. Can also see the inlet to the windscreen ducting
Dash in and a lot more secure
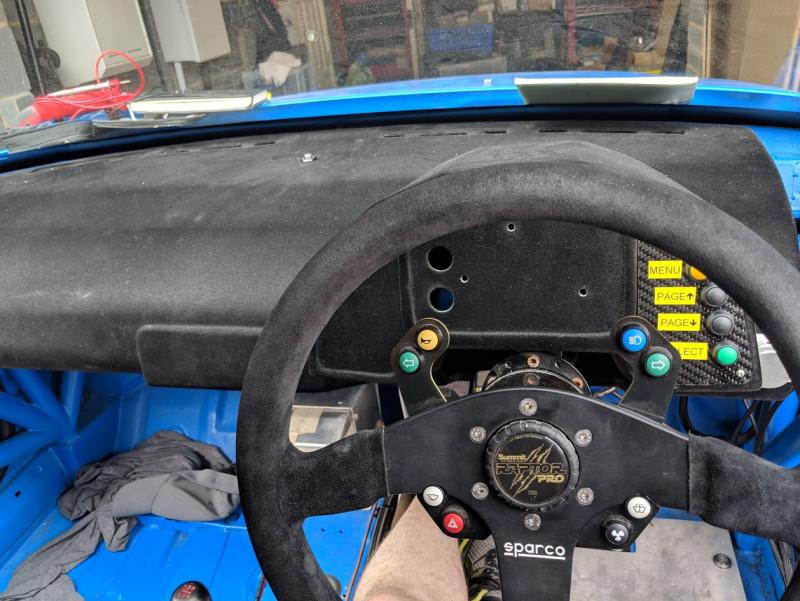
Used some of the remaining S2 cam cover washers to bling up the dash bolts

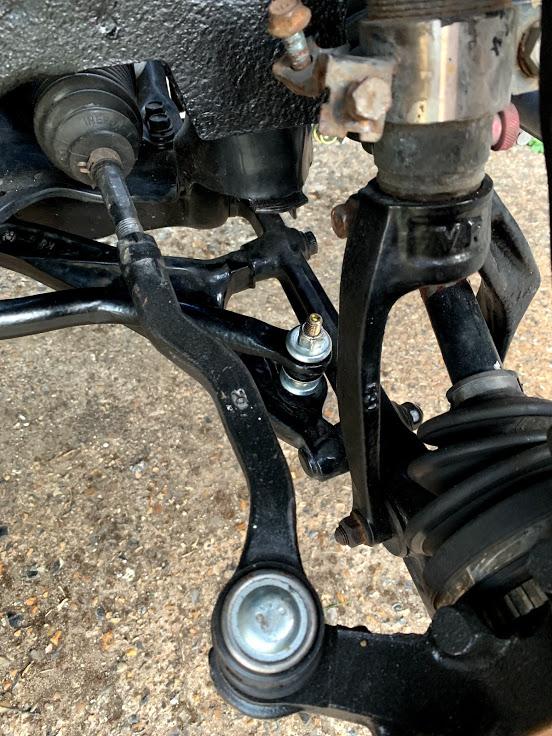
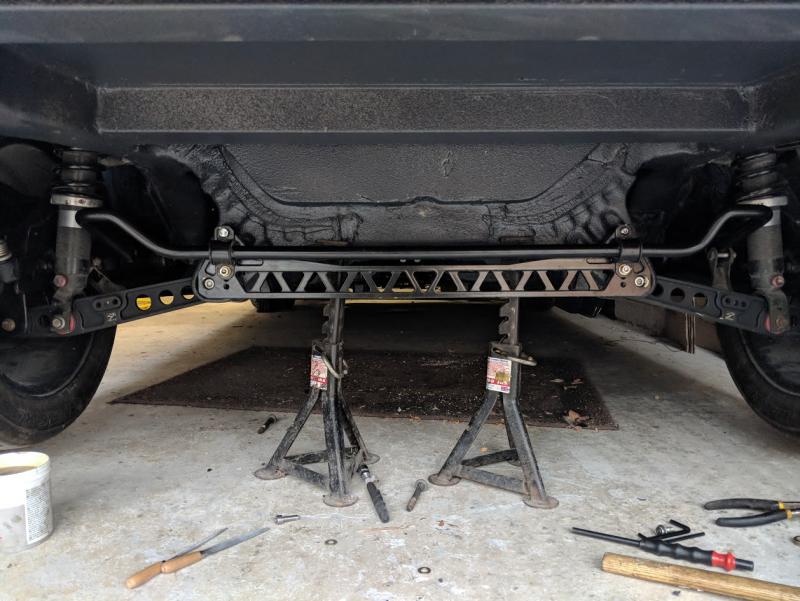
Next job was the back bumper and F7 LCA brace. The LCA brace took a lot of machining to make fit originally and I knew I still had a bit more work to do to make it fit the Aerodeck
Mounted and secure, just needs a new cap head for the upper left roll bar mount as I've lost one
 . I will connect up the drop links later
Back bumper cut out, marked out some options where I wanted to cut the bumper. Decided on the upper mark
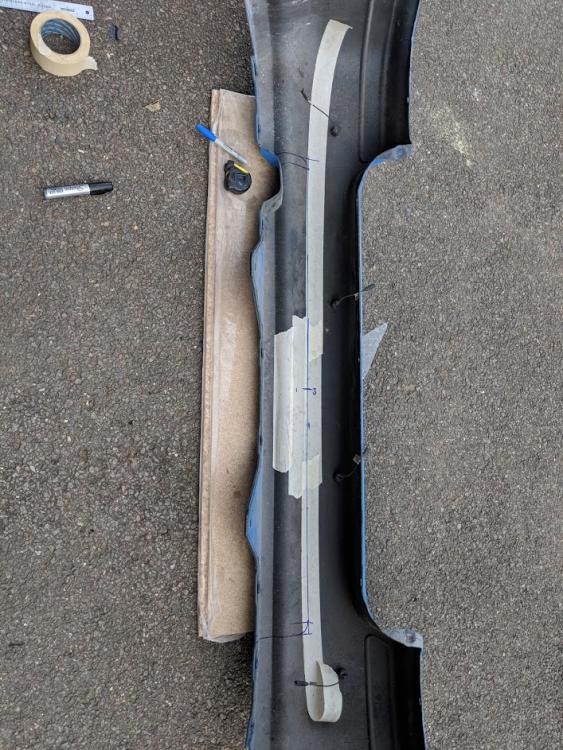
Hole saw the corners
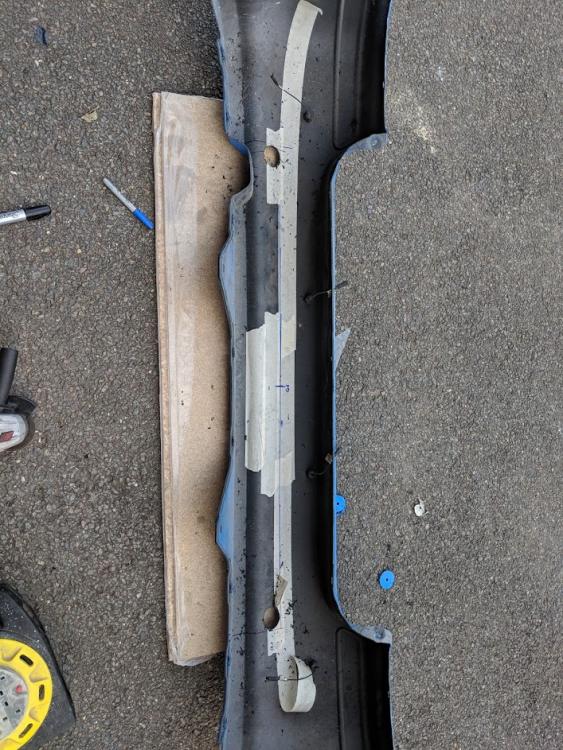
Angle grinder to cut the lines out
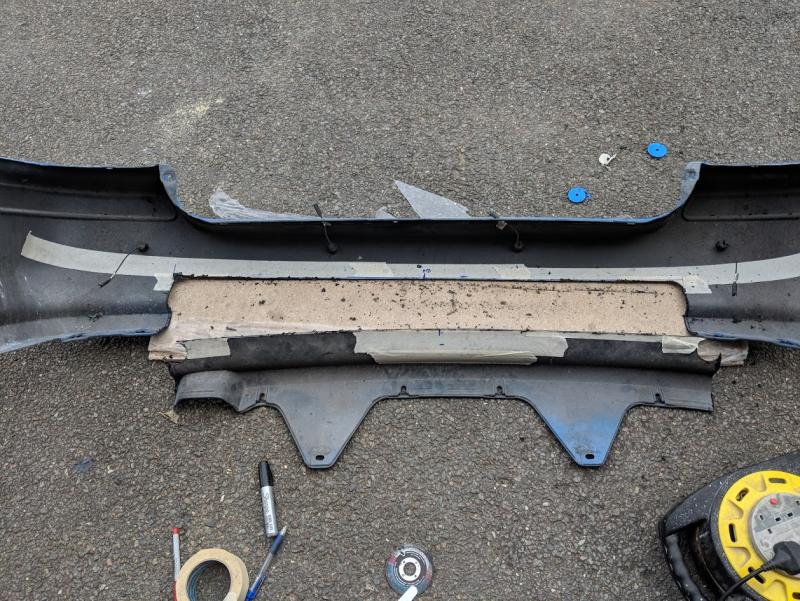
Drum sander to finish the edges and test fit
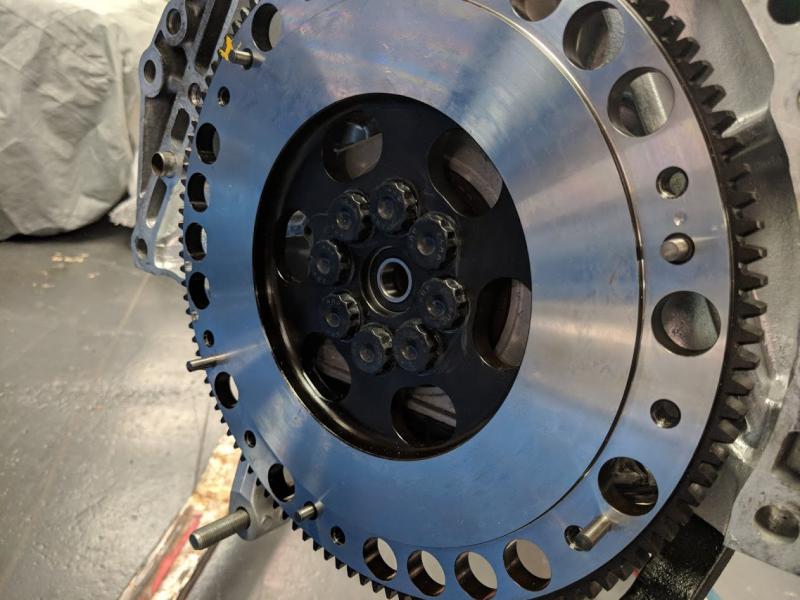
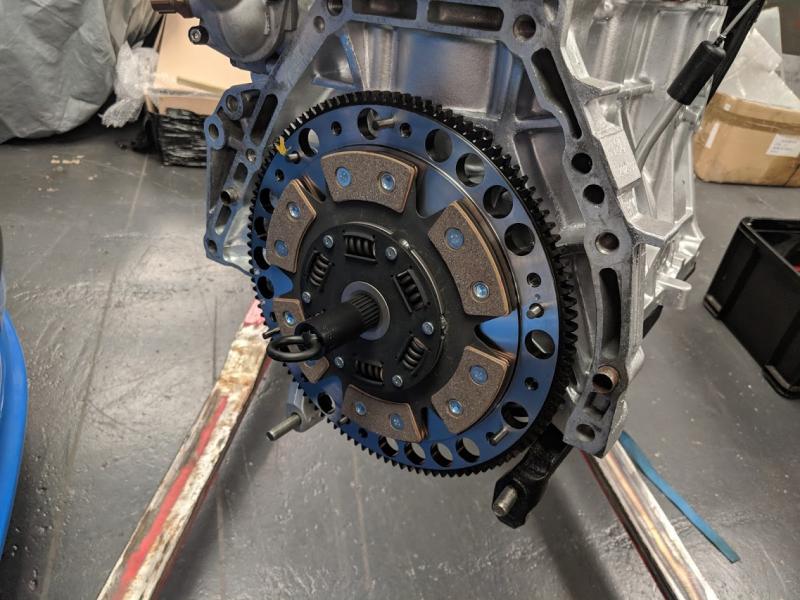
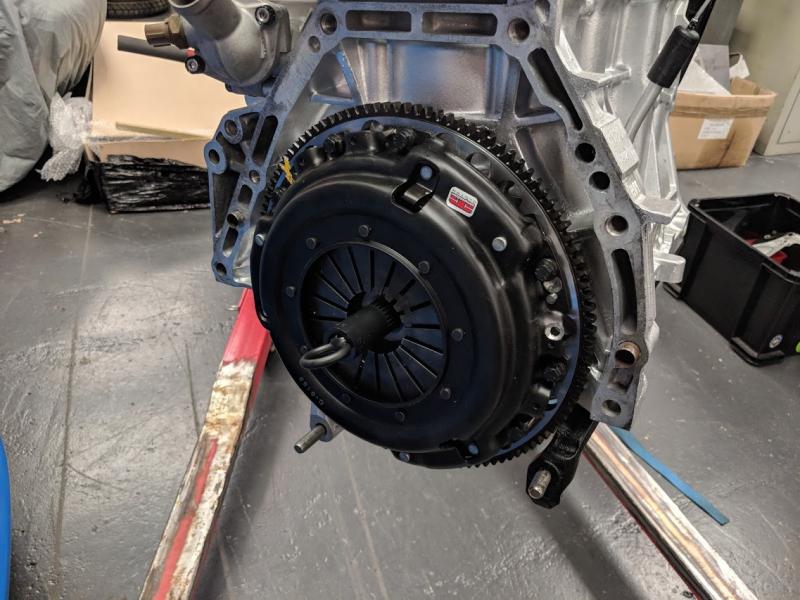
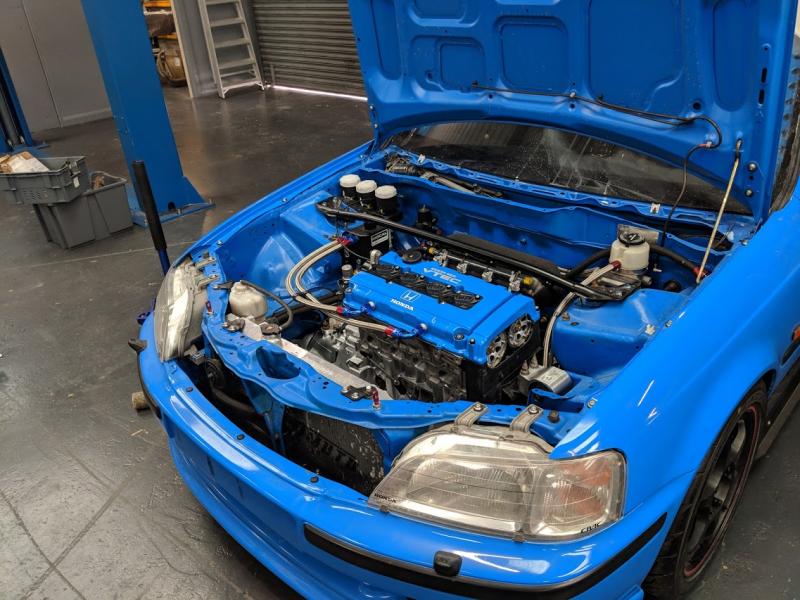
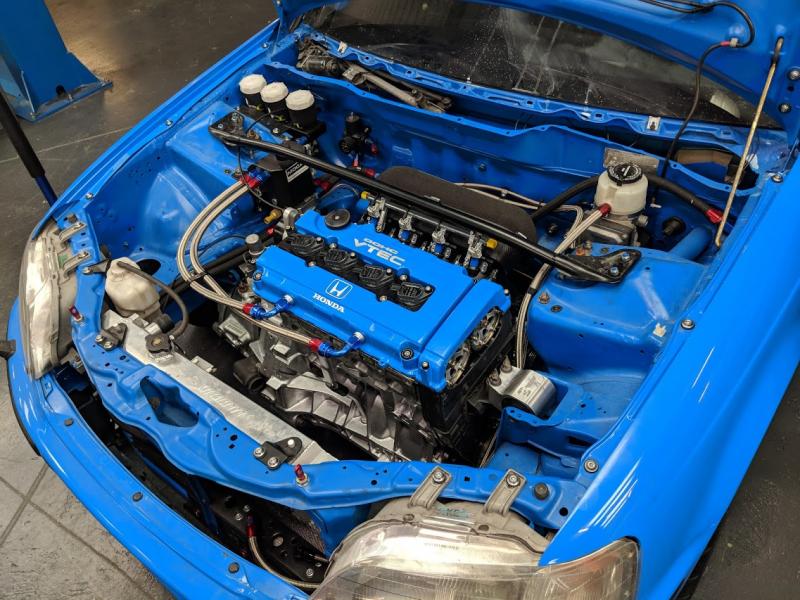
Cam cover off to fill the engine with oil and make sure everything is okay
Also filled the gearbox with MF3. Fill plug is easy to get to with no intake in the way!
So all the oils are now done for running in. Need to check and fill the oil cooler and Accusump but can do that later
-
3
-
-
11 hours ago, VTIDanny said:
no worries mate! so is mine she has a ek4 vti as do i, my mb6 vti is my daily but we both tinker on our eks its a good relationship! still cant get over the build, will we be seeing this at shows next year? do you have instagram also
It's good when you can have a common interest. My misses is learning the basics like servicing and brakes when even the opportunity comes up, she's really good at it.
I'm happy how the car has come out so far, so glad I dry built 95% of it before paint to make sure there were no big issues. Still got a few small bits to sort but so far it's gone back together really well. I'm not on instagram, I tend to upload everything to Google Photos to share with a few friends the updates on the build (warts and all!)
10 hours ago, dmrichards said:work of art, can't wait to see this in the flesh!
Yeah, hope it'll all be done soon!
-
Thanks guys, the misses has been totally supportive of the build and everything I do so couldn't ask for more.
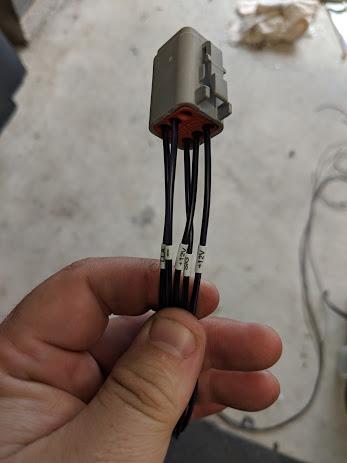
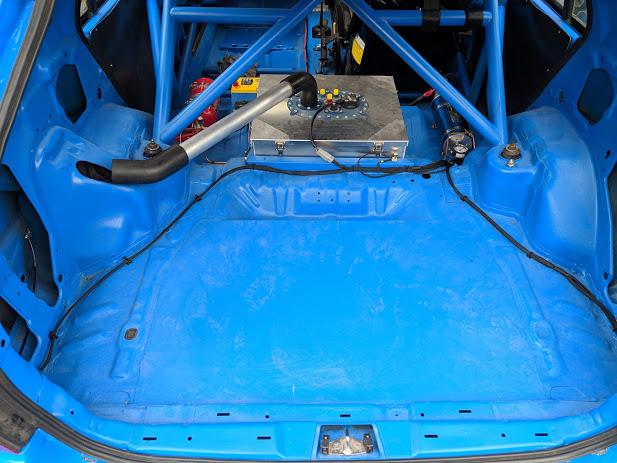
Update over the weekend, totally remade all the wiring to the back of the car, adding the wiring for the Accusump system and splitting the loom into 3 separate sections to make it easier to work on at a later date. Before it was all 1 loom to the back, but I've decided that if anything changes I have to rebuild the whole lot so better to build it as 3 separate looms; lights, fuel tank and accusump. Old loom wasn't as clean as the later stuff I've been making for other cars so a good opportunity to tidy everything up to match the engine and ECU.
Rain light on a custom made bracket and powder coated. Tailgate plug is hidden inside the roof but can be unhooked to remove the whole boot lid which it couldn't be before without taking the wiring out all the way to the dashboard! All on Deutsch Connectors
Tailgate - all wiring here is heatshrunk and glue sealed instead of overbraid. High level brake light retains the original plug under the spoiler.
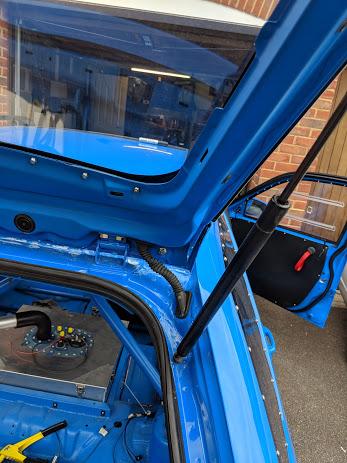
Joining left and right hand side where the functions are the same, such as reversing lights, stop/tail lights and fog lights. Each one is heat shrink/solder joints, water proof and labelled in case I need to fault find later on. Earth lead is way over sized (22amp) but better to be safe than sorry. Also fitted 4 separate earths just in case.
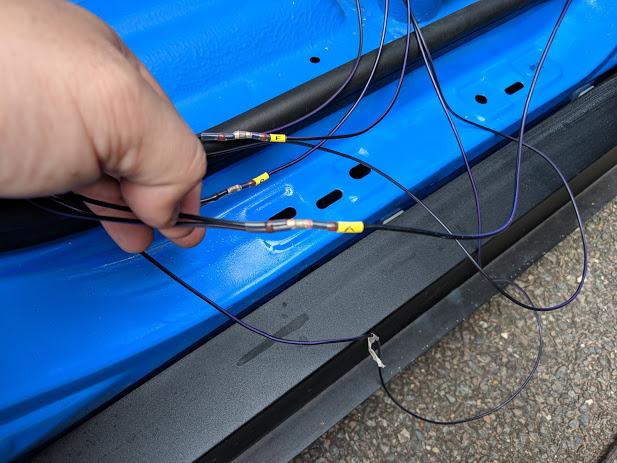
Fuel cell plug, again all wires are labelled at each end just in case
Rear end all fixed on place

Now need to take the dashboard out and start on the last part of the wiring loom before putting power to everything. Then it's fuel lines/filler neck and exhaust and onto mapping! Given the rate I work at, still 6 months away
-
3
-
-
Small update - took a break and got married as you do
Back in the UK now so will get back to working on the car as soon as I can.
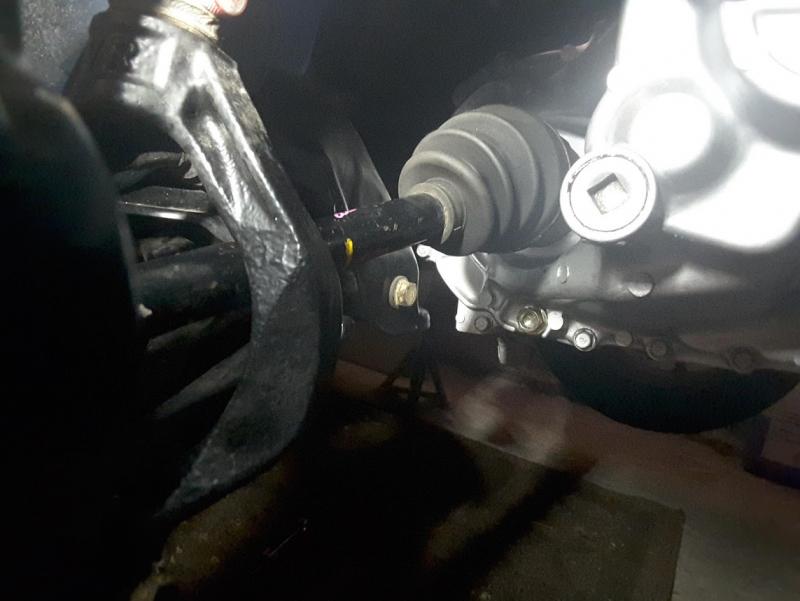
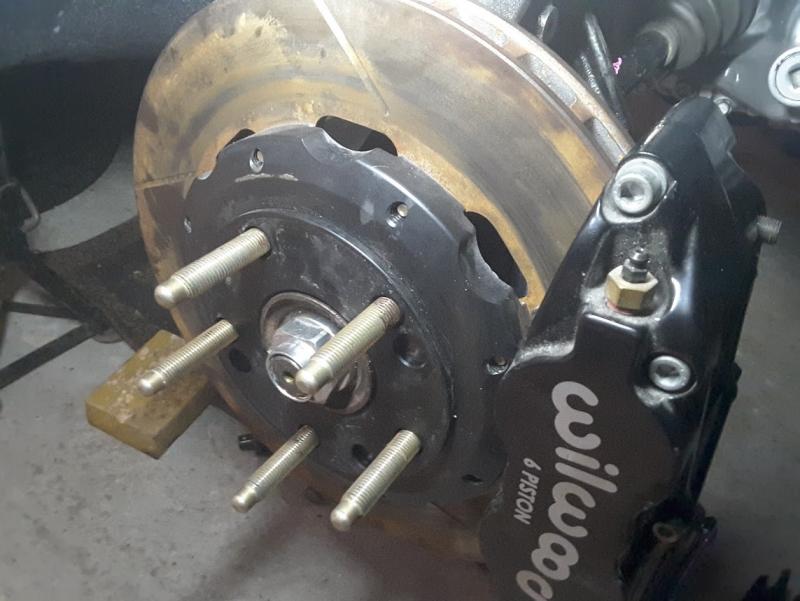
Before I went I managed to fir the front drive shafts, magnetic sump plugs and start to set the ride height properly. Forgotten how much of a pain fitting the drive shafts was! Hopefully now there is no more reason to take the front end apart so I can torque up all the bolts and leave them alone.
-
1
-
-
6 hours ago, Blackwolf said:
Looks good mate just watch the one of the latest car throttle videos and your car makes a couple of appearances
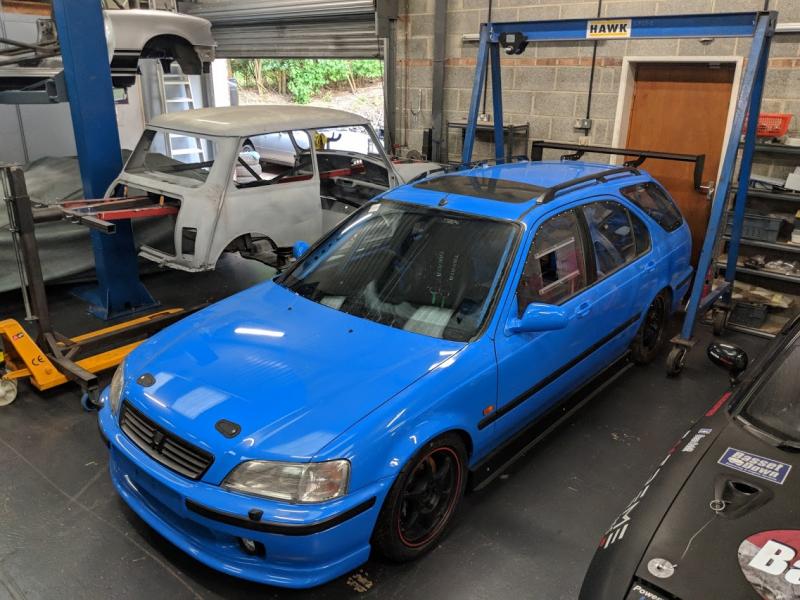
Lol yes it does! Andy and Josh have the car at the moment and Andy built the engine for me. They had the V6 MX5 engine in the workshop while I was there, carbon intakes are gorgeous. A bright blue Civic does stand out even if it's in the background!
-
16 hours ago, Chandler said:
gotta paint the starter aswel
") @DeLaSoul
@DeLaSoul
Needs a few other bits too but just getting it all back in the bay and making sure nothing is missing but yes it needs to be stripped, cleaned and painted
-
Thanks guys.
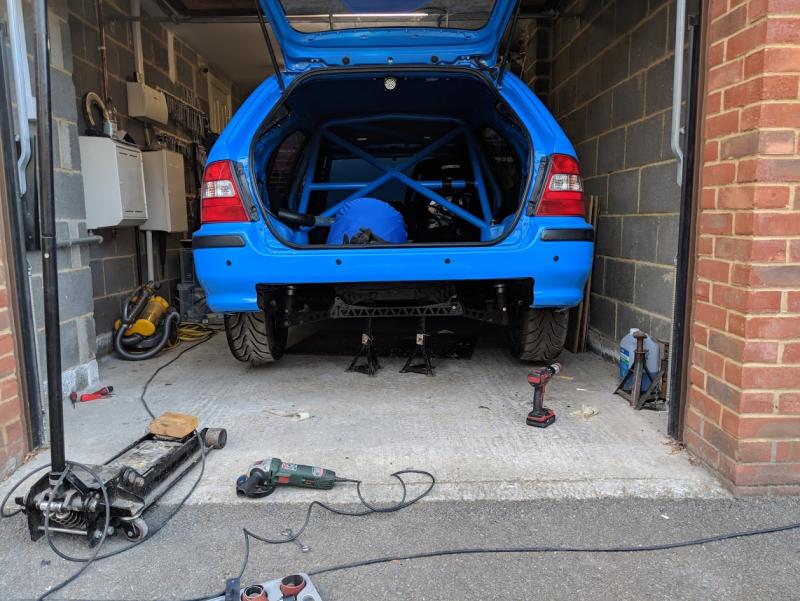
Well the engine is now in thanks to some help from friends over the weekend
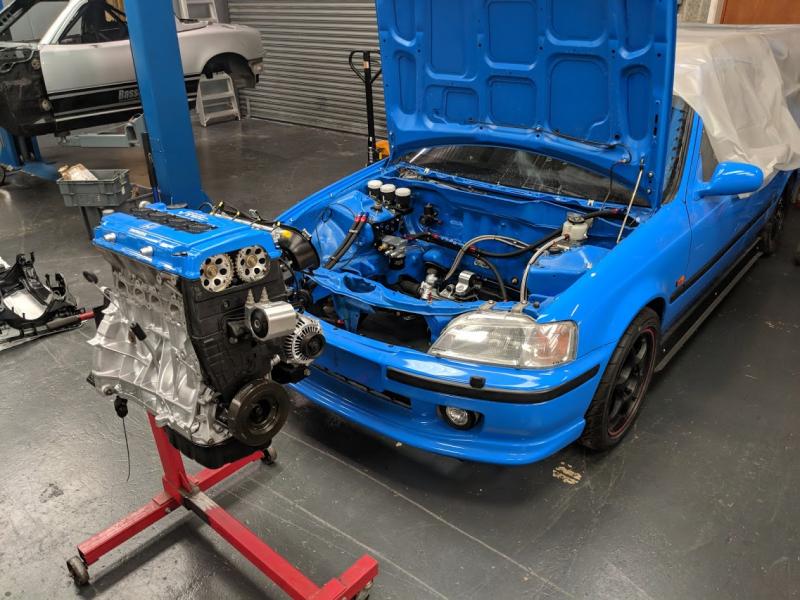

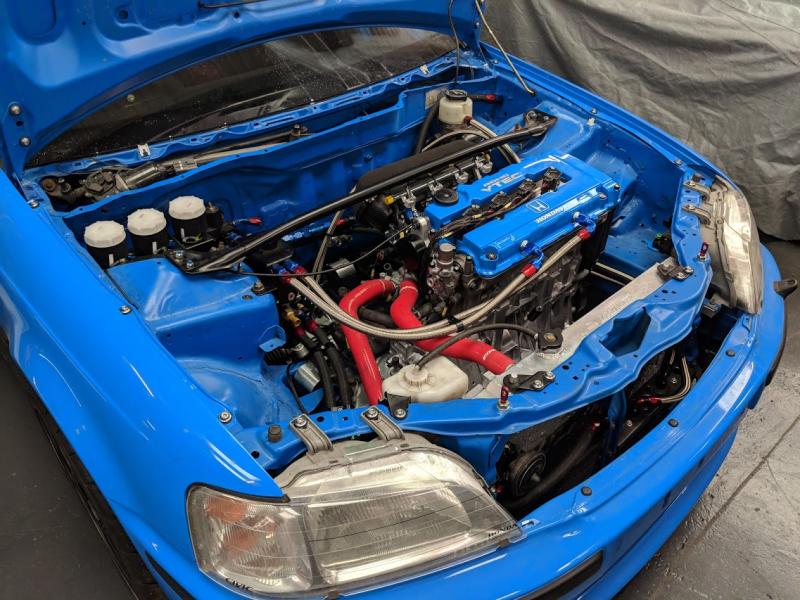
Still got a few hoses, gear linkage and bits to connect but the hard part is done. Just glad it all went back in fairly easily!
-
4
-
-
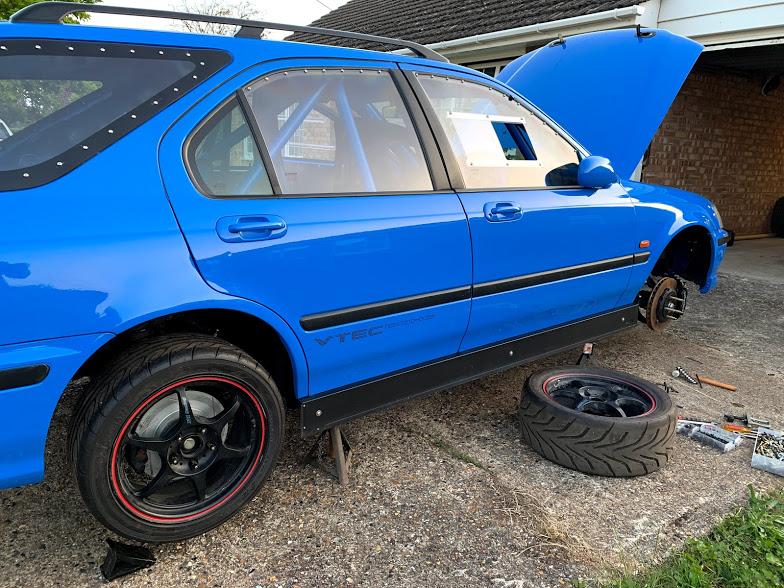
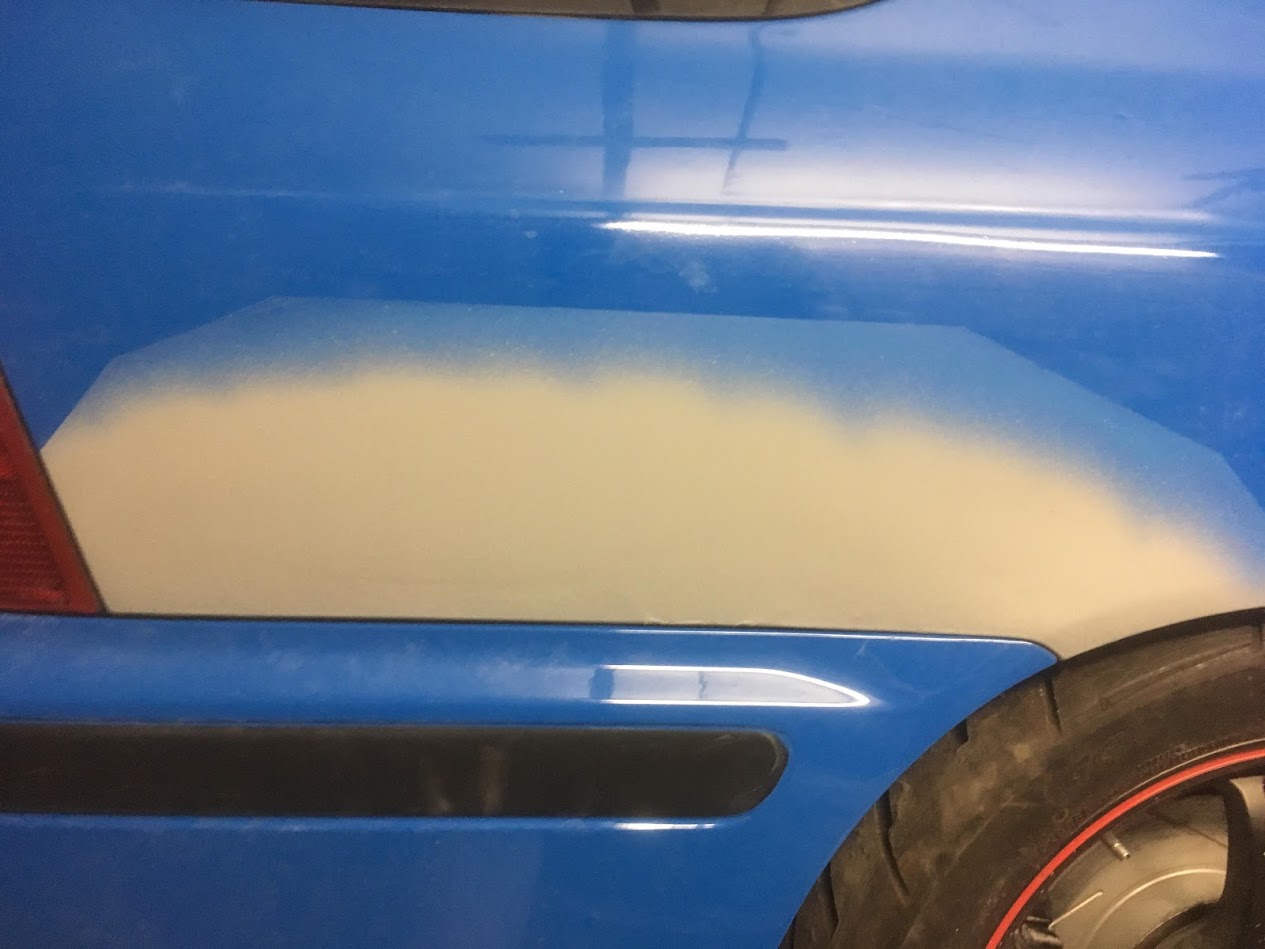
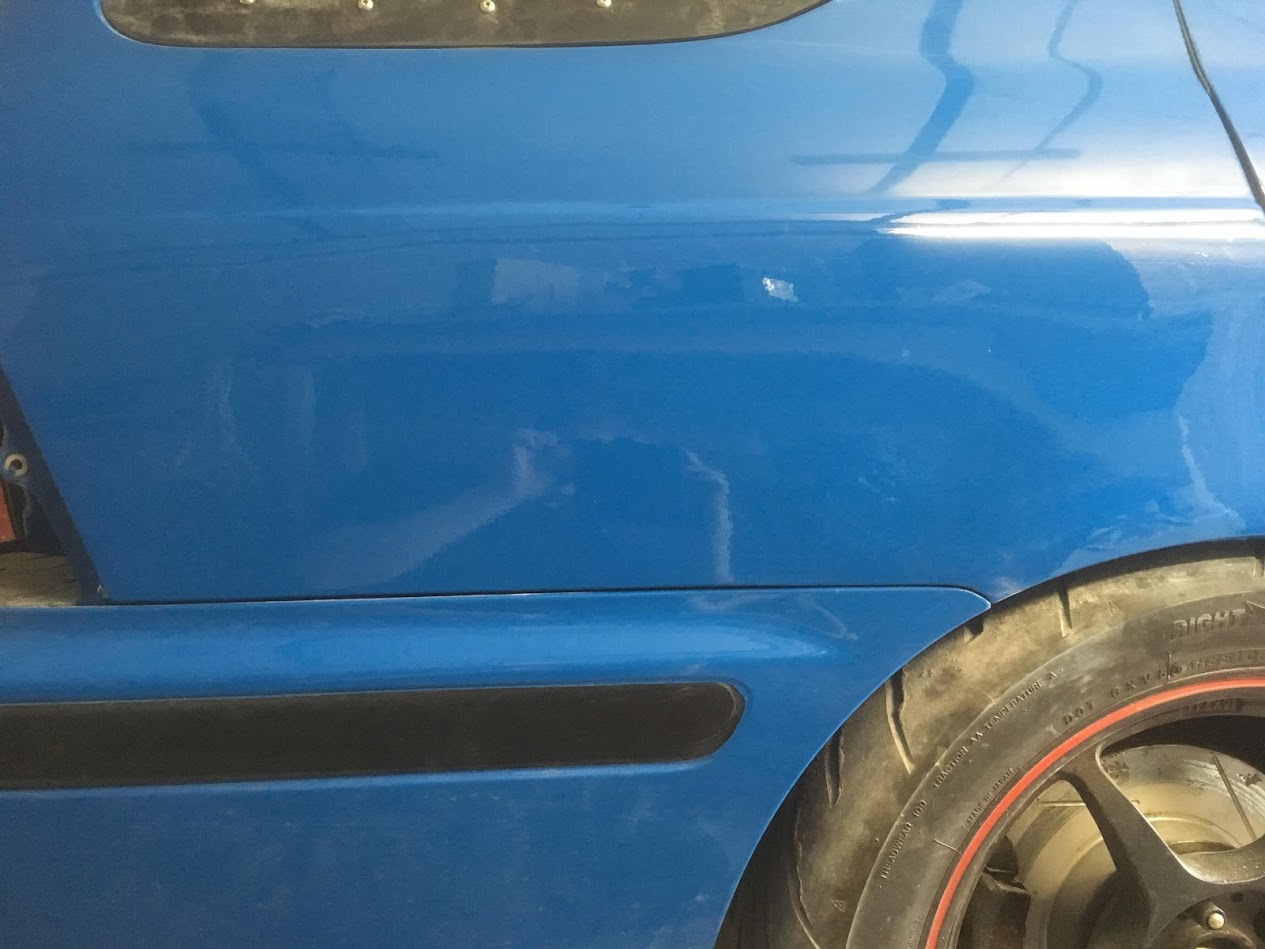
Car's being polished and getting ready for the engine fitted. Rear quarter panels look like they need more work
Where they've been rolled they are slightly rippled and I'm not happy with it. Not sure what to do now
-
3
-
-
9 hours ago, dmrichards said:
here's what state it's in at the minute, its really killed the motivation I had but I won't be beaten!
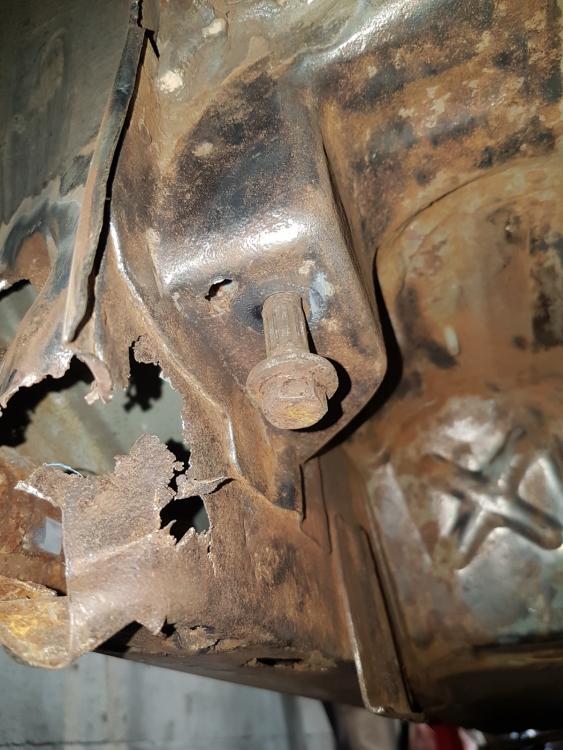

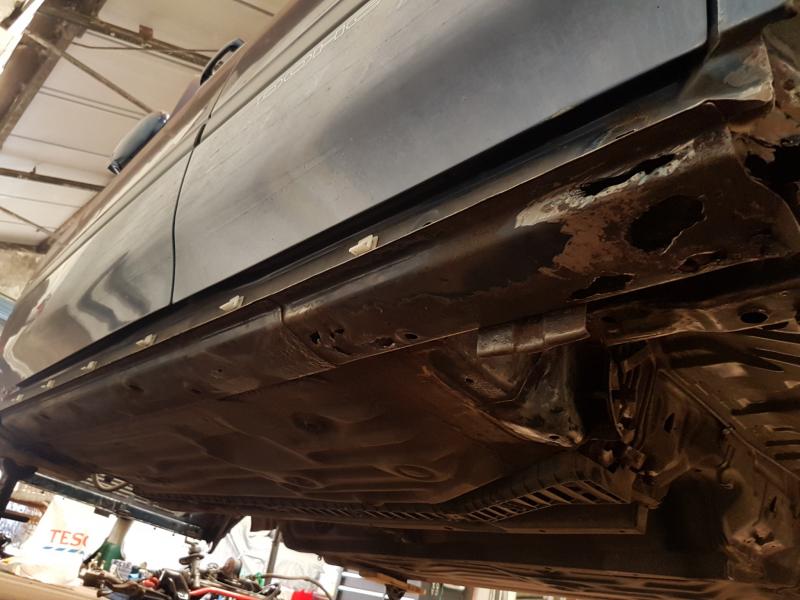
Under the car you can use patch panels and fabricate your own bits fairly easily. I can't weld but a friend took care of the rust on the underside of mine and a hole in the front wheel arch inner after I made the patch panels. It'll all be good in the end mate
-
2
-
-
2 hours ago, Chandler said:
pics don't load mate
They did earlier, will try again later
-
1
-
-
On 18/05/2018 at 8:49 AM, Krzys said:
Nice!
Changing the LSD at all?
No, not just yet. Want to drive it first then look to change the LSD later
On 20/05/2018 at 8:19 AM, dr_broon said:Lovely stuff. 4.7fd brings the car to life

Hope so, for UK tracks I don't need a long box anymore
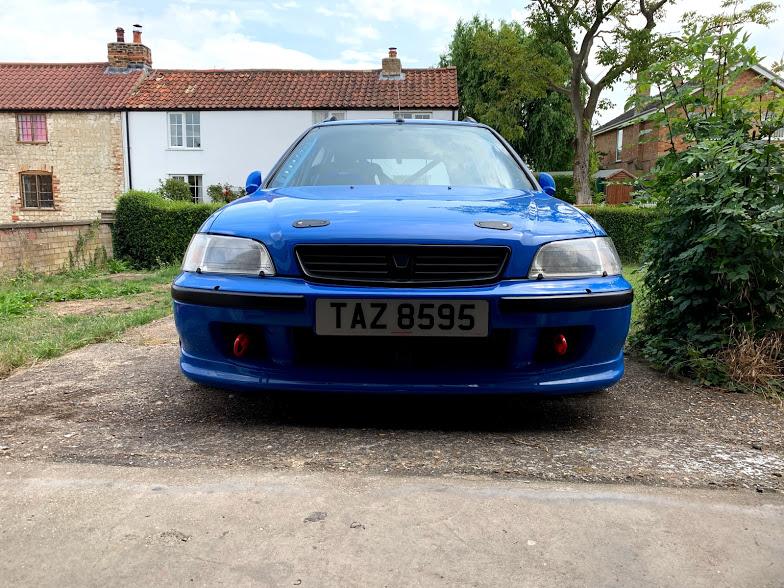
Bodyshop made good progress the last few days...
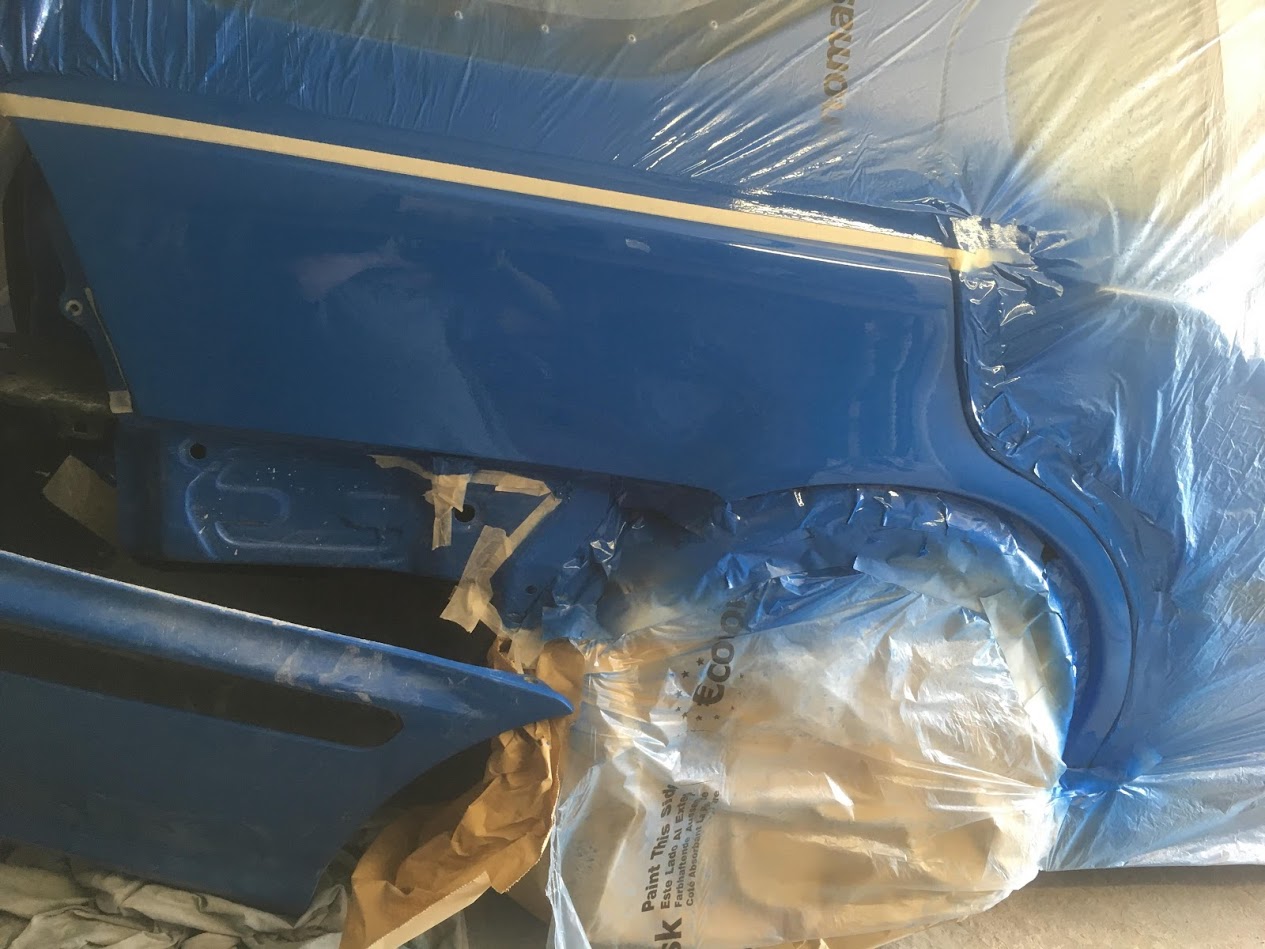
It'll sit there for a week or so now while he goes on holiday and then he can buff and polish the whole car and it can go for the engine install
-
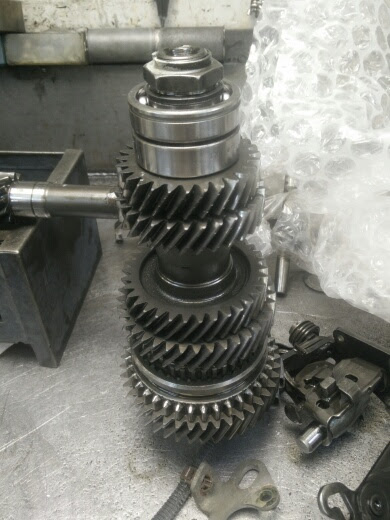
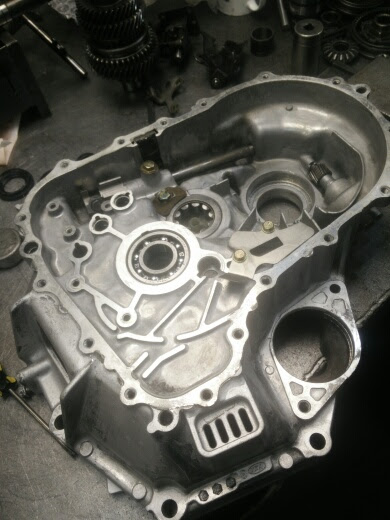
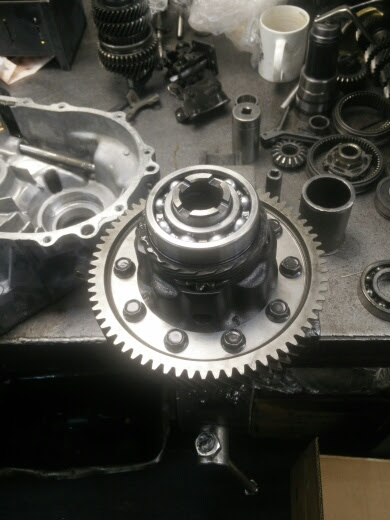
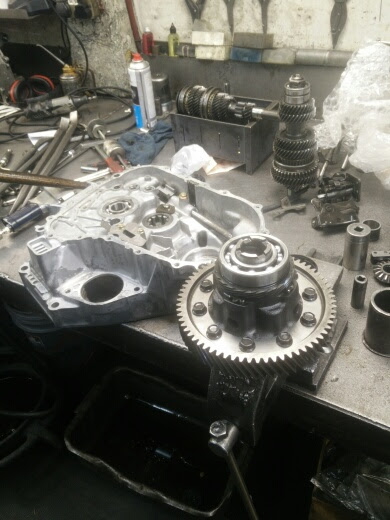
Bodywork update, the metalwork is now done so just needs smoothing and prepping for paint
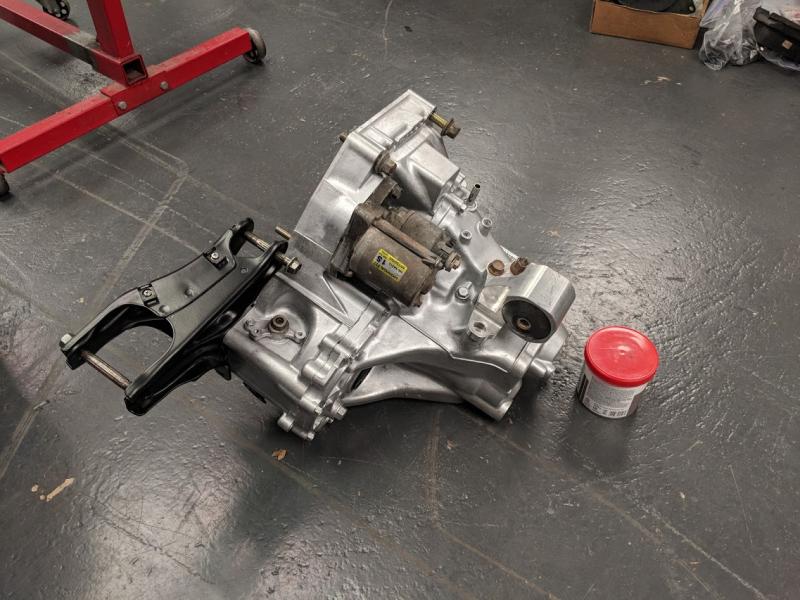
Gearbox is almost done too, and is now fitted with a 4.7 final drive, all new syncros, seals and new bearings all round.
-
2
-
-
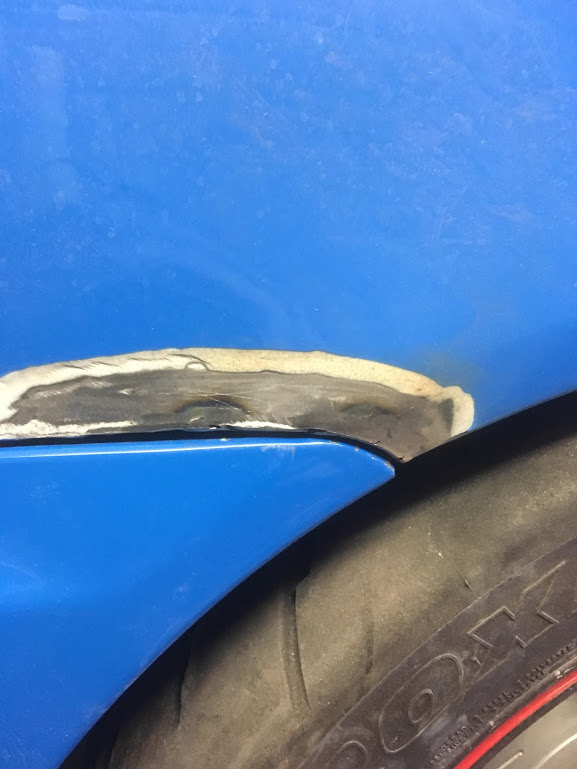
2 hours ago, Chandler said:
how come you didn't get the arches roller before paint? surely that would've made sense?
shame about the rear arch aswel mate

Wheels didn't get close enough to worry about it before paint so didn't bother. By the time we do the cambers correctly it still shouldn't be an issue but he's got the car and can do it so he may as well. If the arches are warmed up first and it's done properly it won't damage the paint


MC2 Project - Chassis prep
in Honda Civic MA/MB/MC
Posted
@Blackwolf Sorry I've been updating Instagram as it's very easy to press upload to photos. Lots of minor updates, you can find me under delasoul_99