


DeLaSoul
-
Posts
443 -
Joined
-
Last visited
-
Days Won
30
Content Type
Store
Calendar
Forums
Gallery
Downloads
Posts posted by DeLaSoul
-
-
1 hour ago, Krzys said:
If you can find me

Trackdays, now you have my attention, would love to see it in action!
That's what it was built for!

-
 1
1
-
-
9 minutes ago, Chandler said:
i know where he's moved to

Shut up you, not even put it on my FB profile!
2 hours ago, Dave said:Blown away by this build! Truely amazing job you've done mate, would love to do a resto like this on DD (bodywork wise and underneath + chassis parts etc). She's gonne be like a brand new car when you're done....................with a purpose! Should be amazing on the track!
PS: Really want to see this one in the metal! where have you moved to??
Thank you. I've had fun building it, learnt a lot from it and will want to build something else once it's done I'm sure!
I'm now in the land of Dagenham dustbins for my sins (and new job).
I'm just waiting on the engine to be built by a friend and I can finish it all off. He has all the parts and he does bits when he can, I help when I'm in the area. I'm just slowly rebuilding the chassis until then. I hope by Feb it'll be a complete car and then time for testing, a few trackdays and some shows so it'll be around
-
3
-
-
2 hours ago, Krzys said:
Amazing work as always! Where have you moved to?
Top secret, I could tell you but then I'd have to shoot you

-
12 hours ago, Blackwolf said:
Wow this build is amazing really inspires me to get on with mine would love some hits and tips if you ever have the time
Hi, no problem - if I can help with advice I'm always happy to. I've learned a lot along the way and still learning as it's all going back together!
-
1
-
-
2 minutes ago, Chandler said:
ye man, well worth the money! need to get some proper plugs and sort all my wiring out from the component back to new plugs as its a mess in the cabin

will give you a message to see where you got the plugs from etc and that can be my winter job
I probably still have a few new ones left from my job plus I have pins for the plugs that I bought a while back so I'm sure we can sort something mate
-
6 minutes ago, Chandler said:
think i need to up my wiring game looking at that ha ha,
shame you've now moved so far away!!
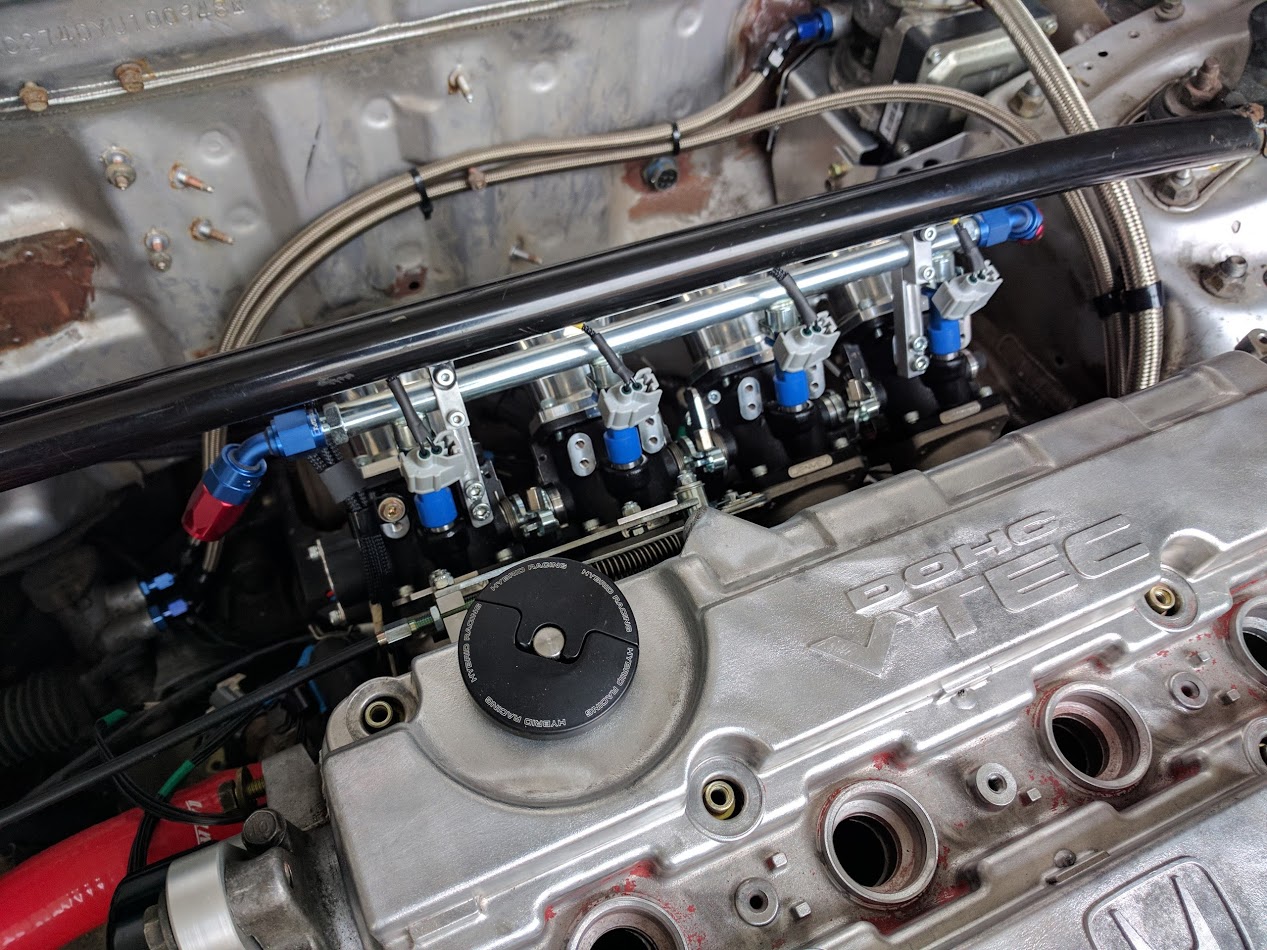
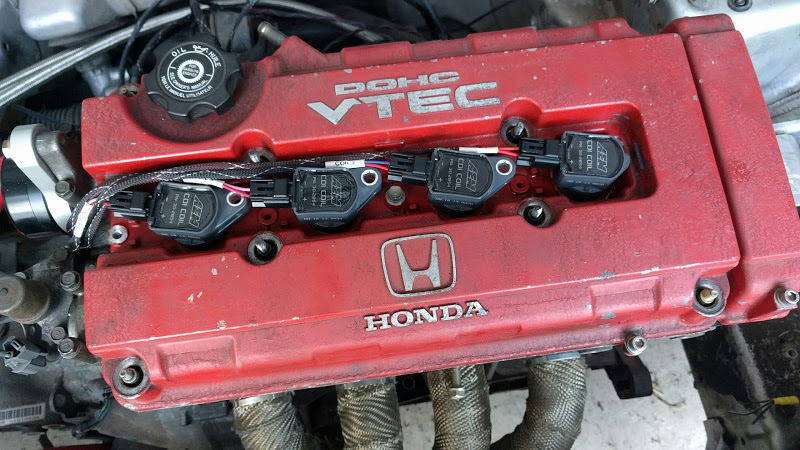
cracking work as always, plus that BWR COP plate does the job good doesn't it
")
I can always help with wiring mate, and after I saw your gold BWR plate I knew I had to have one!
-
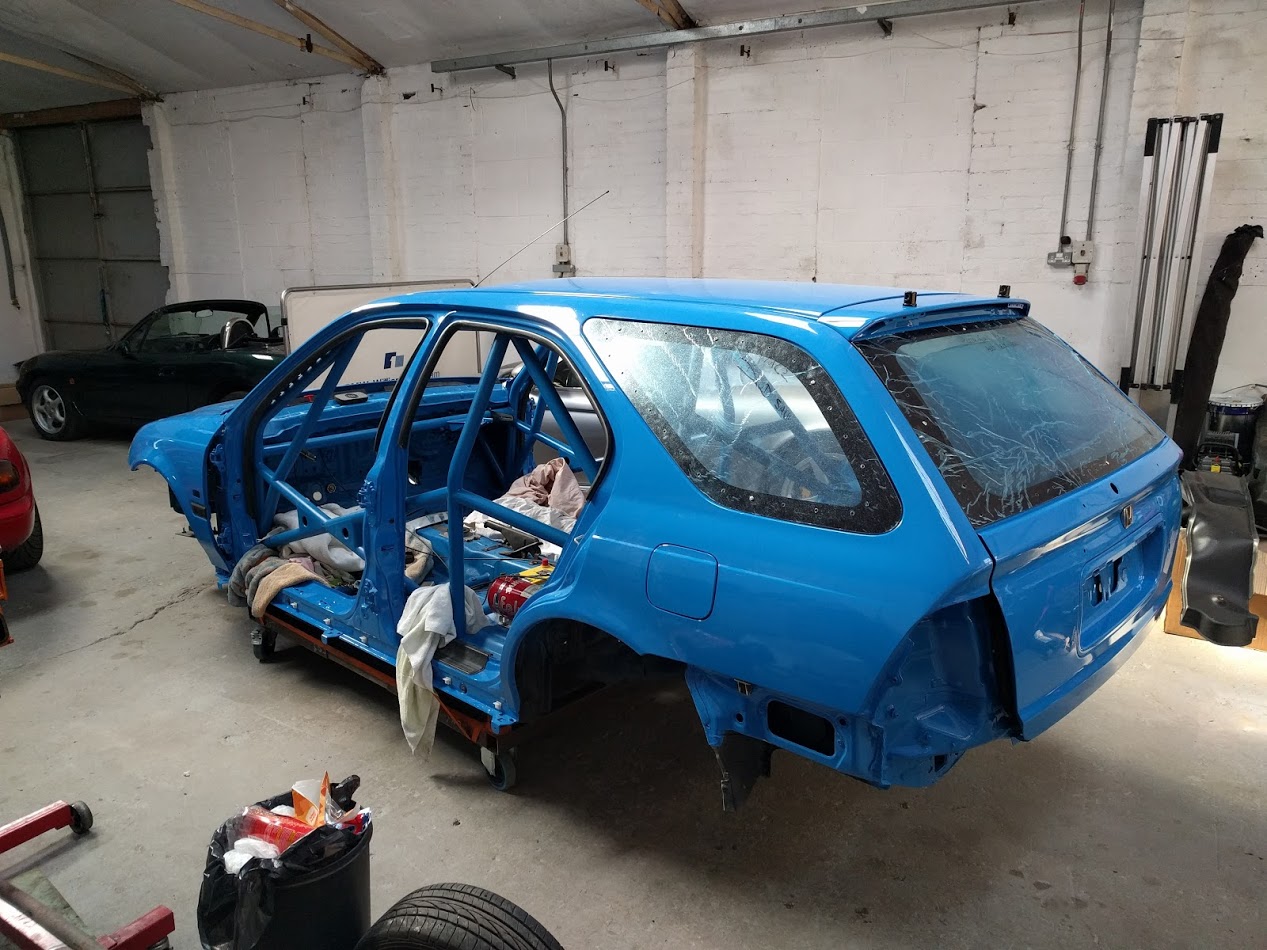
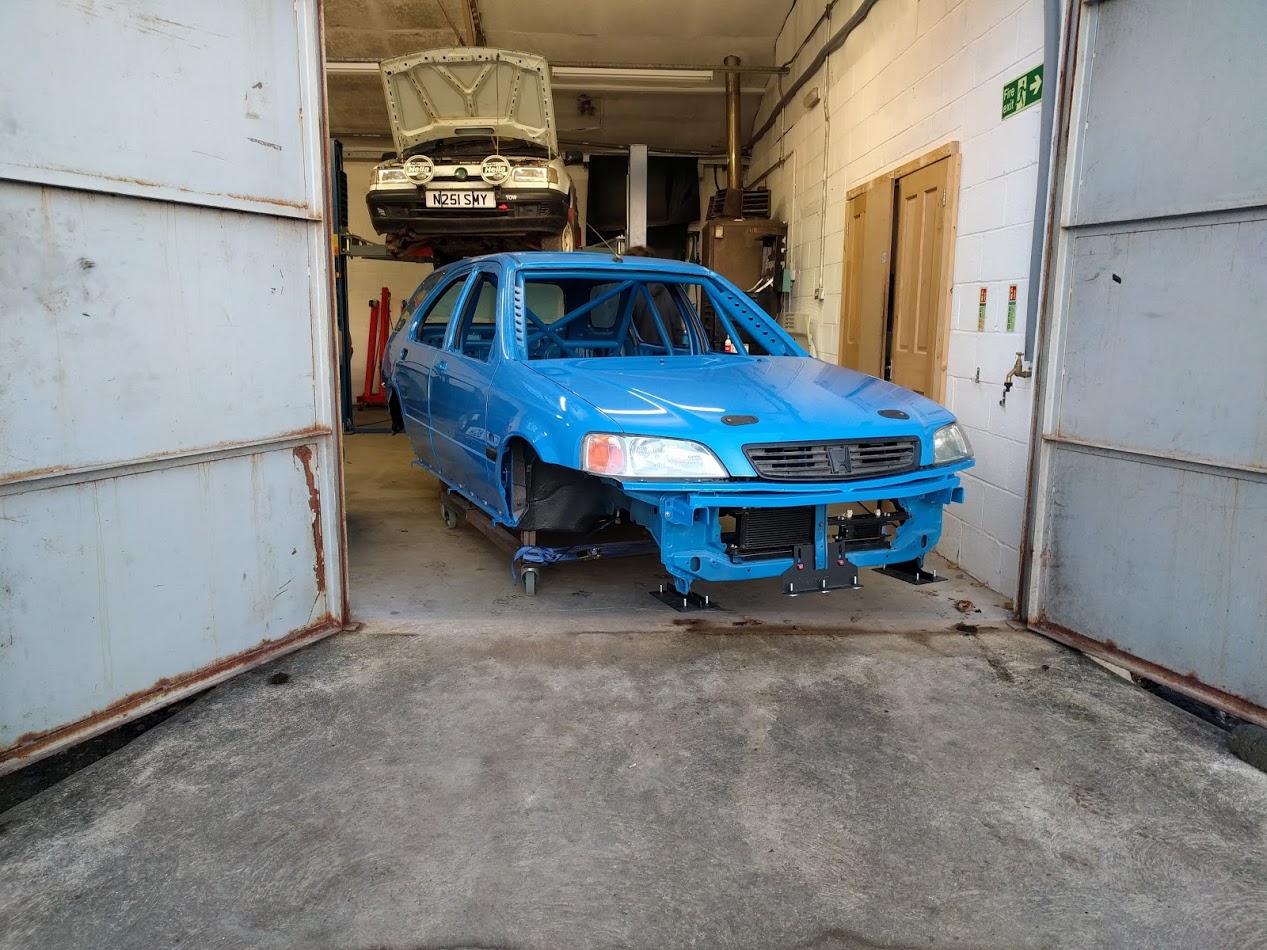
After a long break away, redundancy and moving house a lot has happened to the chassis so time for the normal long update!
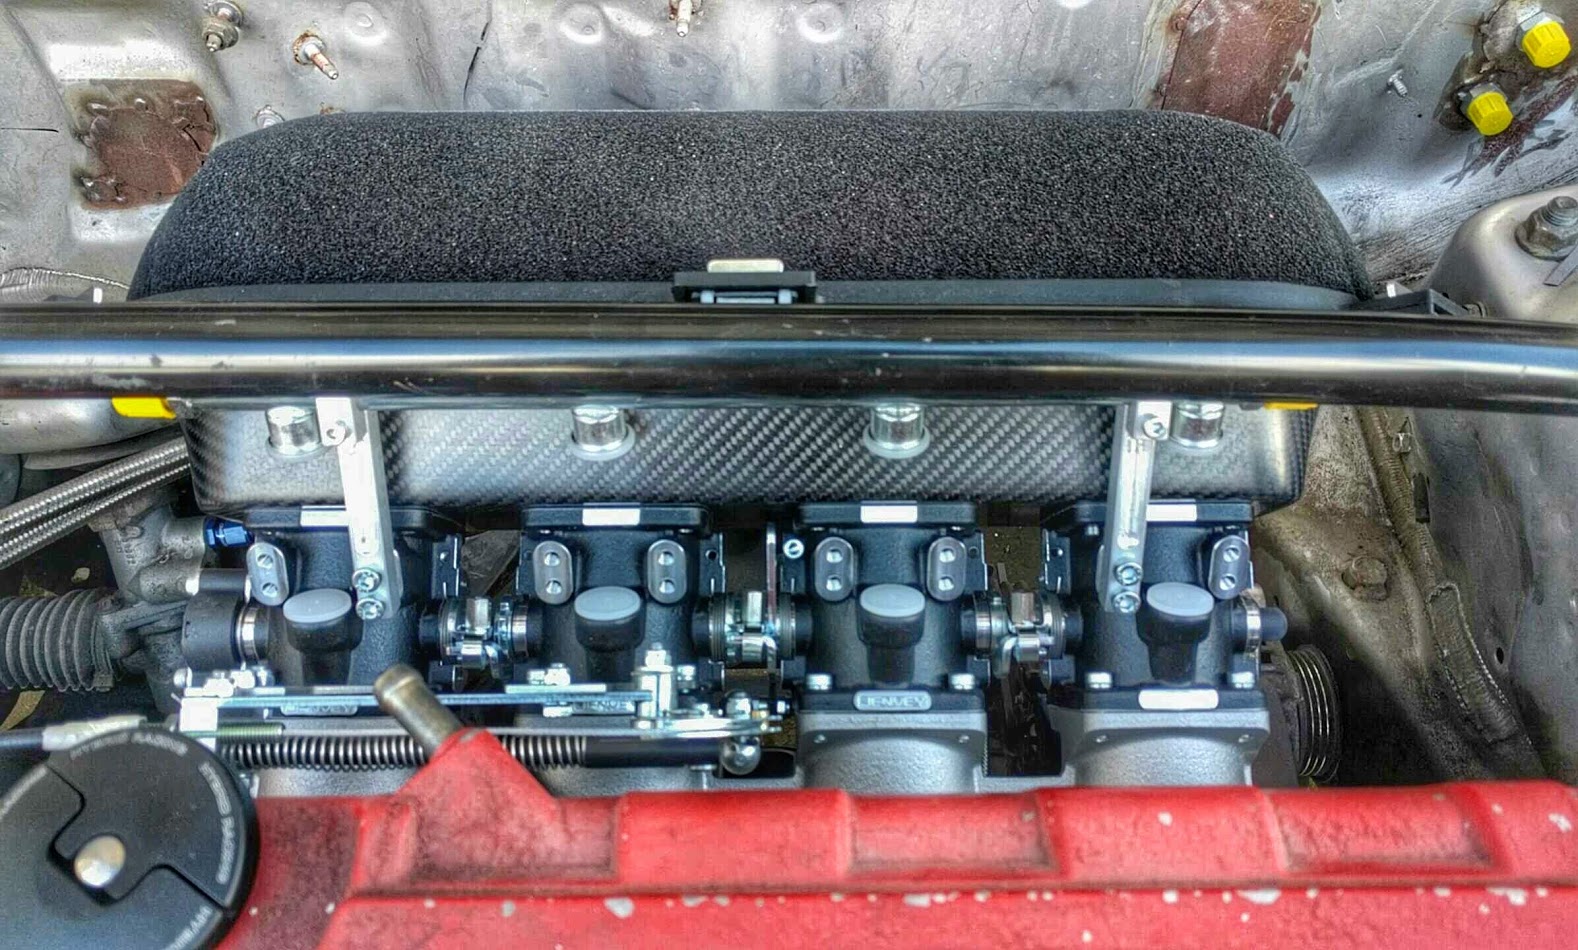
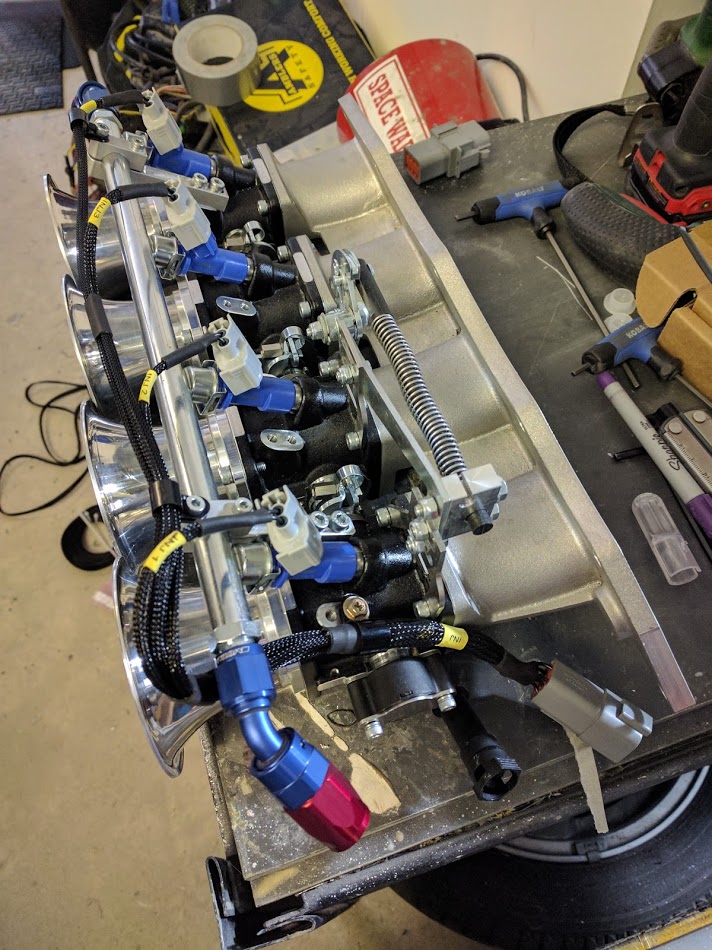
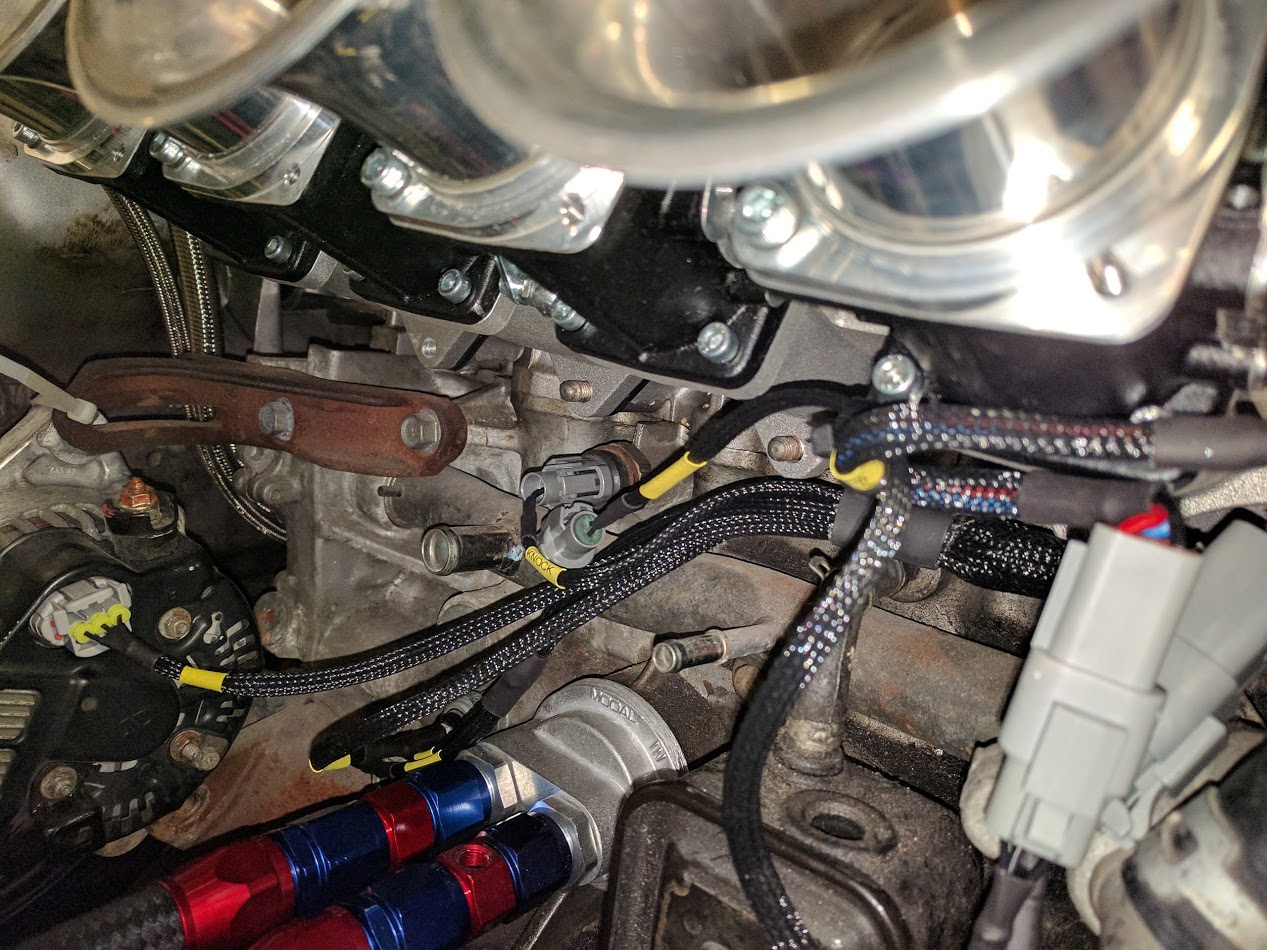
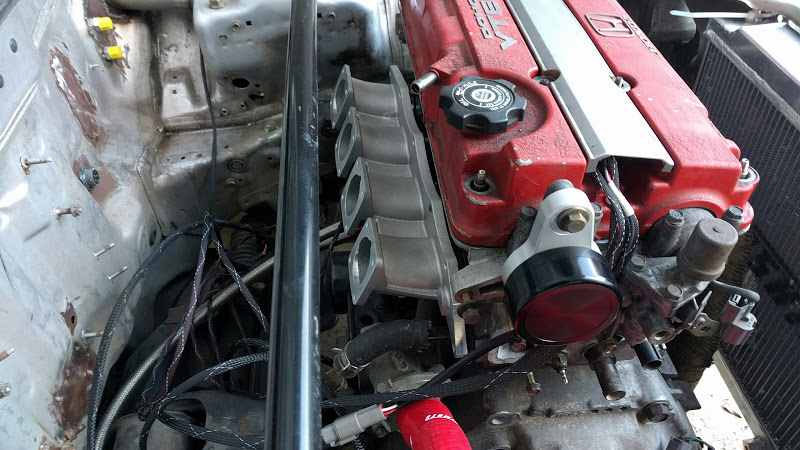
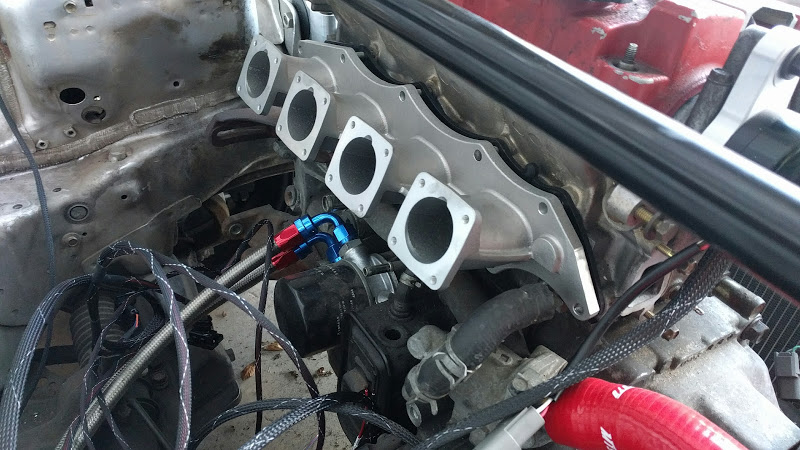
Throttle bodies - Now all fitted and the linkages are working
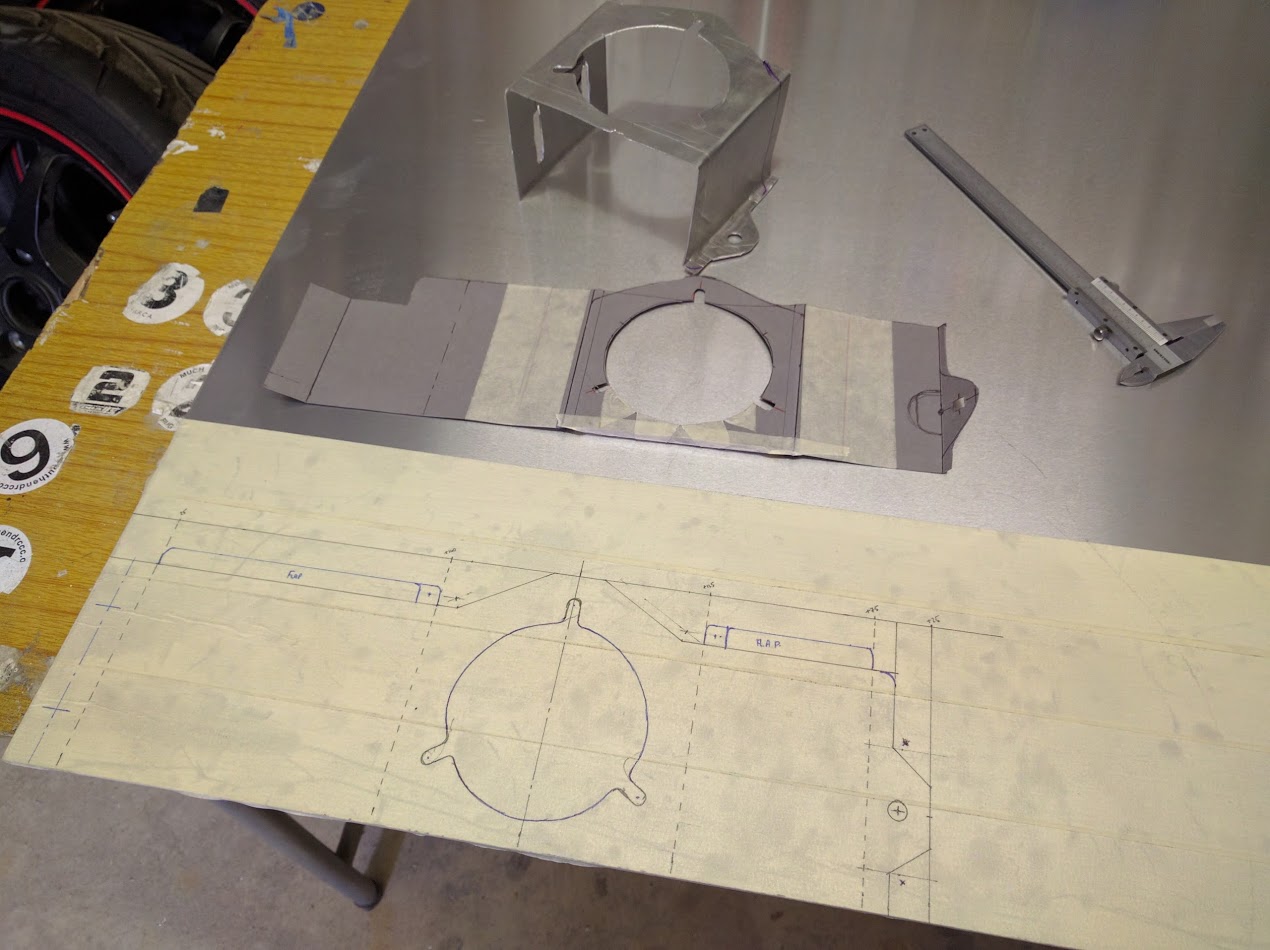
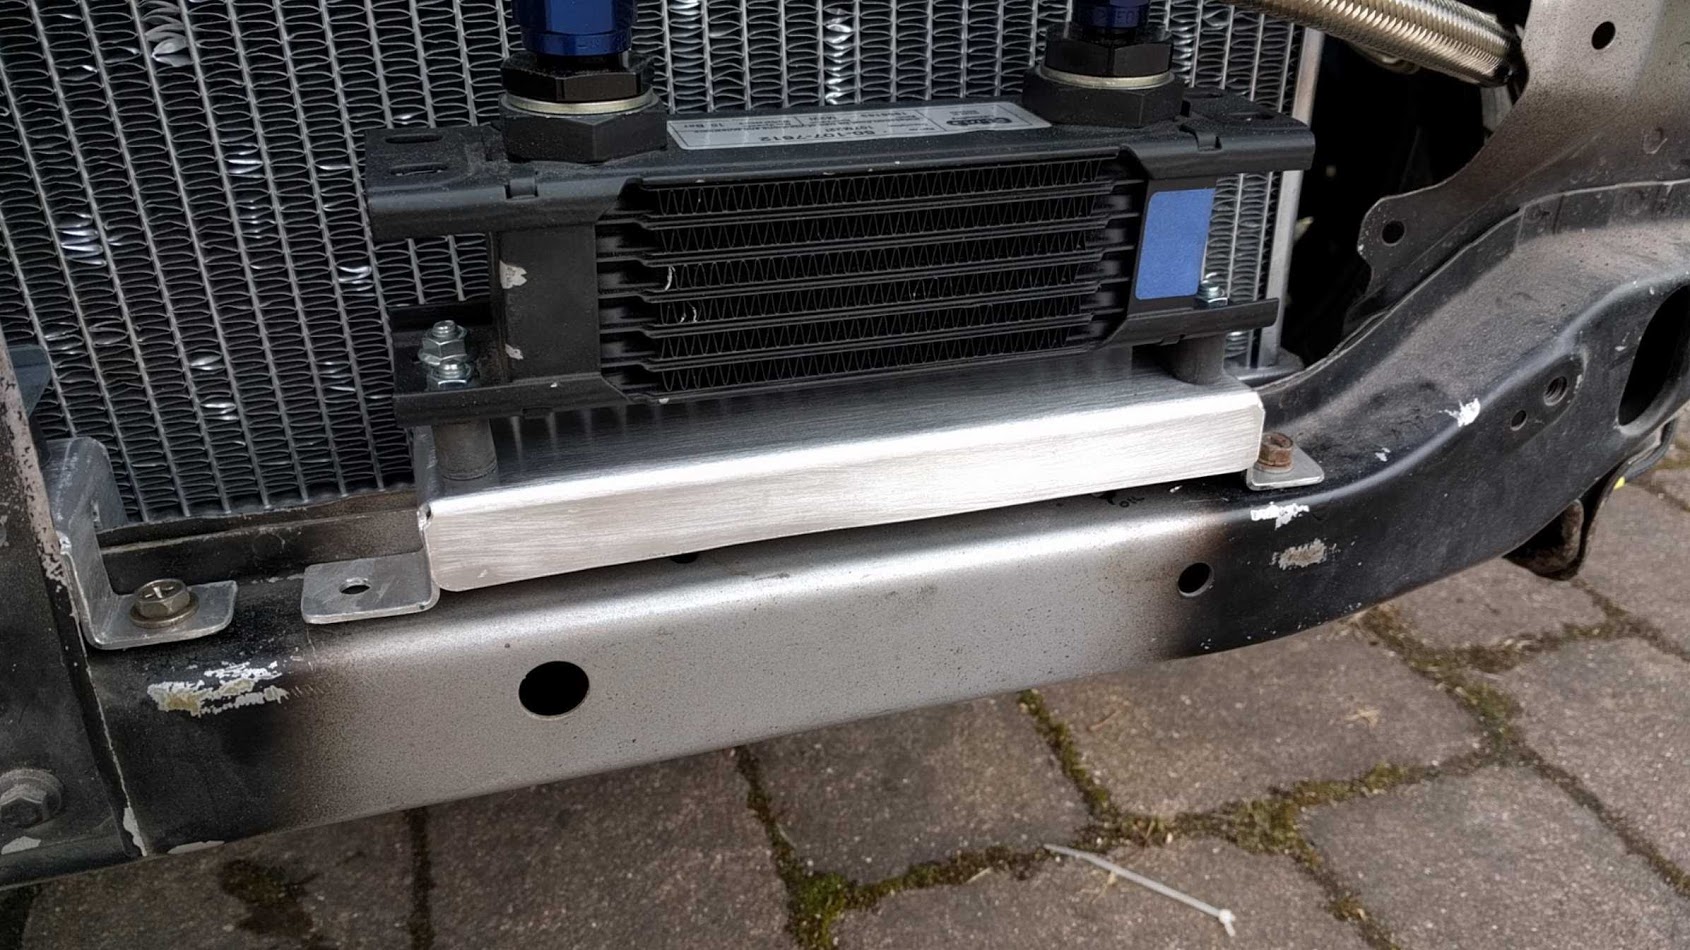
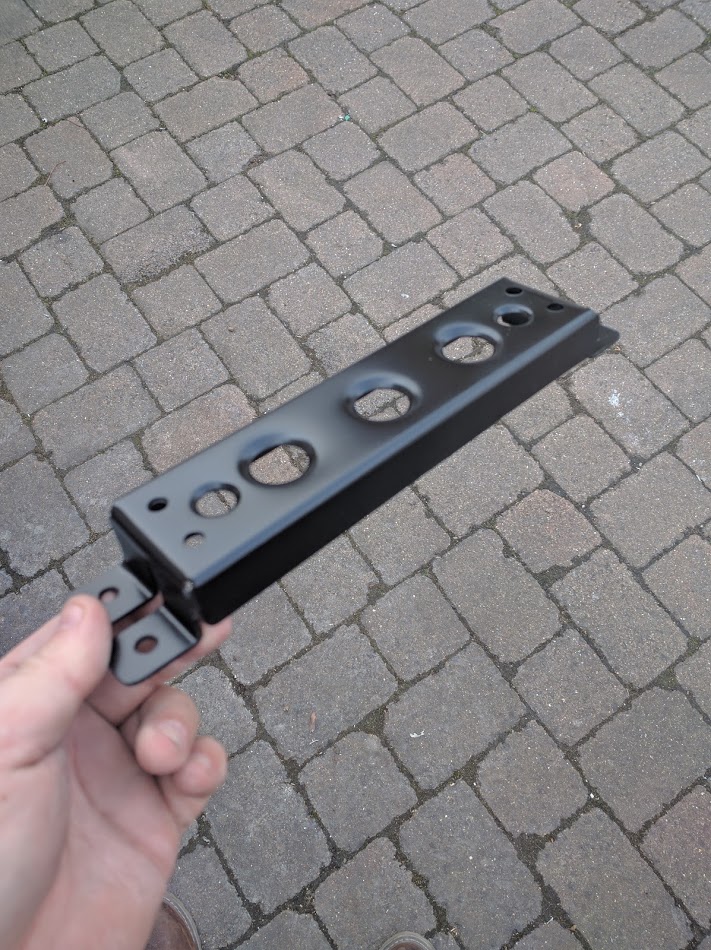
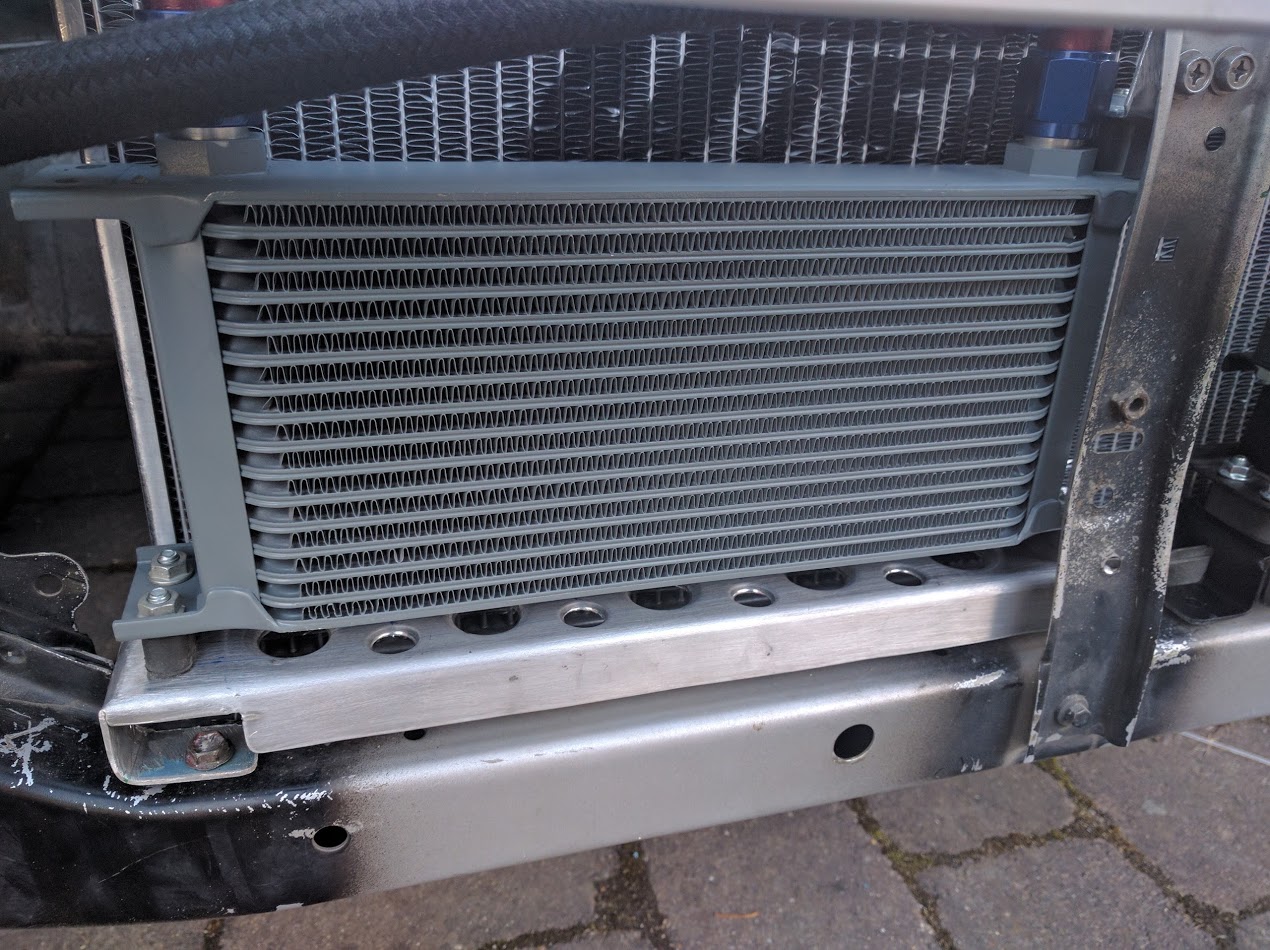
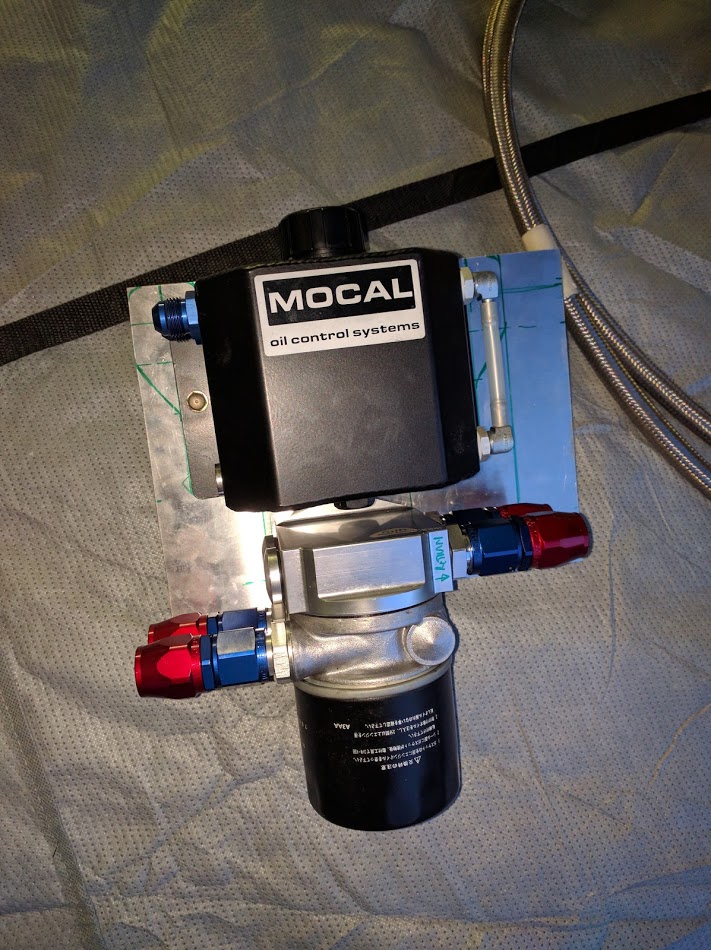
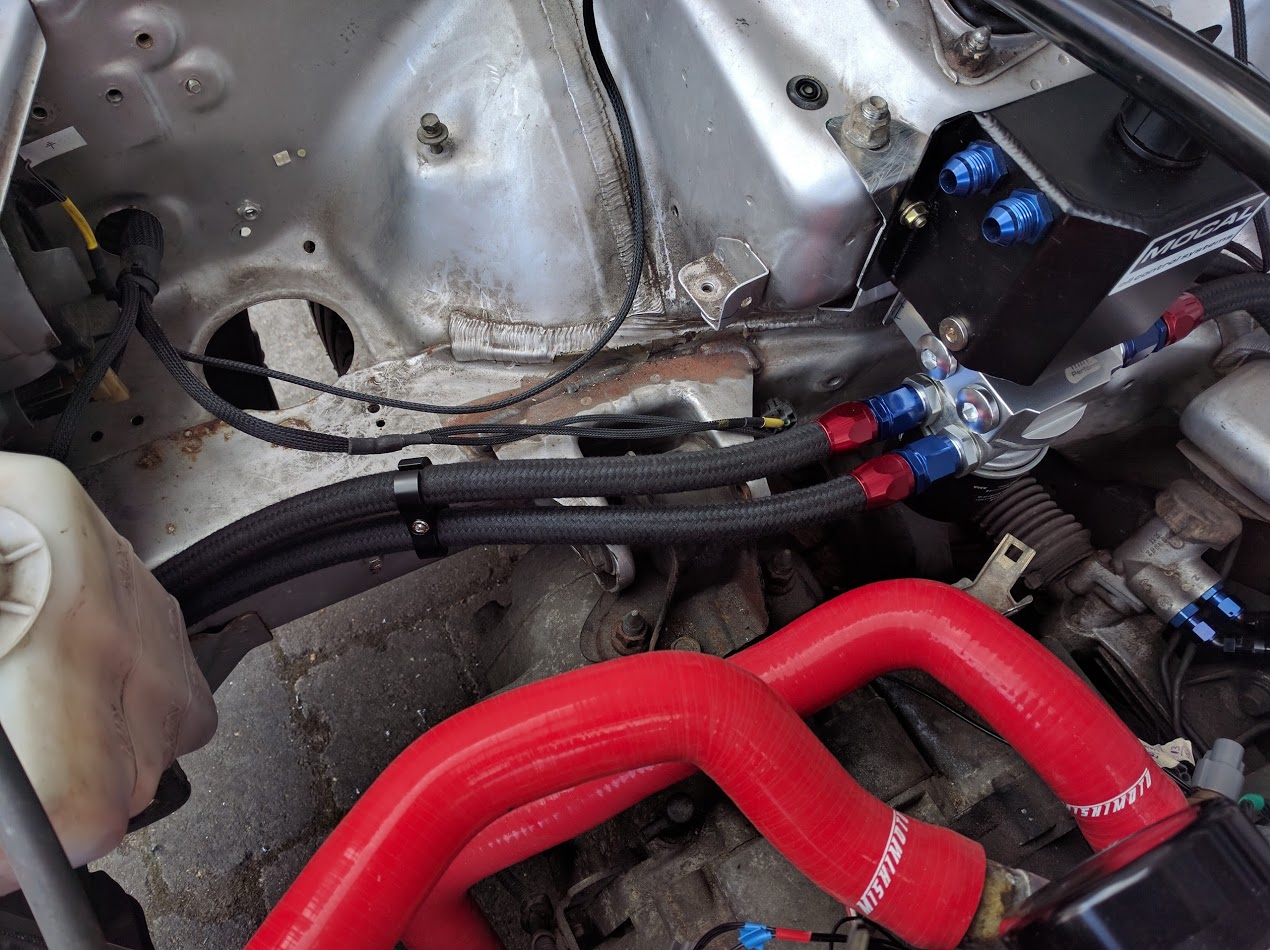
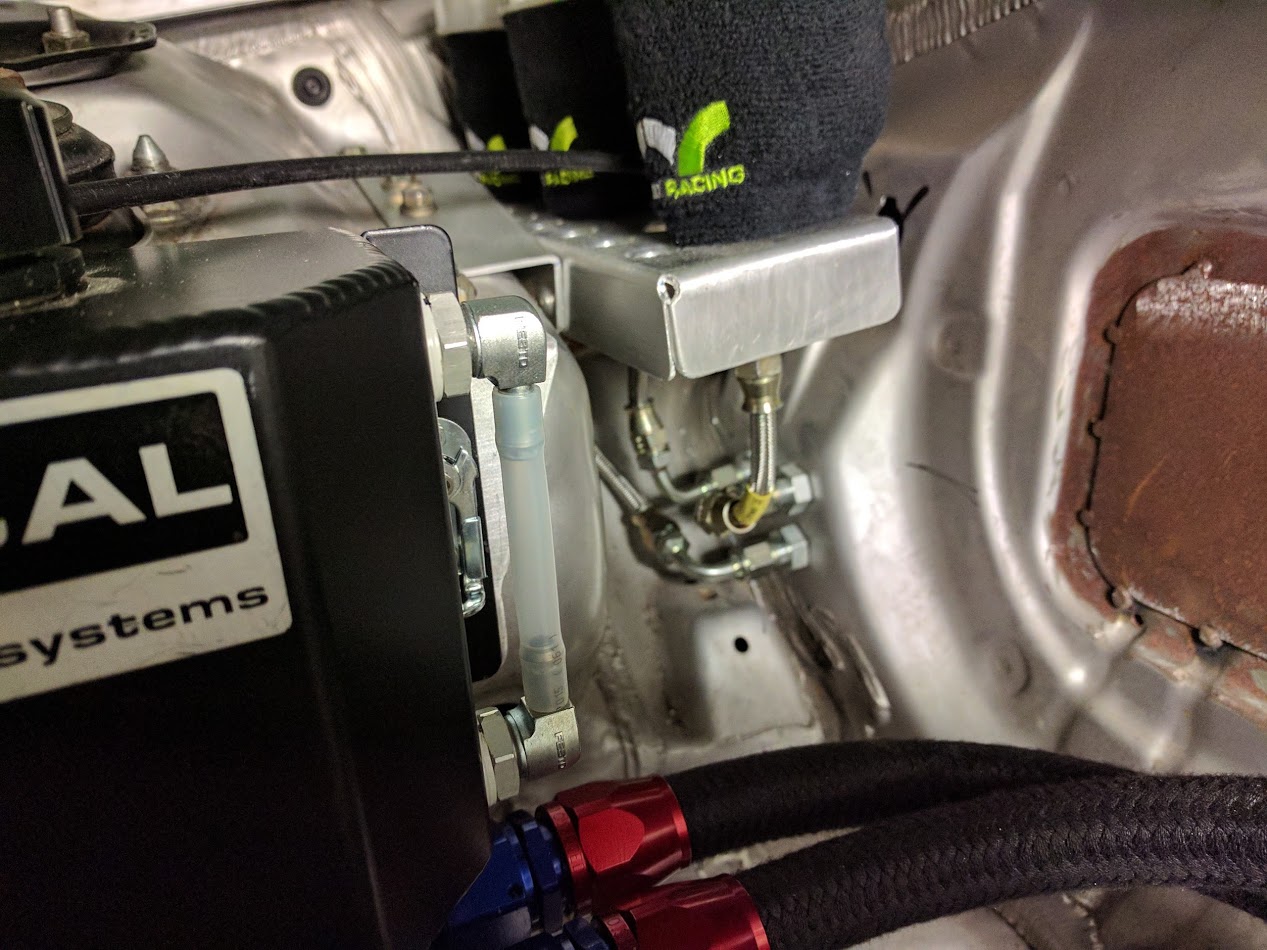
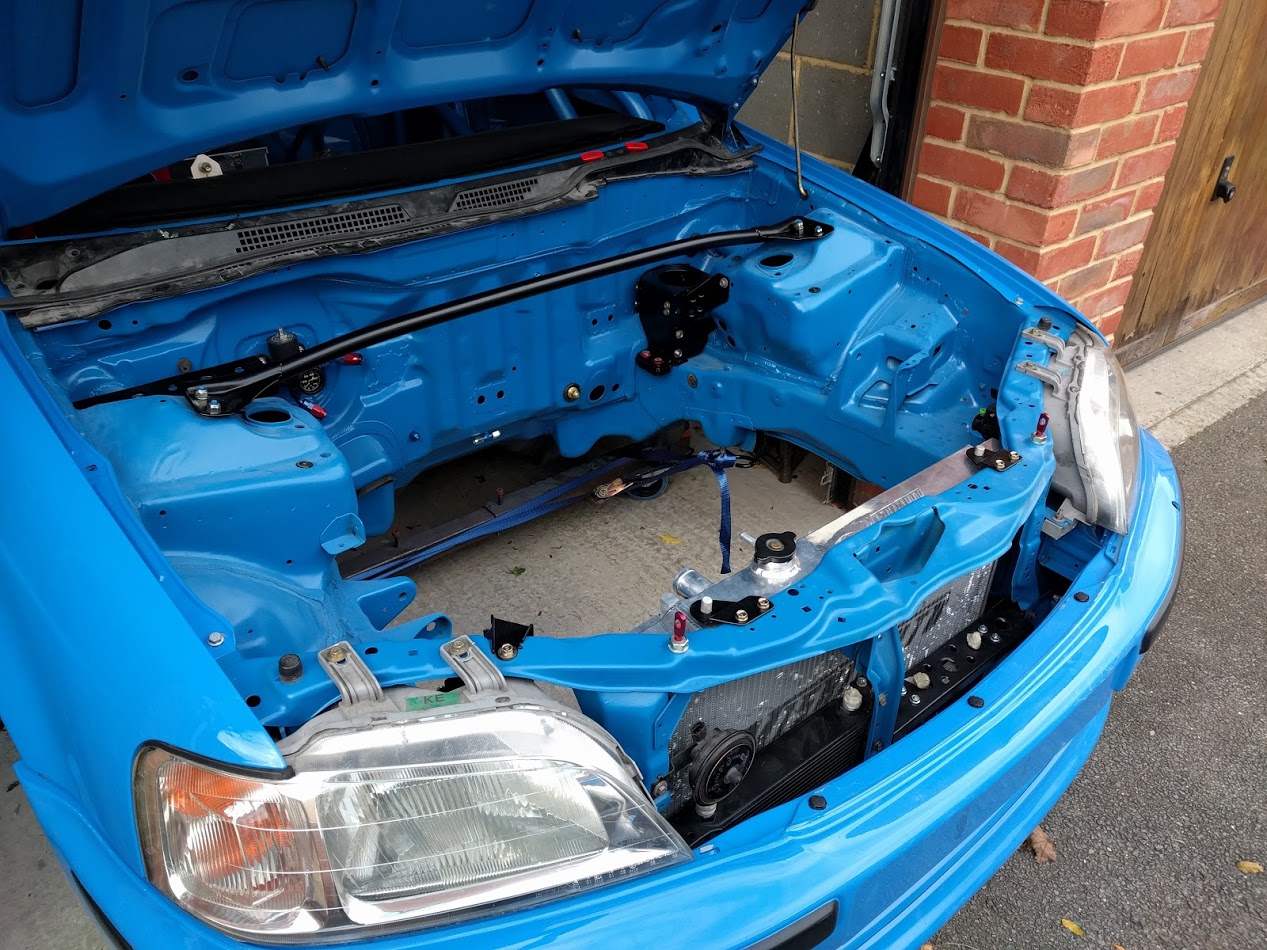
Power Steering and oil cooler:
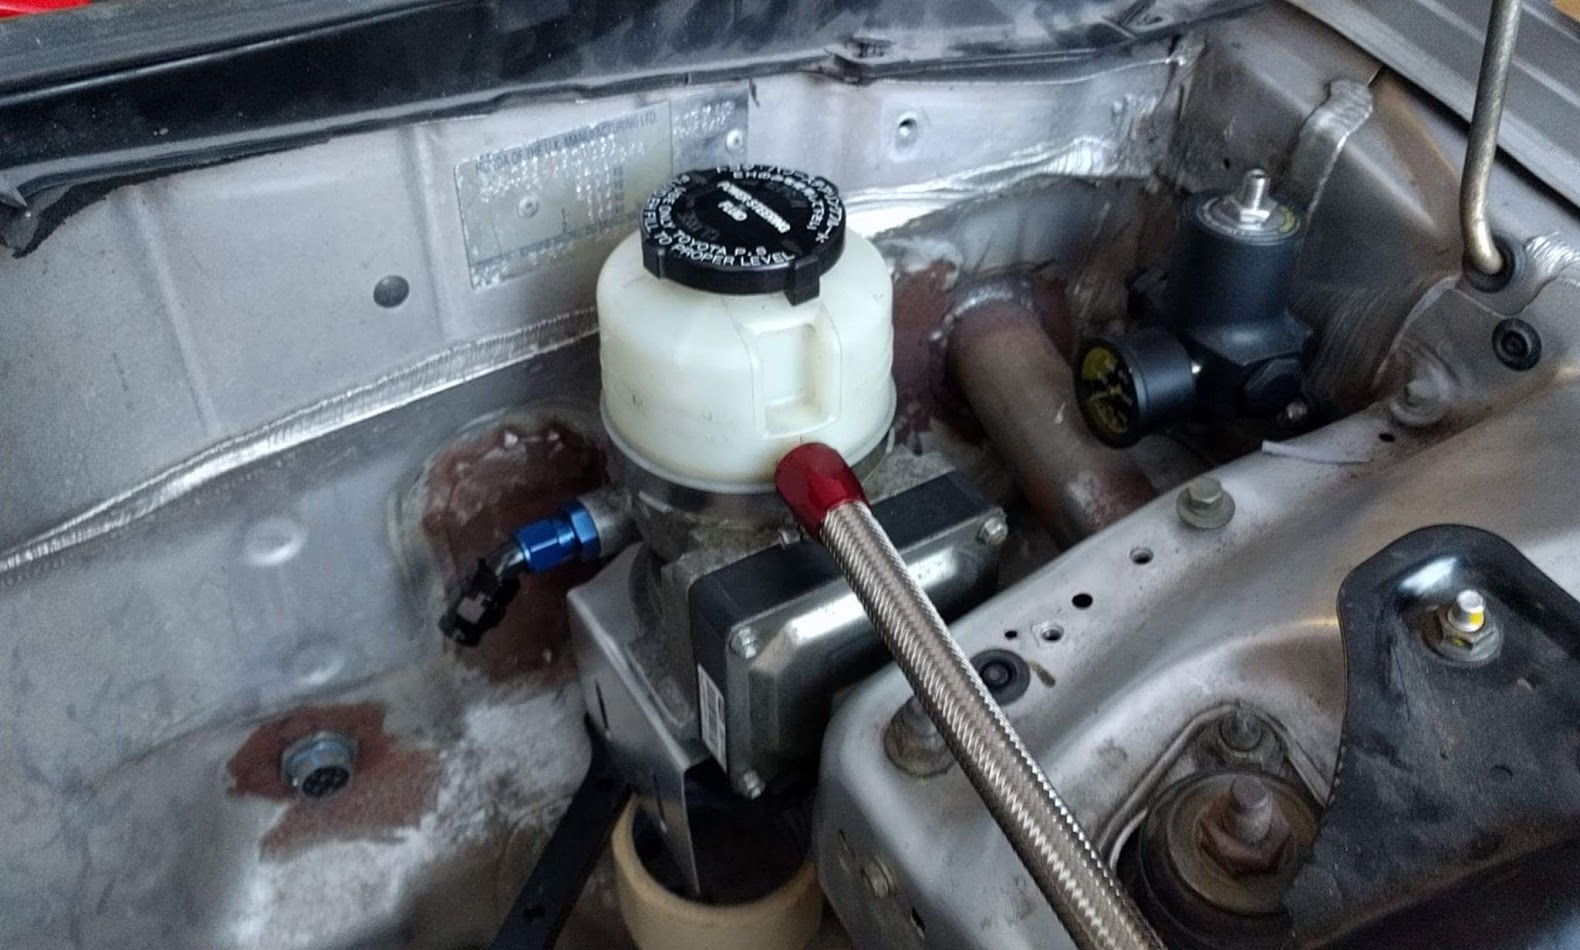

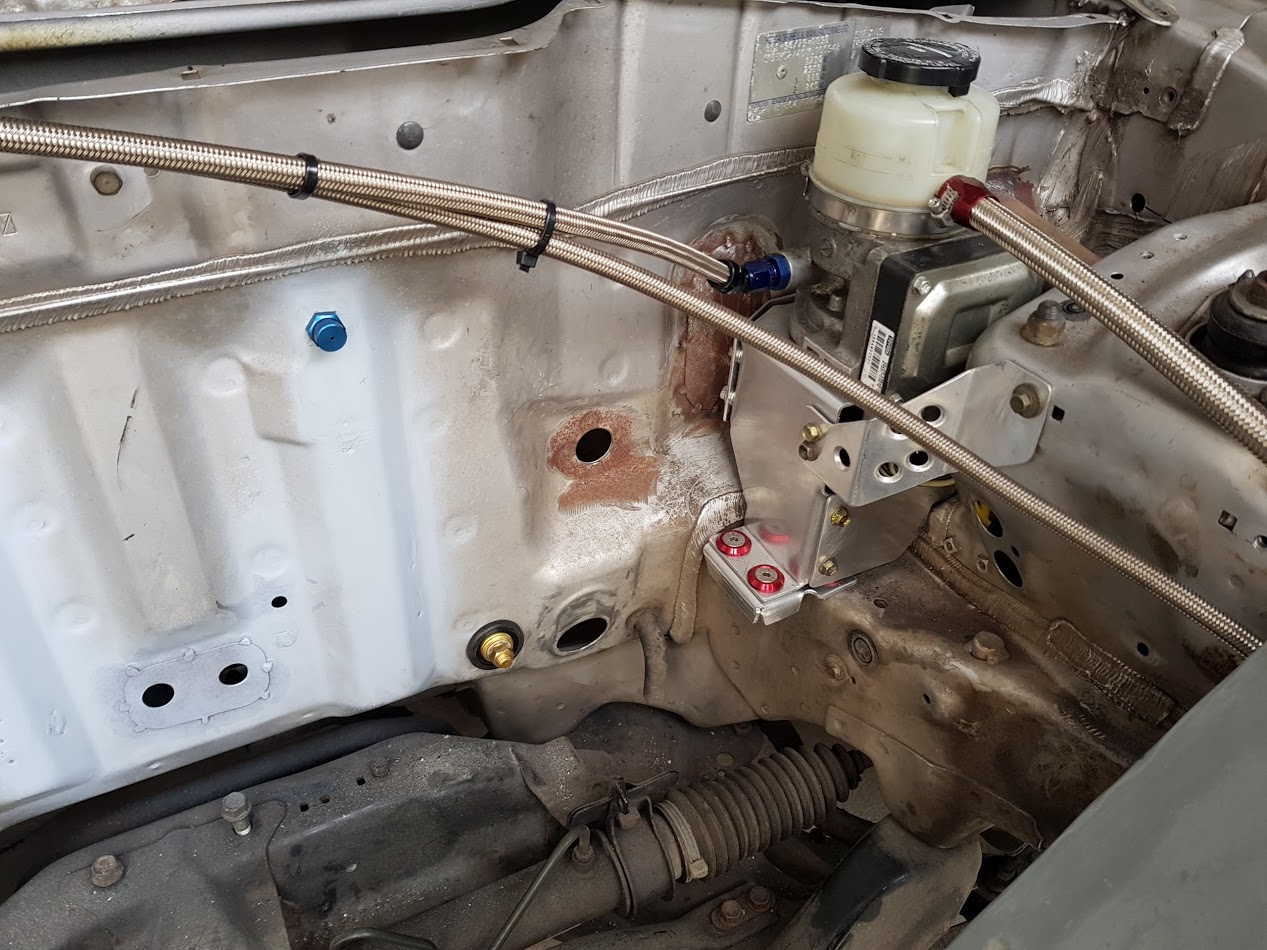

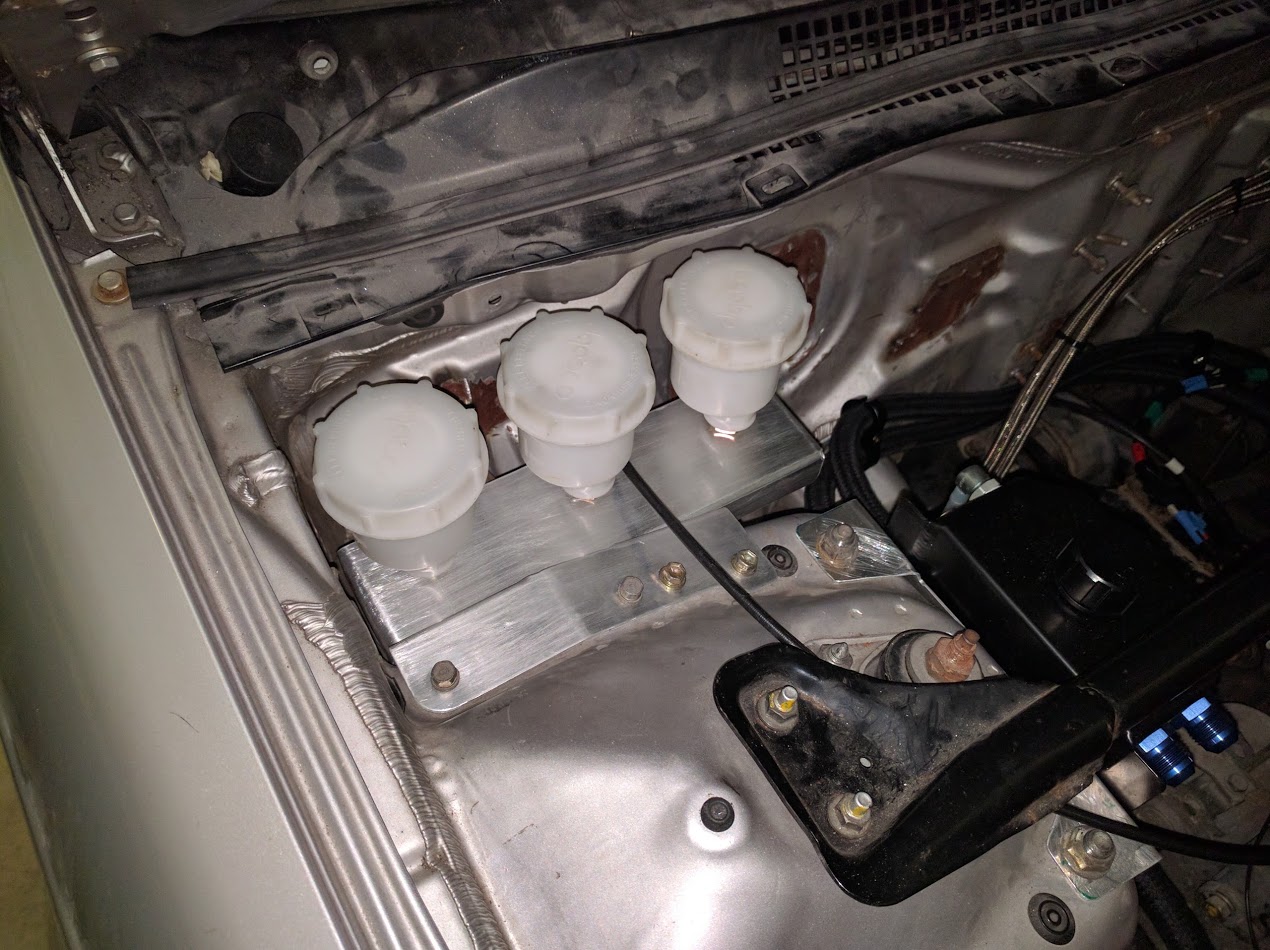
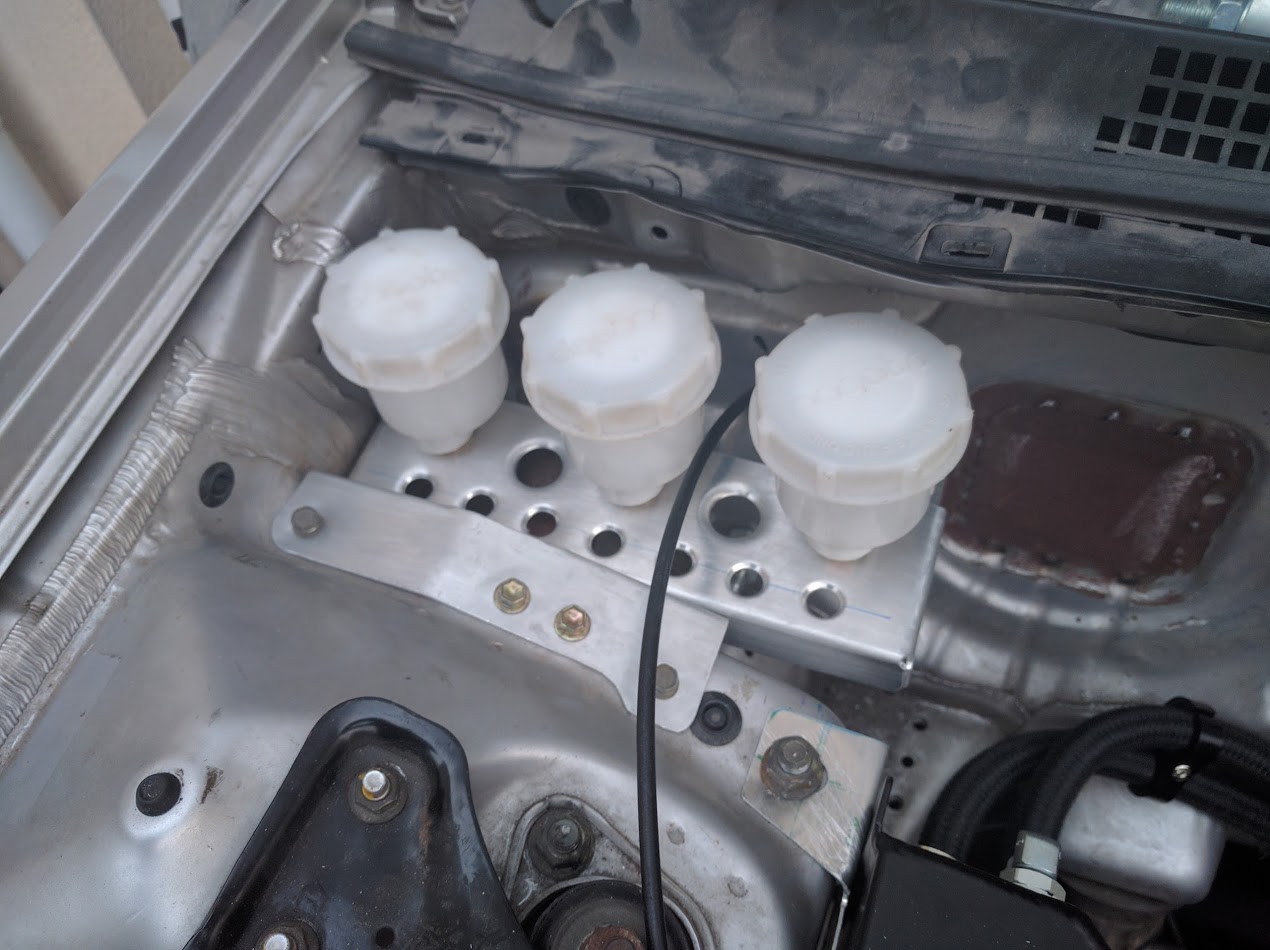
Master Cylinders:
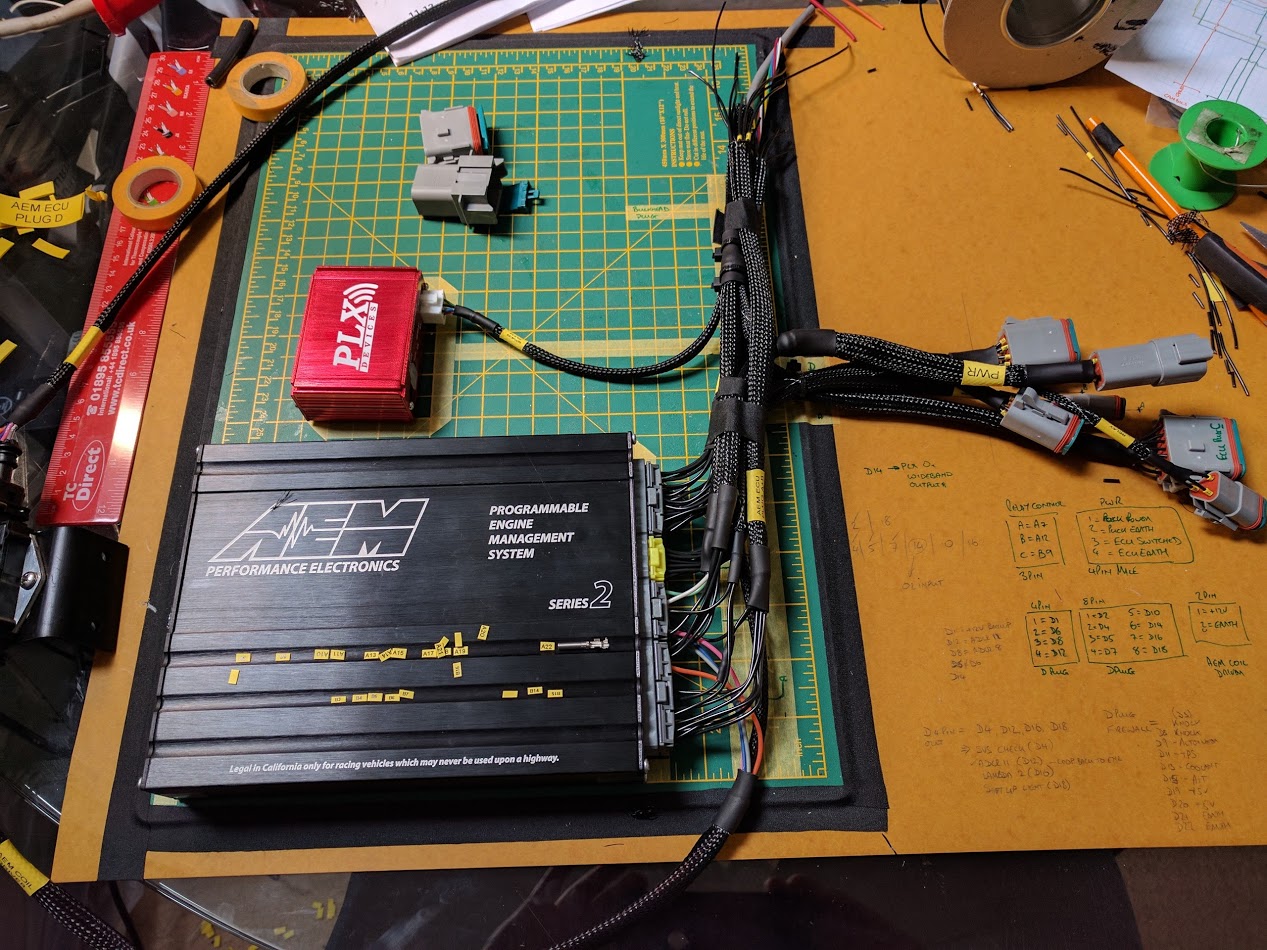
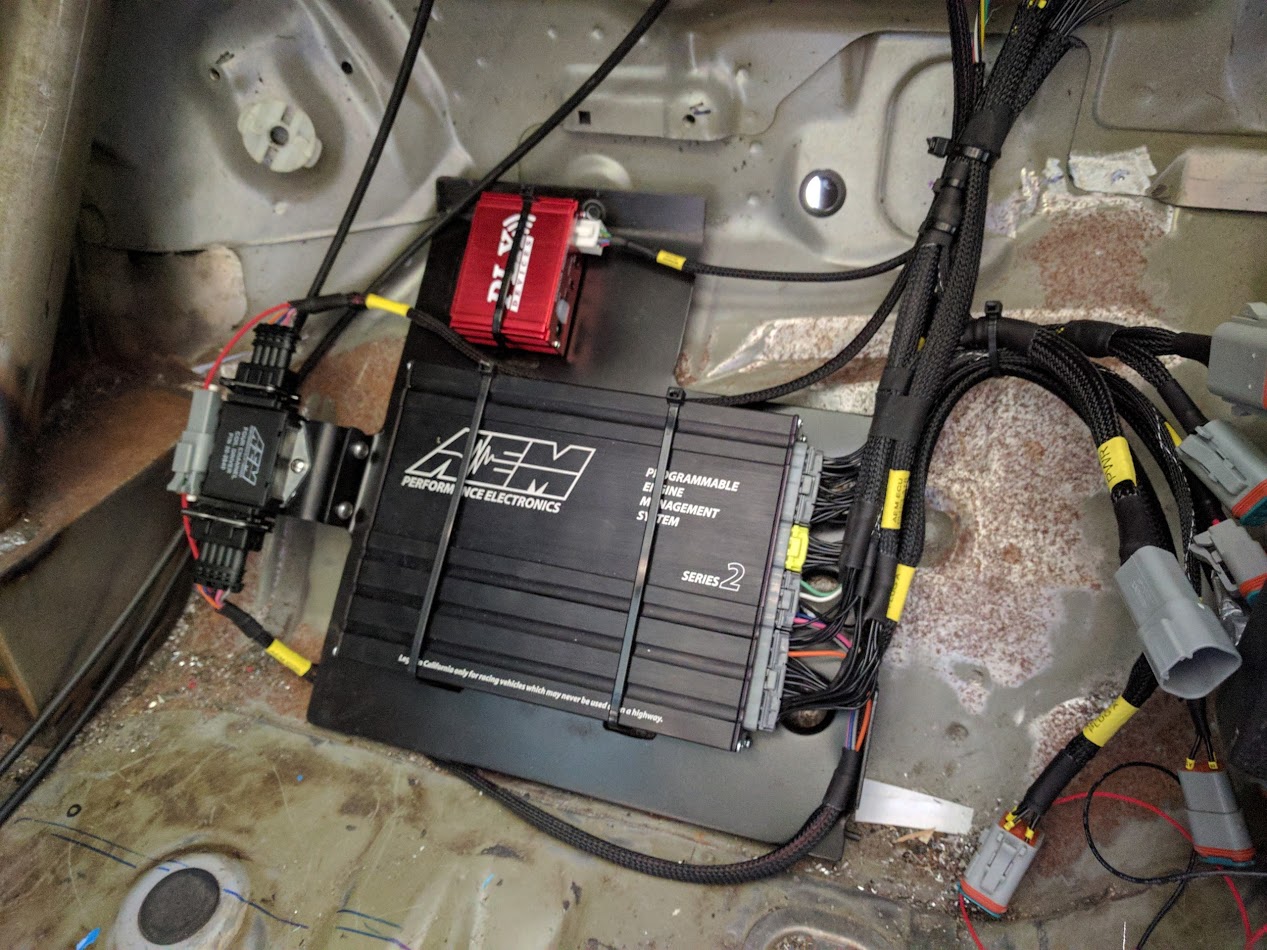
ECU and Engine wiring:
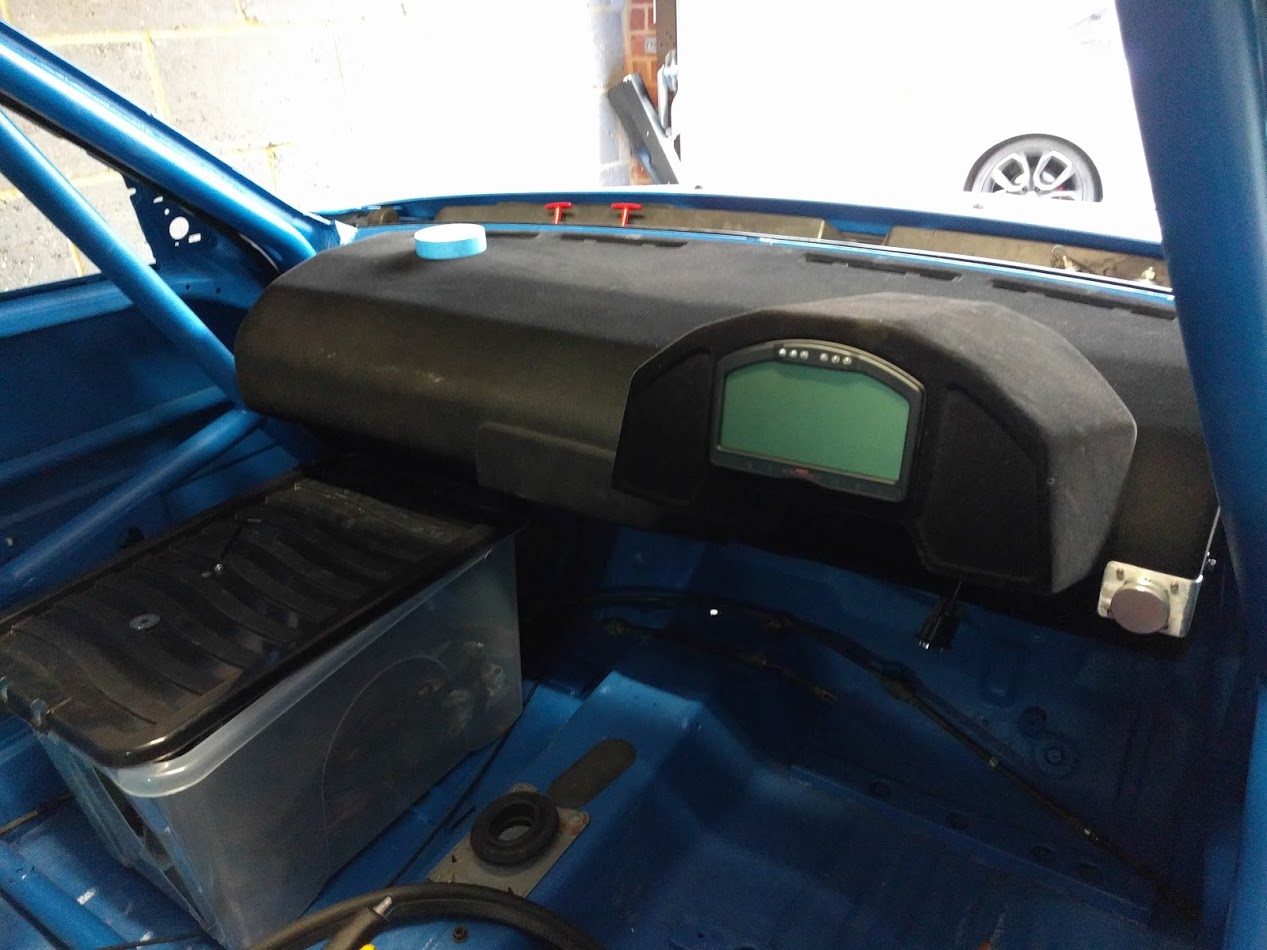
Dashboard and Instrument binnacle re-mould:
Bodywork and Aero:
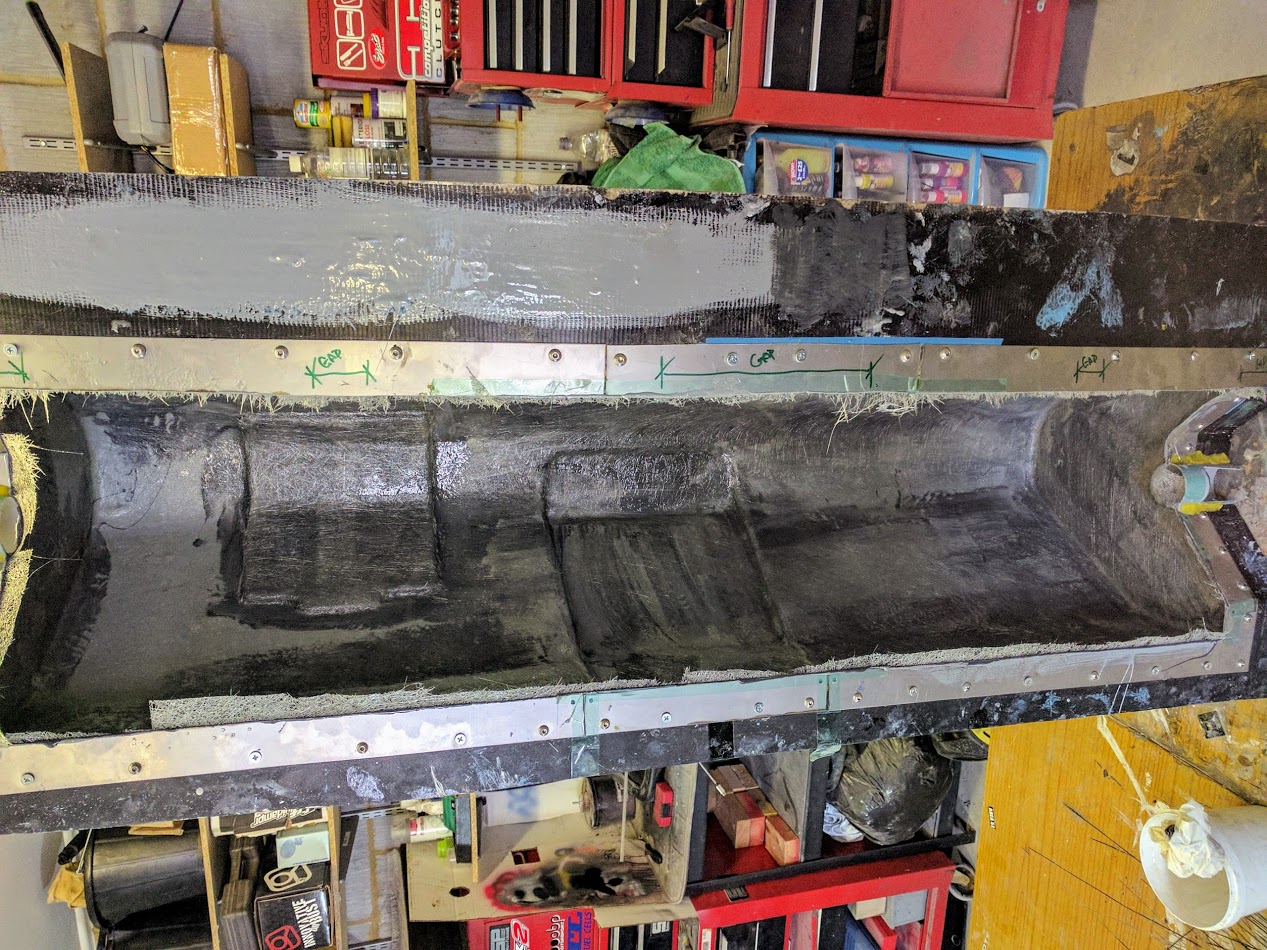
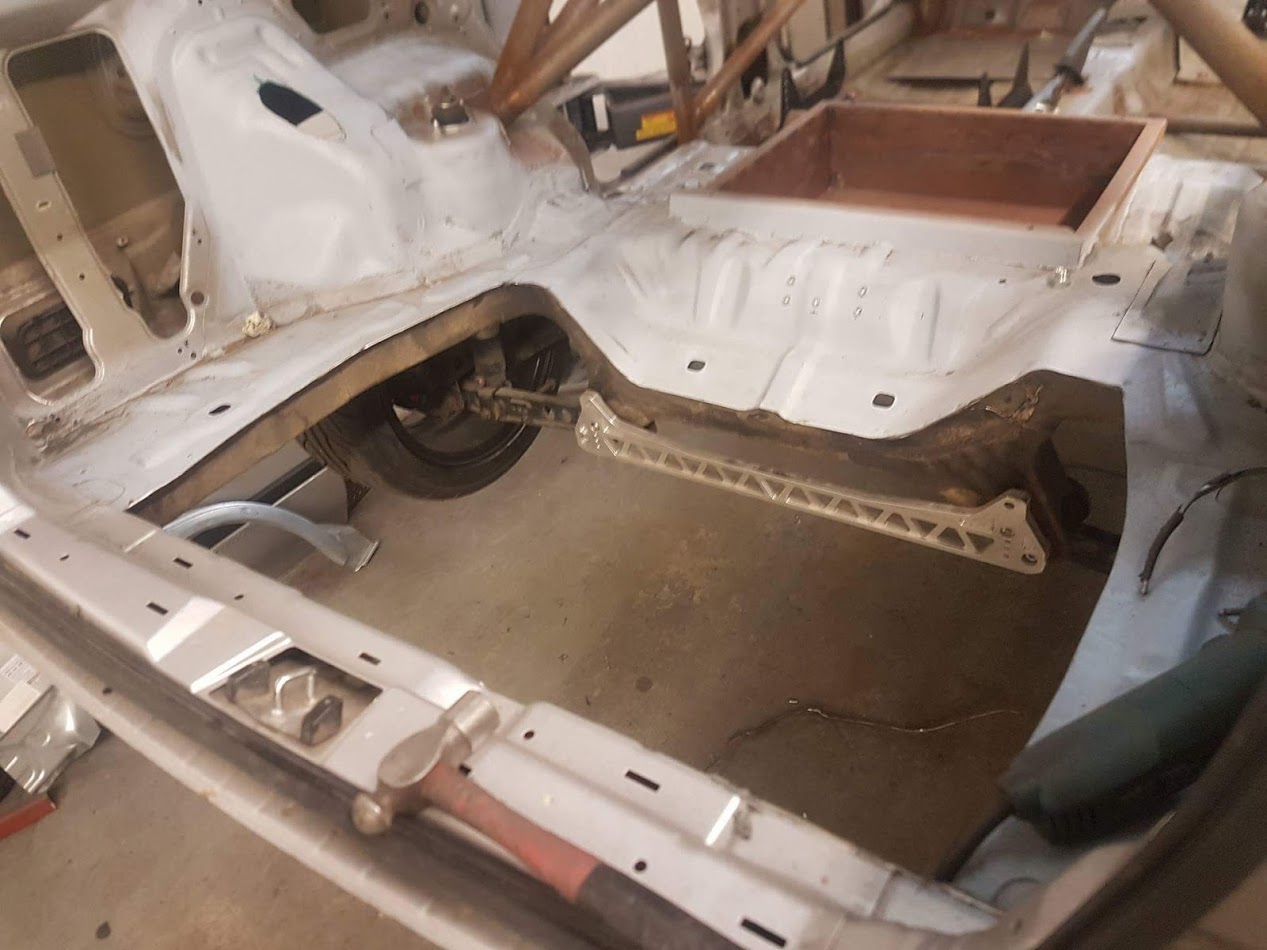
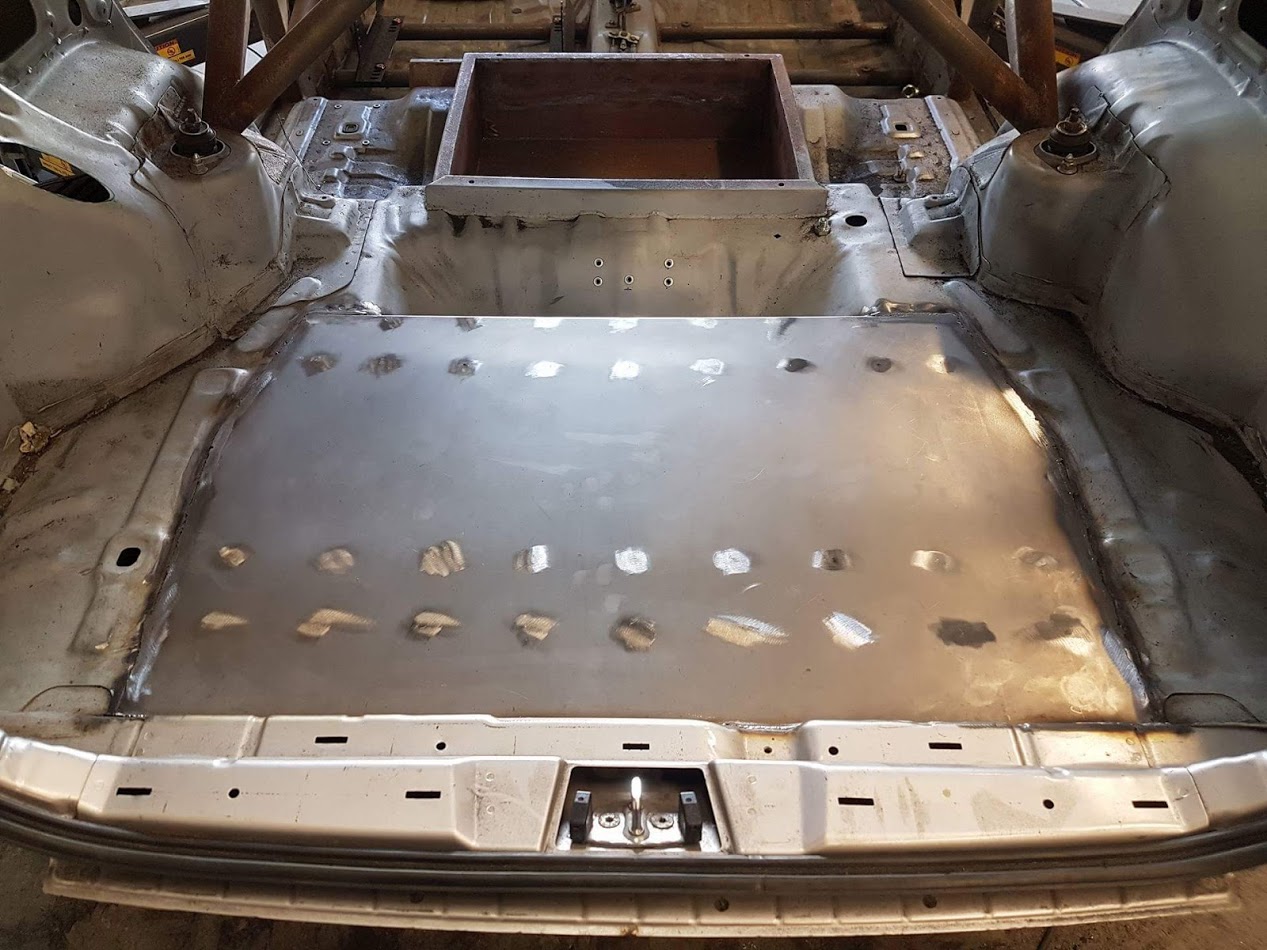
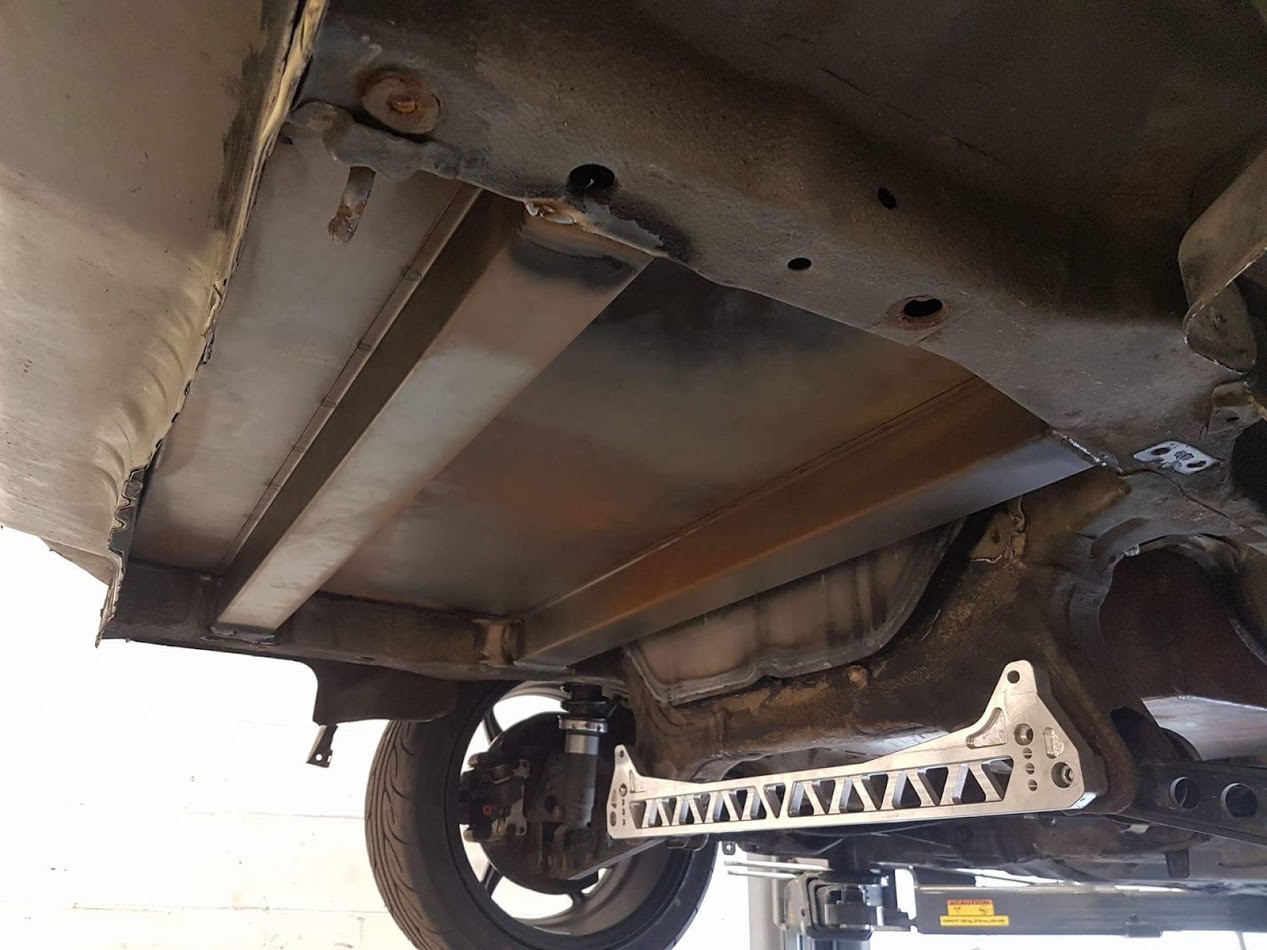
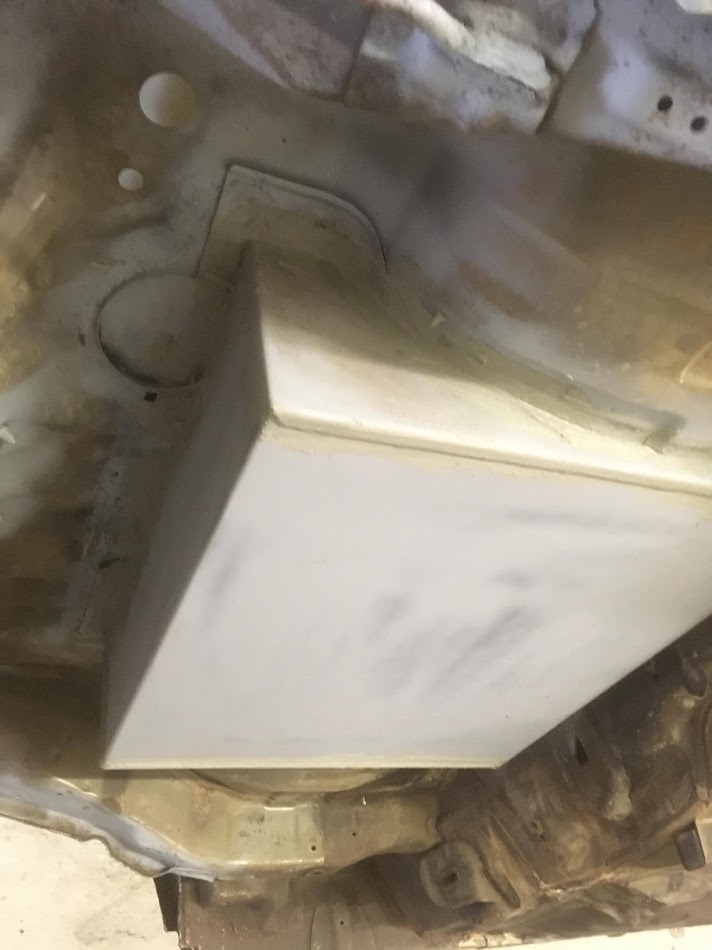
Flat rear floor and extra bracing
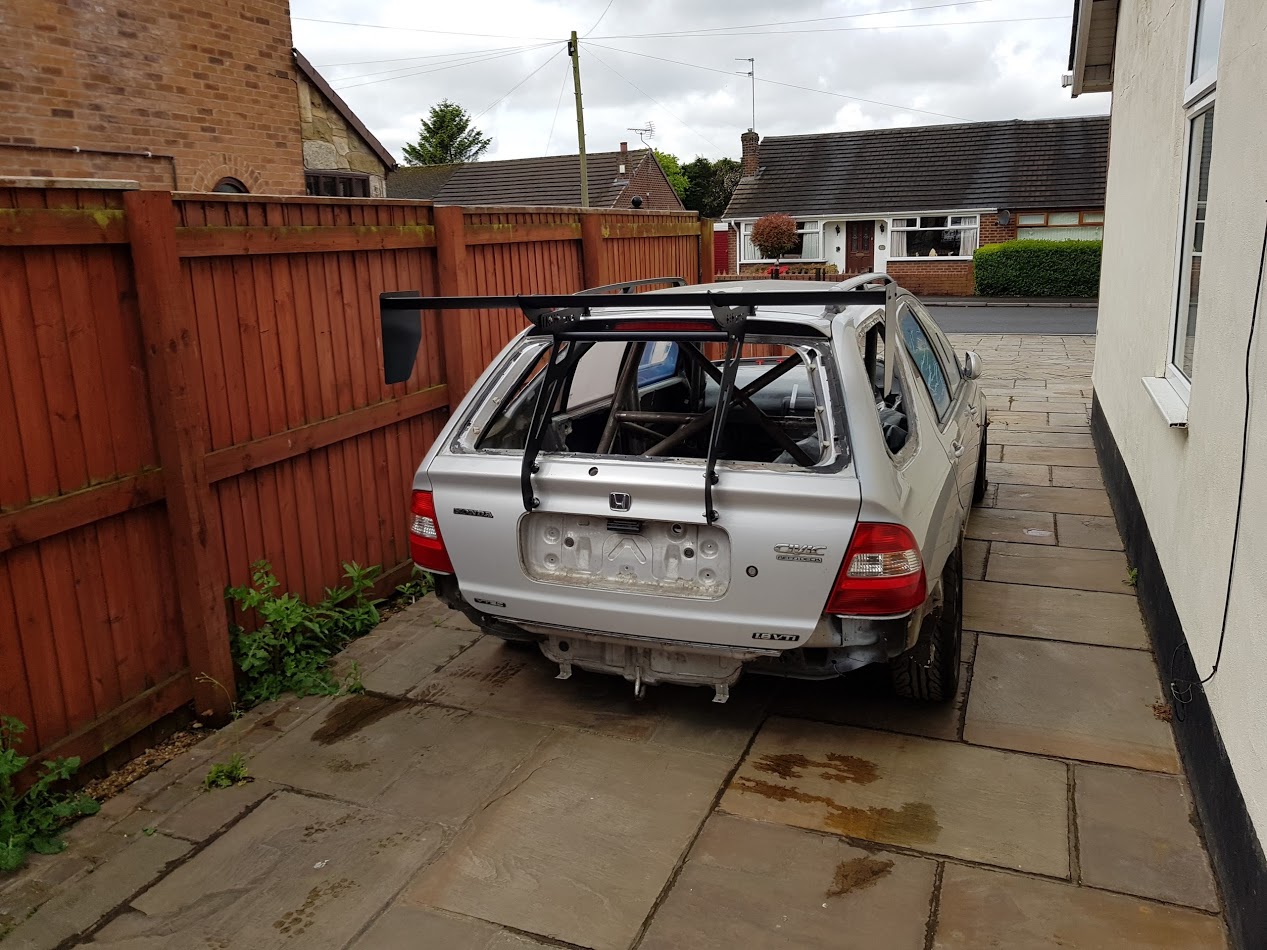
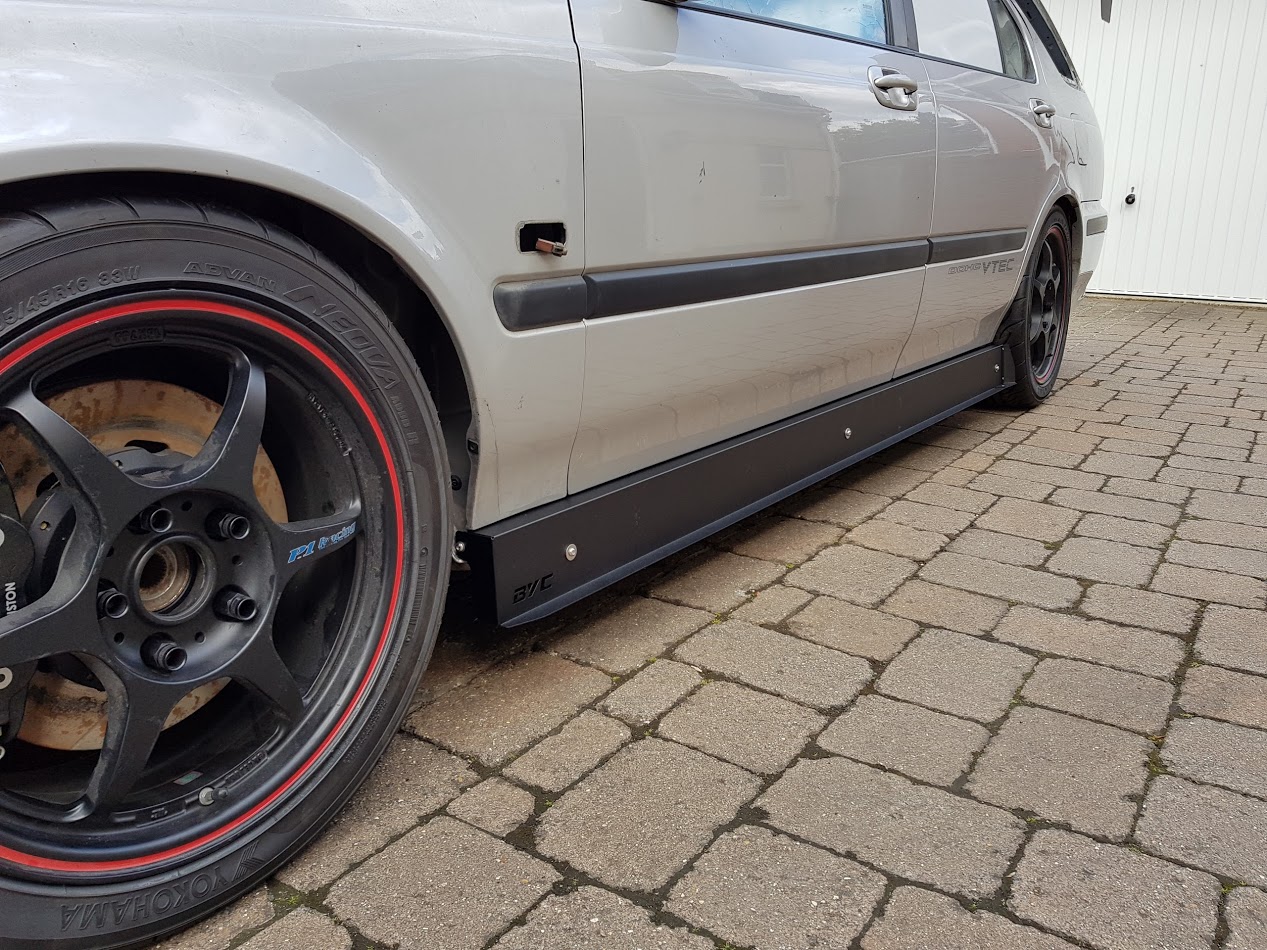
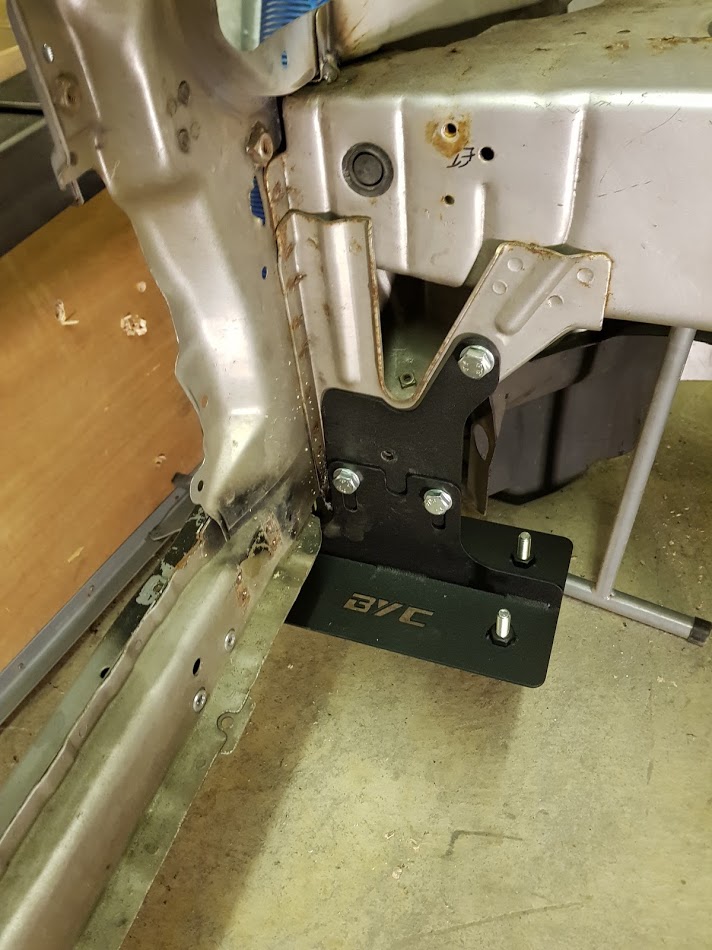
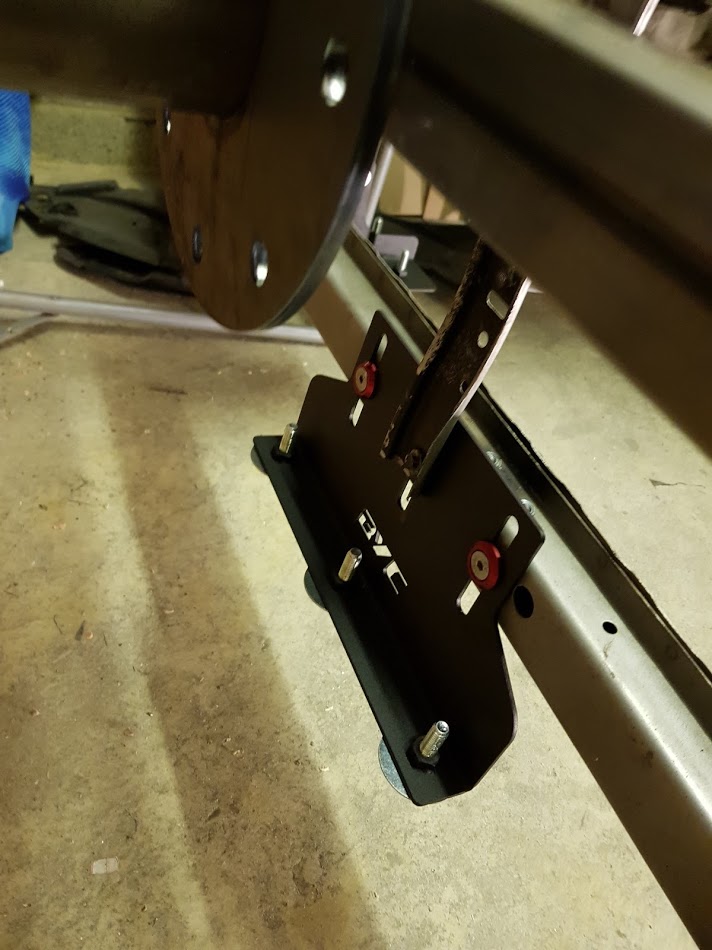
BYC side skirts
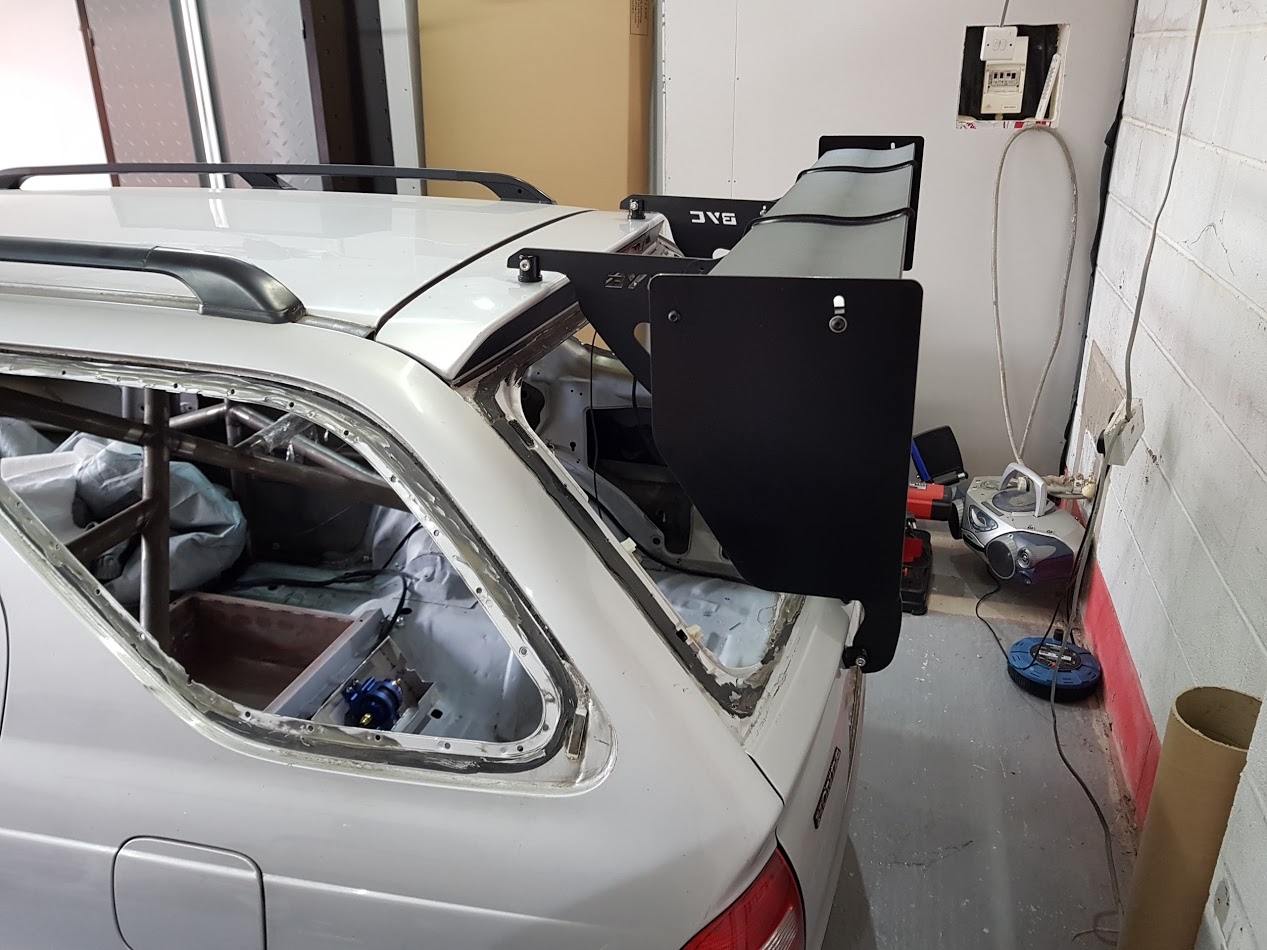
Big gay wing!
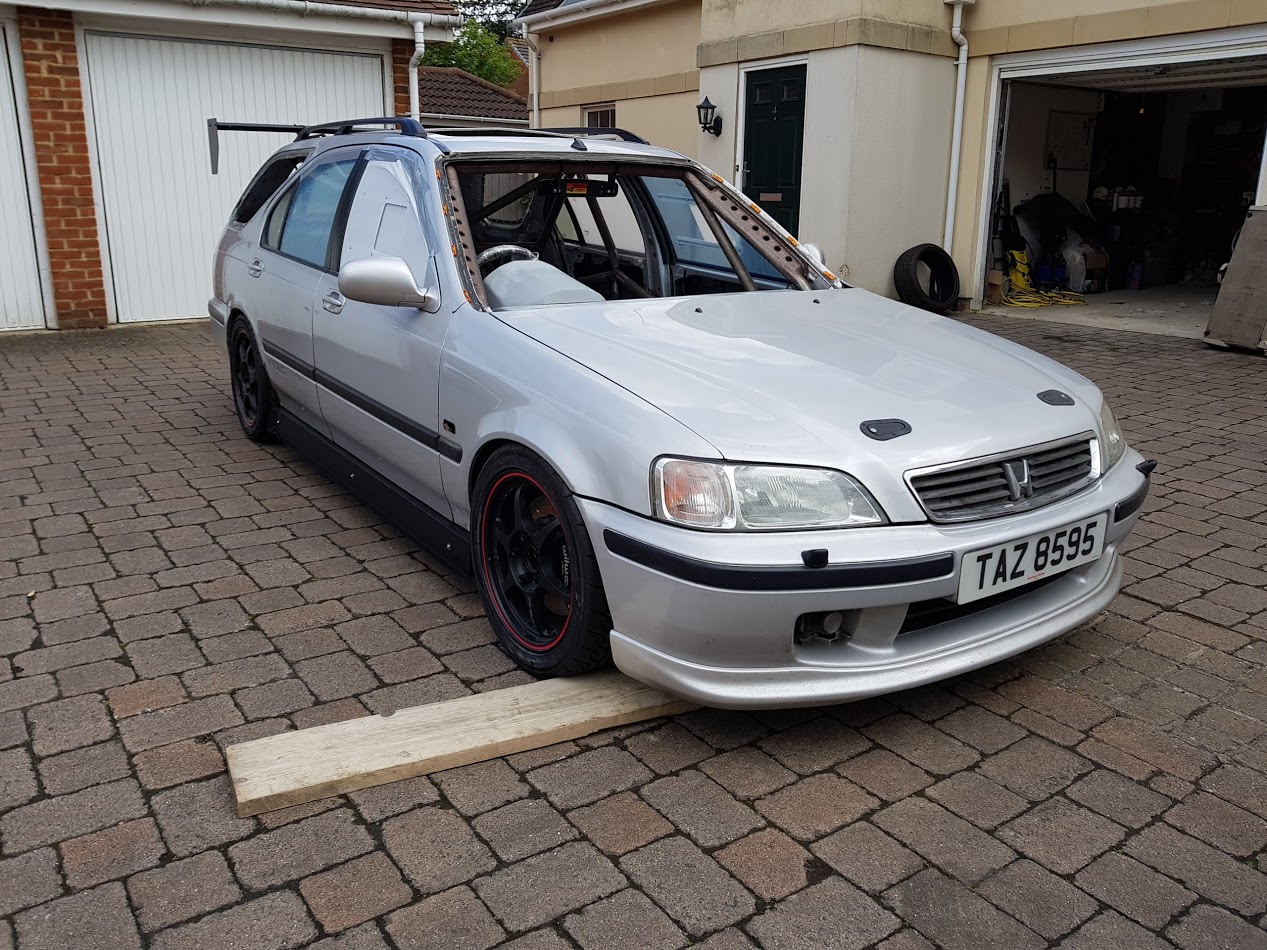
Front splitter mounts
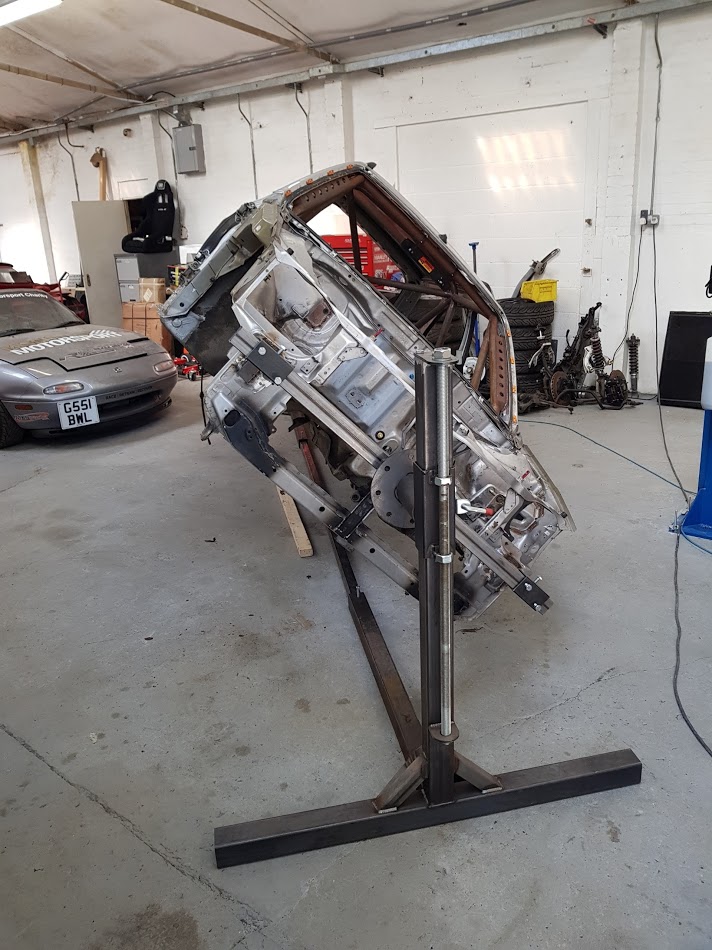
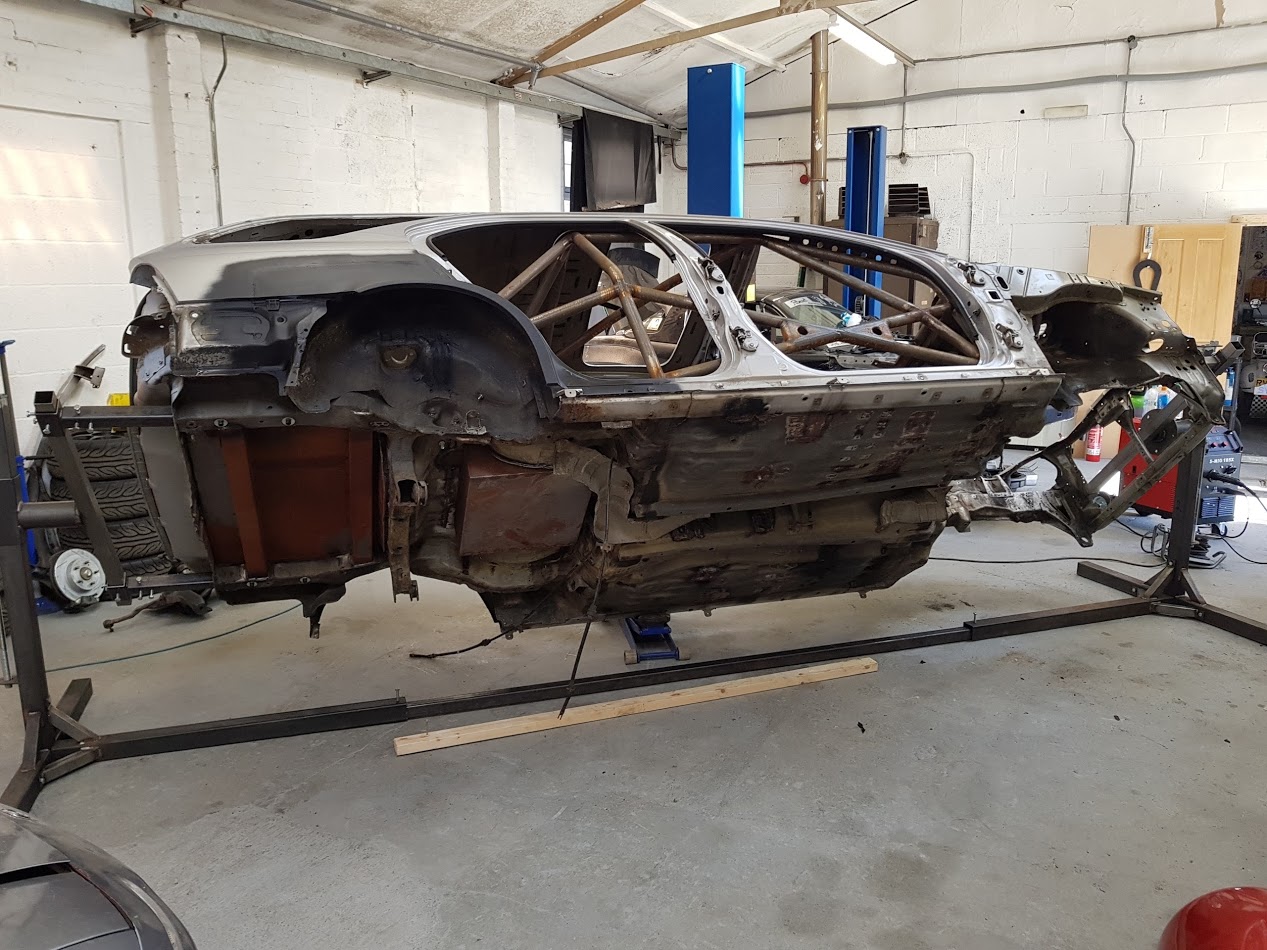
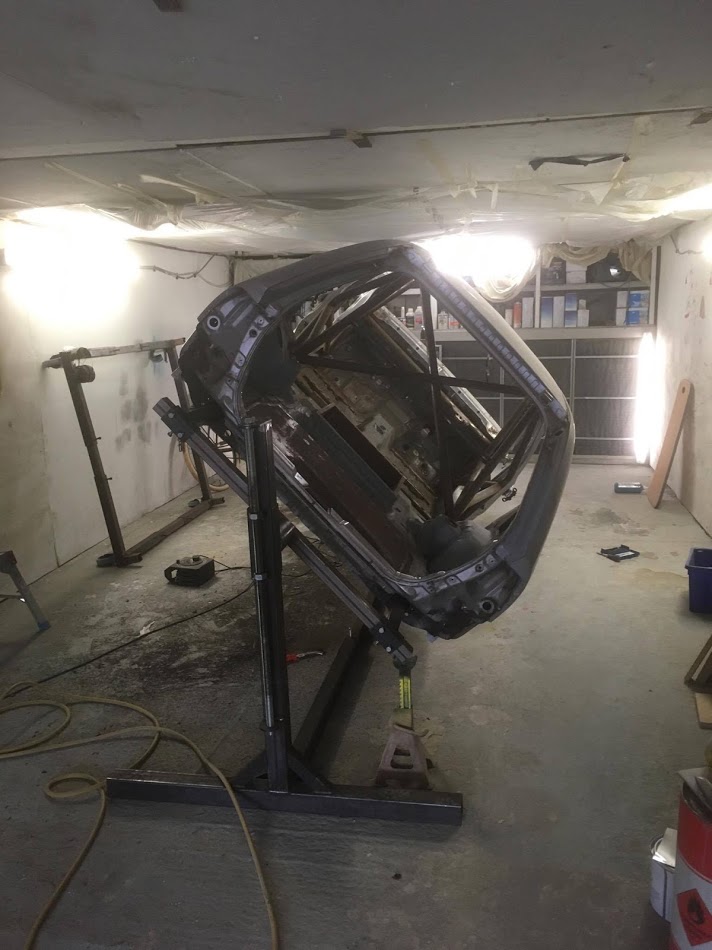
Mounting to rotisserie:
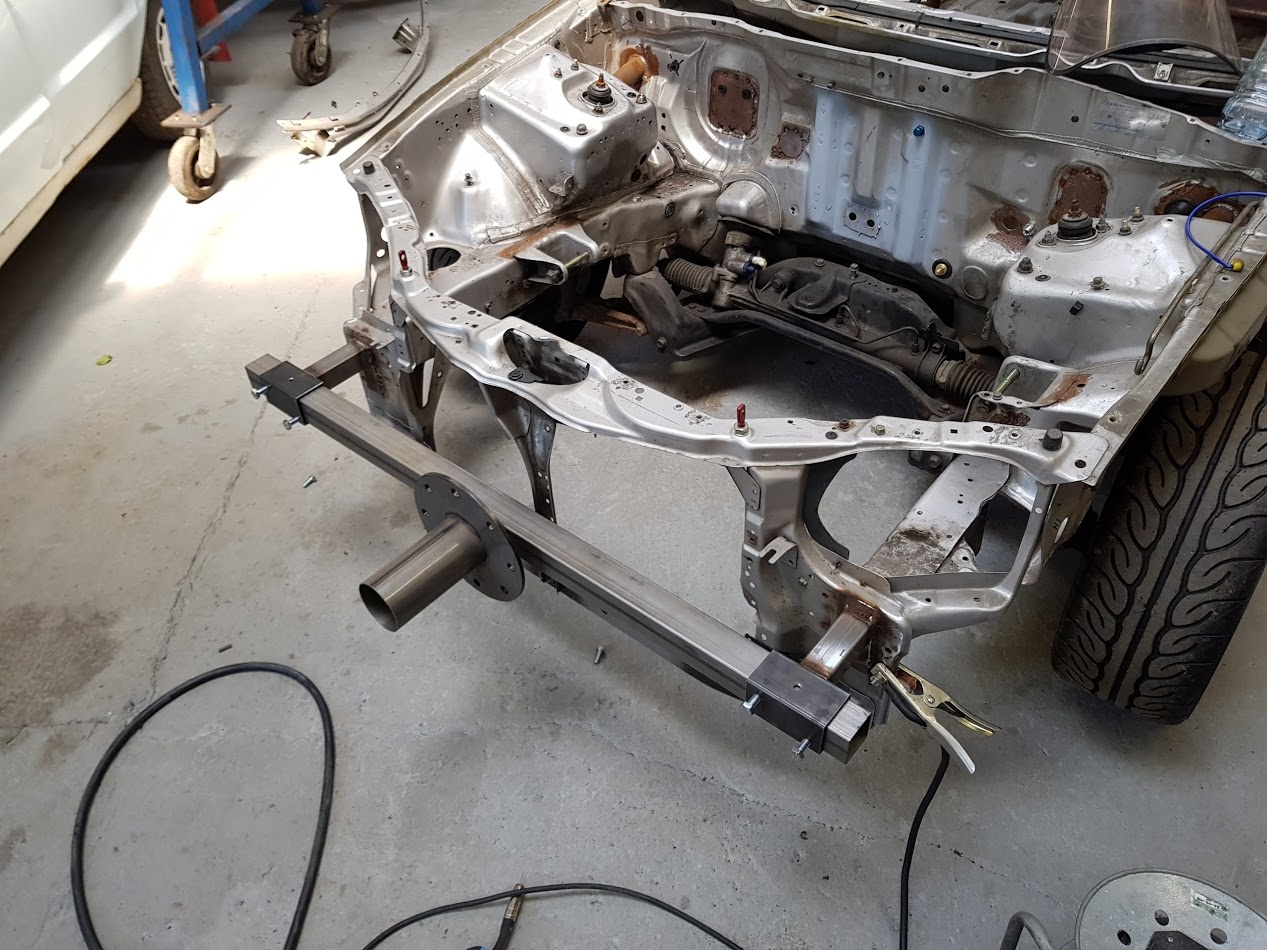
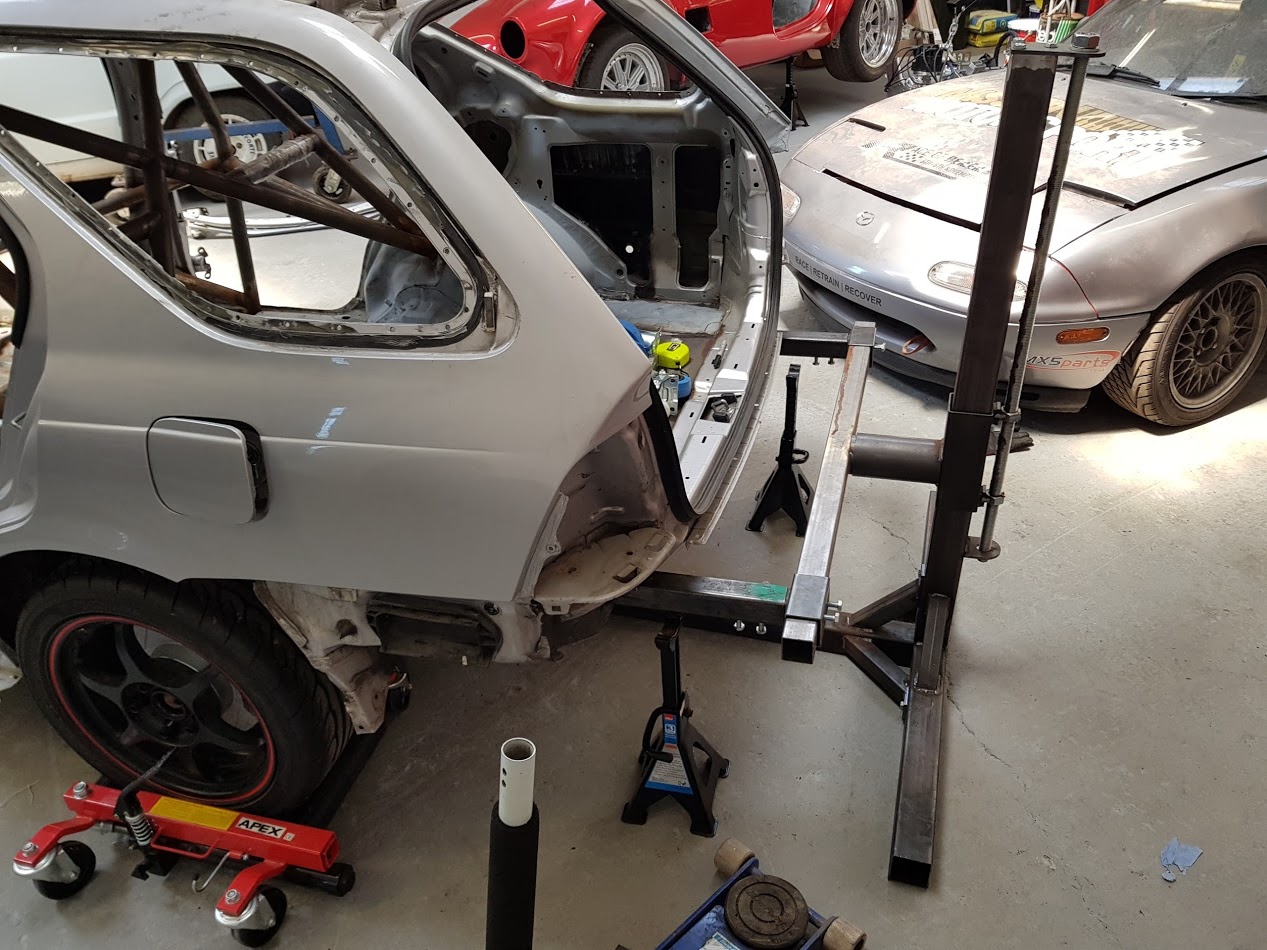
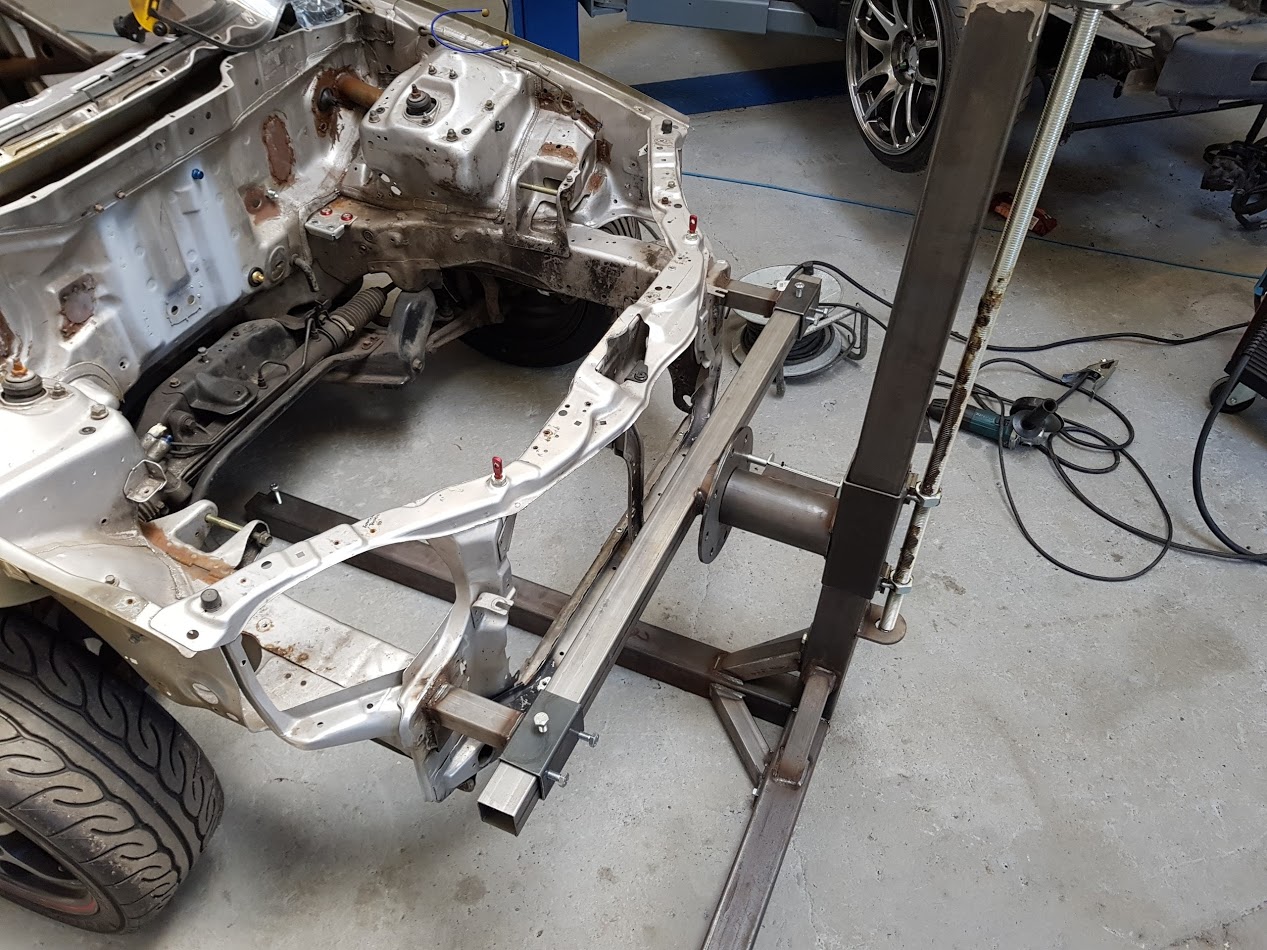
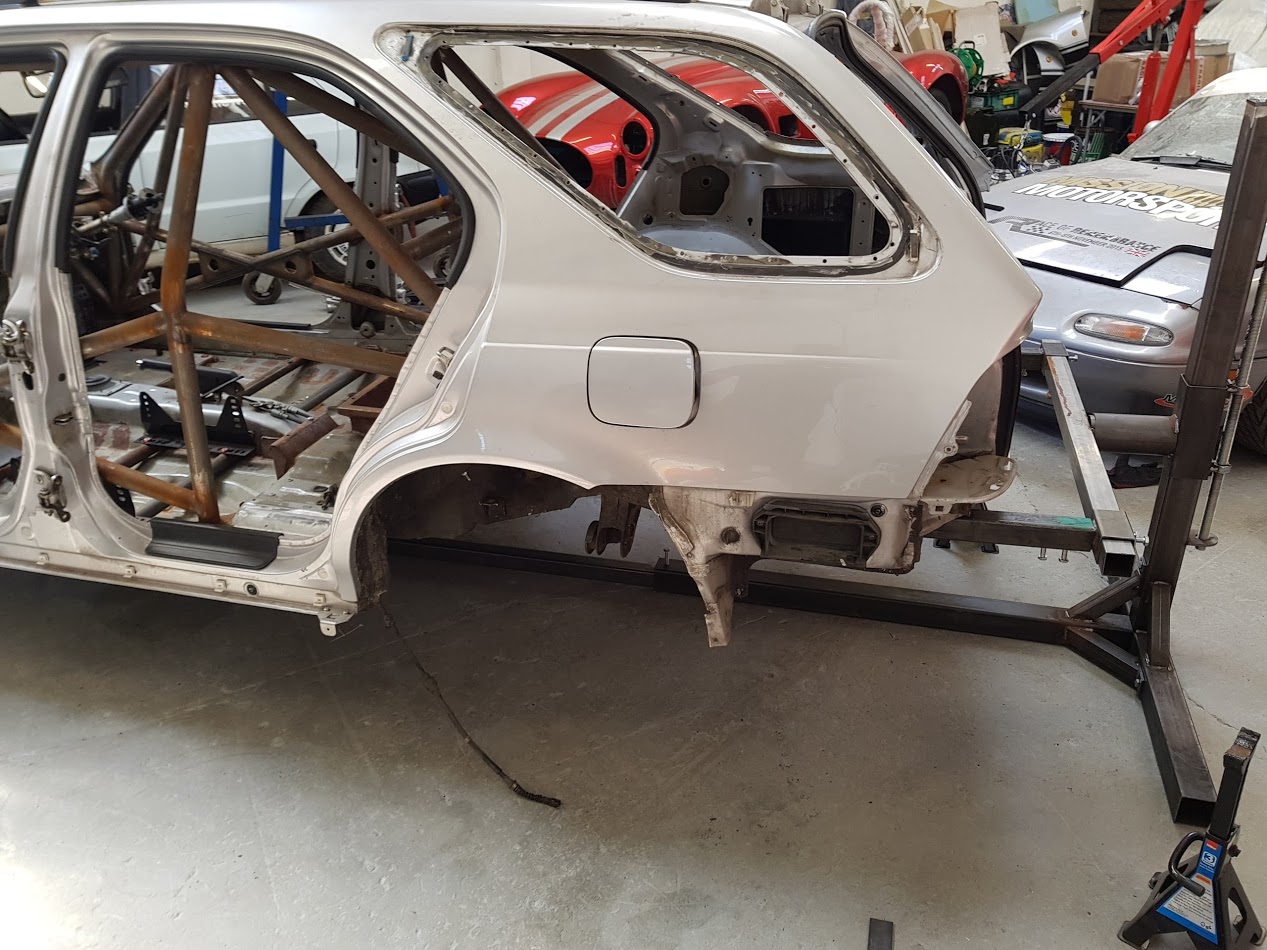
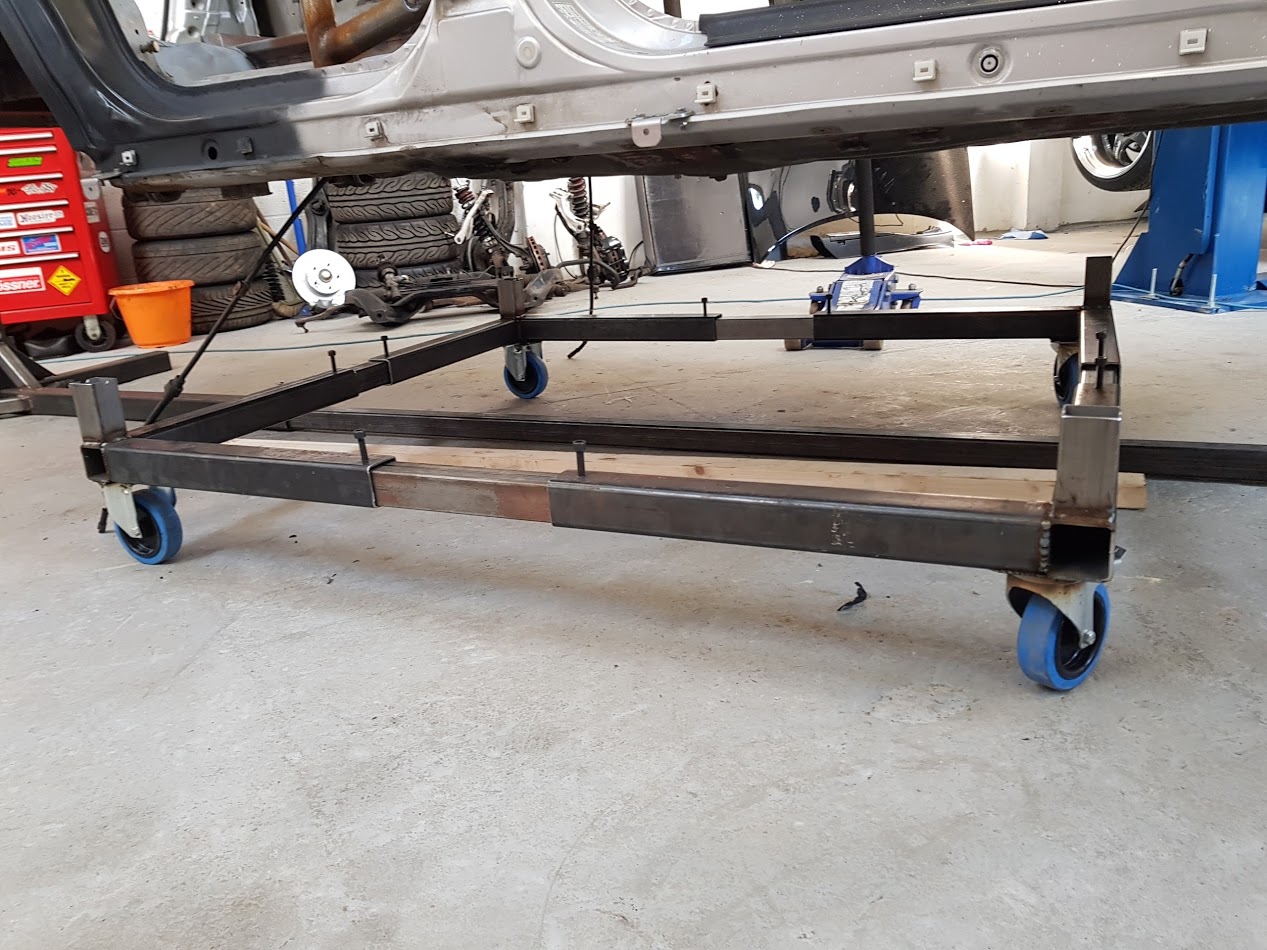
Chassis dolly so I can move it around in the new workshop:
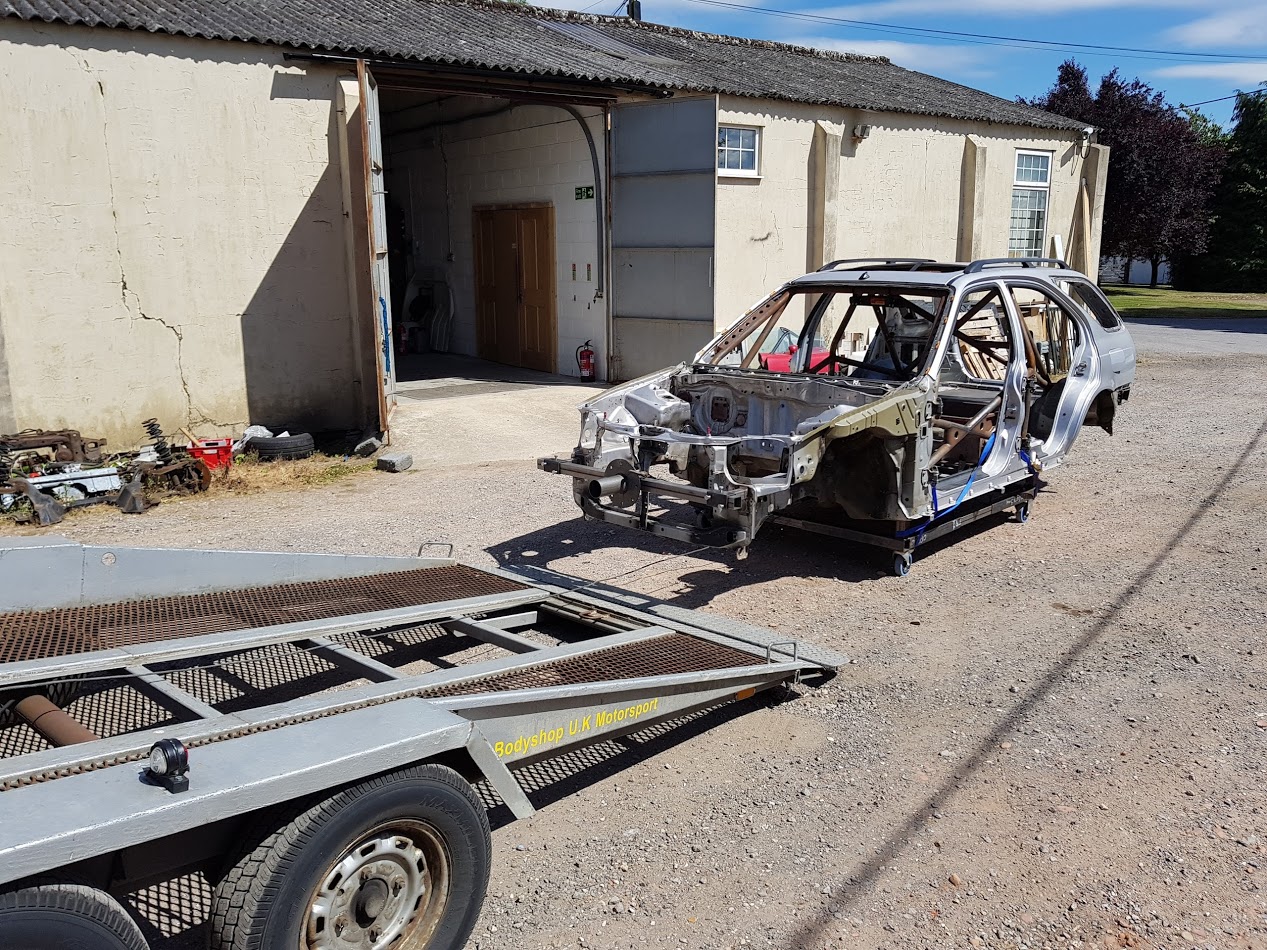
Off to the bodyshop:
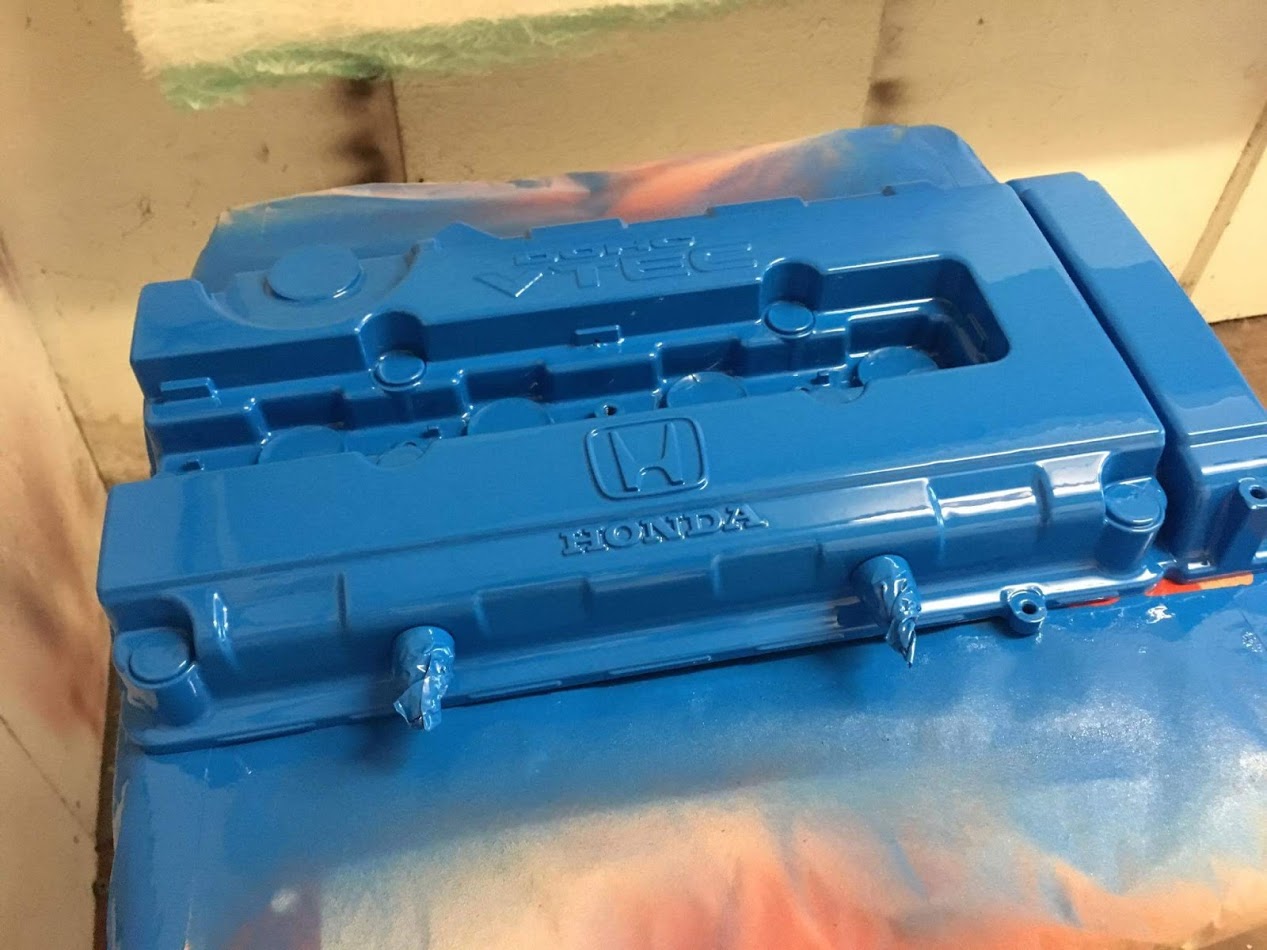
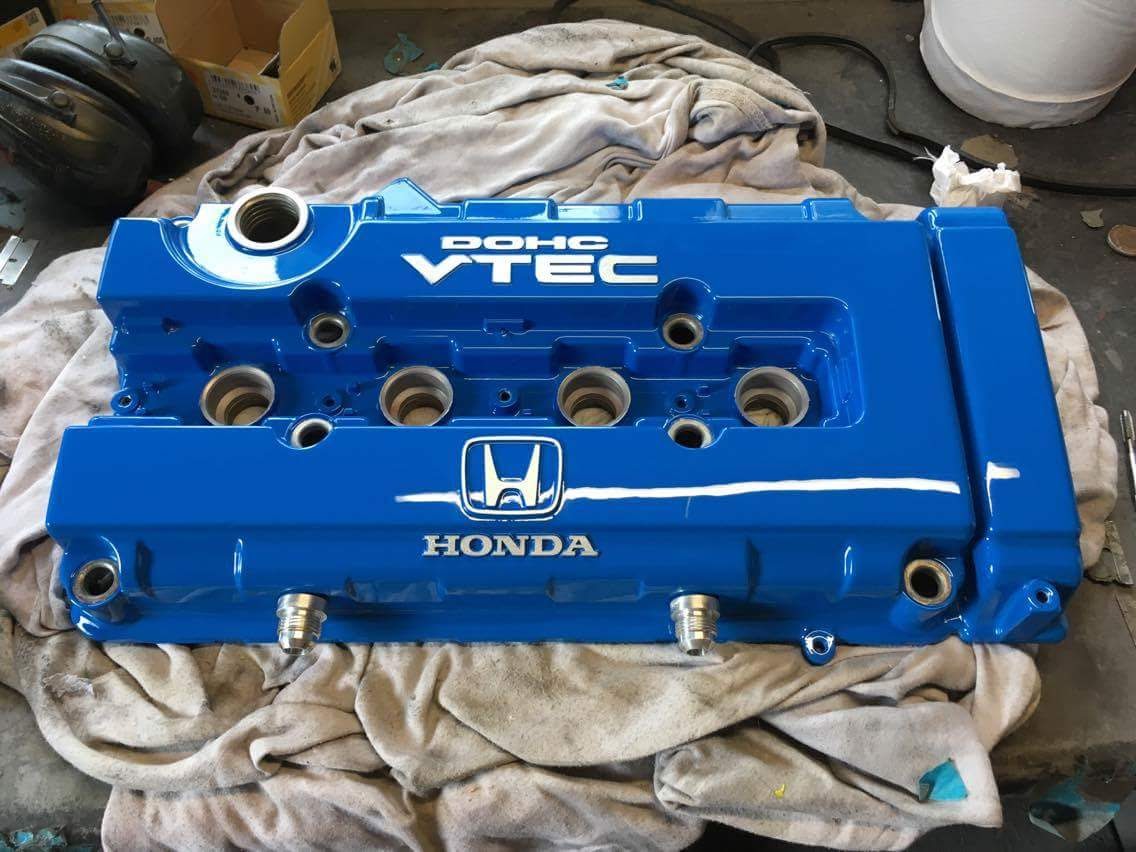
Cam cover back from Spooner Restorations
") :
:

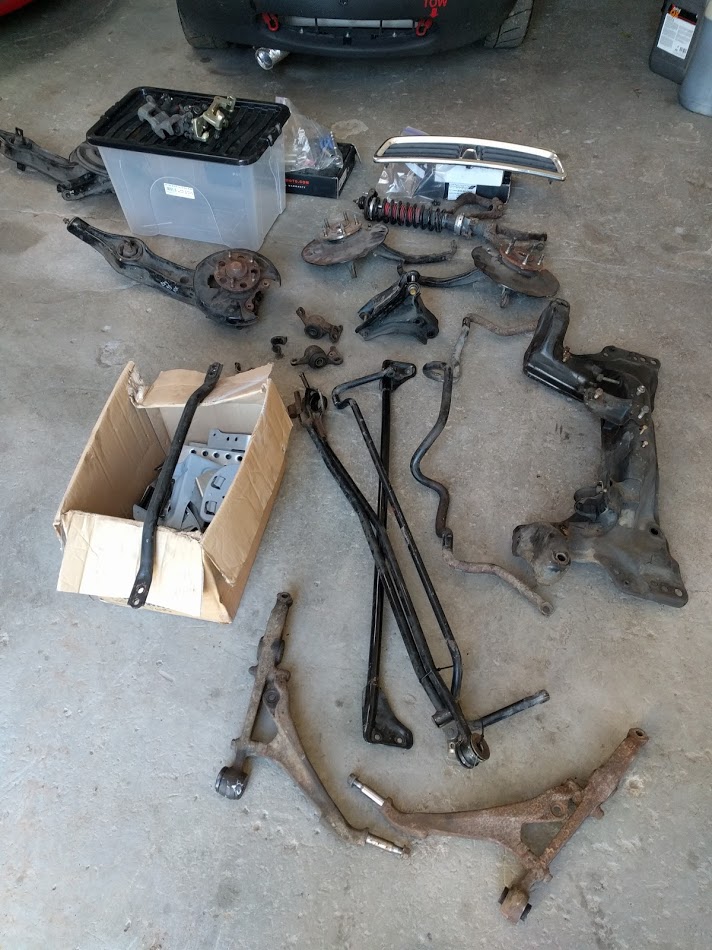
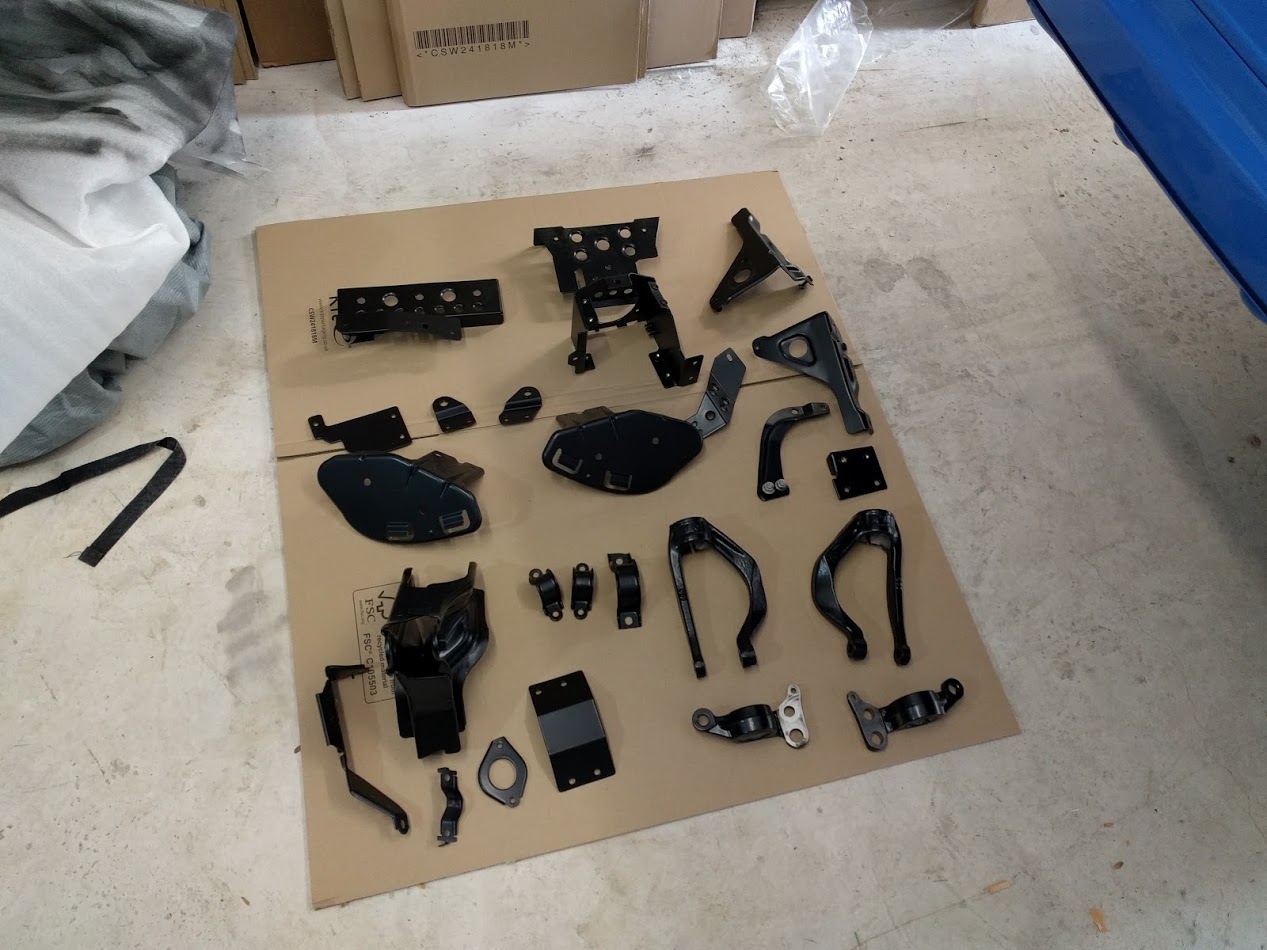
Parts for shot blasting and powder coating:
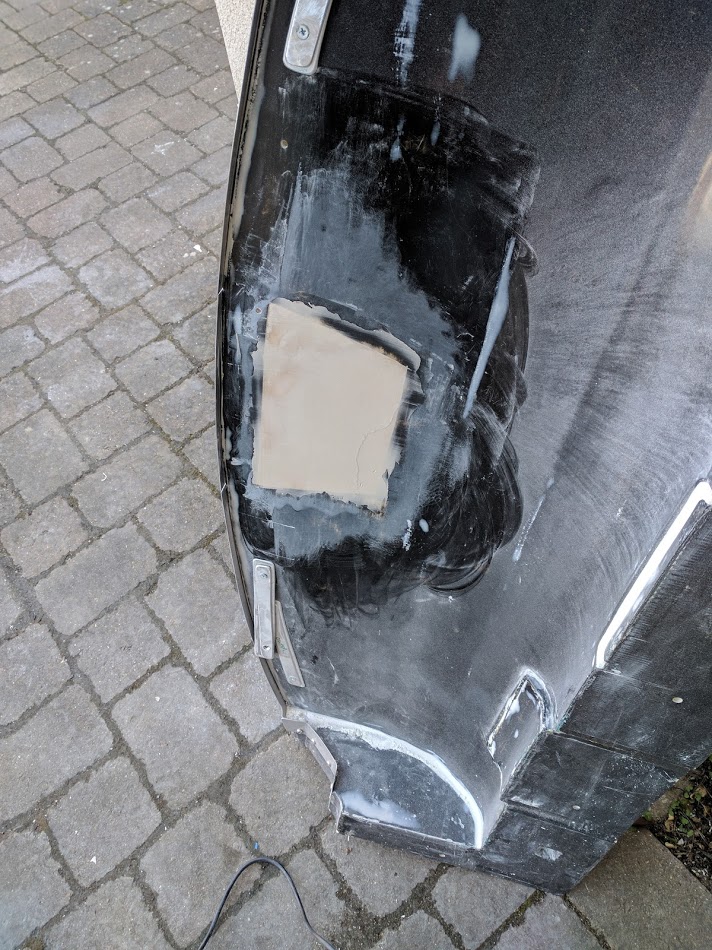
Body prep for paint:
Seam sealer around a lot of the new fabrication work like the fuel cell well
Underside black raptor
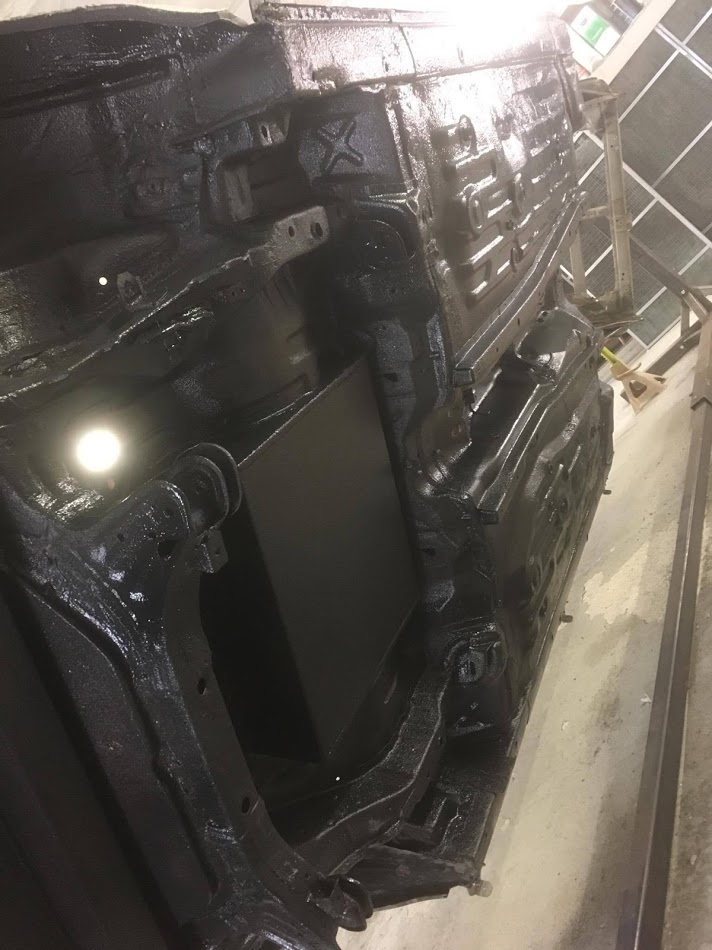
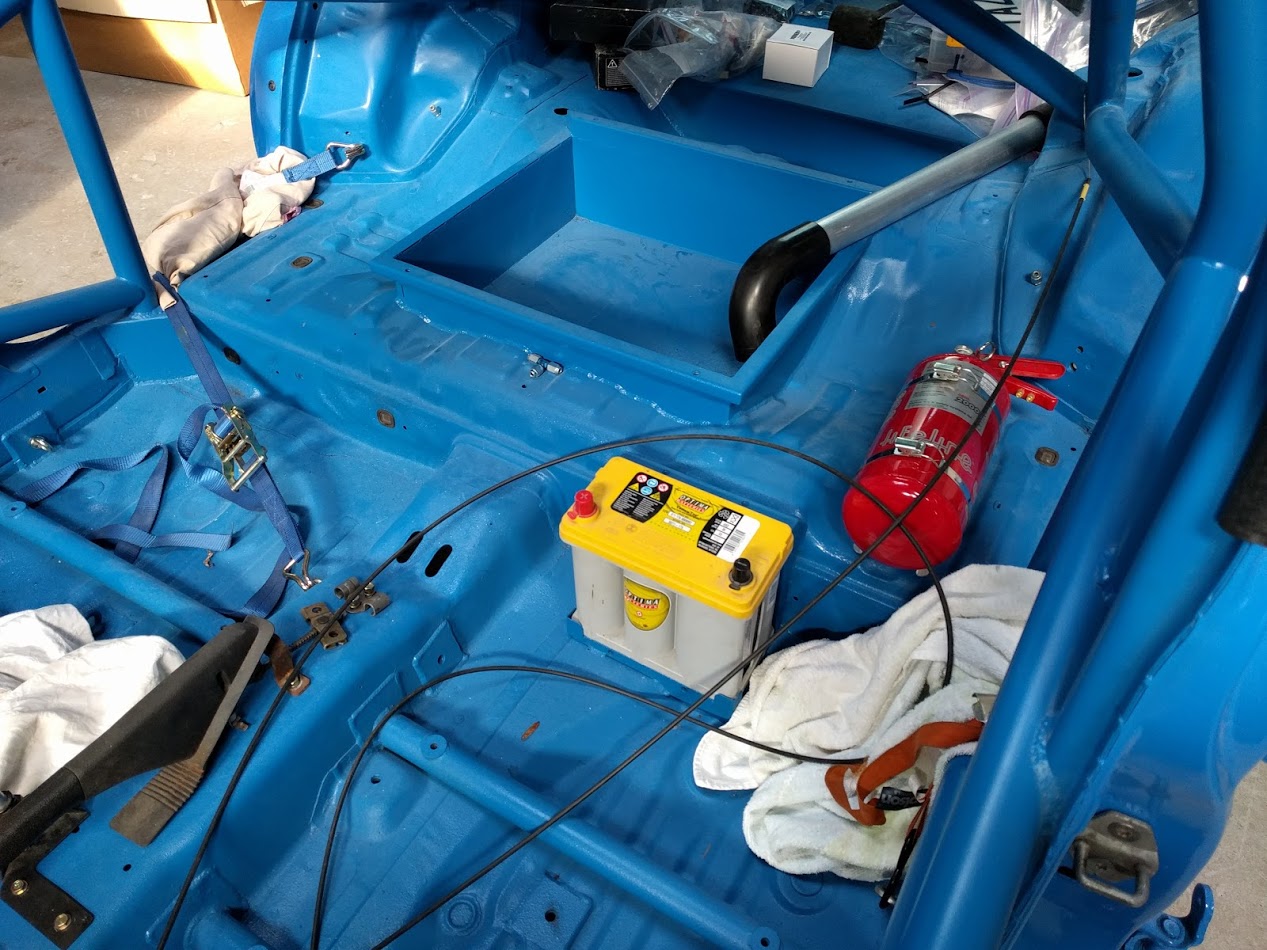
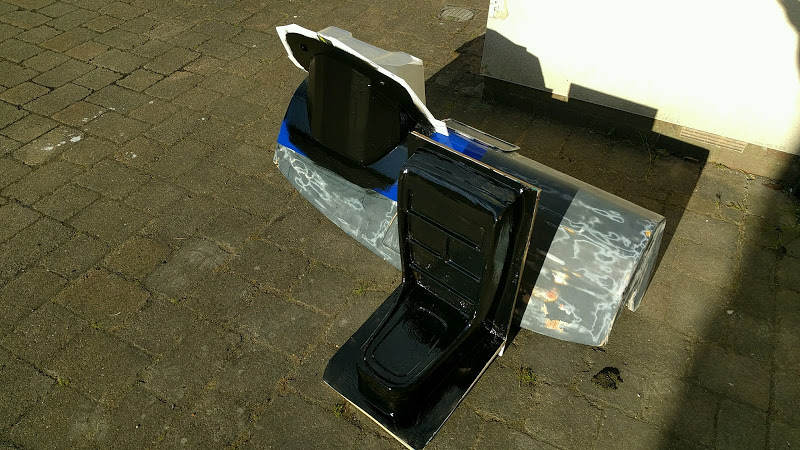
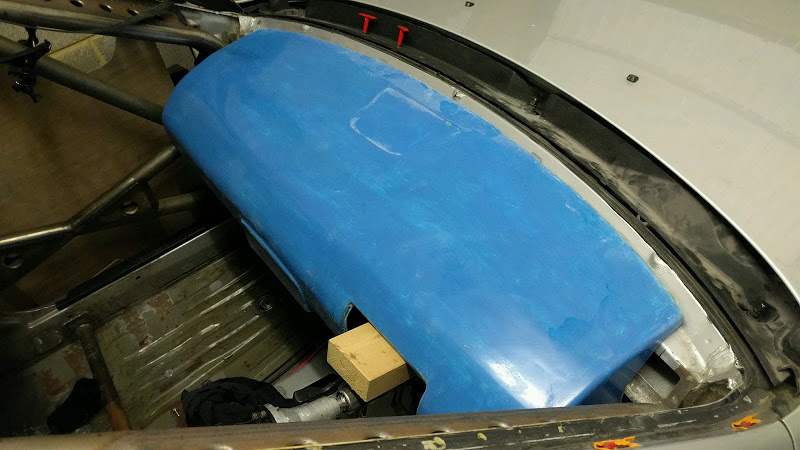
interior and engine bay are matt blue, chassis floor is blue tinted raptor
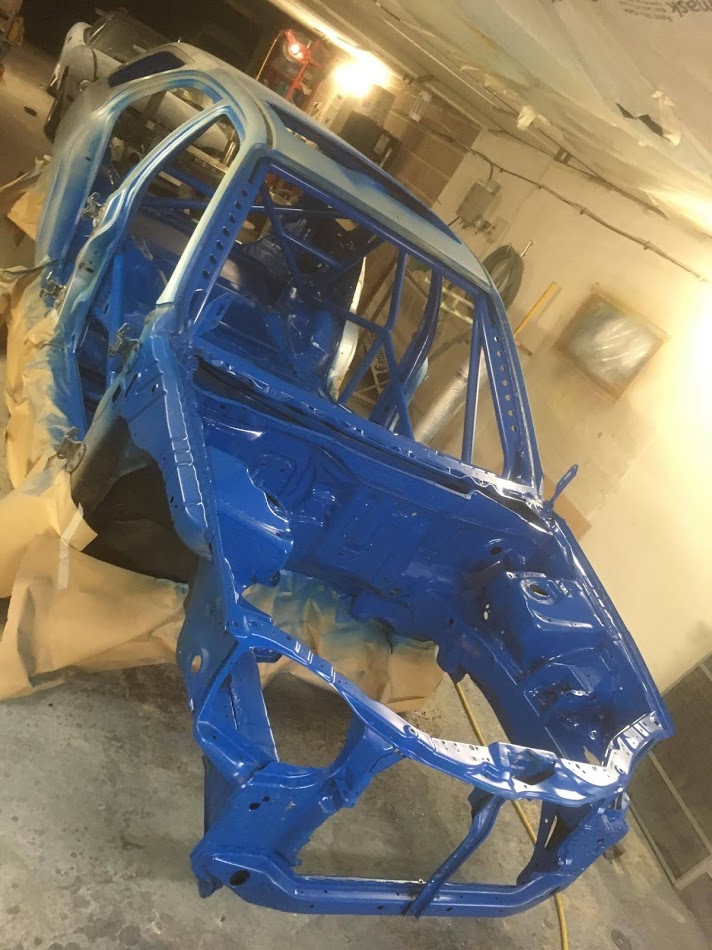
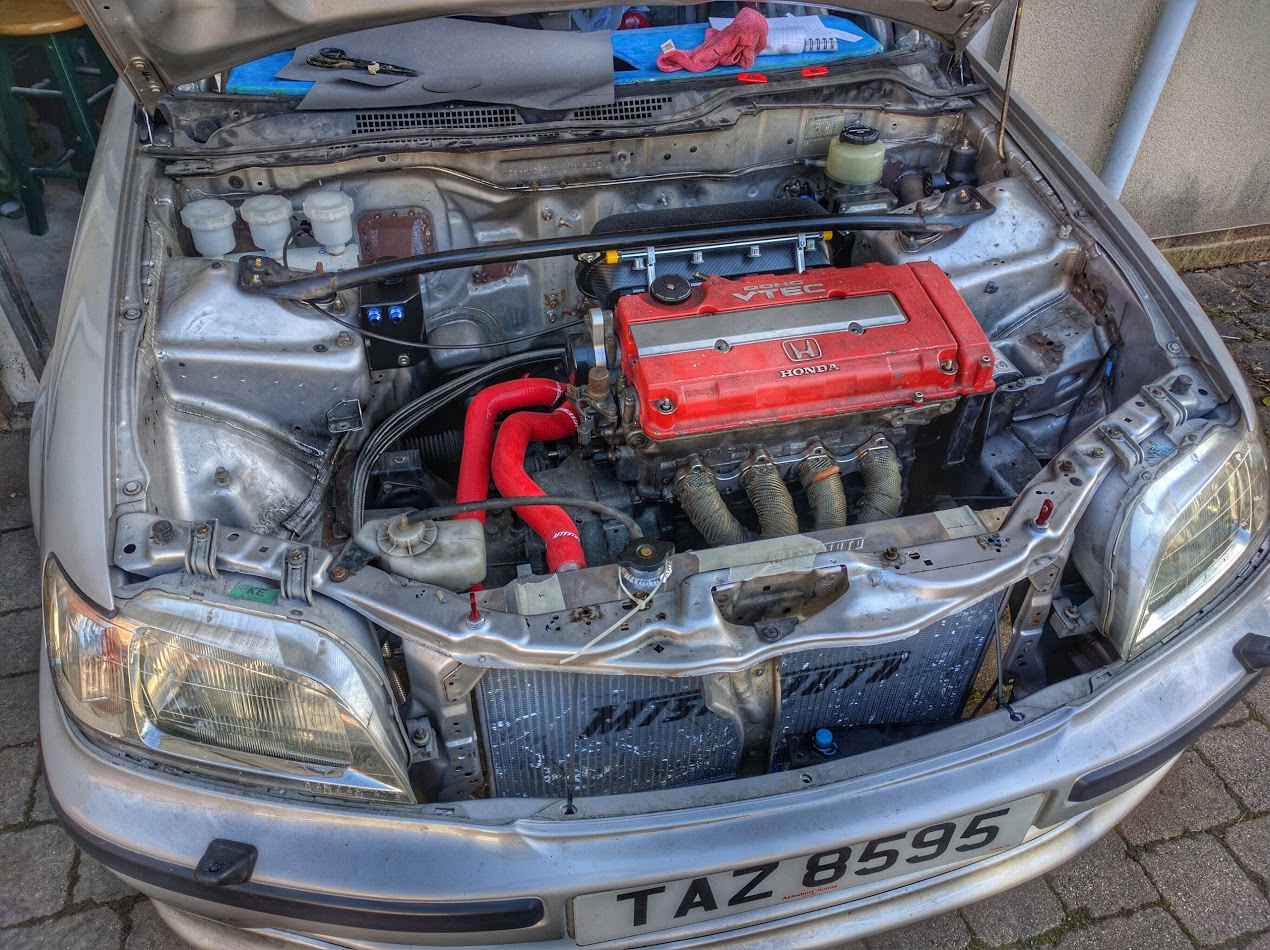
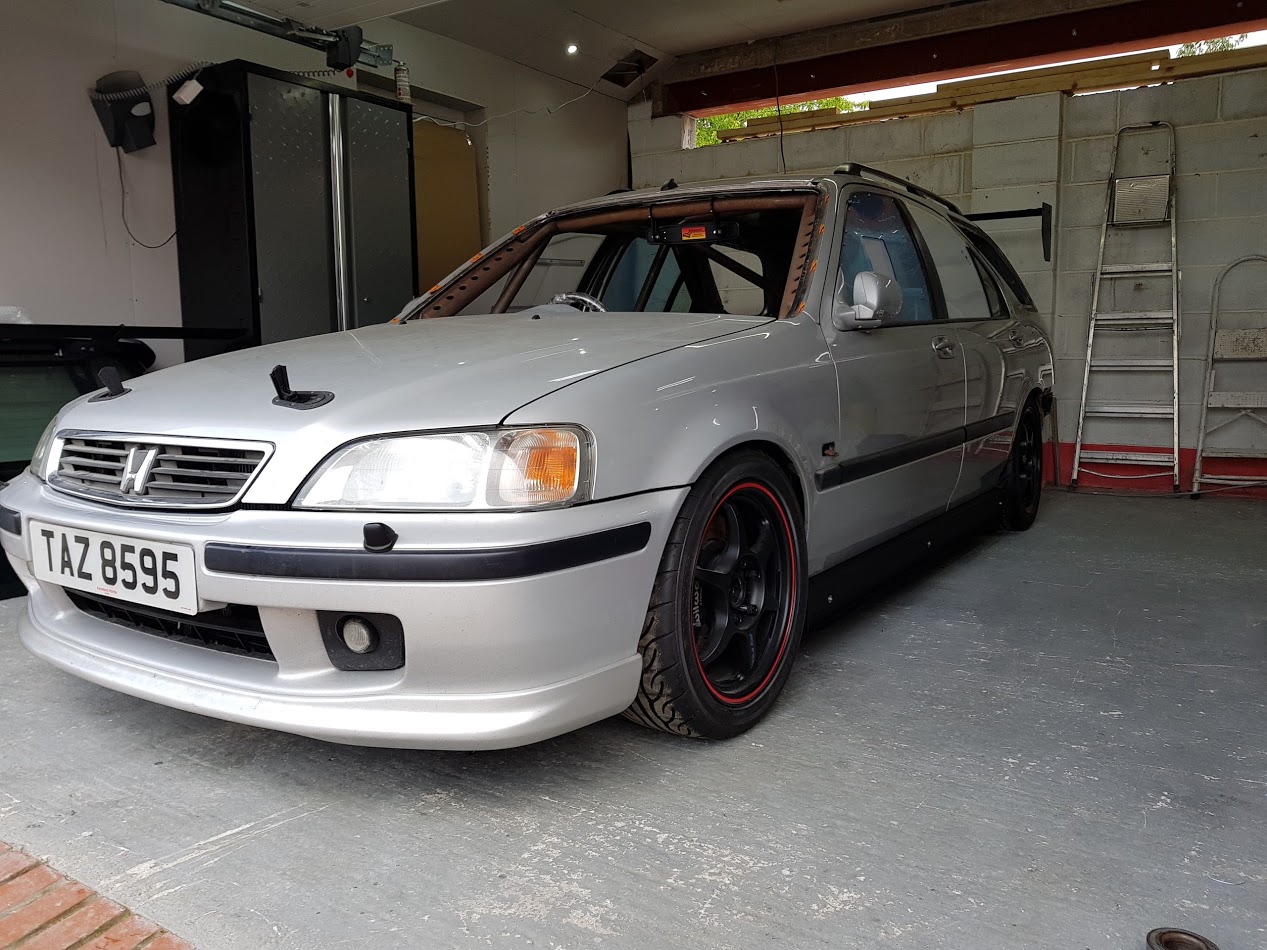
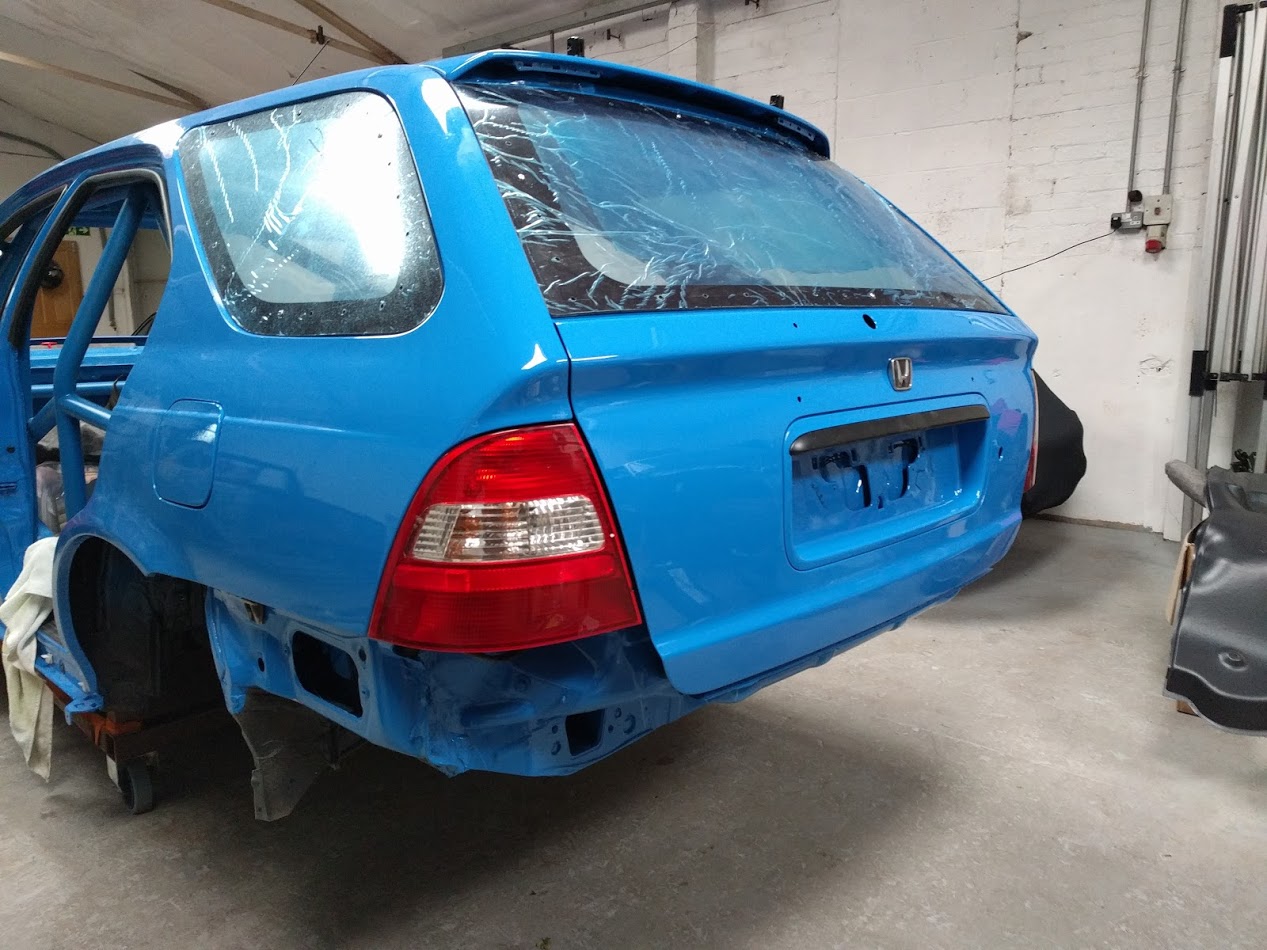
Outside is gloss French racing blue, same as the cam cover
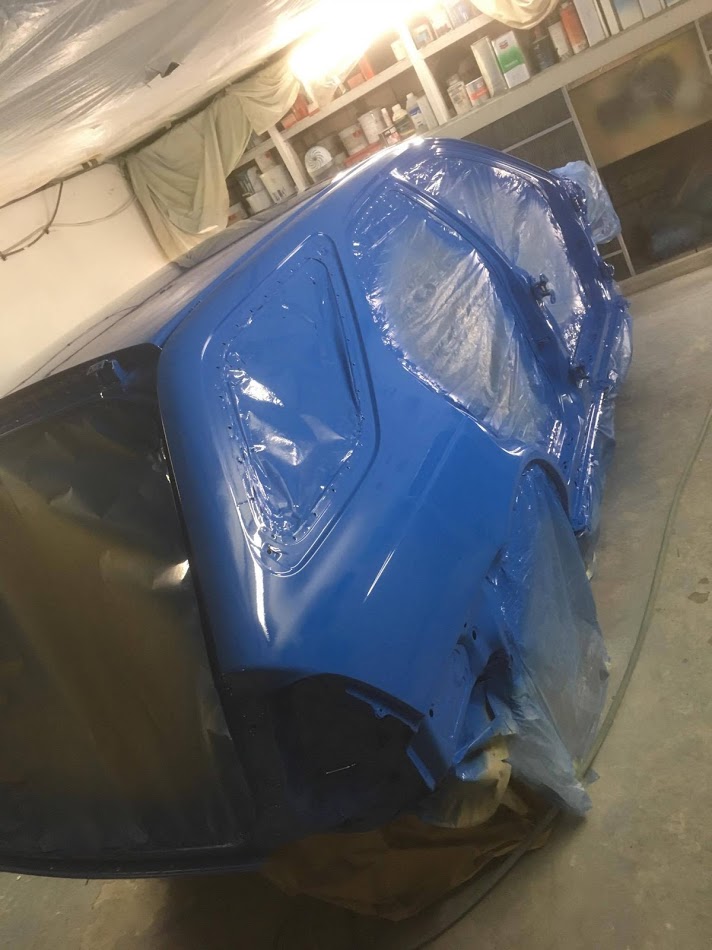
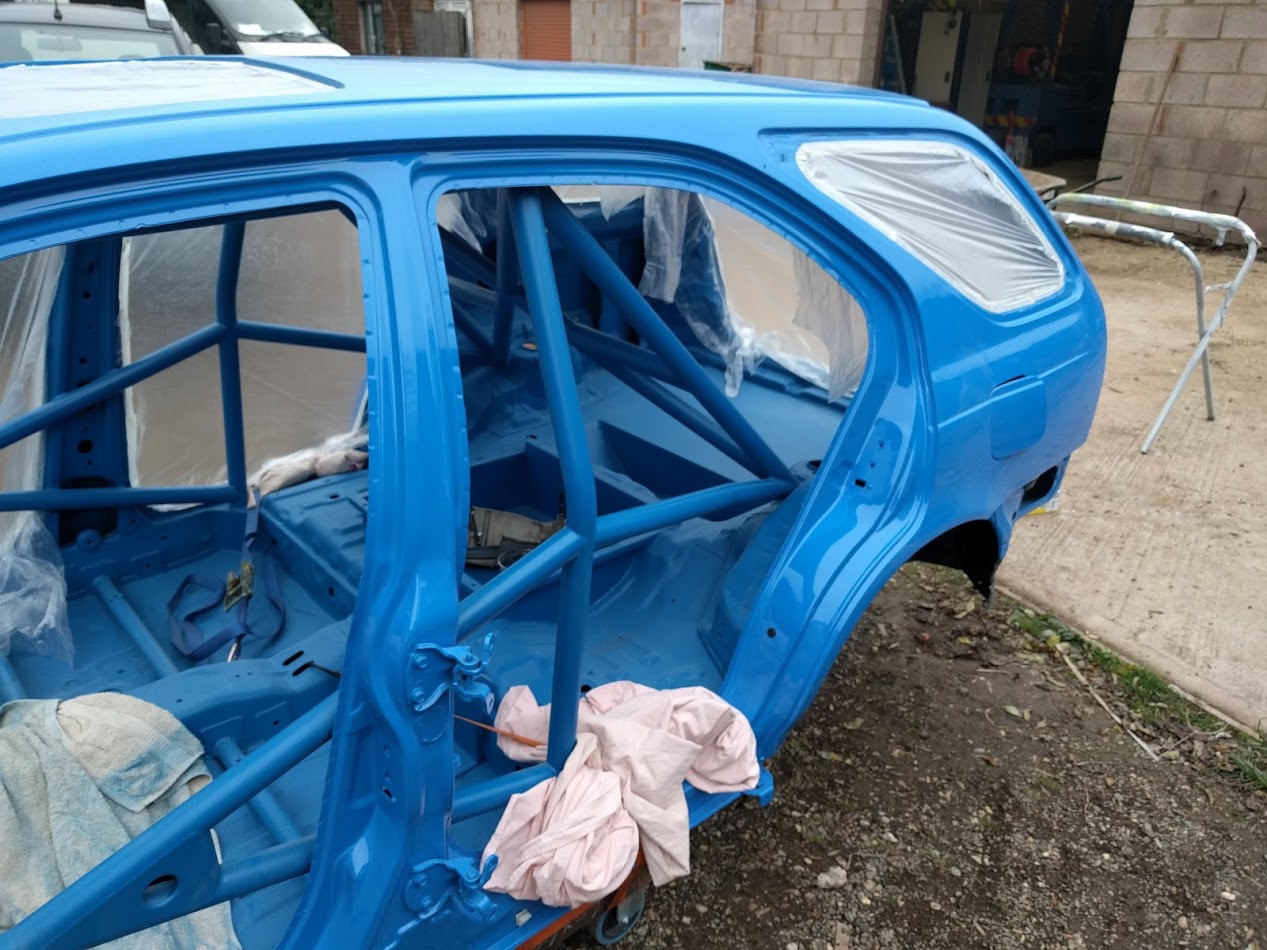
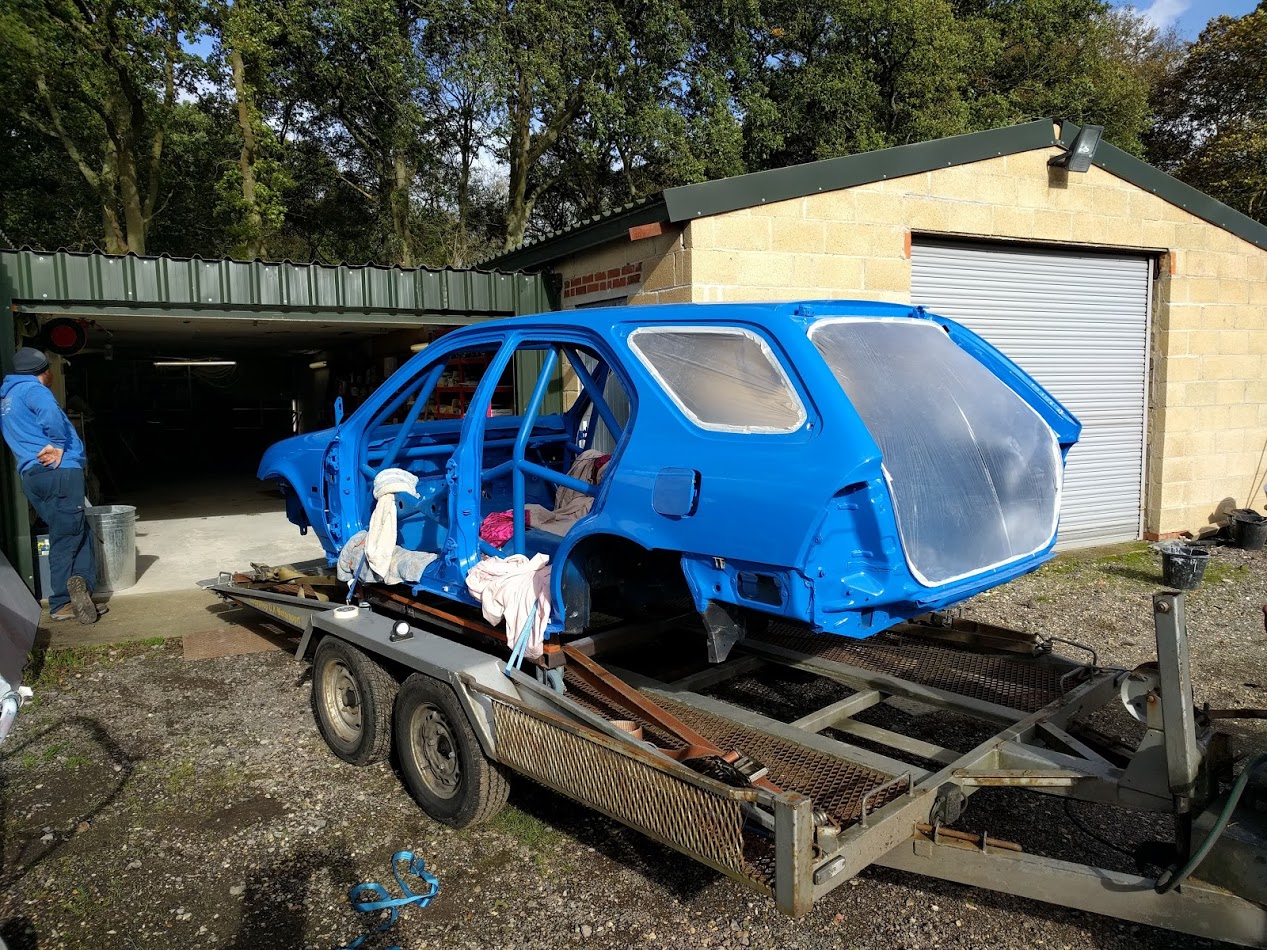
Re-assembly begins now the paint is dry
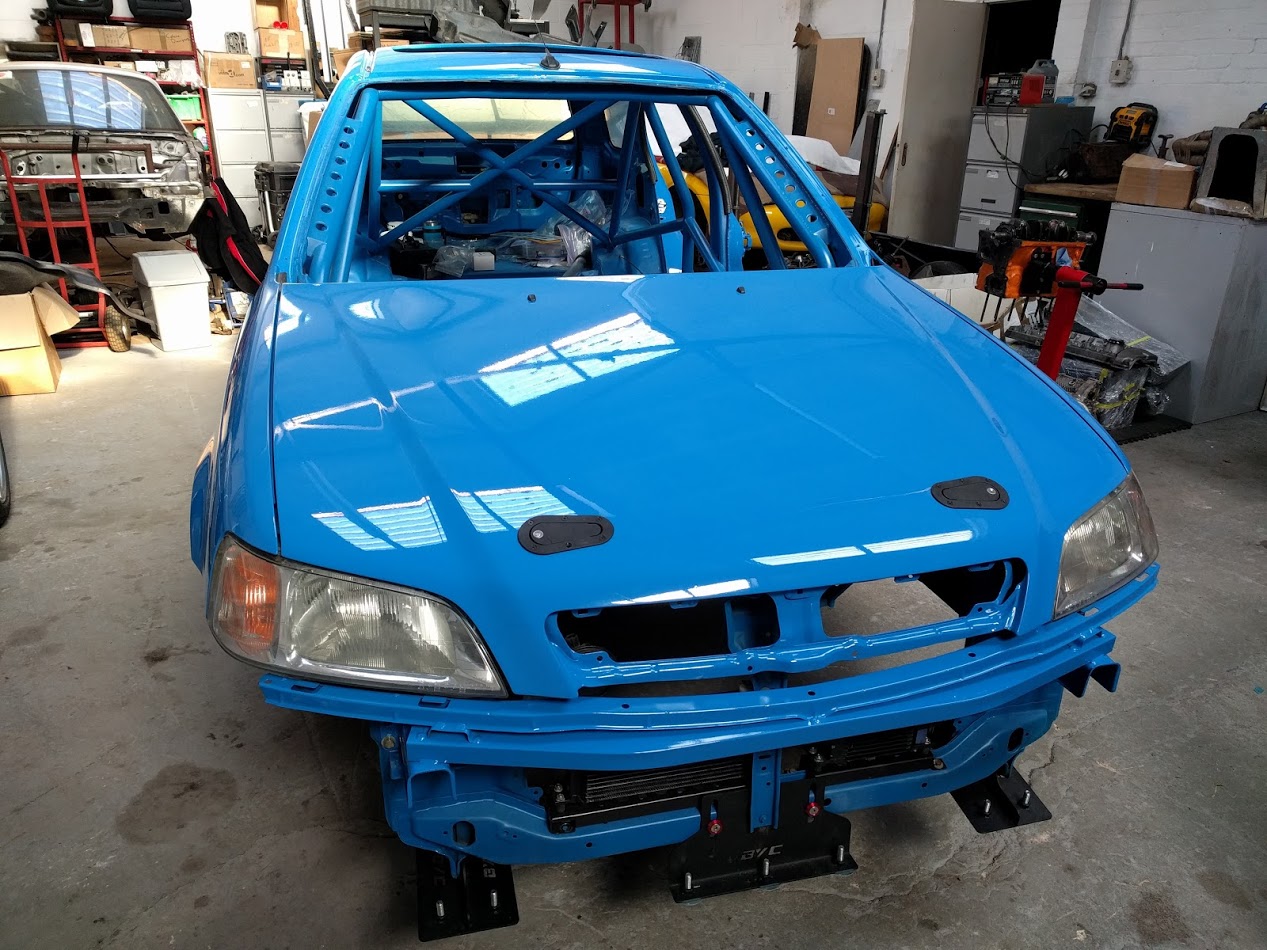
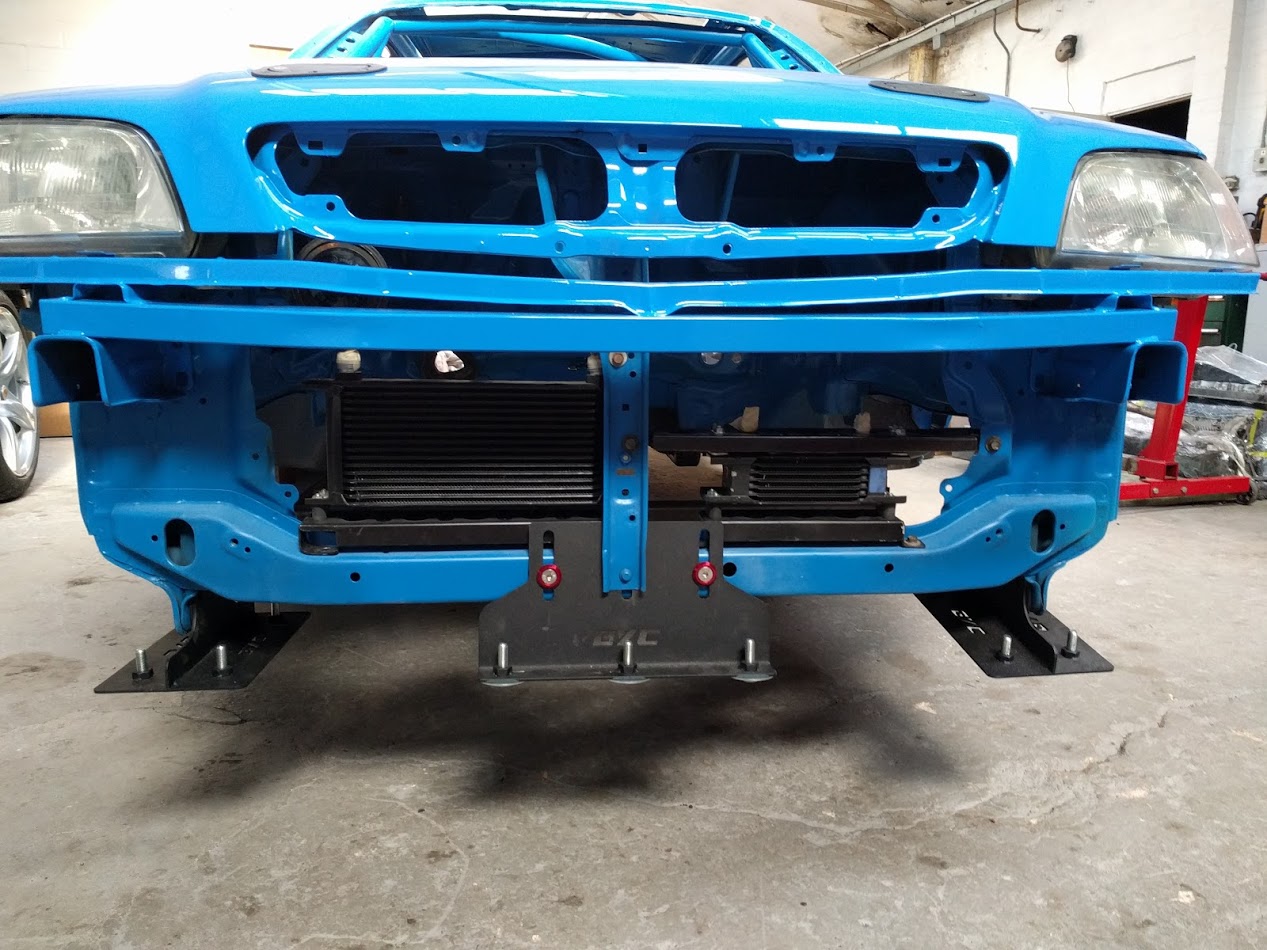
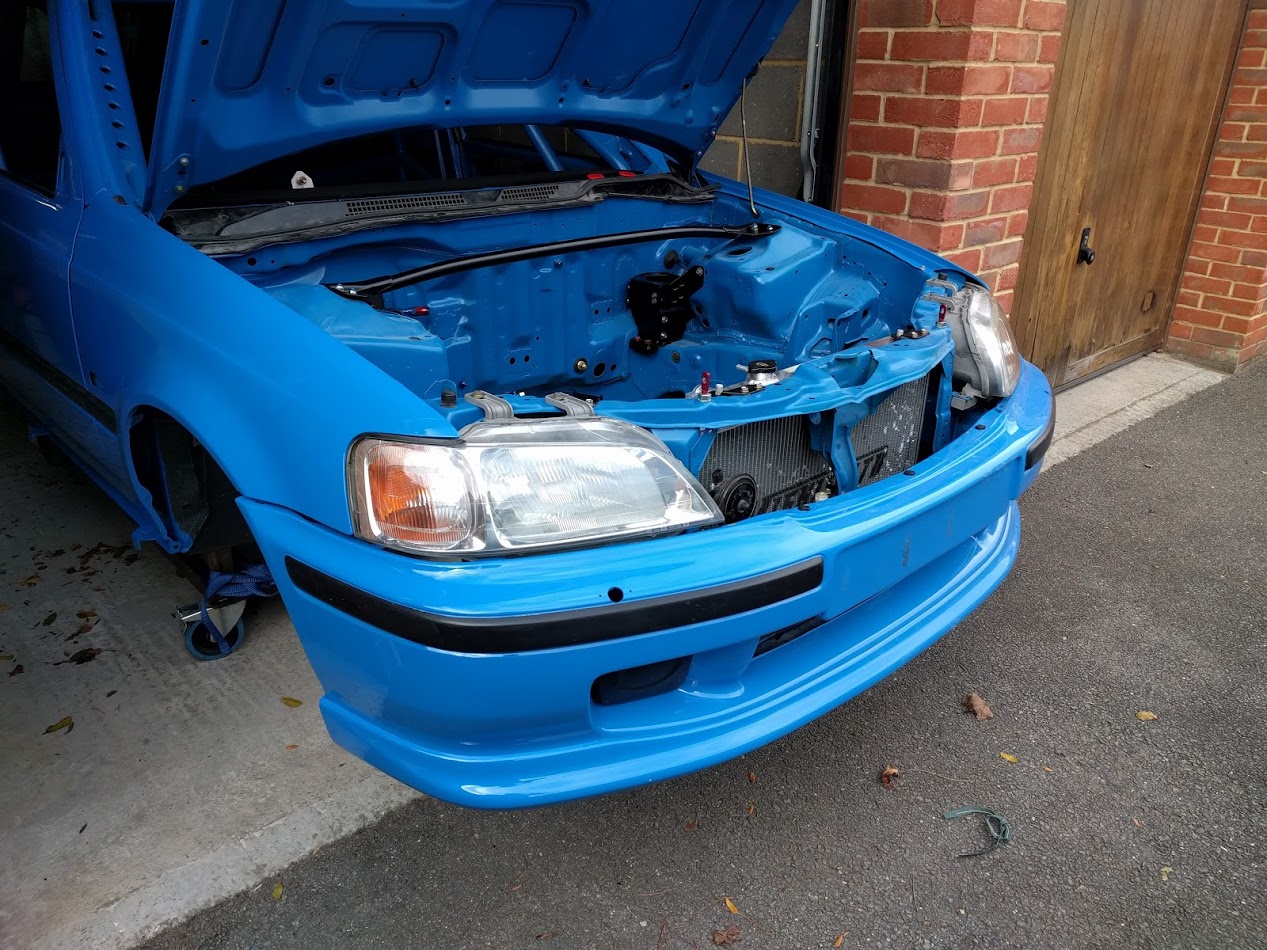
Cut the bumper to clear the center front splitter mount

Dashboard installed
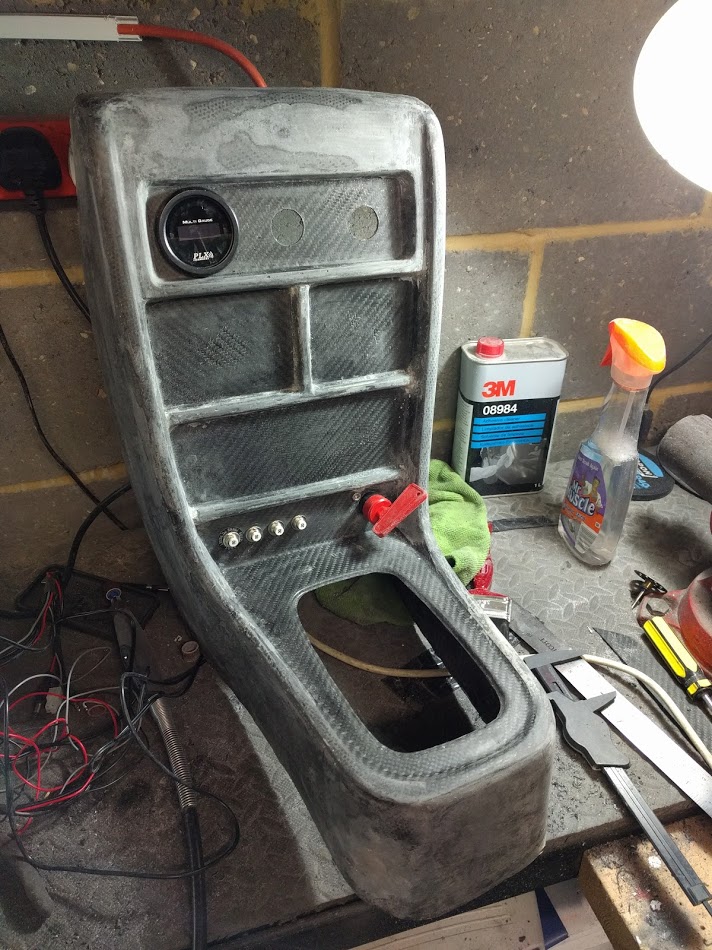
Center console in progress, second pull was much better but still not perfect, so I can use it to mock up the switches
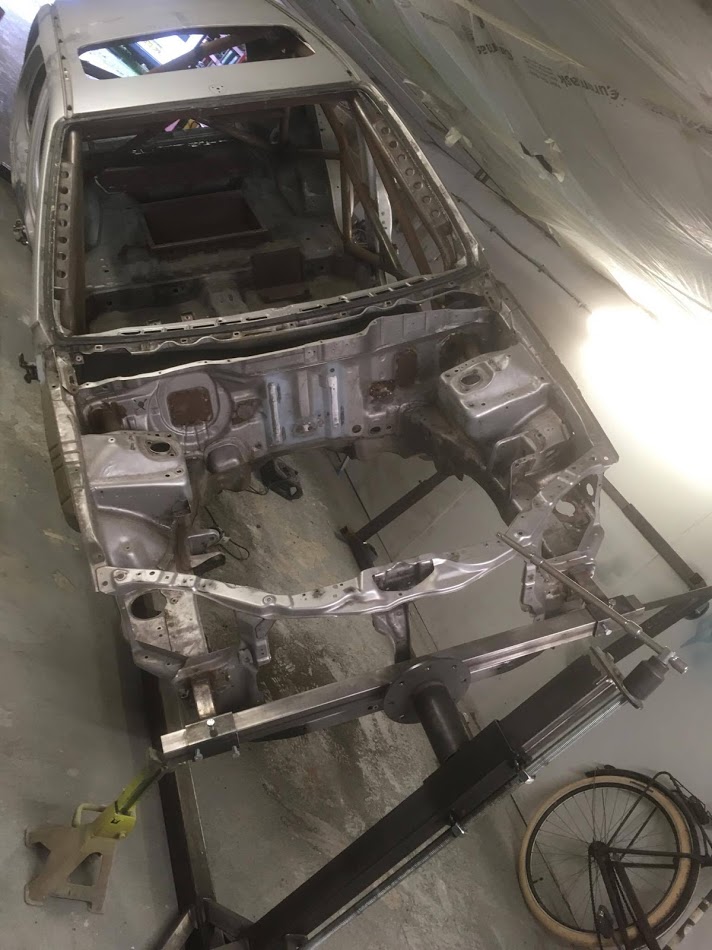
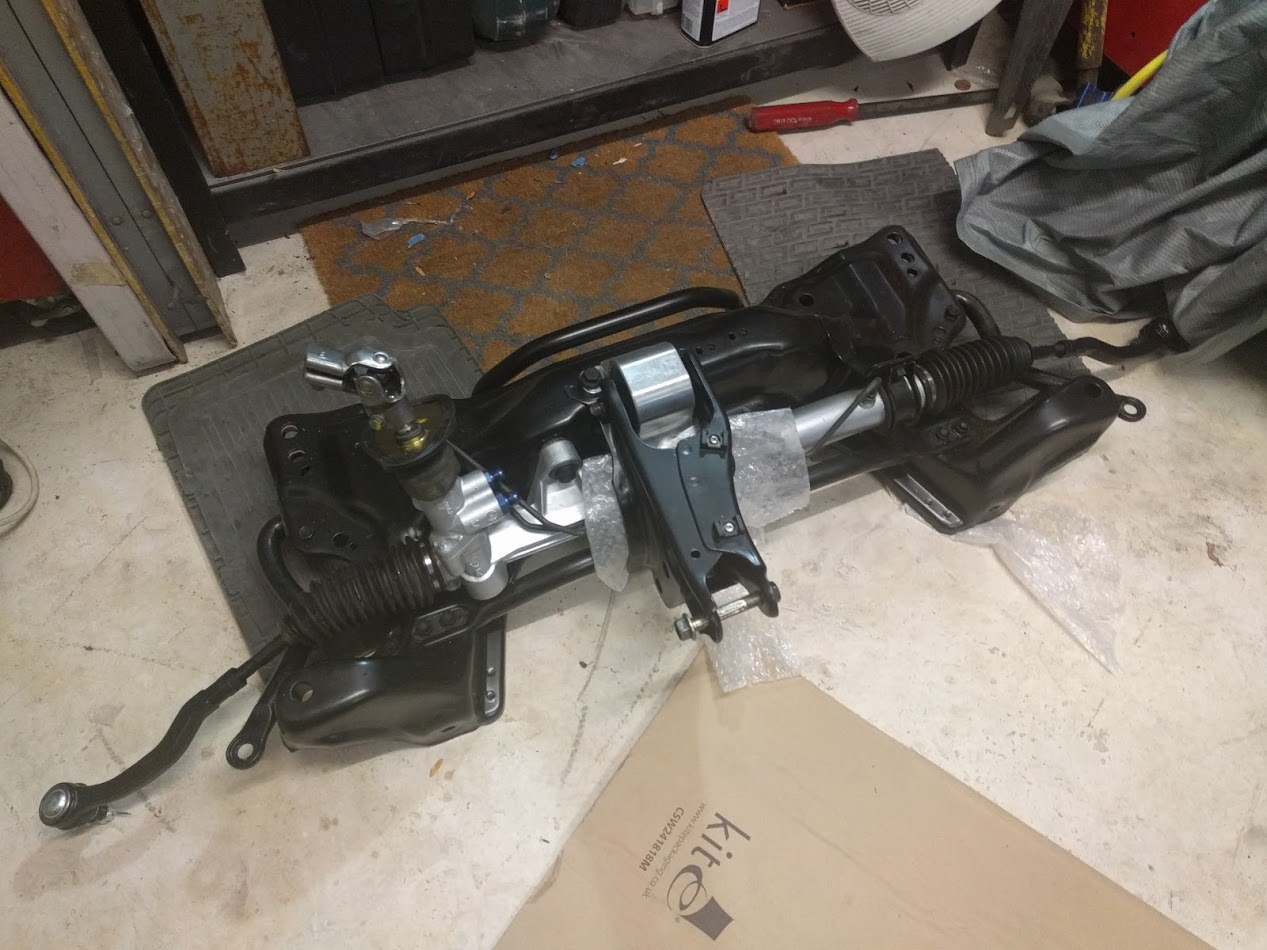
Front subframe, steering rack and ball joints all refreshed, new engine mounts all ready to be installed
Finally, engine progress:
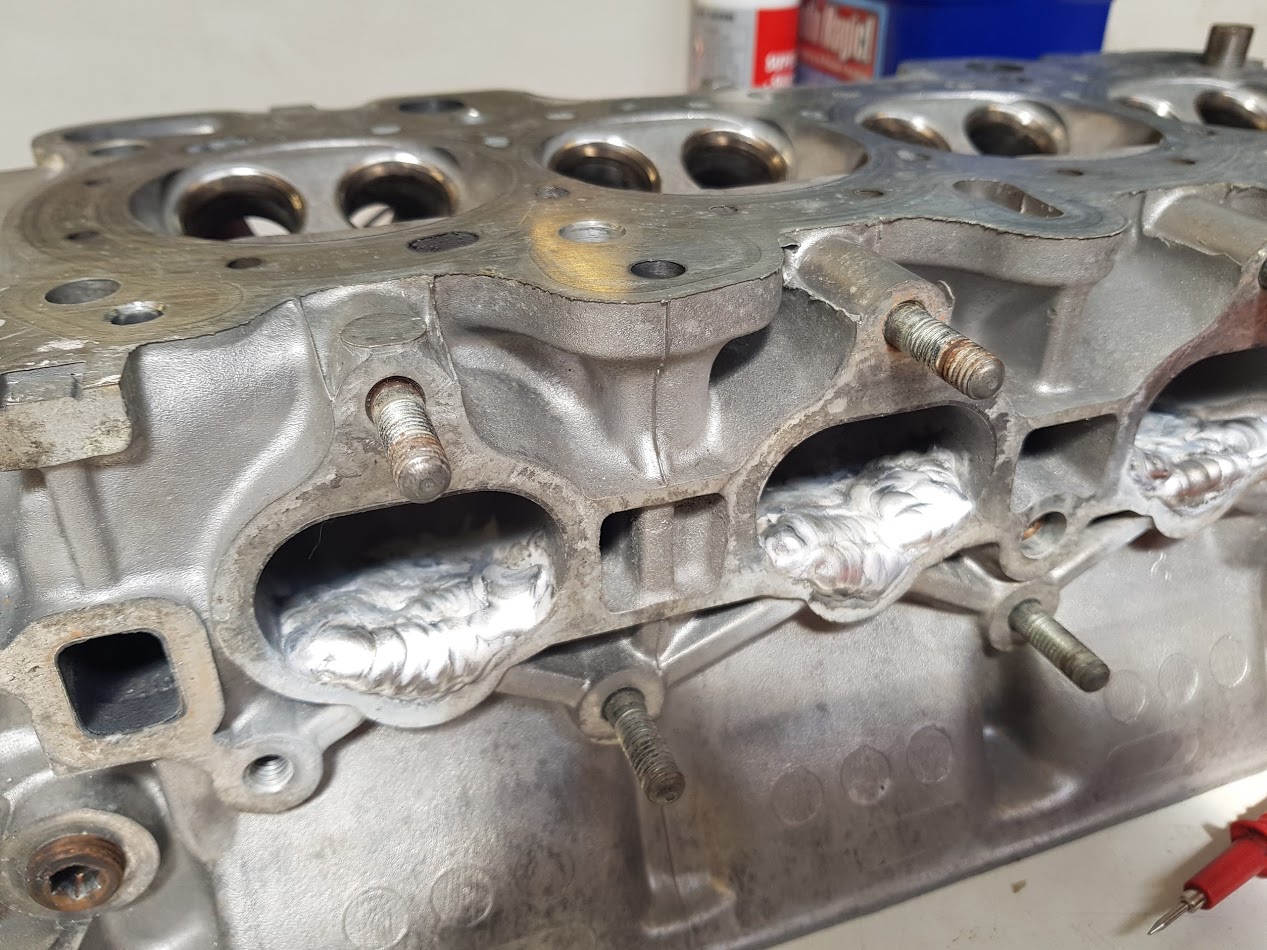
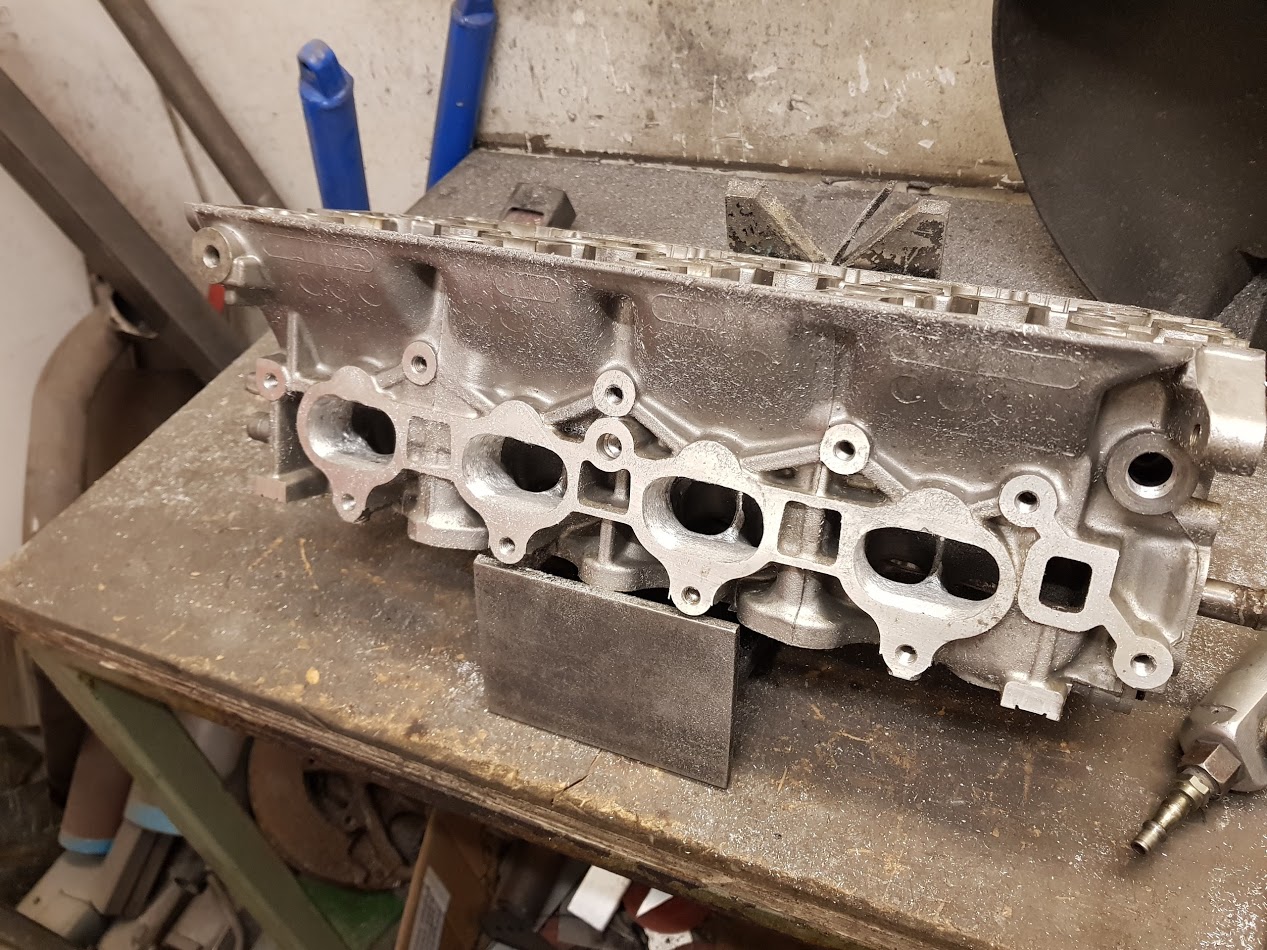
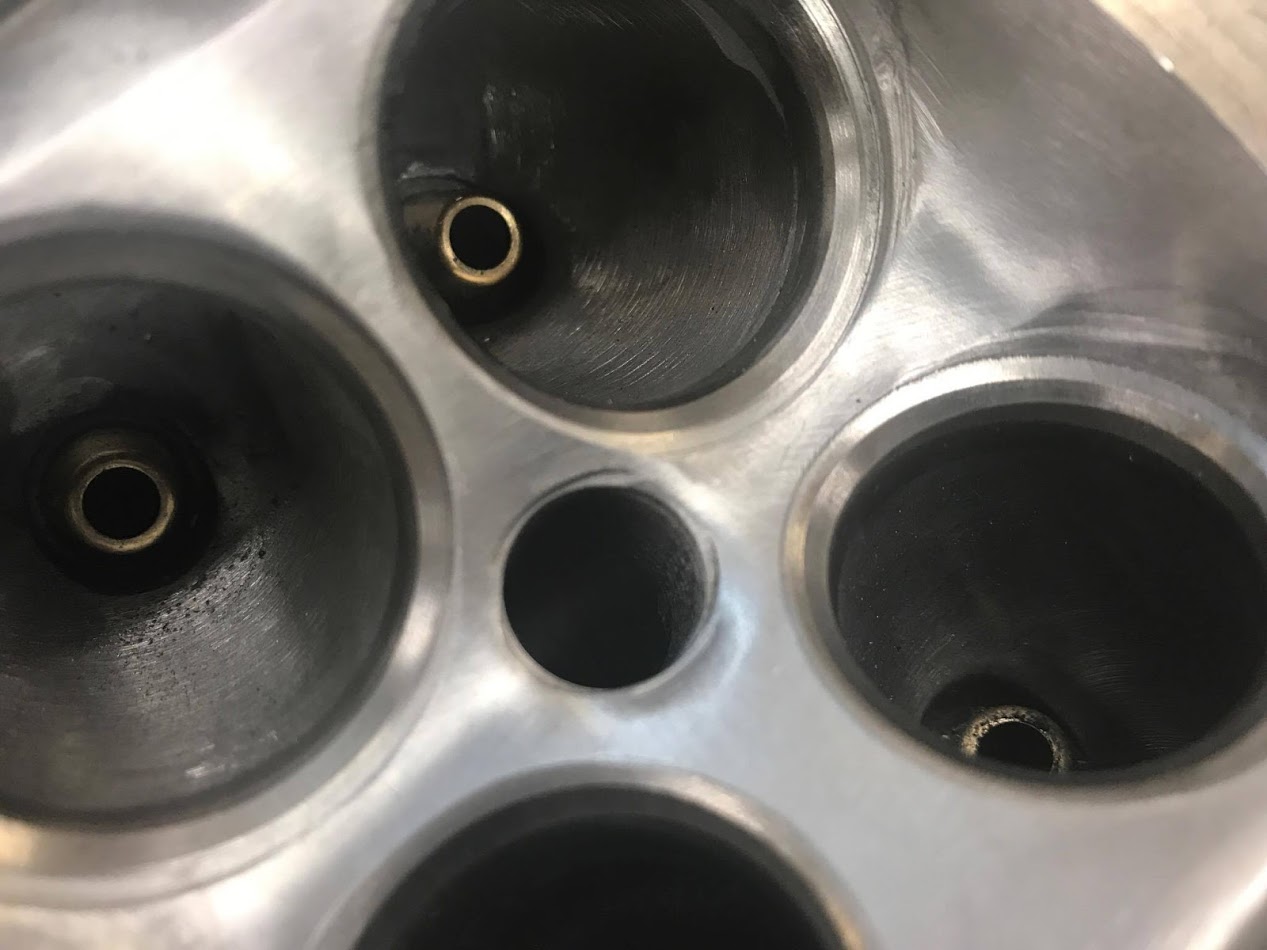
Intake ports filled in and matched to intake manifold

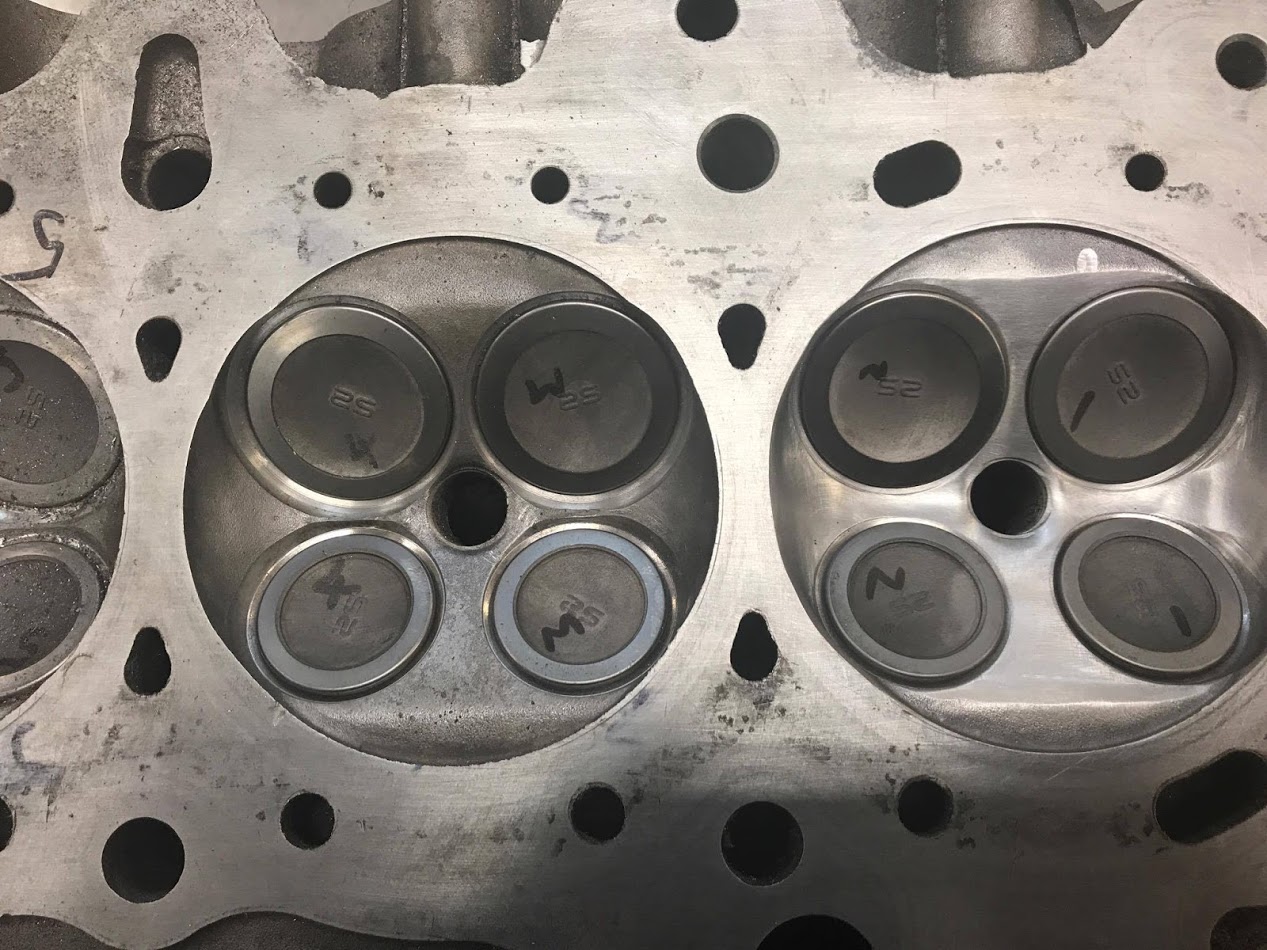
New valves installed and 3 stage valve job done.
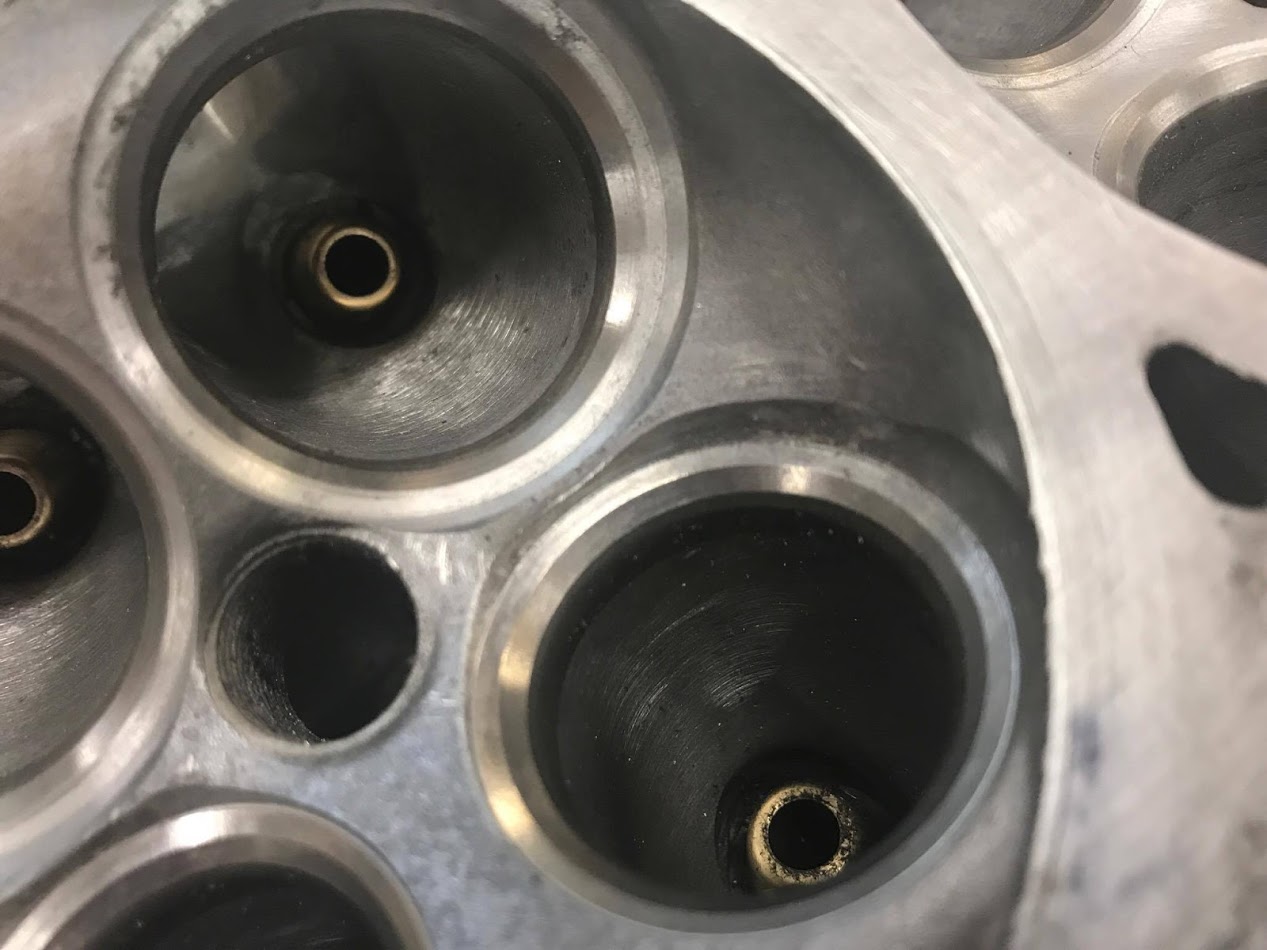
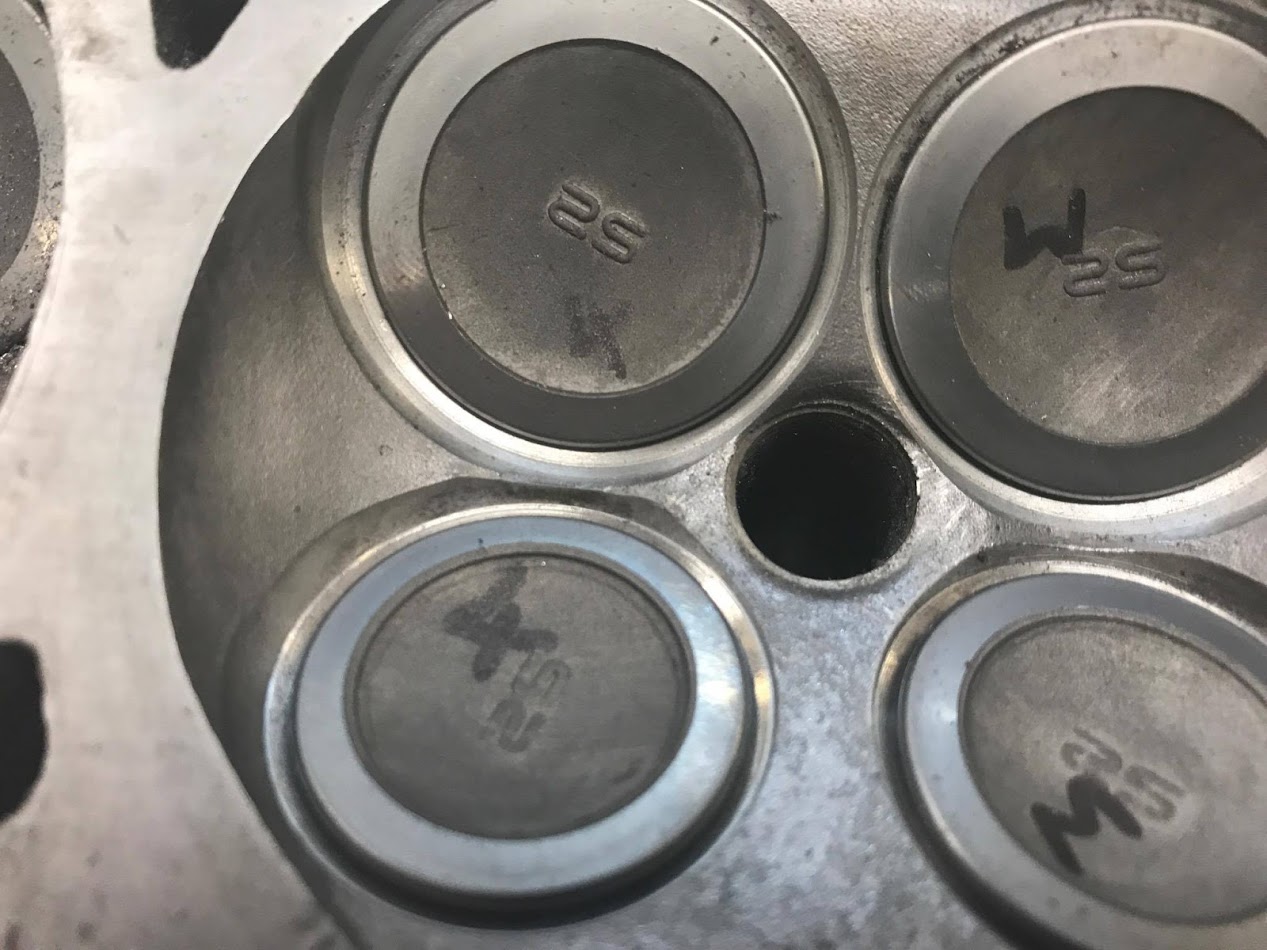
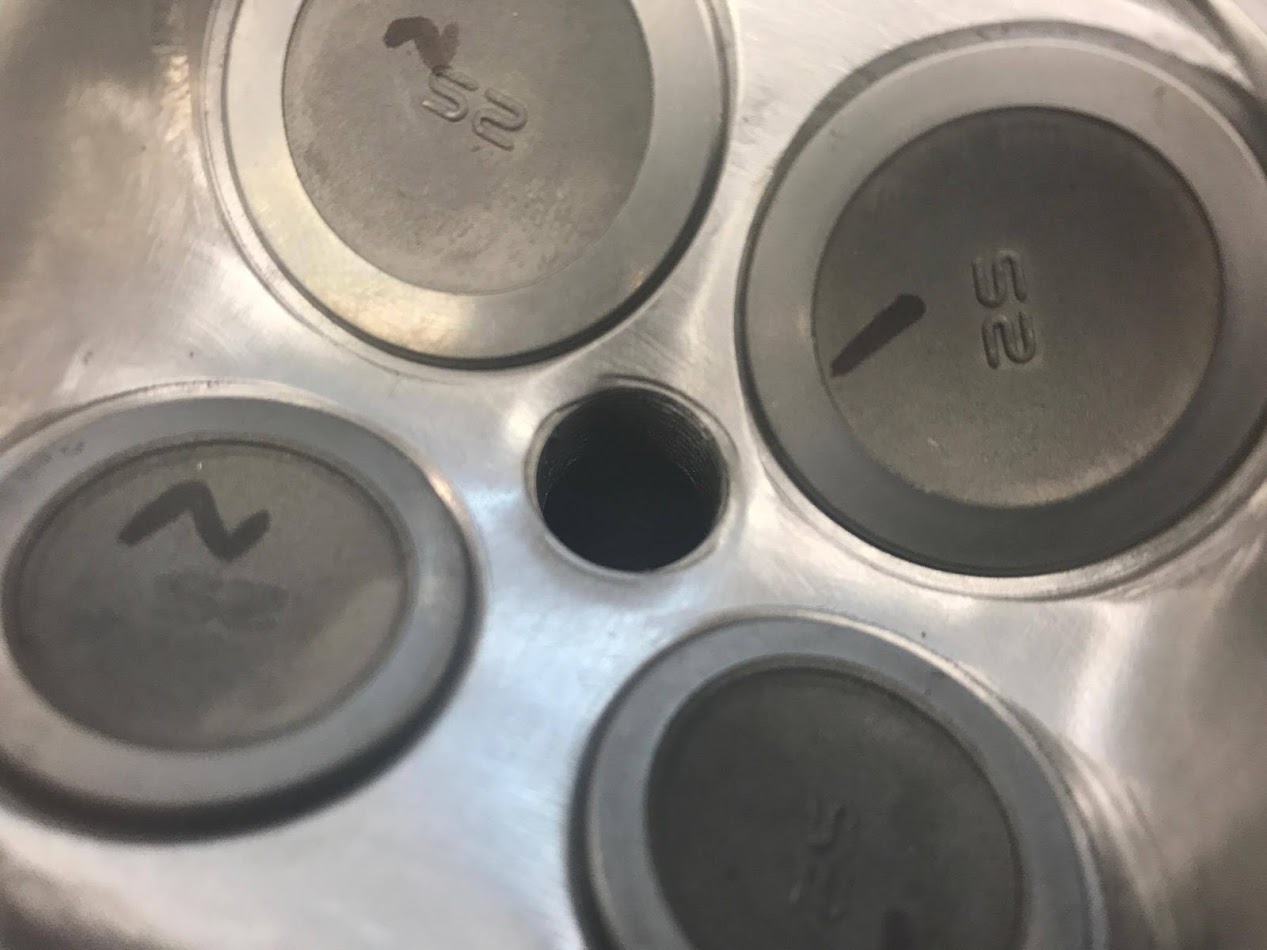
Difference left to right
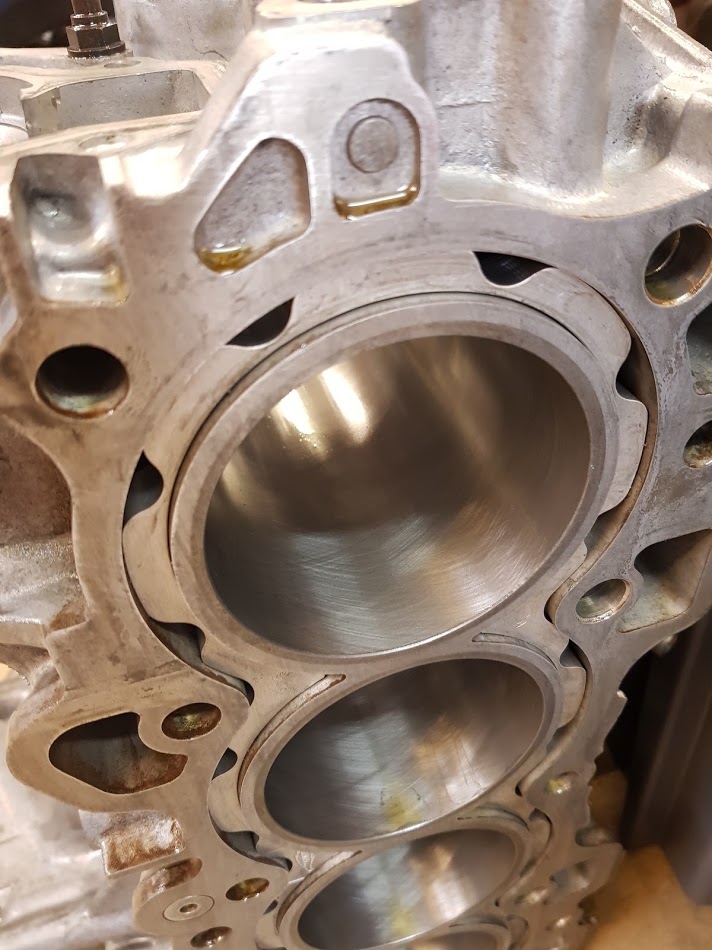
Block was cleaned, soda blasted and prepped (all bolts and brackets removed. Block guard fitted, bores machined true (+0.5mm) and honed

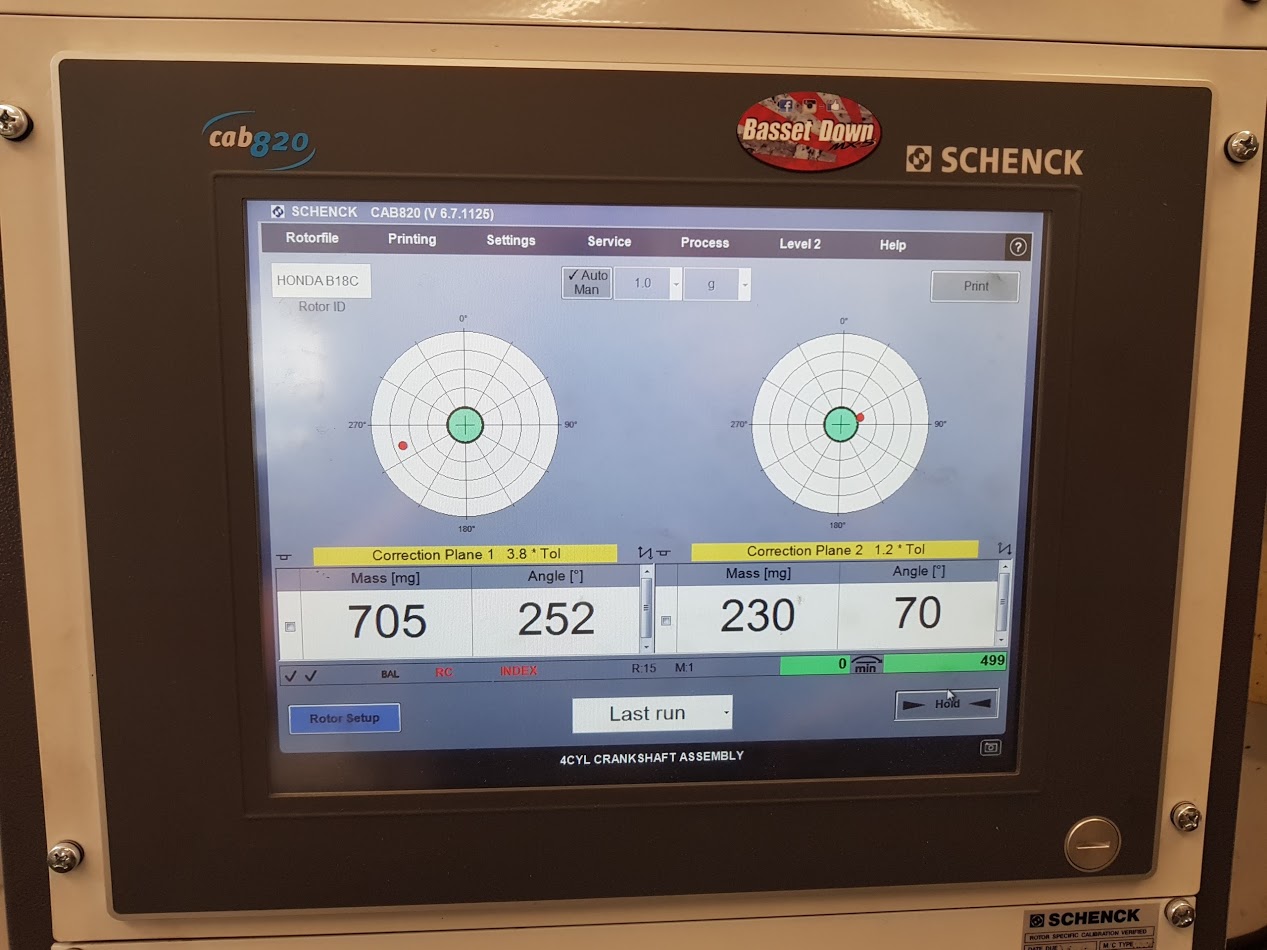
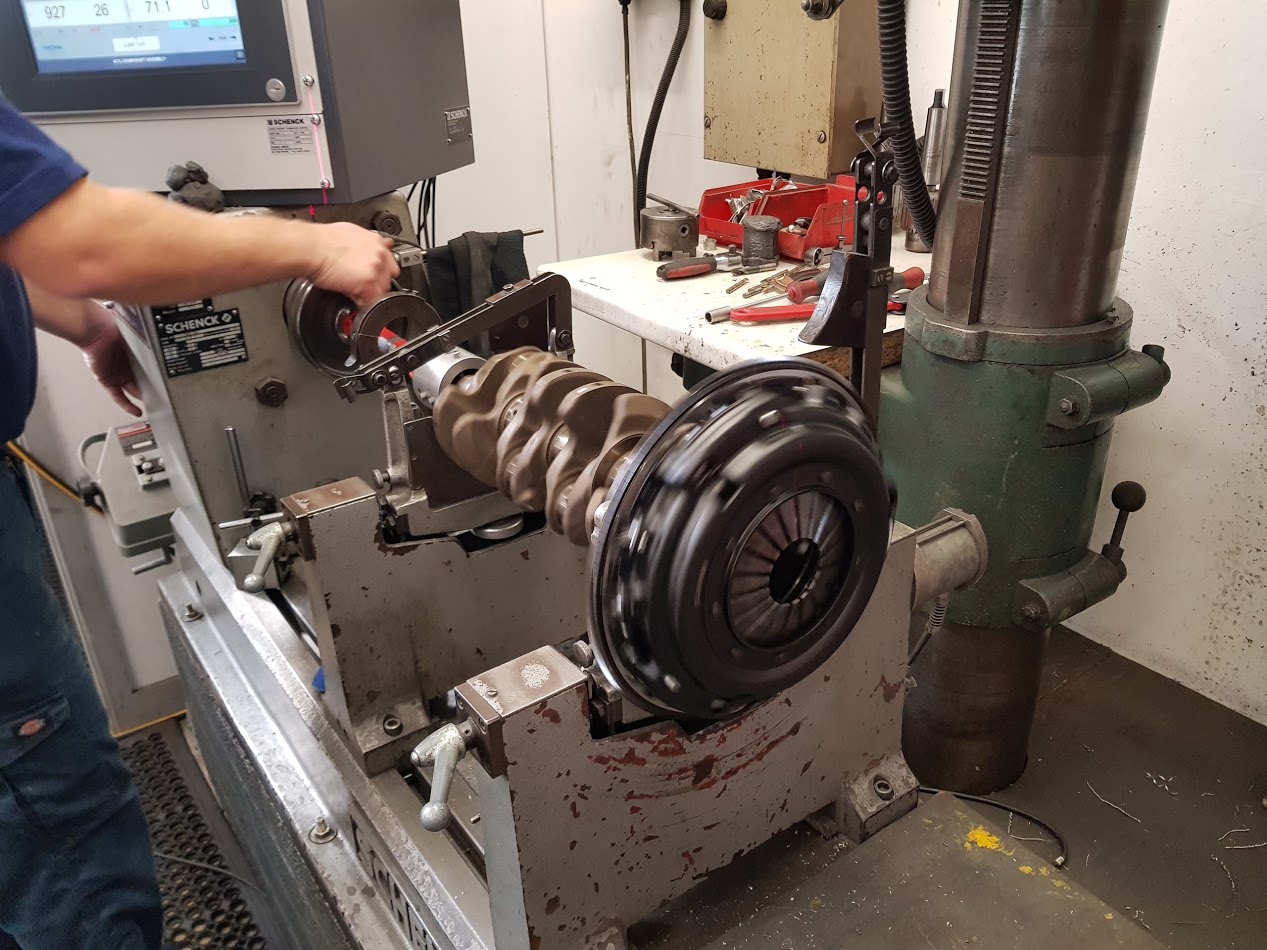
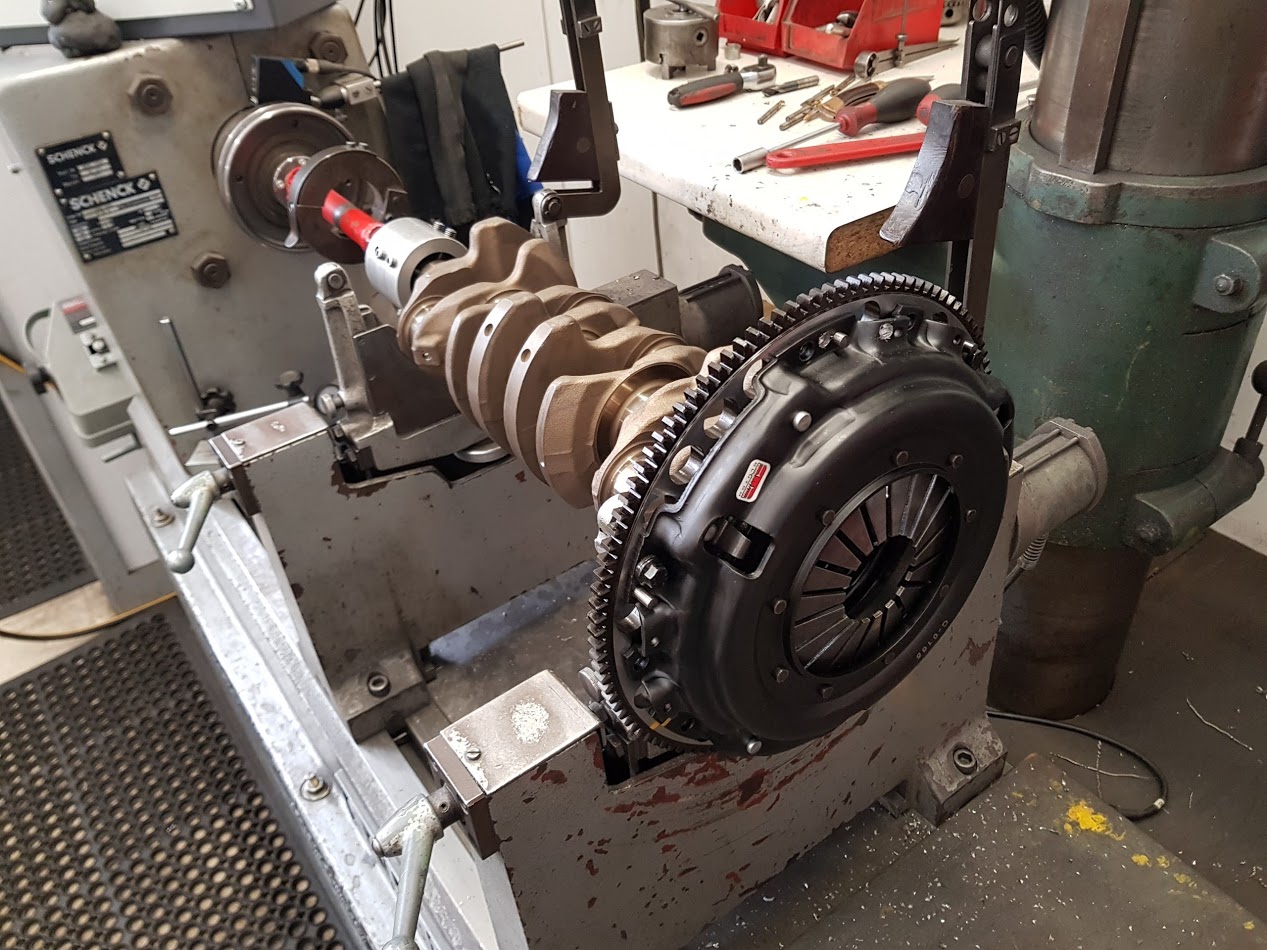
Crank balanced (I had a go but had to let the expert take over)
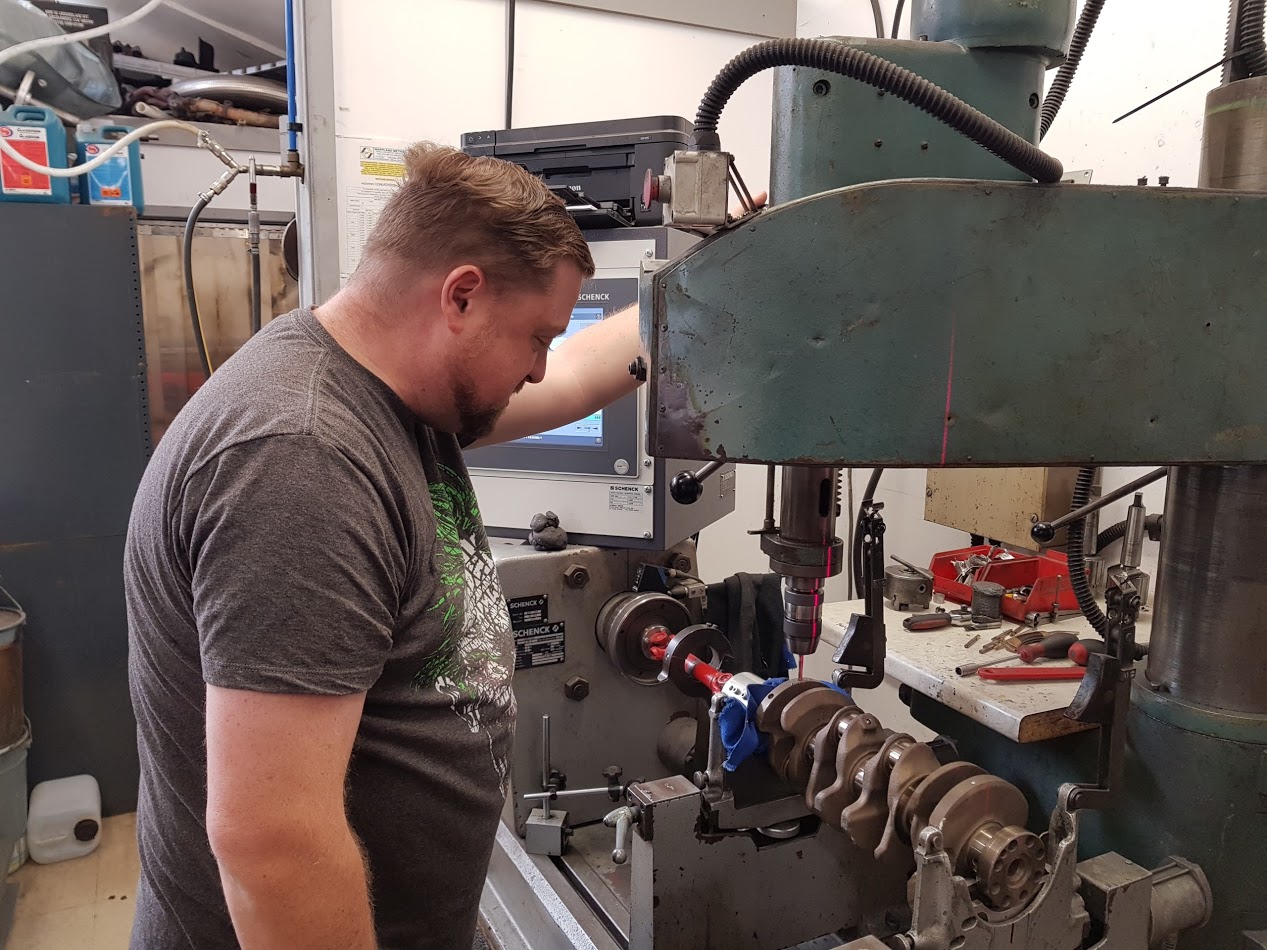
Wasn't too bad to begin with but we got it spot on
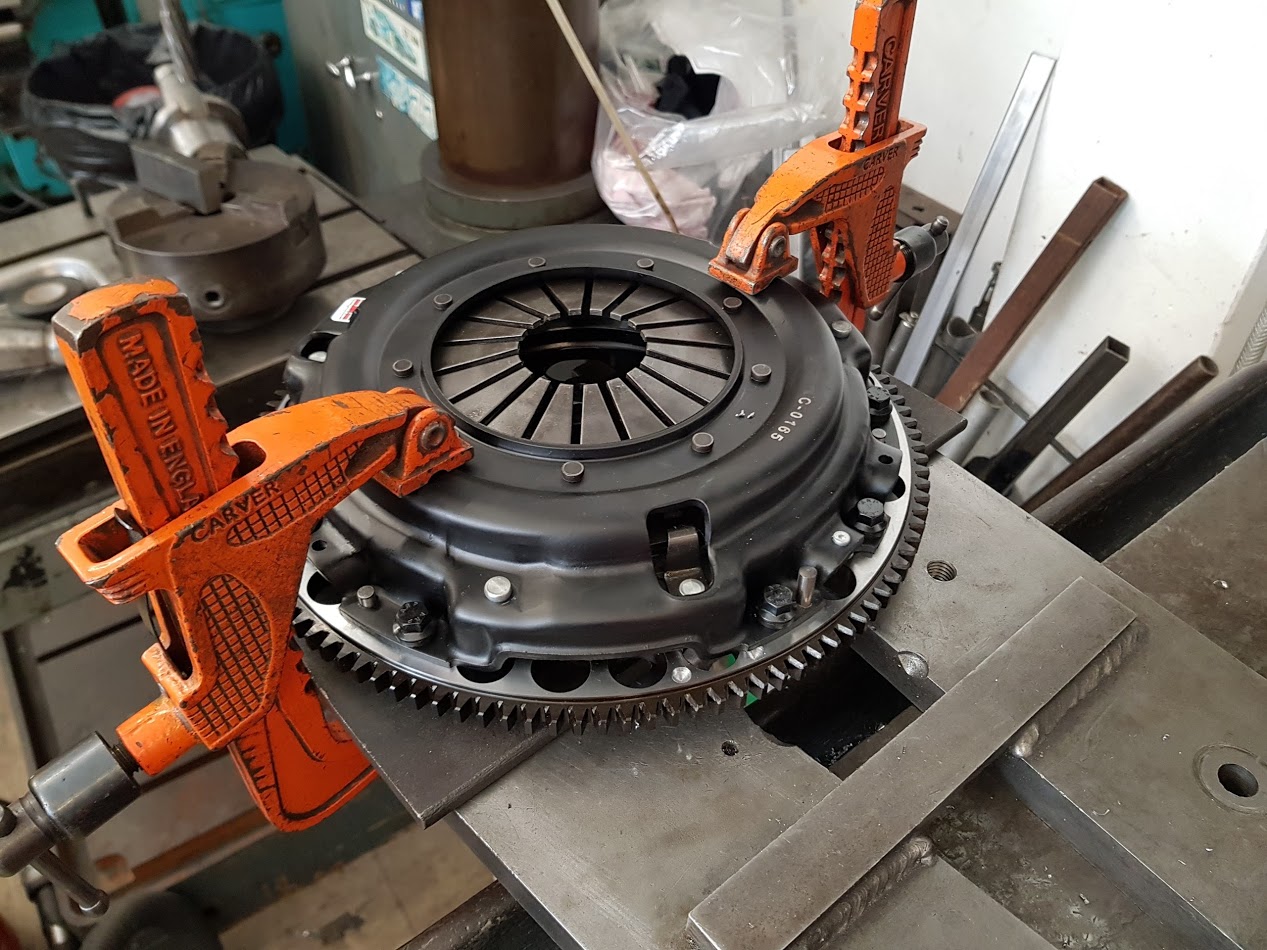
Next was the flywheel
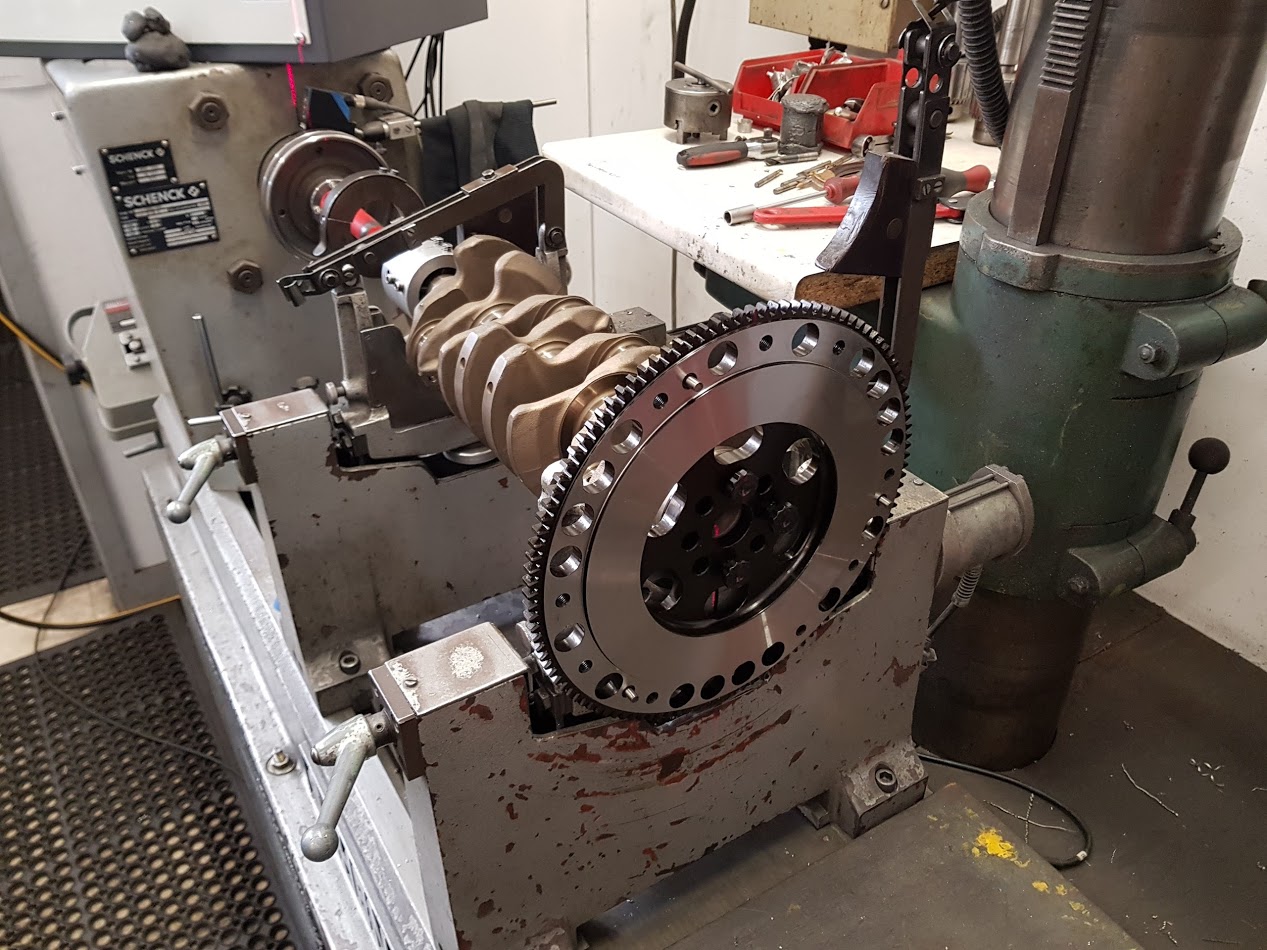
and clutch cover. Had to dowel the cover as it wanted to move around a bit
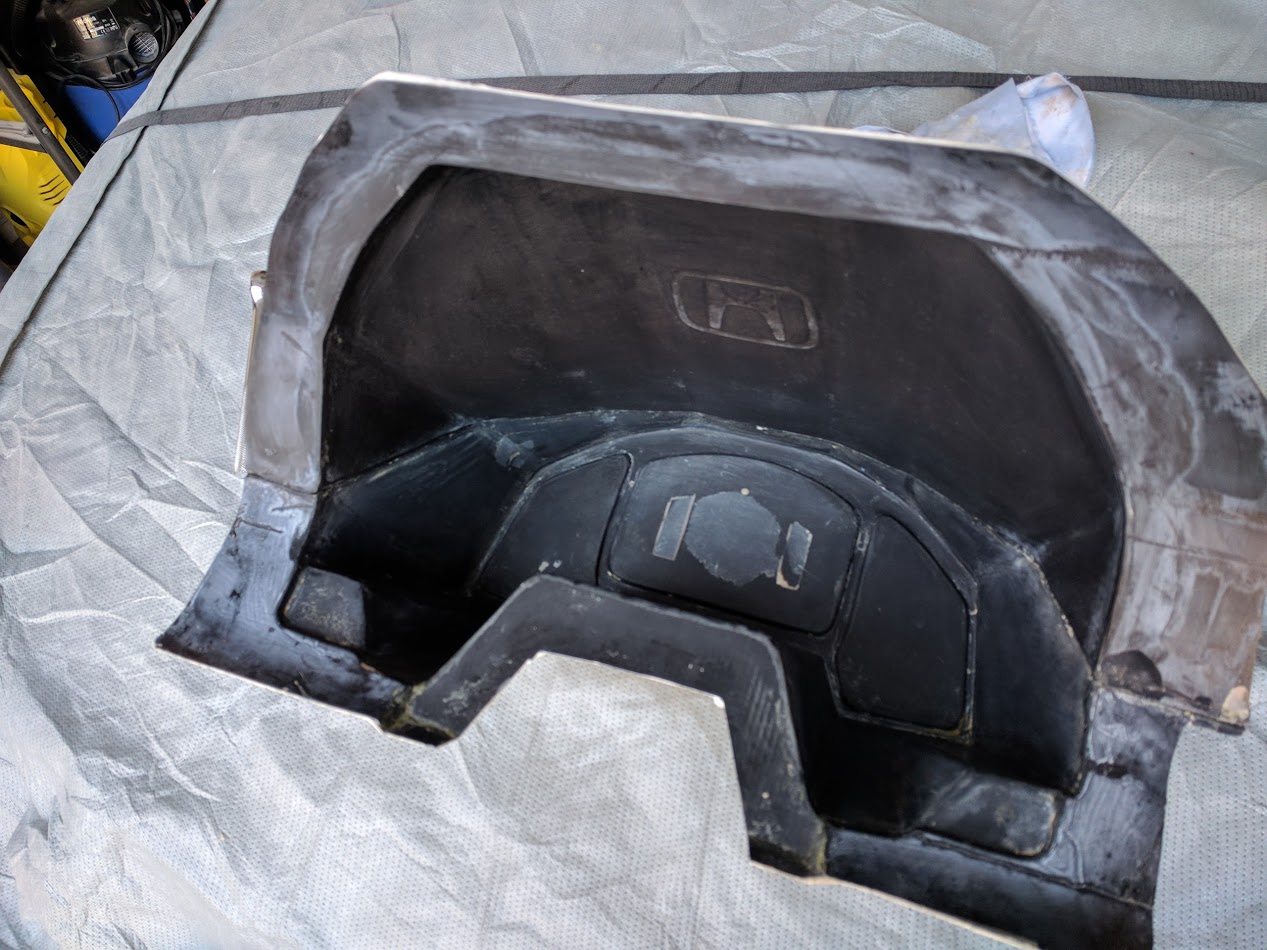
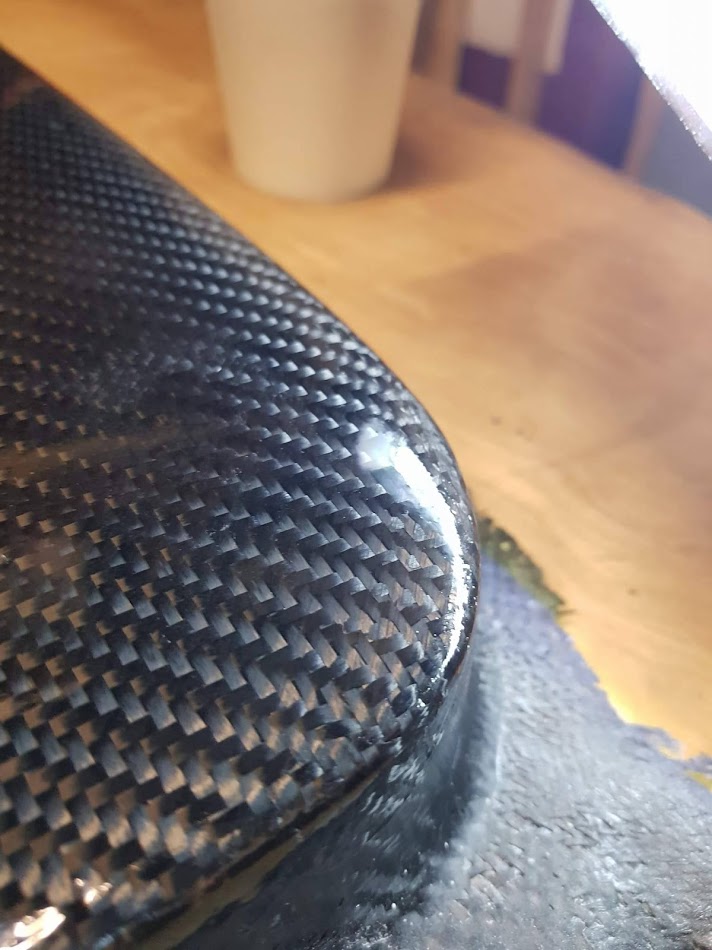
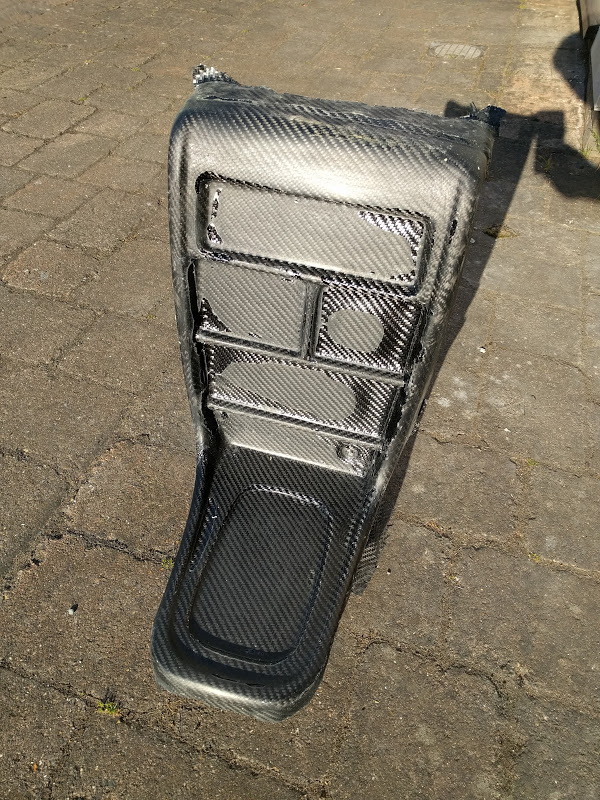
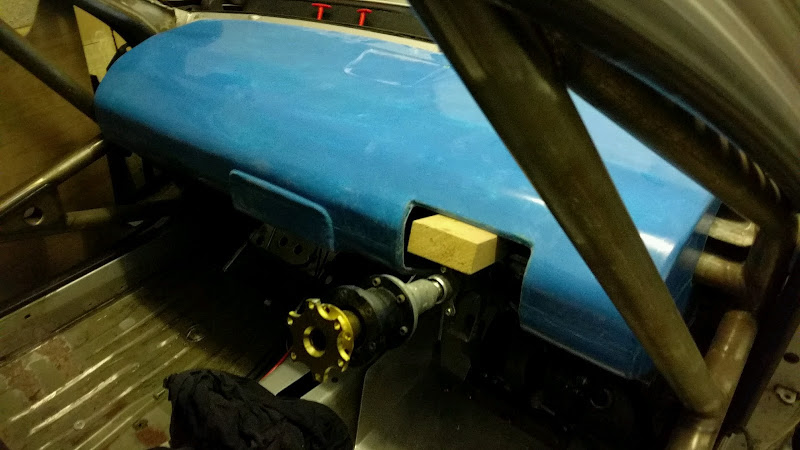
Carbon roof bung in progress
And that's that! Car rebuild is in progress and moving along steadily now it's all back from paint
-
1
-
-
Thanks, when I can get home to England I will get it painted and the outside will look like a complete car at least and make it worthy.
-
2
-
-
Amazed mine is here, it's not finished yet!! Still waiting on a few bits before shot blasting and paint
-
3
-
-
13 hours ago, Chandler said:
damn them bodies are lush! i really wana order mine. but gotta wait for the plastic card to come through
You're welcome to come and see the car when I'm about, I've just had to send one of the bodies back as they've fitted the throttle arm on the wrong way and it hits the filter back plate.
-
Thanks guys, although I was initially annoyed that the first pull off the centre console mould didn't go to plan I've learnt from it. Picked up some cheap vacuum bags from Asda and tried them over the mould tool last night and the concept works - just need better quality seals. I've been offered the use of a proper vacuum pump as well so second time lucky hopefully!
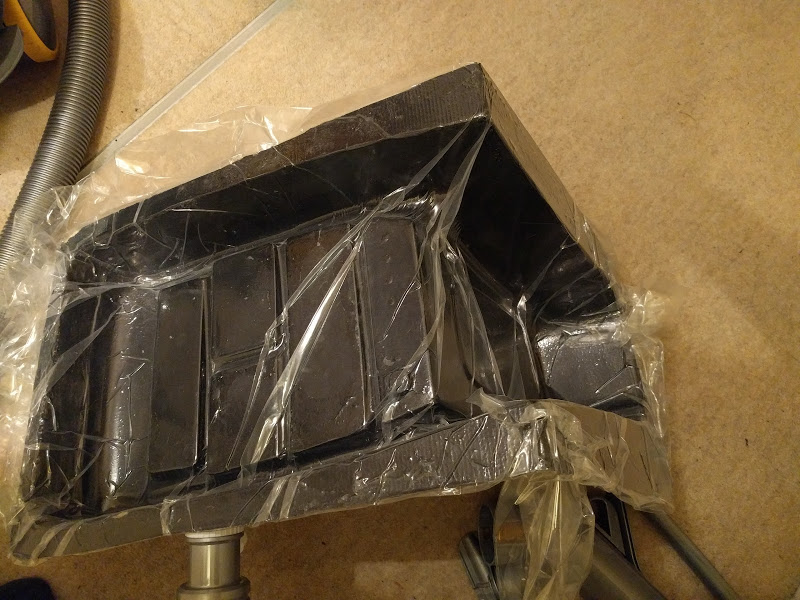
This is without properly positioning the bag, just put it in and suck (lol) so I can smooth it all out on the final attempt. The laminating resin has a 24hr flash time so I have time to work and position everything.
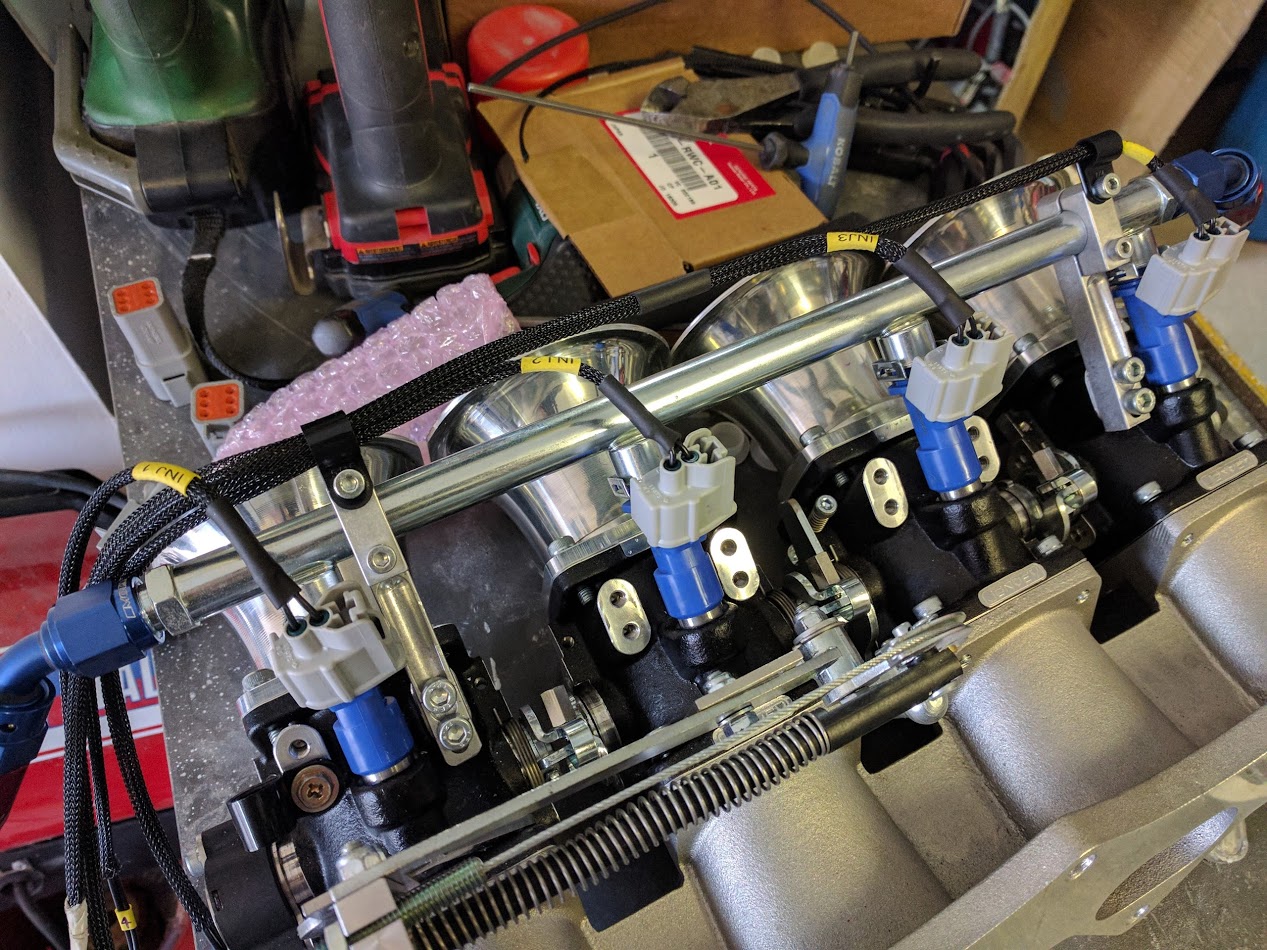
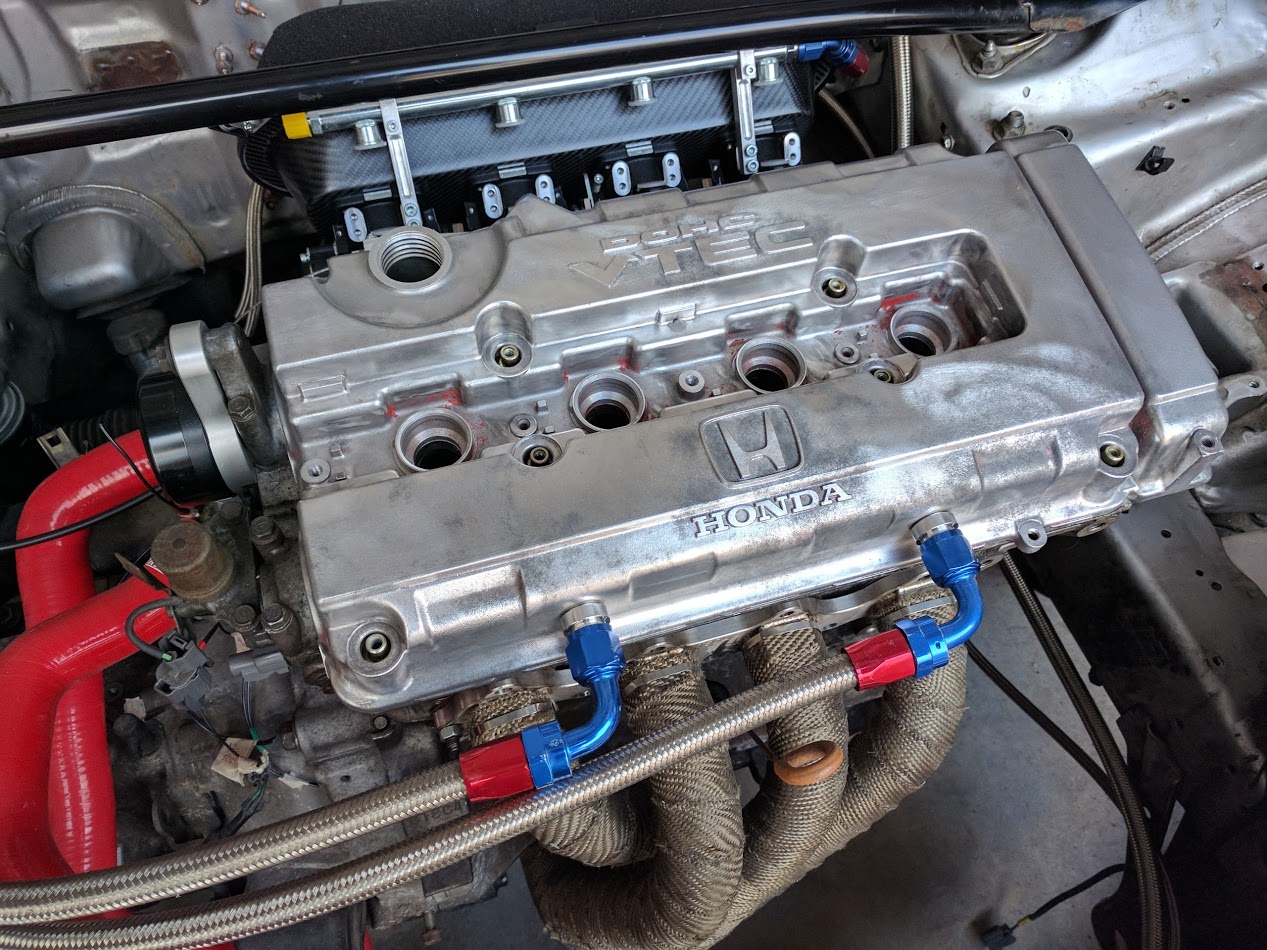
Also forgot a few new bits arrived a few weeks back, more shiny goodness for the engine bay.....
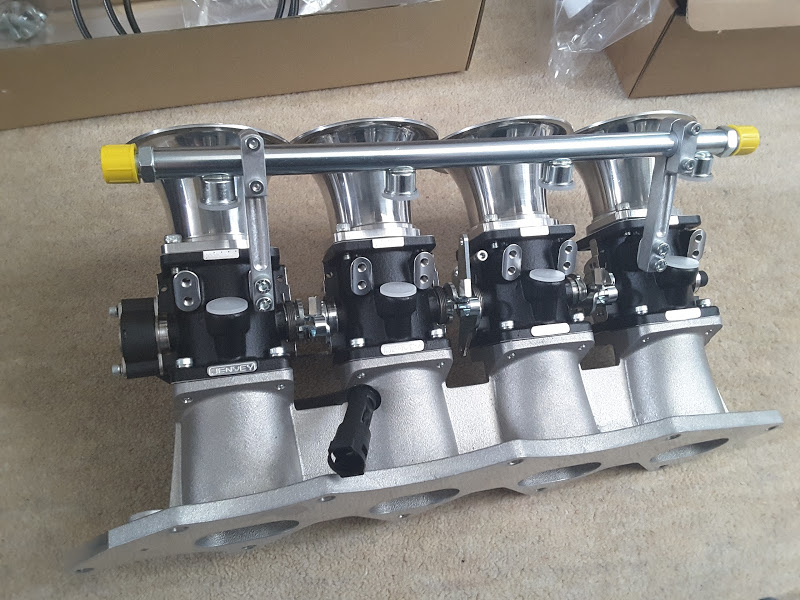
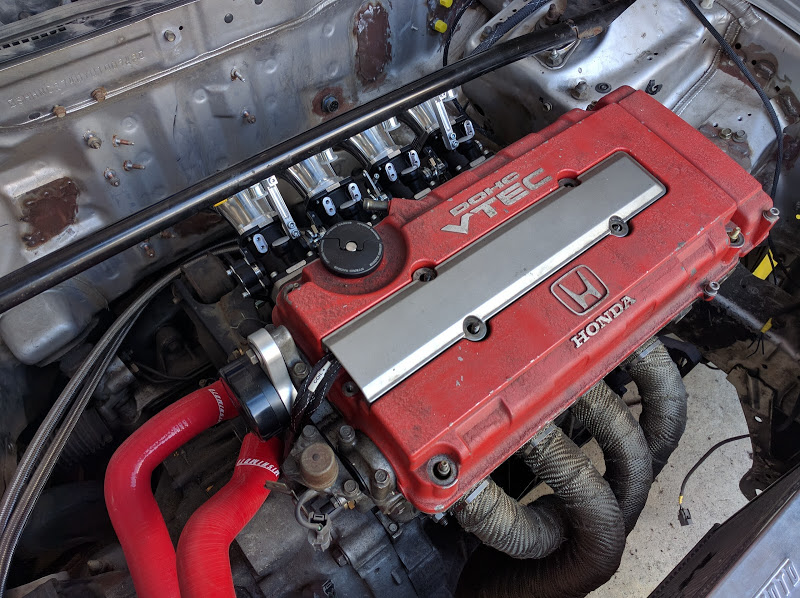
It's looking like an engine again!!!
Also have the new lightweight Competition Clutch flywheel and 6 puck stage 4 clutch & cover plate in my grubby little hands with the:
- AEM v2 ECU with COP configured
- Skunk2 Ultra stage 2 cams
- Skunk2 cam pulleys
- Skunk2 Pro series valve springs
- LMA's
- Valve guides
- Valve stem oil seals
- Oil pump
- Collets
- Skunk2 retainers
- Fluidamper bottom pulley
- Gearbox syncros, bearings, seals
- Catch can
- AN10 cam cover fittings
- Wideband lambda sensor and gauge
All ordered and on route so that's the engine bay complete bar the exhaust system and plumbing in the electro hydraulic power steering. Once it's all here the engine will be pulled, head flowed and ported and the everything dynamically balanced and put together. The block needs the head guard fitted and rehoning but that will all be done at the same time. Still considering switching to an electric water pump but will wait and see what monies are left after the above it put together. It's getting exciting!!!!!!
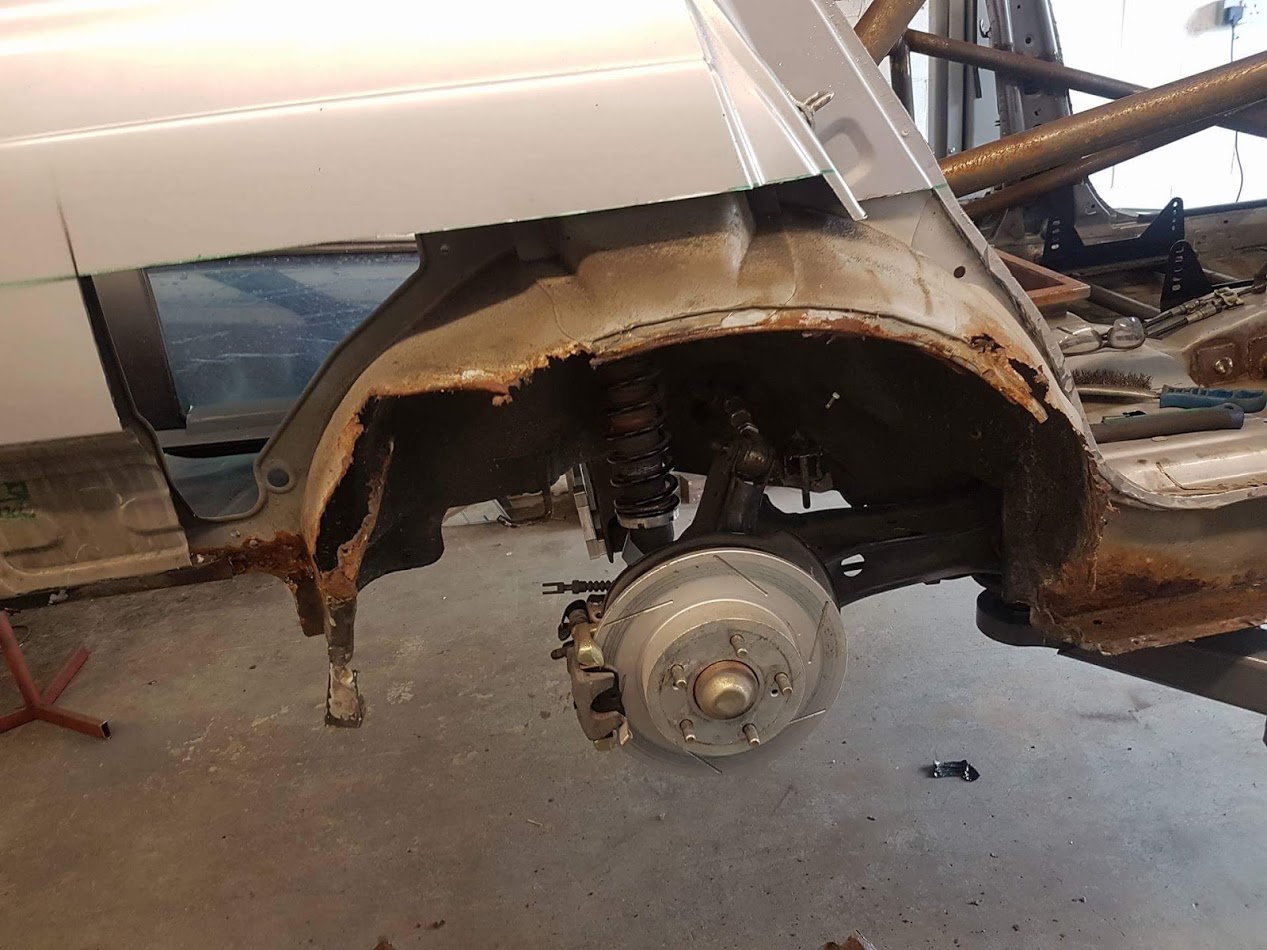
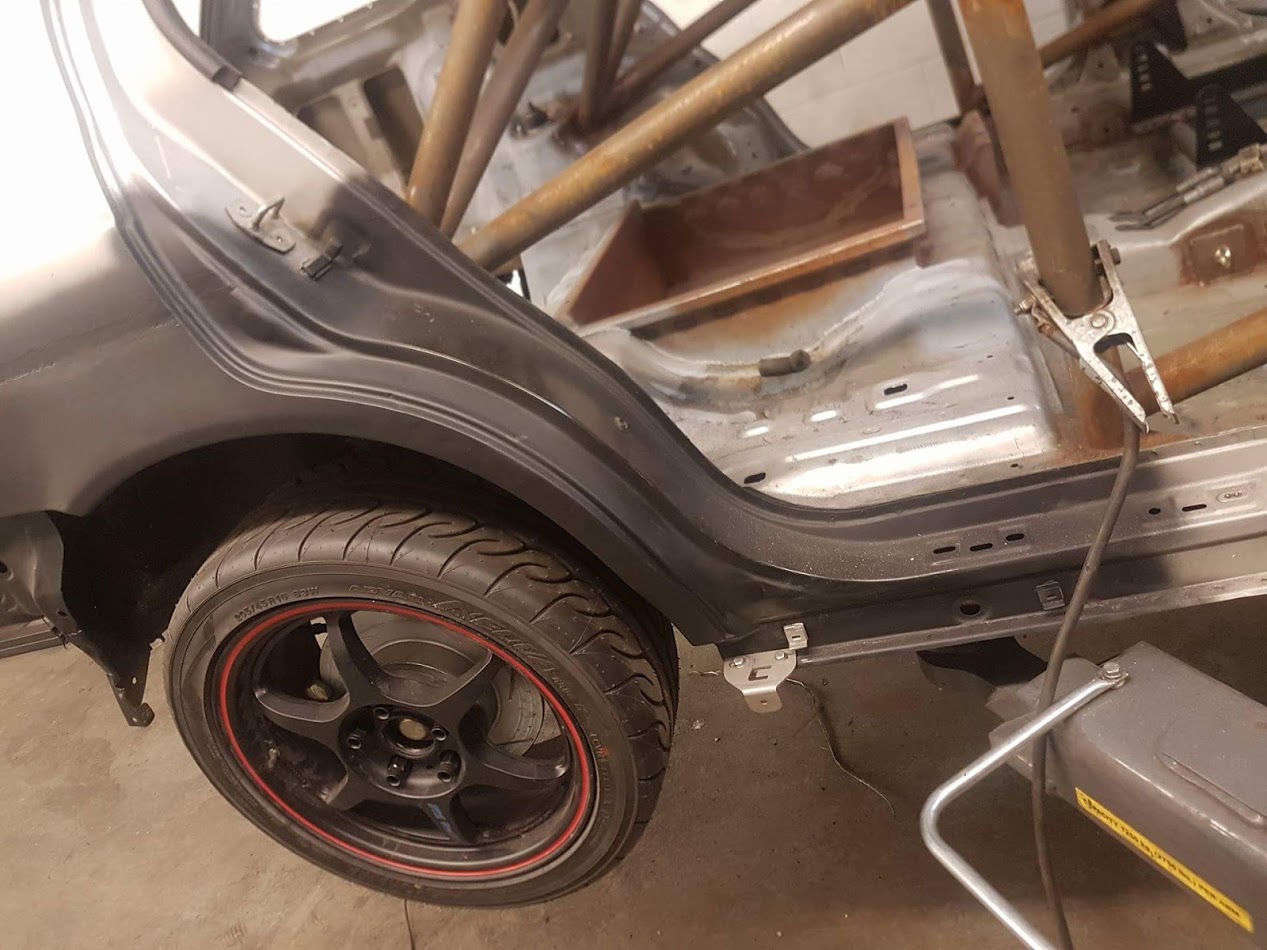
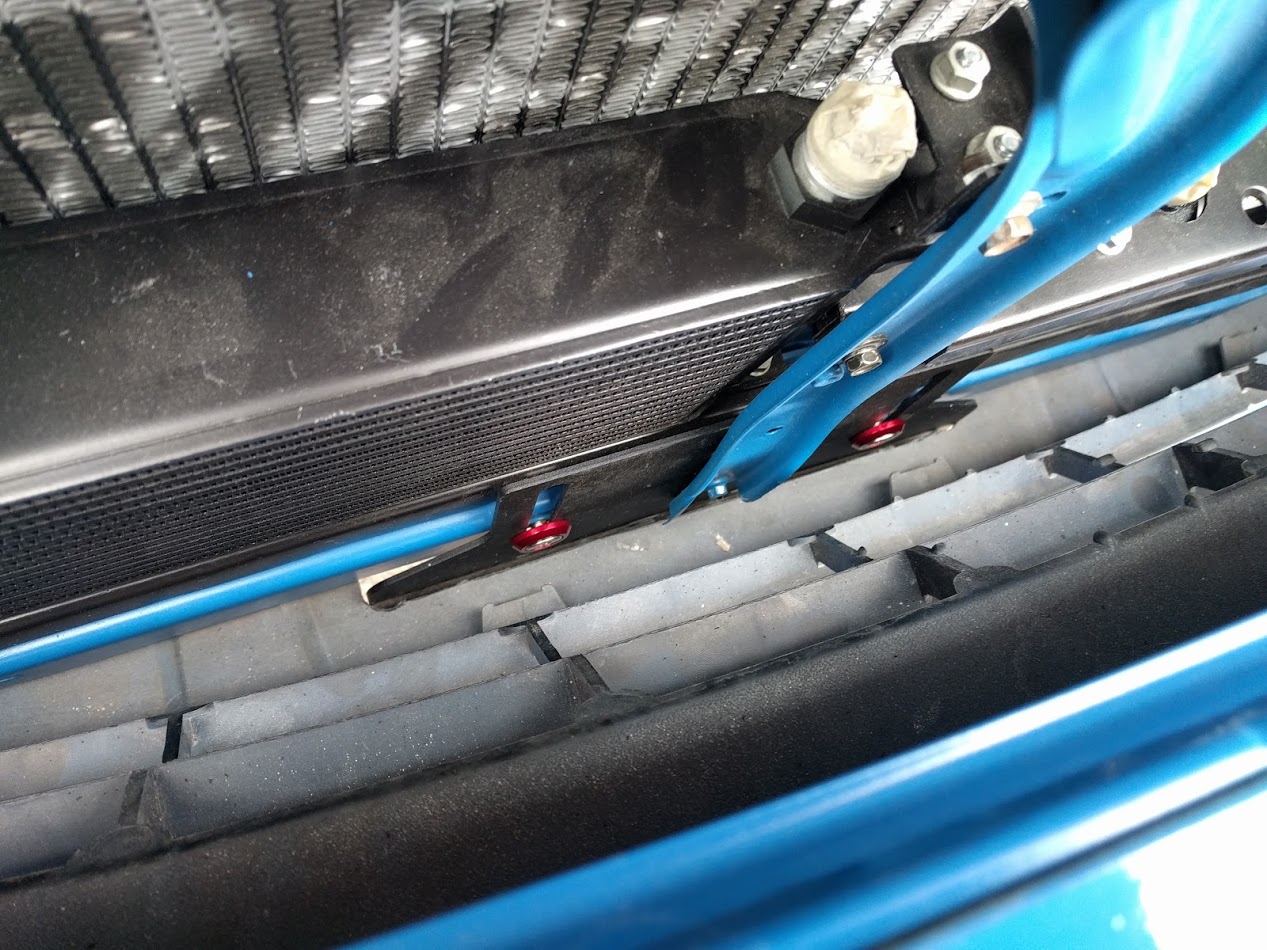
Chassis wise, I need to mount the intercoolers for the oil and power steering (weld on brackets) and adapt the radiator mounts to suit the bigger rad. I'm doing a false floor on the passenger side to match the drivers side and it can then go to media blast and paint. I have a new rear quarter and tail light to go on.
After all of that, the jobs left are -
-
Extend front arches (wheels/tyres don't fit) or fit narrower tyres

-
Side skirts - fit originals or do something a bit different..........
- Engine loom
- Carbon interior parts
- Plumb in fire extinguisher
- Build fuse panel for dashboard
- Ducting for heater system
- Run brake/clutch lines
- Buy injectors
It's been a bloody long build but I've got 98% of the parts now so and dry built everything on the chassis so I know it all fits. I'll almost be too scared to drive it!
-
4
-
Quick update - mould tools are done (which took a bit of work as the paint reacted with the gel coat despite 10 coats for wax and 2 coats of release agent!)
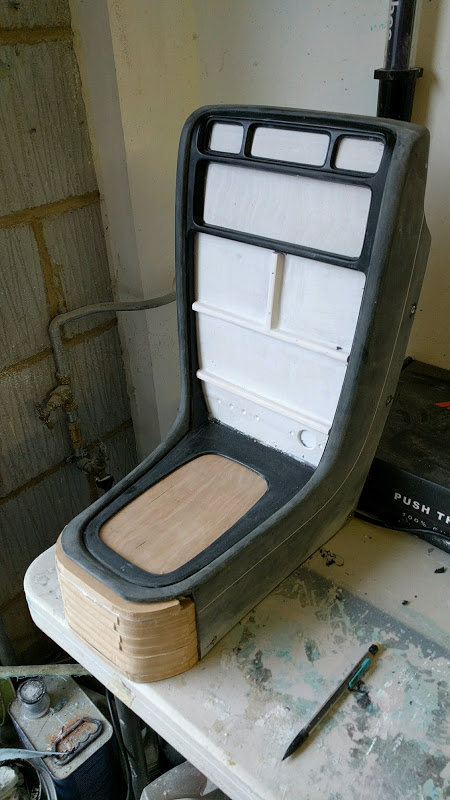
Bolted the binnacle back to the dash mould, built a skirt for the split mould and started one side off with gelcoat, the centre console was mounted to a back board and gelcoat applied.
A layer of blue vinyl under the moulding area just in case!!!
Fibre glass build up, 4-6 layers
Not the neatest job but functional.....
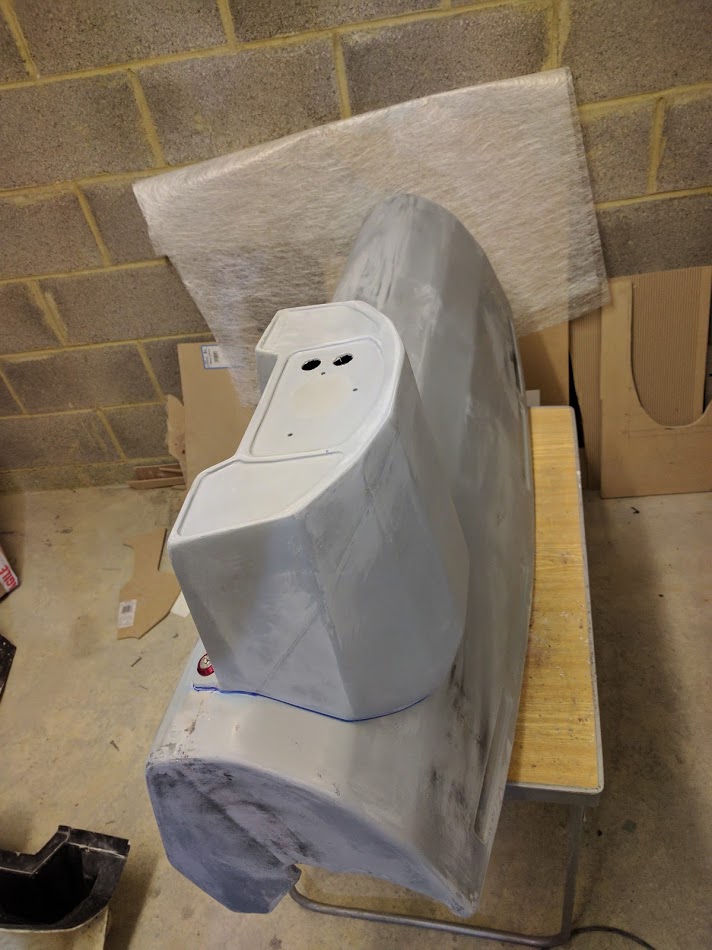
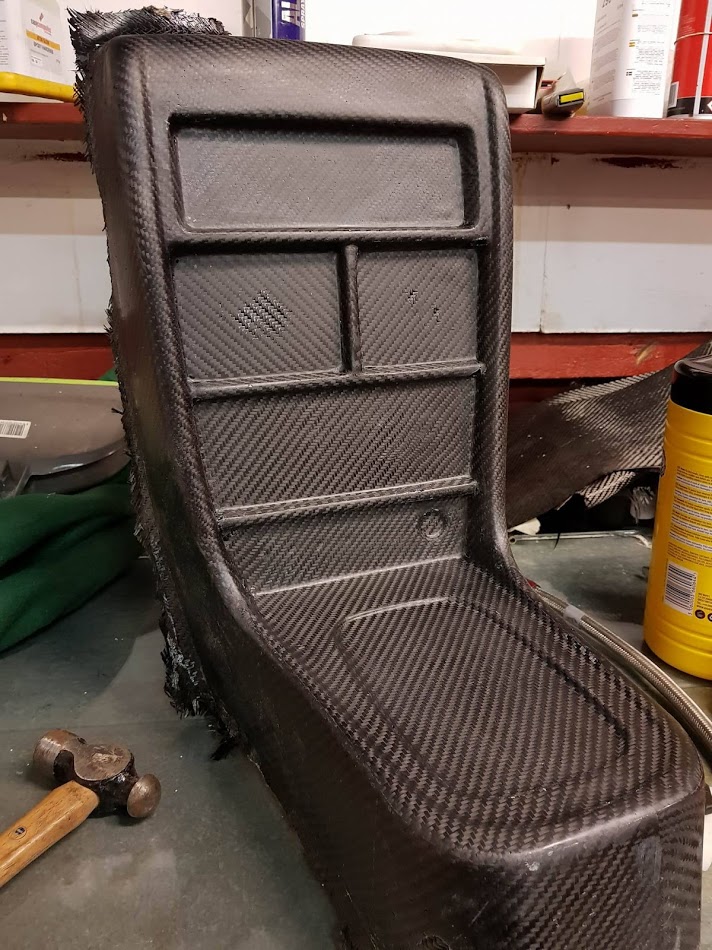
Pulled the top of the instrument binnacle off, was actually a really good pull!!!
Texture on the surface is where the gelcoat and paint reacted, I sanded most of it off but I actually quite like it. It's going to be flocked anyway so it doesn't matter too much
Centre console tool, some cleanup needed but again I'm pleased with the result for a relatively complex part (well complex for the second ever attempt at this stuff!)
Clean up in bottom of the instrument binnacle needed!!!
Didn't take too long, just a pain. I had to cut 2 holes in the front to hammer out part of the tool (I can fill later) Just a few hours of work and it was nice and shiny again.
Test fit and bolt together to make sure it was okay before the final clean up
Okay, so I started on the centre console mould and laid down a s few layers of 200gsm carbon as a test using a laminating resin (as I was told this would be a solid alternative to resin infusion and would still give a light, strong part). First attempt didn't go quite to plan but I learned a lot from it, mostly I need to vacuum bag the part and use a lighter first stage of carbon (apparently)! At least I didn't go too far with it or do the binnacle before I found the issues
Shape is there, and some of the detail, it's just not stuck down to the mould in a few areas and that could be a few things, but mainly the fact it wasn't vacuum bagged. Onward and upward though now I know! I feel a trip to Asda and some cheap vacuum storage bags coming on.......
-
2
-
-
Okay, actually did some work on the car over the weekend

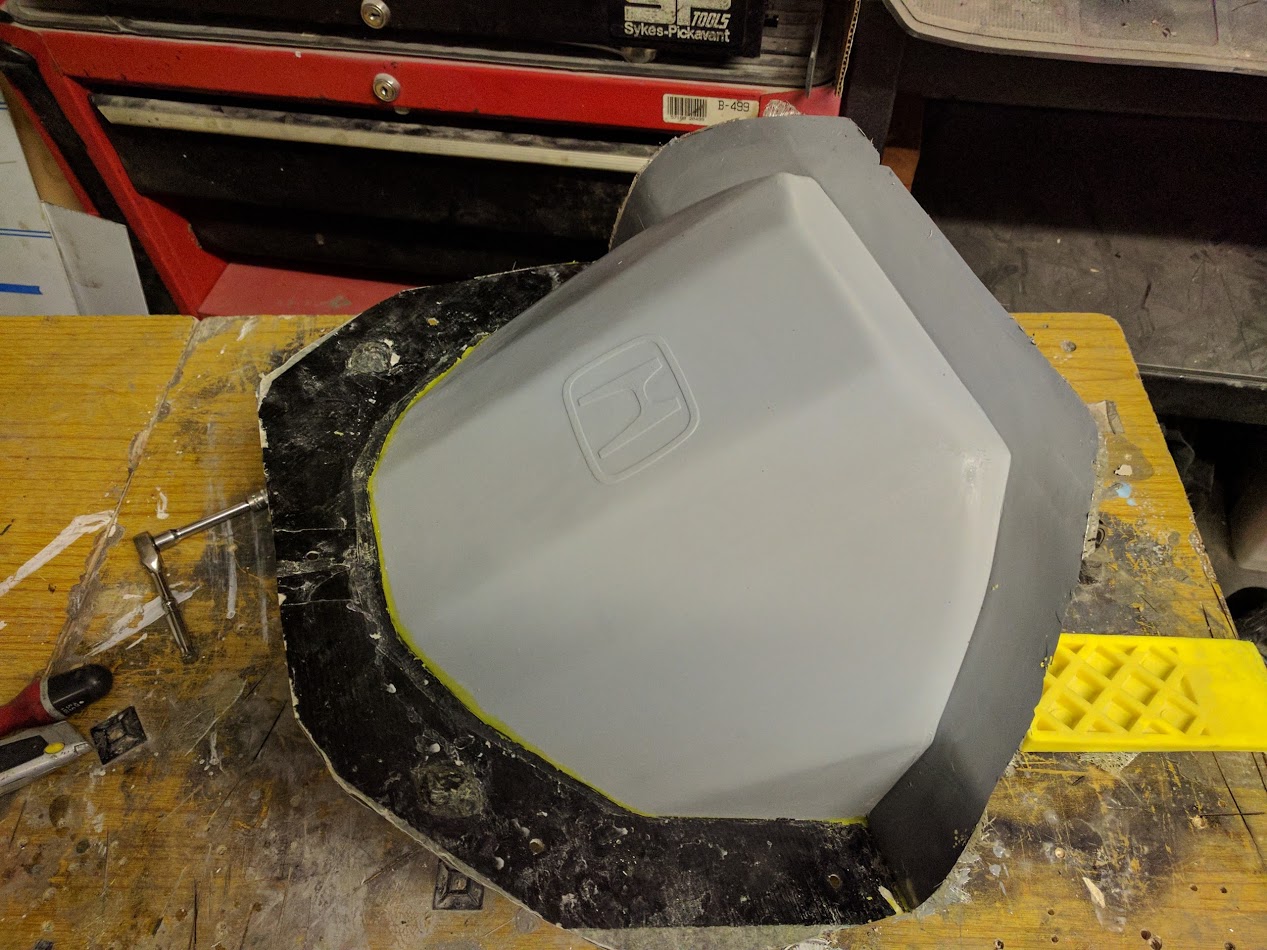
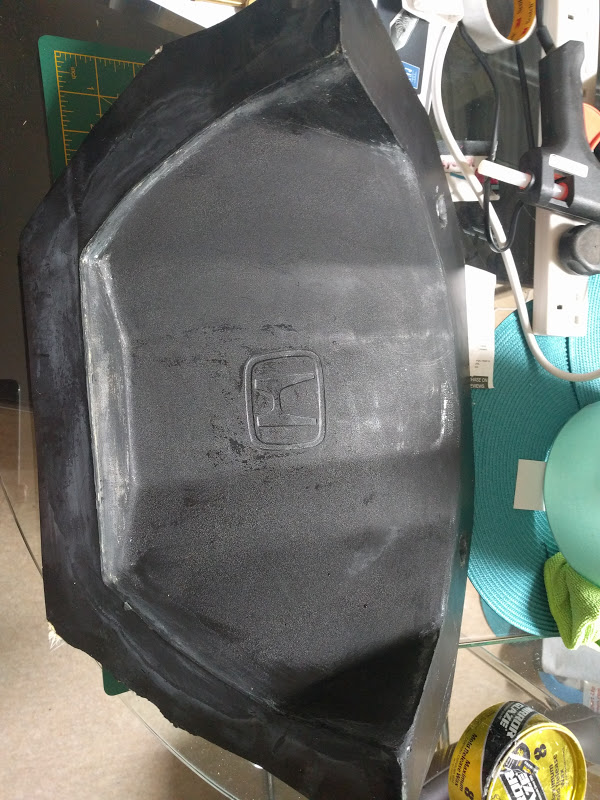
Primed and resanded the binnacle again
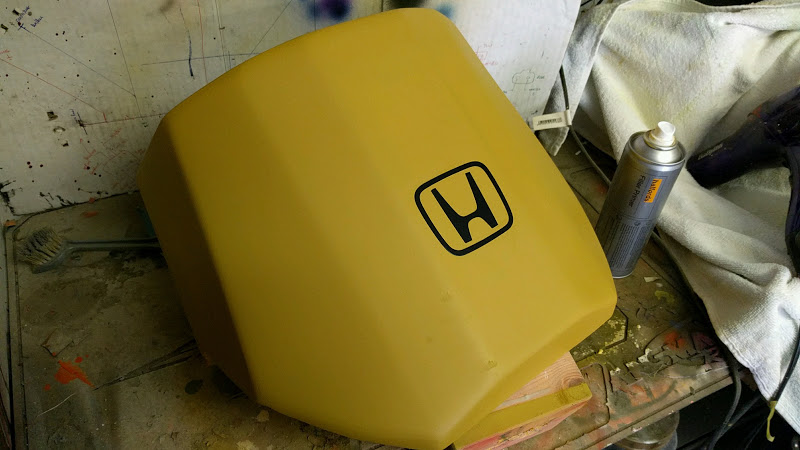
and added the Honda logo to the top. Not sure how this will come out in the mould but nothing ventured....
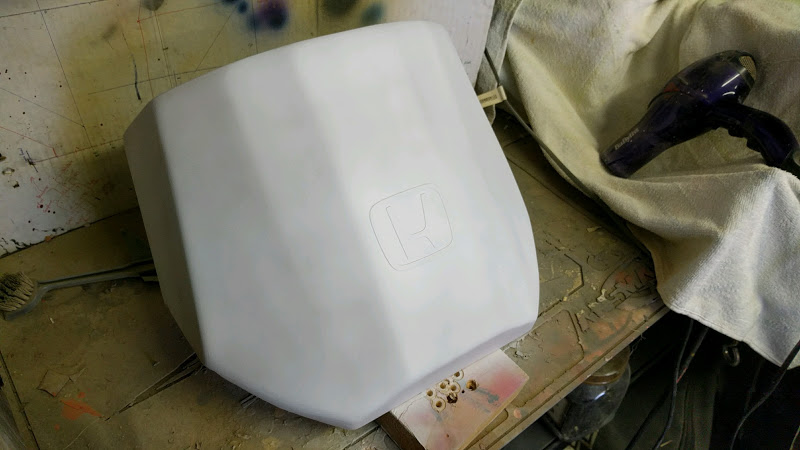

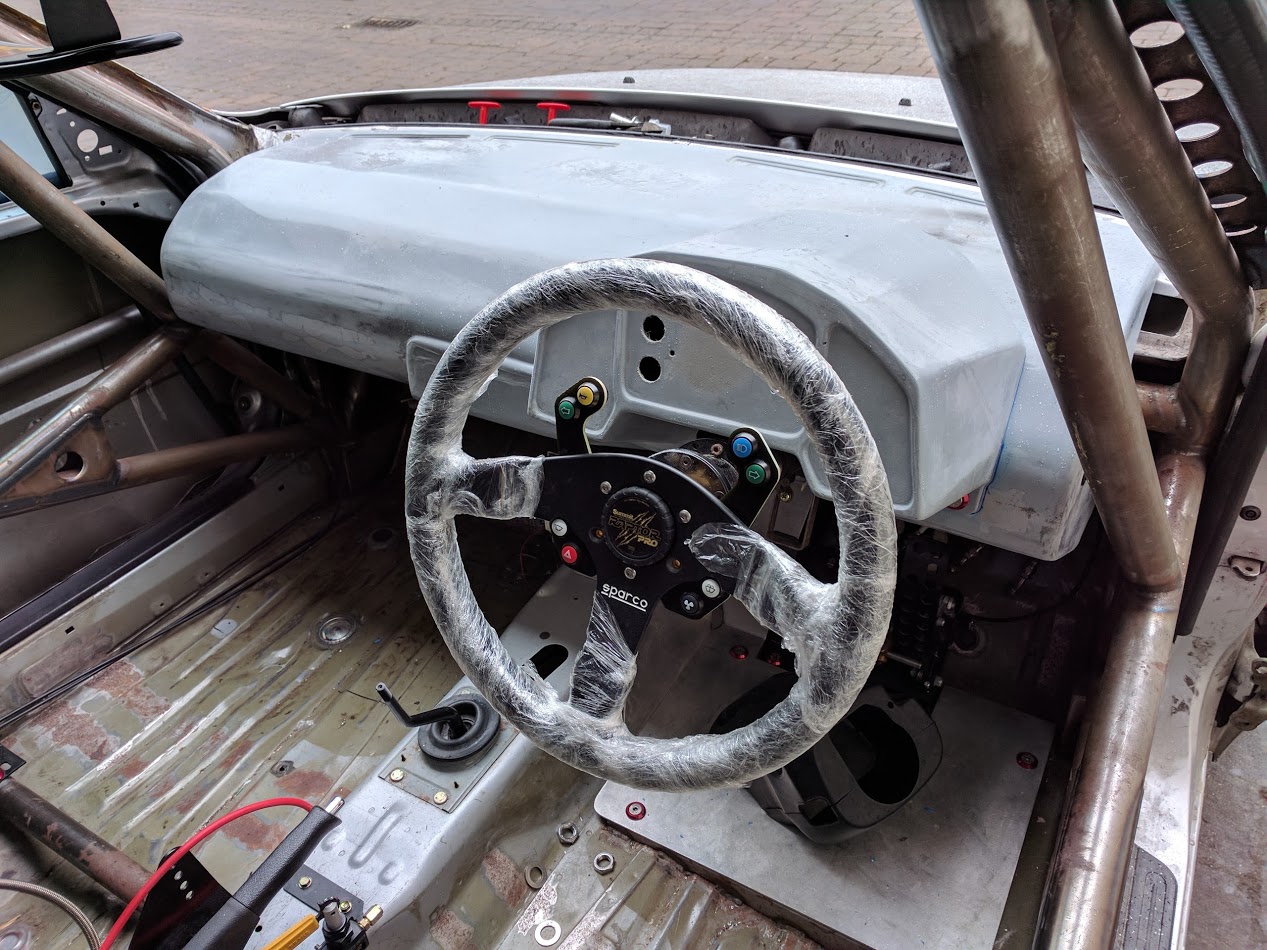
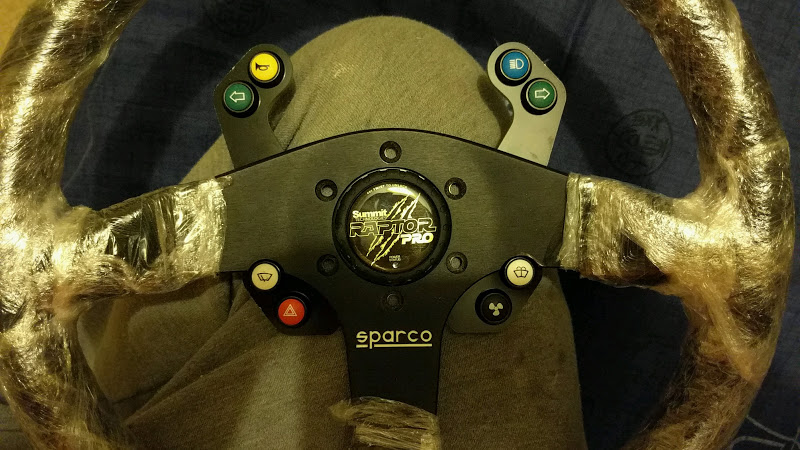
Even better with the correct steering wheel!

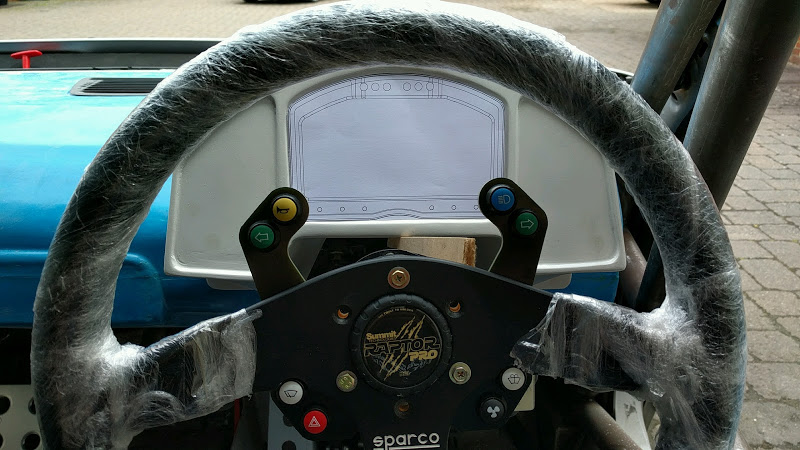
This is now ready for polishing and moulding so I bolted it to the dashboard mould tool and will continue to work on it from there.
Centre console also saw some attention with another sanding, repriming and painting. I then mounted it on a backing board ready for polishing and moulding...
-
3
-
-
Thanks guys, sorry I was away for so long.
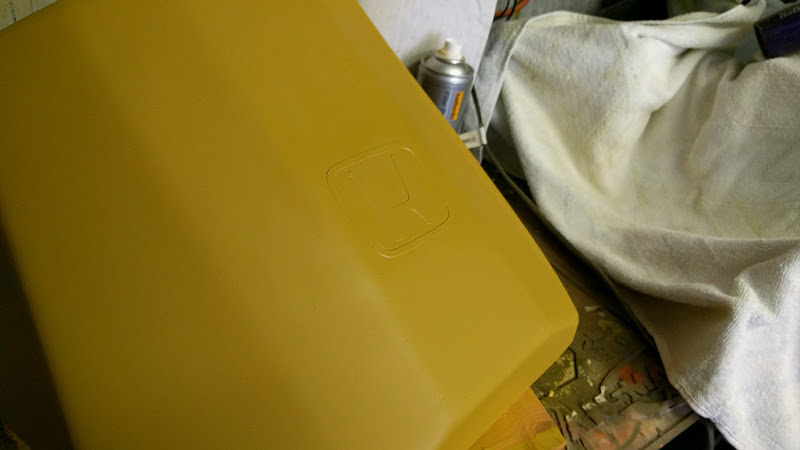
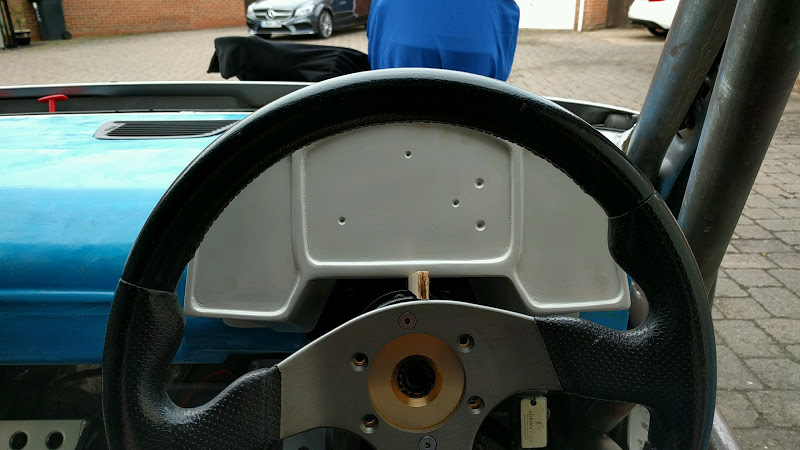
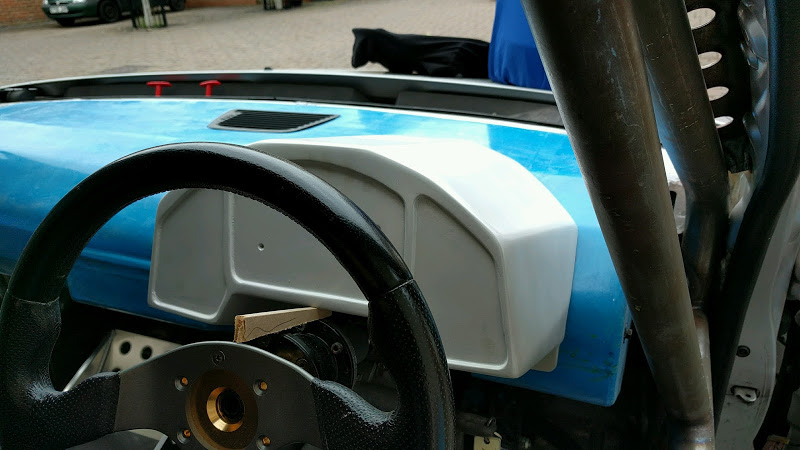
Did a little more last night, decided to recess the dash into the binnacle slightly and setup a panel each side I can use for dials or switches. Recessing them like this will allow me to flock the binnacle (same as the dash) and put a small carbon panel in the hole that I can change/update as my needs change. i may even put a set of air vents in to keep me warm/cool. The small drill marks line up with the mounting points for the display so I know where to drill once it's all done. More sanding, filling and painting to follow.....
-
2
-
-
Okay, photobomb time!
Dash mould polish and prep - I changed the profile of the corners at the last minute (hence the filler)
Joined top and bottom together, filleting wax in the gaps to seal it.....
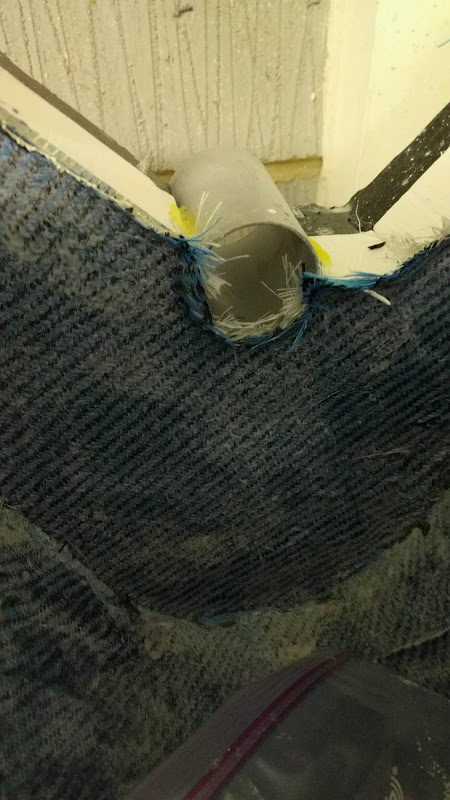
Blue carbon fibre cloth and fire retardant resin layup. The drain pipe is to simulate the roll cage as I wan the dash to almost clip on around it in the car...
Kevlar tape around "weaker" areas as the build progressed.....
After several layers of carbon and kevlar, final build up of fibreglass to complete the inside....
Once removed I found the top surface has a little too much flex/sag so some reinforcement was added....

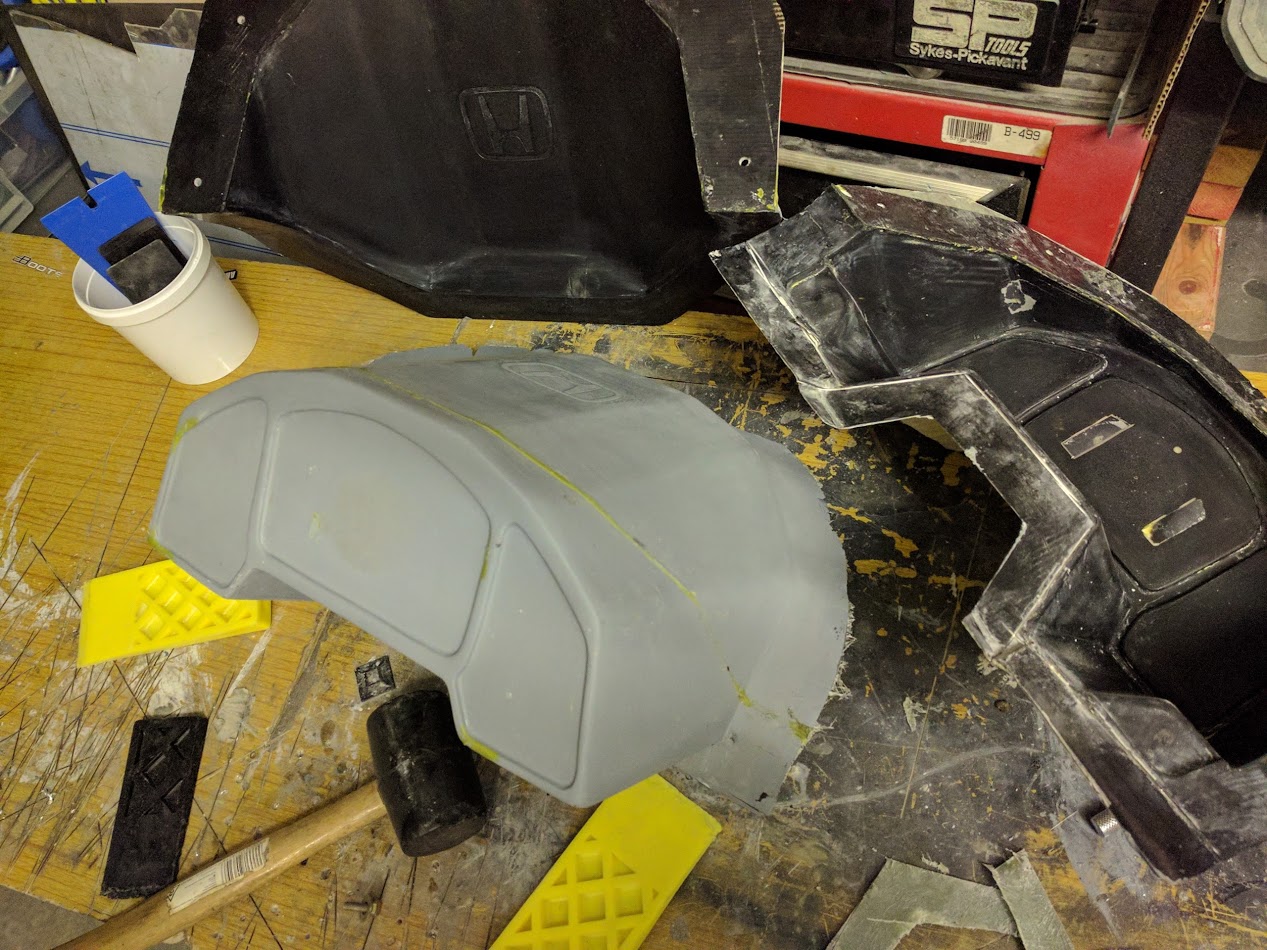
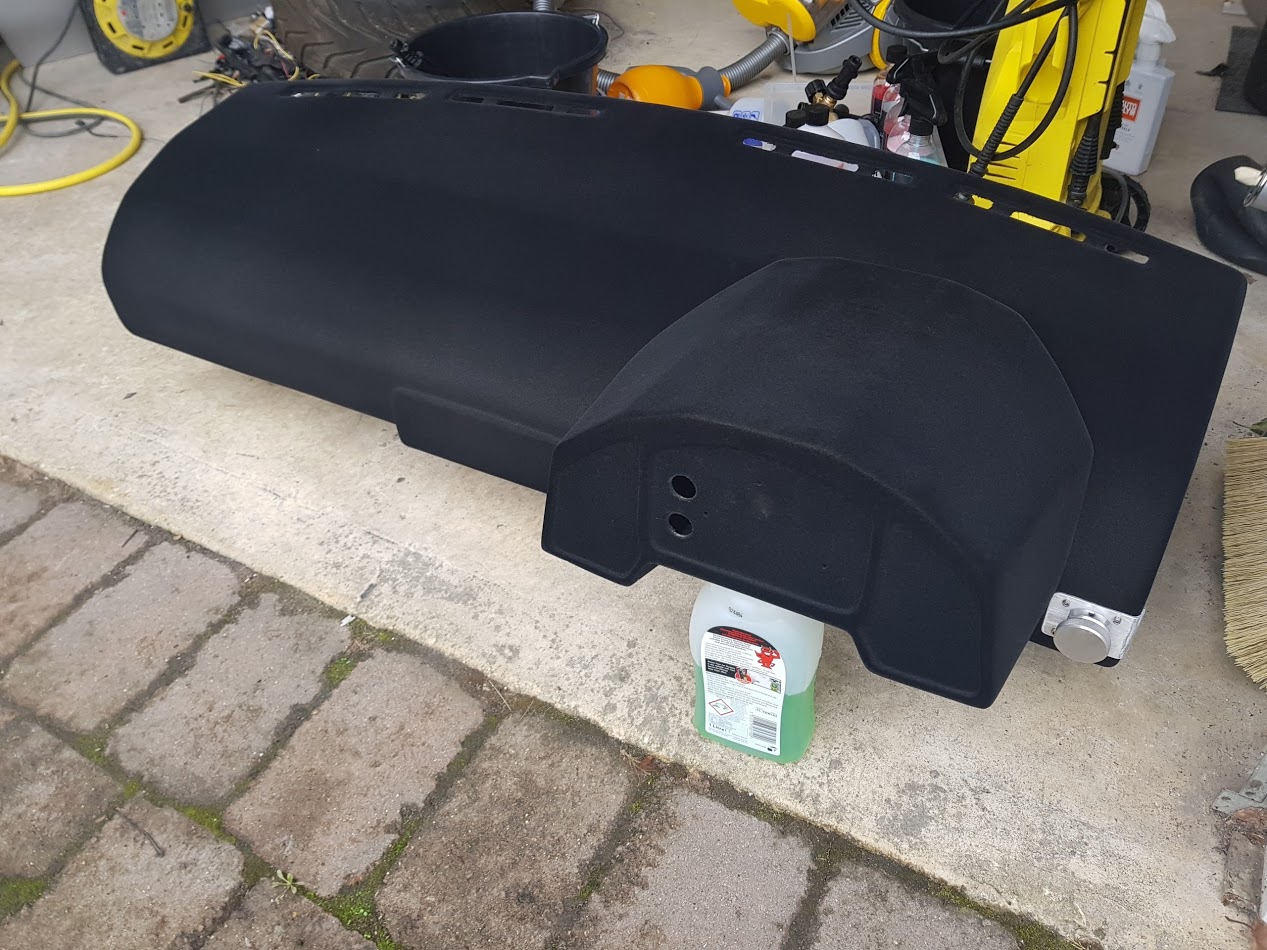
Dash out of the mould. Lightweight, smooth and only needed minimal finishing. Pretty happy for my first attempt!
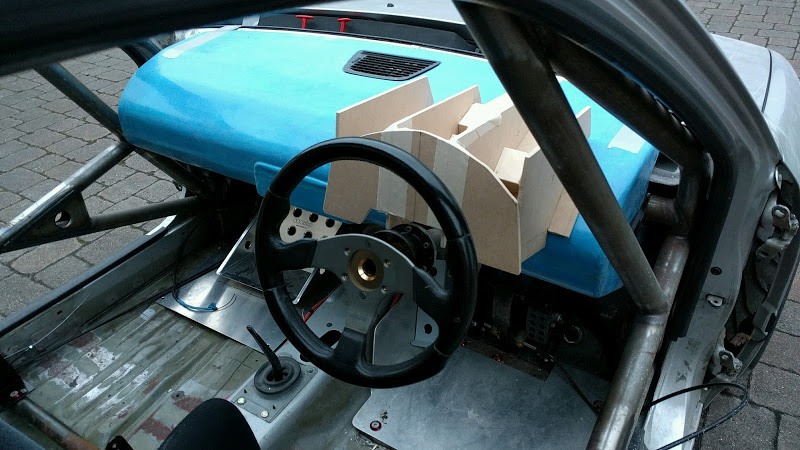
Quick trim around the steering column and the mandatory test fit.....
Fits around the cage too!

Turned my attention to the centre console. Using the original (that was cut to suit the new dash) as a template, it was smoothed and the holes filled in....
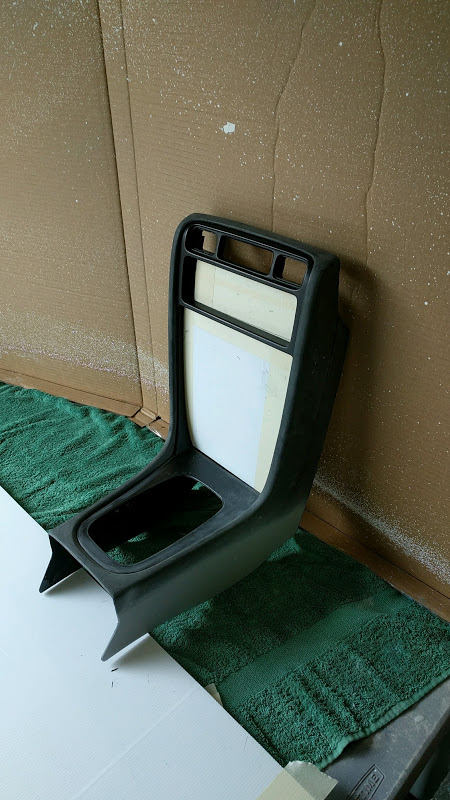
Areas marked out for fuses and switched etc.....
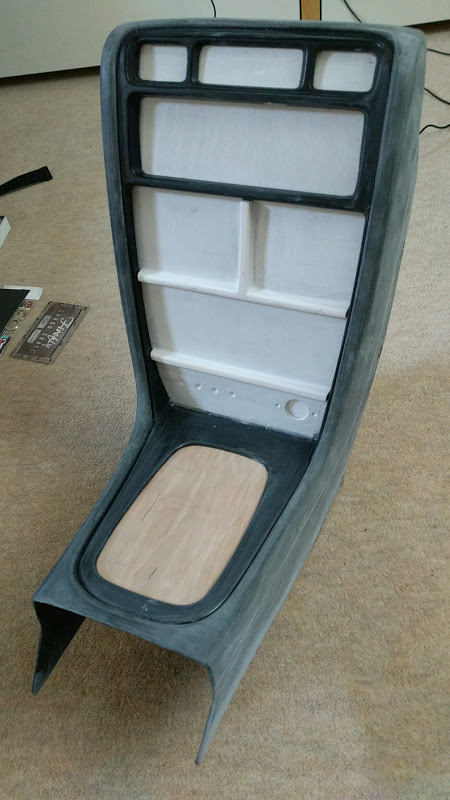
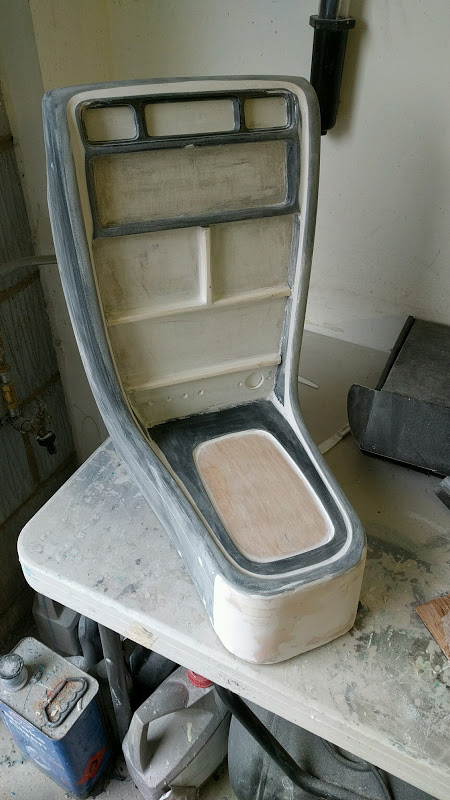
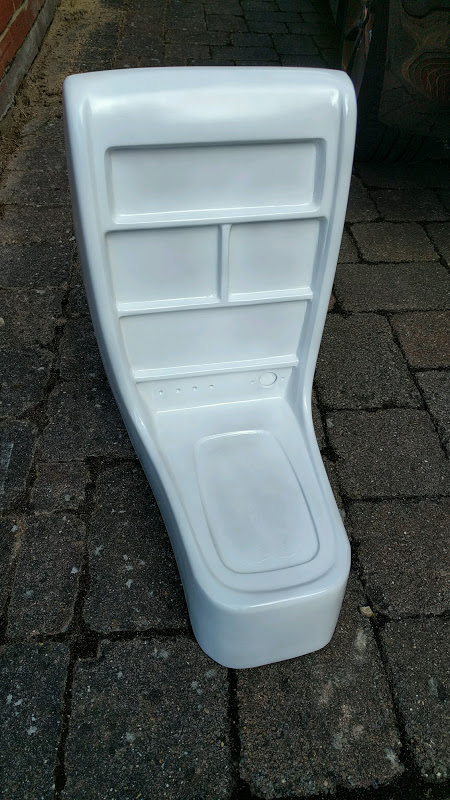
Smoothed and primed ready for moulding.....
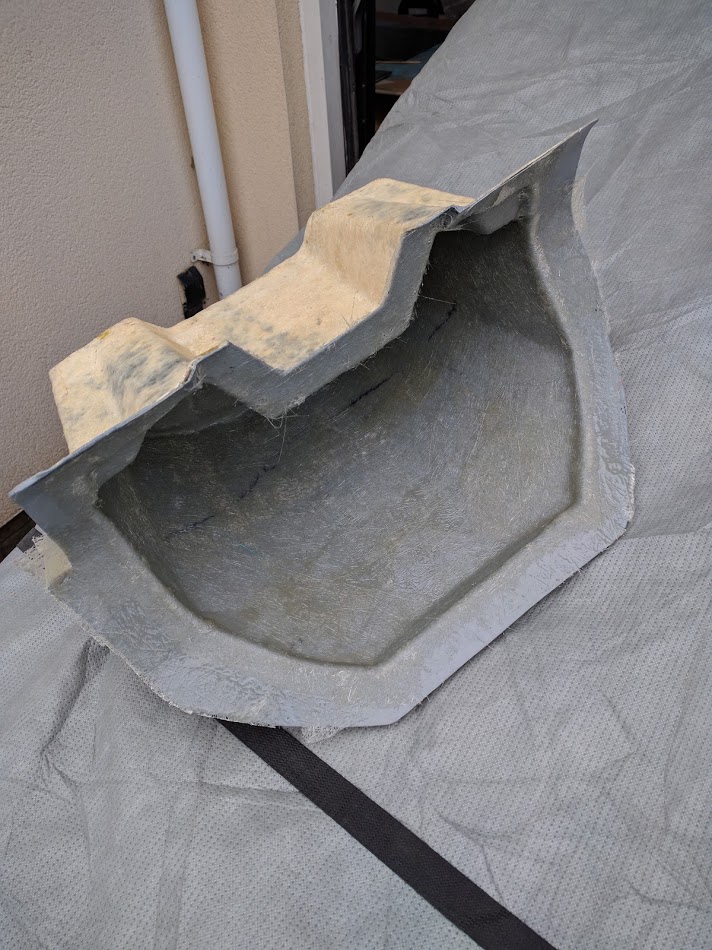
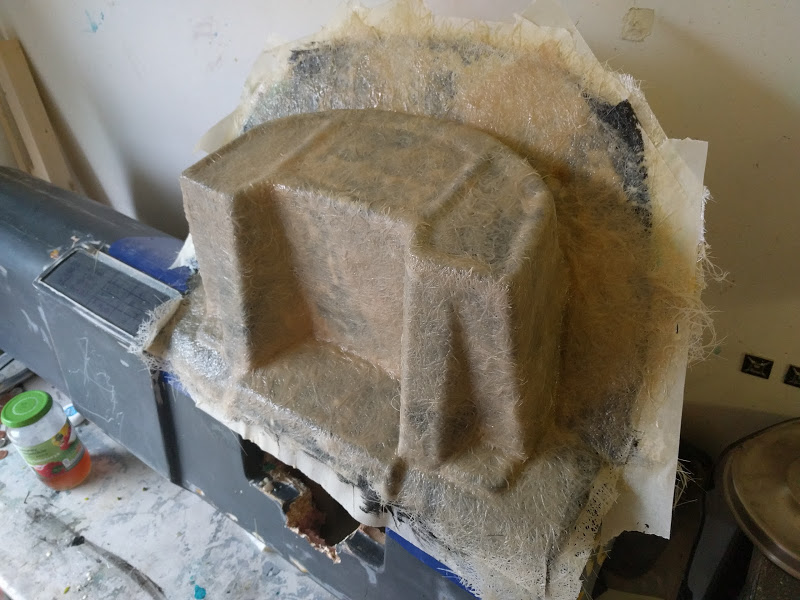
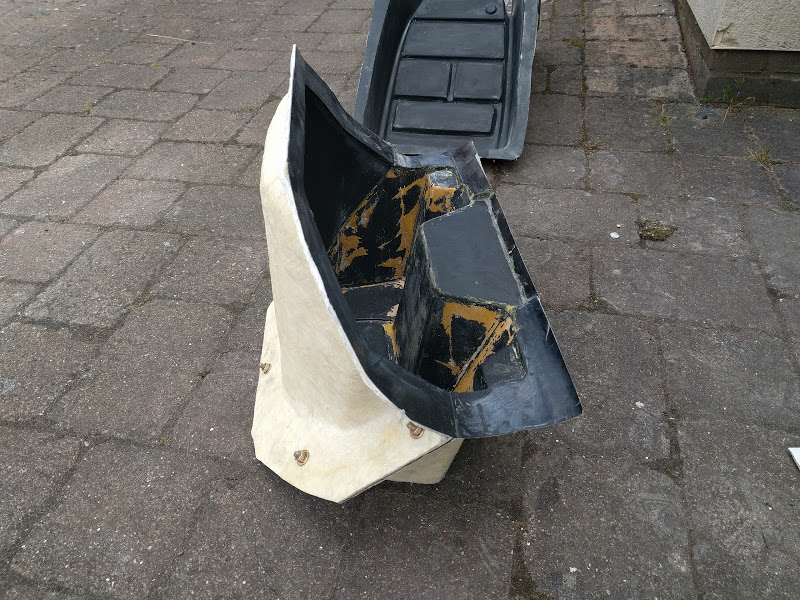
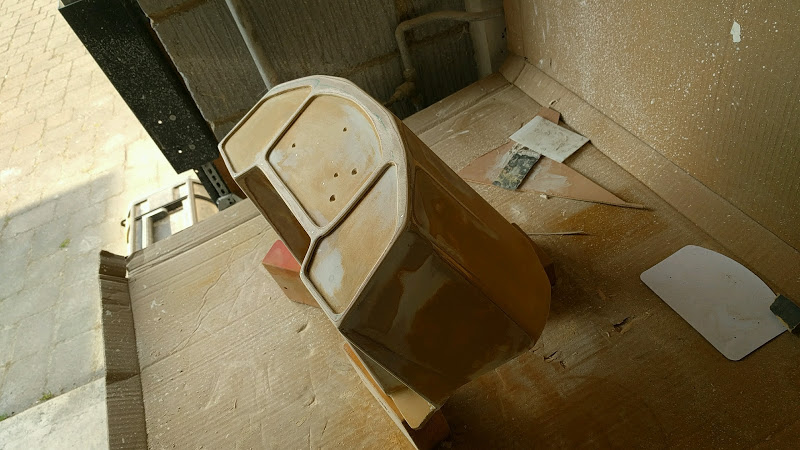
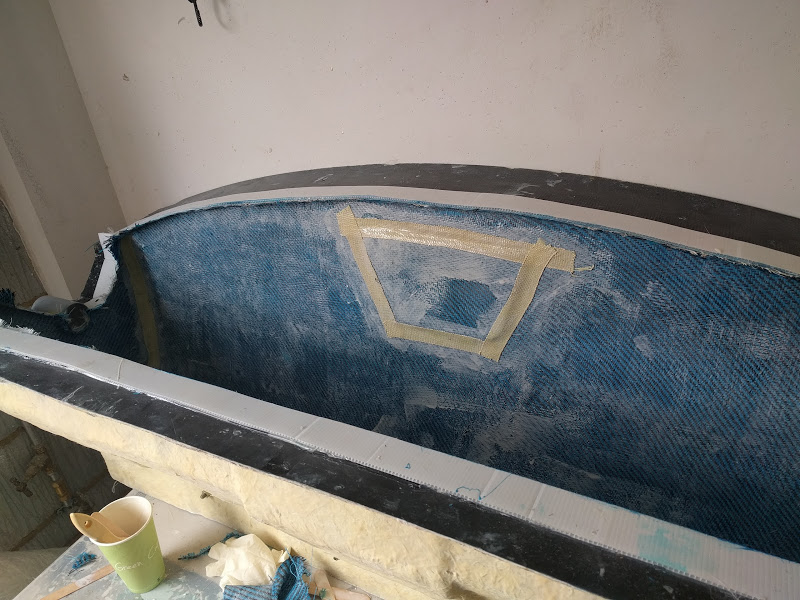
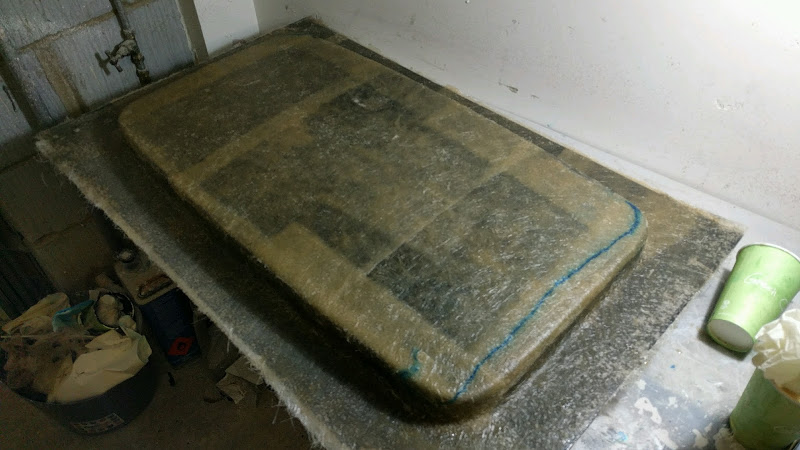
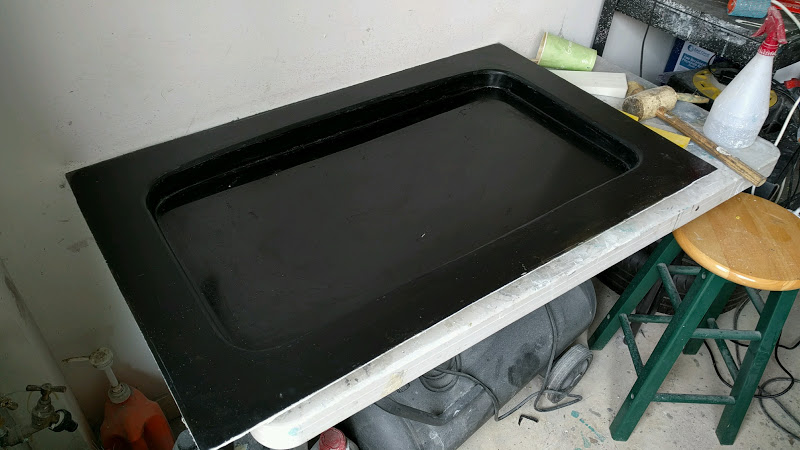
Went back and did the sunroof mould ready for carbon fibre/resin infusion, first coat of tooling gel coat....

Fibreglass layup.....
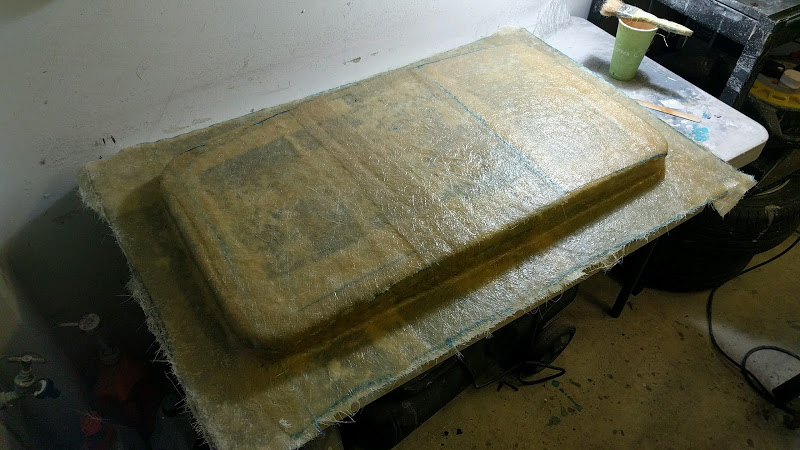
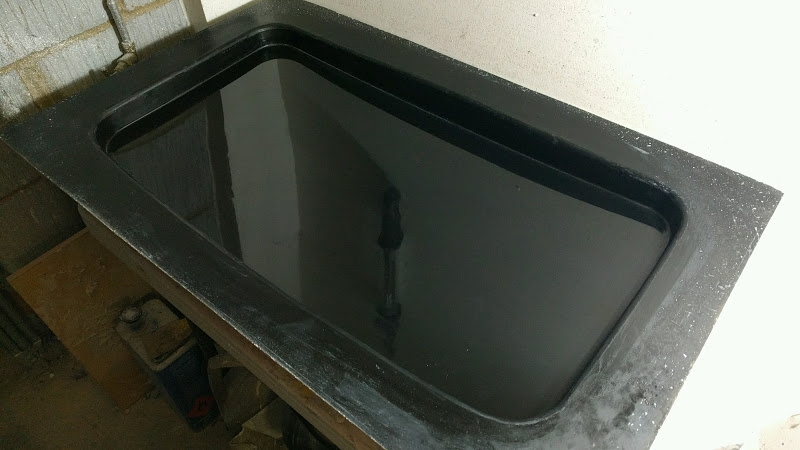
After 5 layers (need a solid mould) it was time to split the tool from the plug. Build up took 4 evenings....
This came apart with no real effort but there were some small defects in the mould that needed to be fixed as you can see in the reflection.....
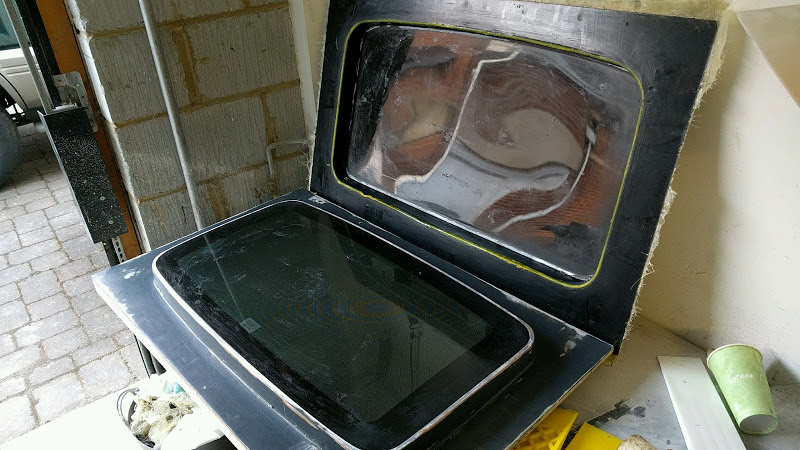
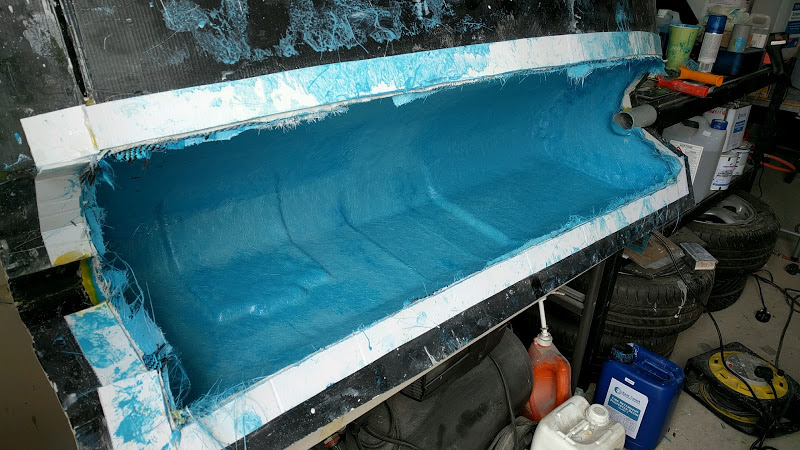
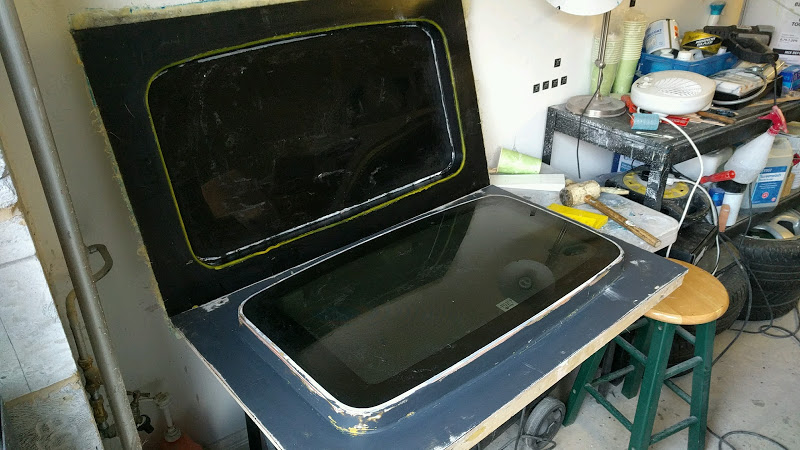
Clean up, fix and polish.....
This is now ready for resin and carbon which I'm not doing as I don't have the equipment so I'm waiting on a friend to do the work.
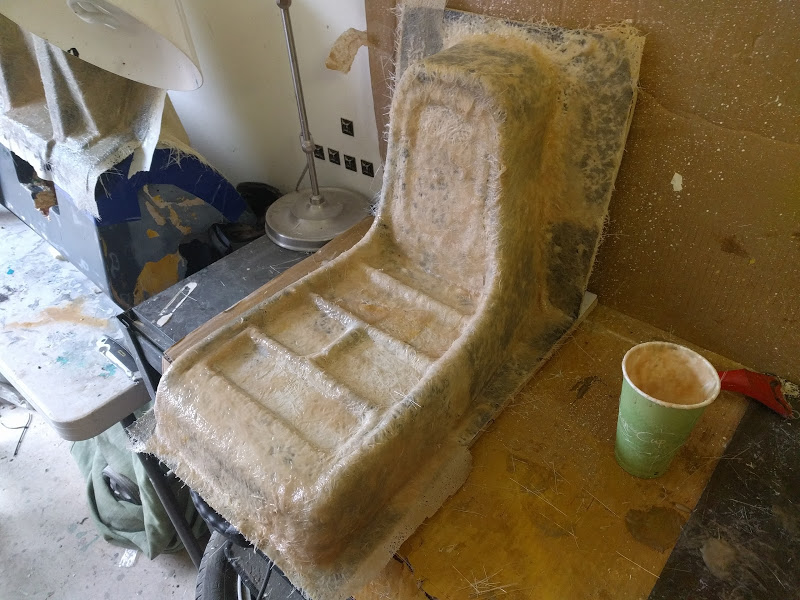
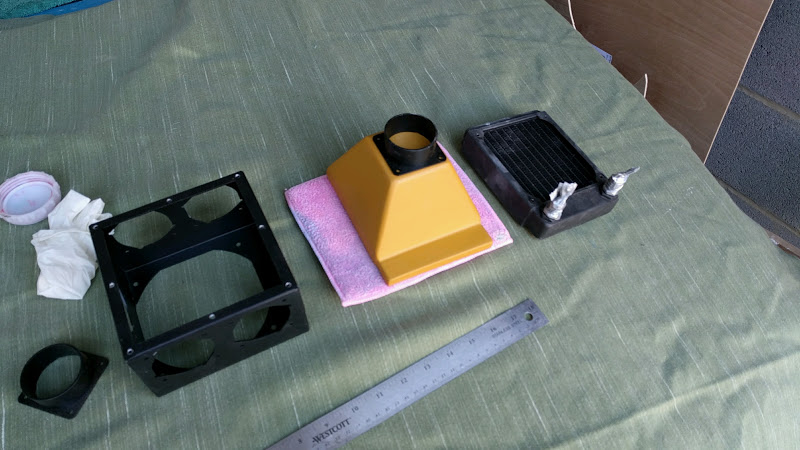
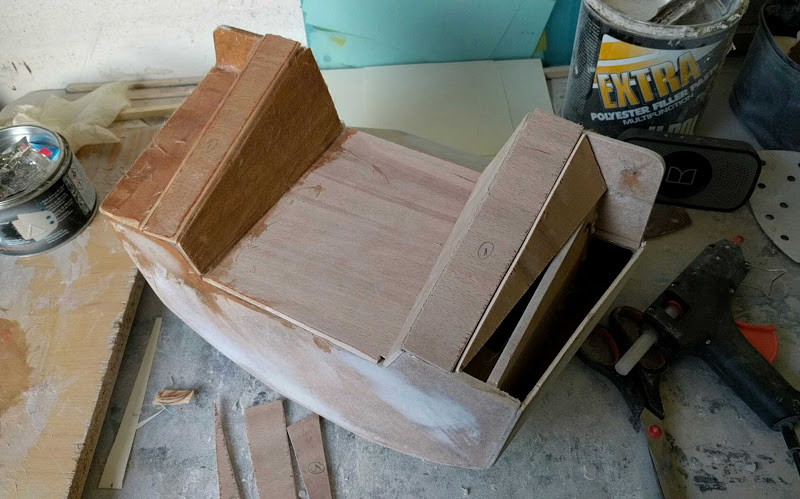
While I wait, move onto the heater ducting. I needed a cover/duct for the heater matrix so decided to do on in kevlar. Made a very quick and simple mould tool from scraps of wood and fibre glass filler.....
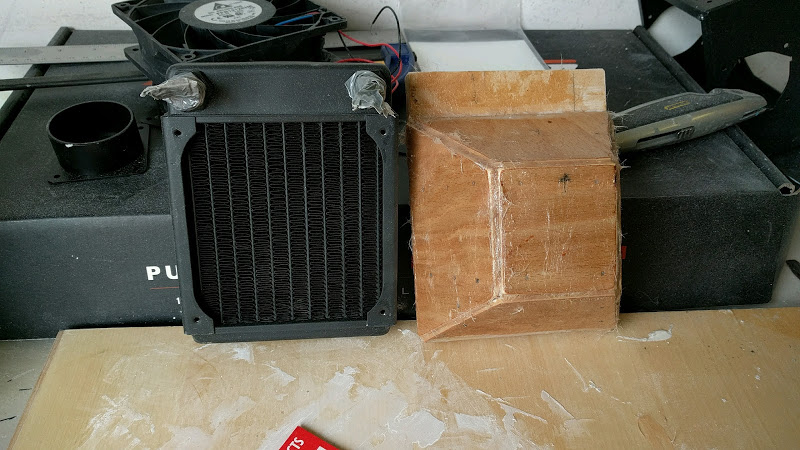
So the ducting will go over the matrix and pull air from the cabins original fresh air duct.....
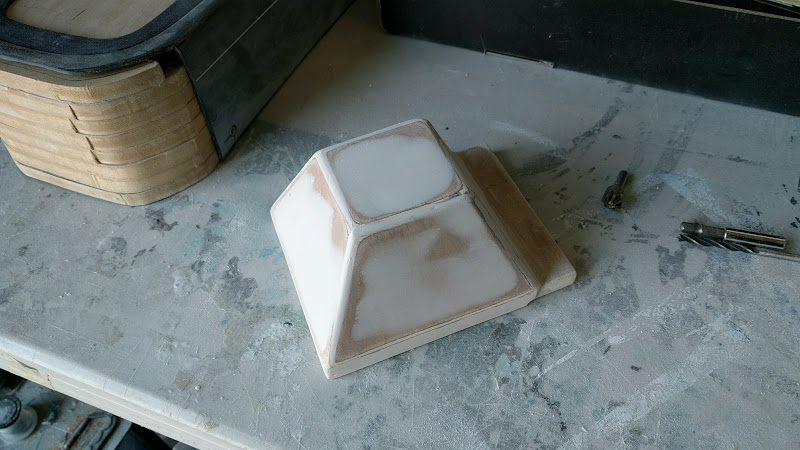
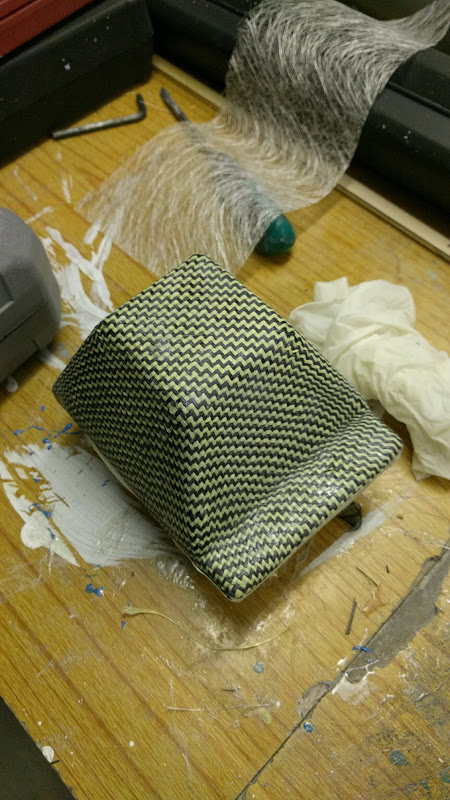
Build up with kevlar, just because racecar!!!!

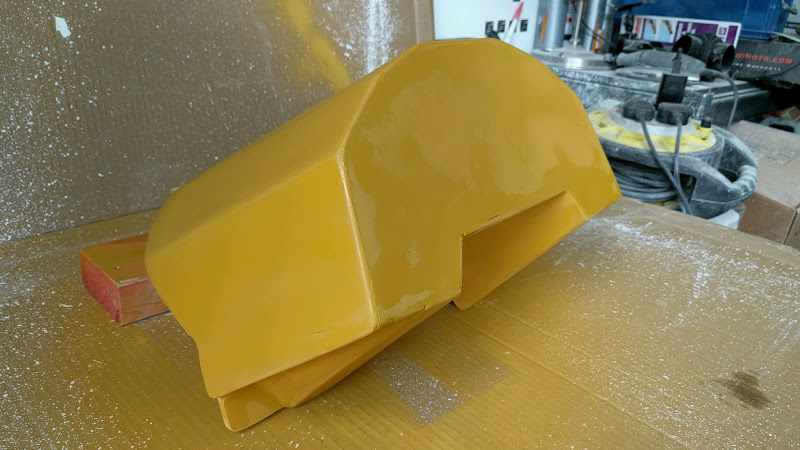
Flash off and trim...
Separate and trim around the heater hoses....
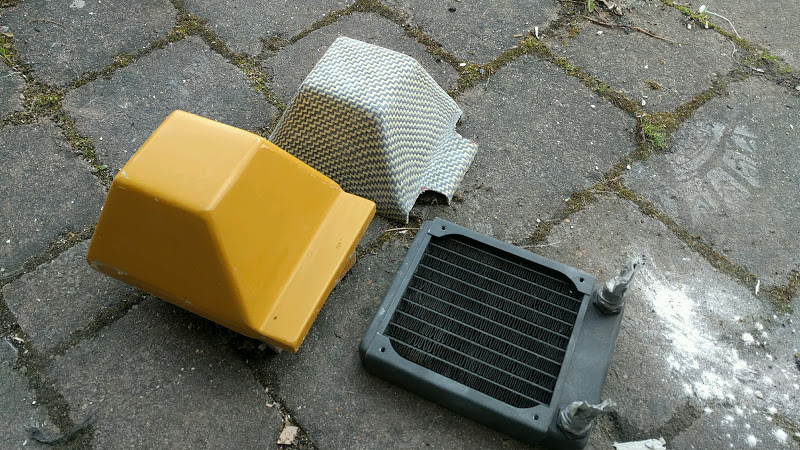
Last stage will be to cut and mount the air pipe but I will do that once its all been test fitted to the car.
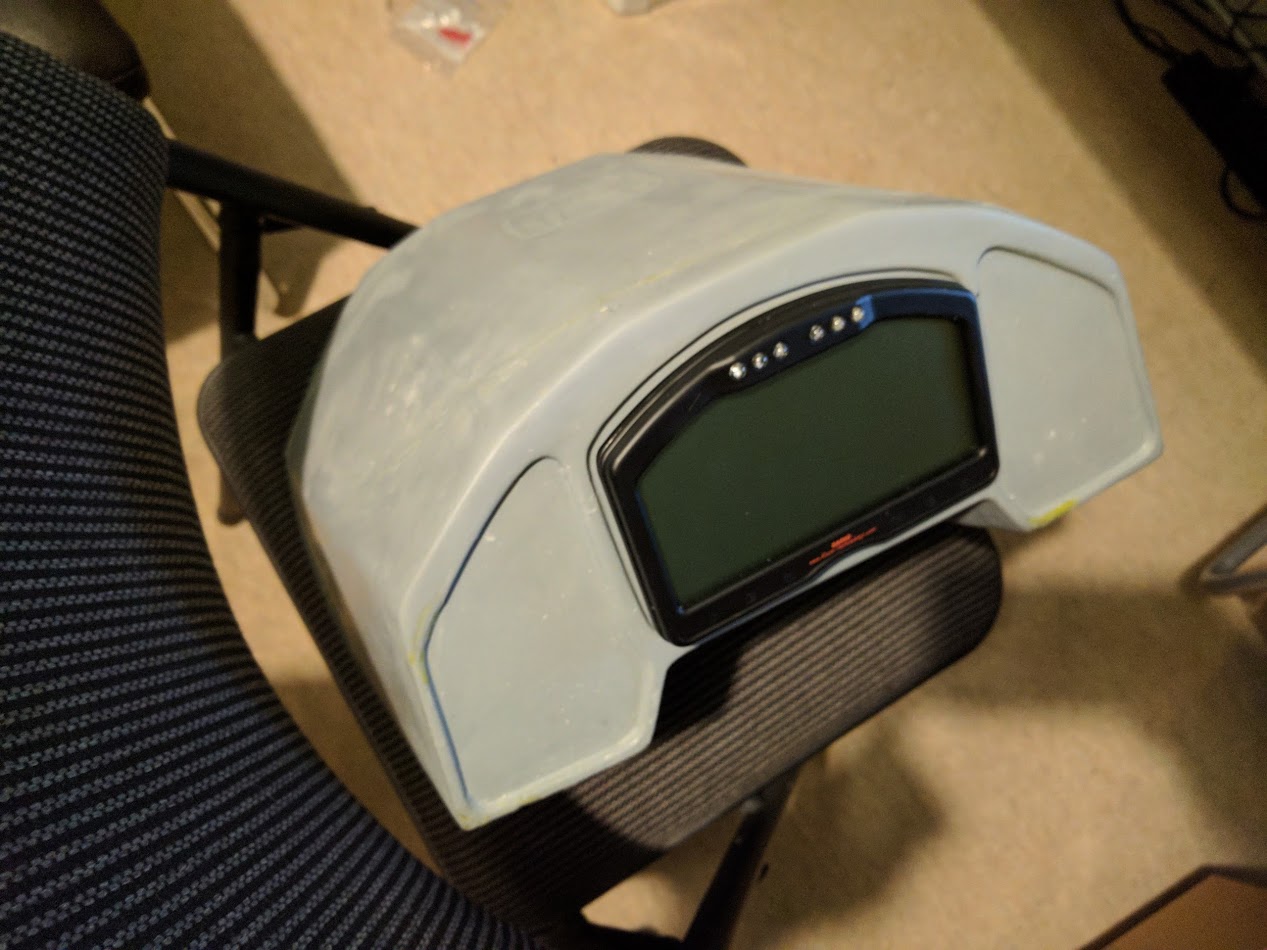
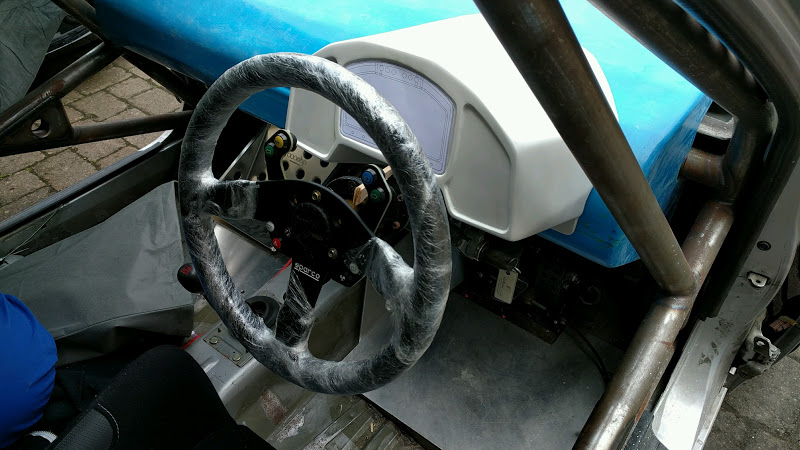
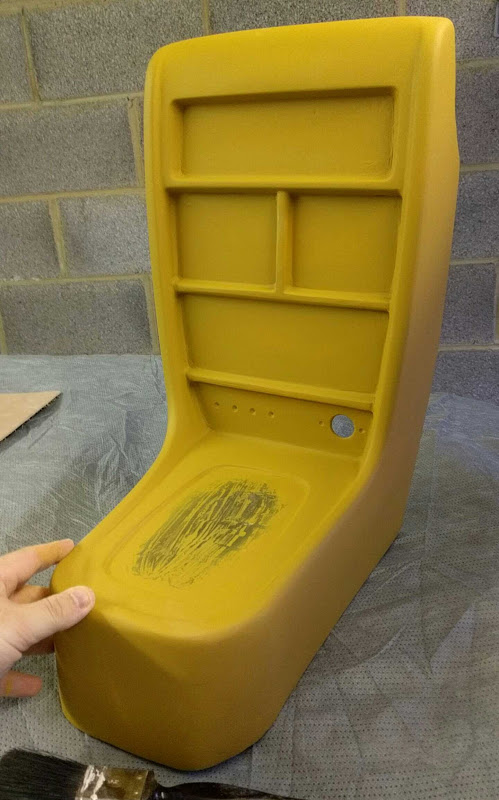
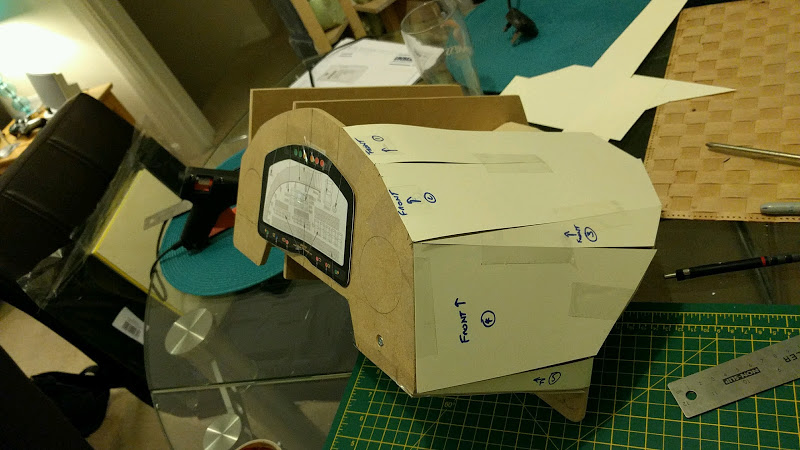
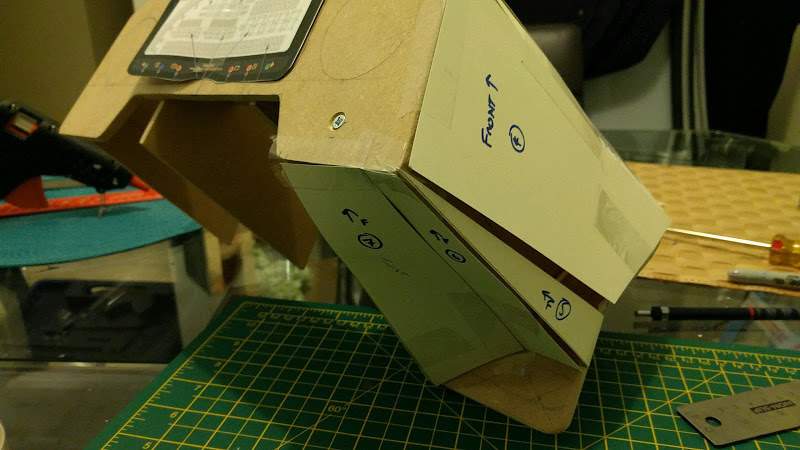
And forward onto the instrument binnacle. I wanted something to hold after market dials and keep them as easy to read as possible. Start with a dummy layout in card/foam board on the original dashboard mould tool...
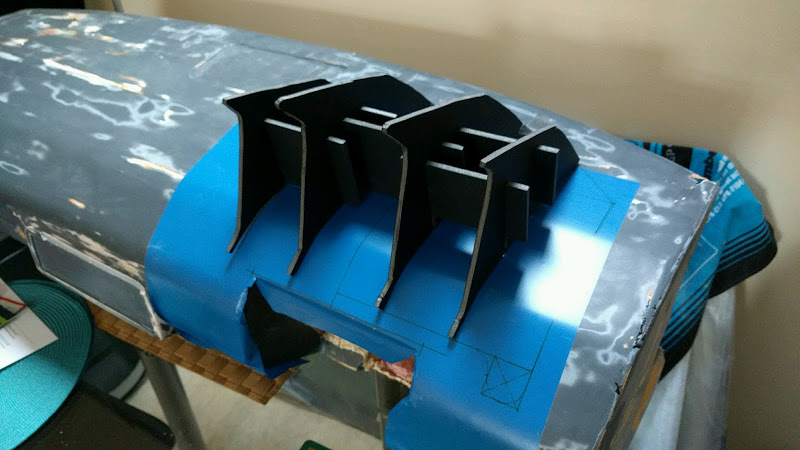
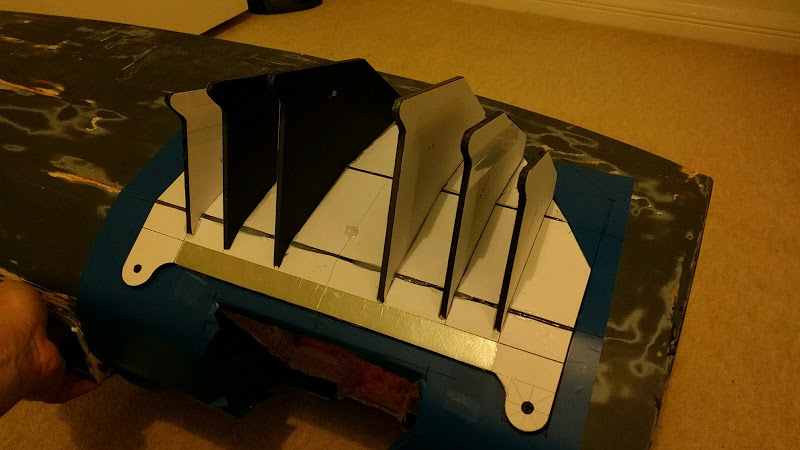
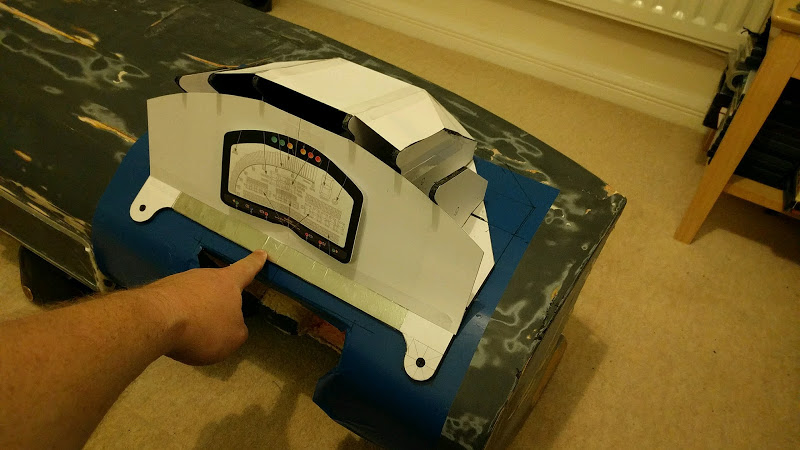
You get the idea. However, after fitting the dashboard and test fitting the binnacle a number of things were obvious.
1. It was bloody ugly!
2. I couldn't read the dials
3. I was really really ugly!
So I started again. Only lost an evening work but it needs to be right!
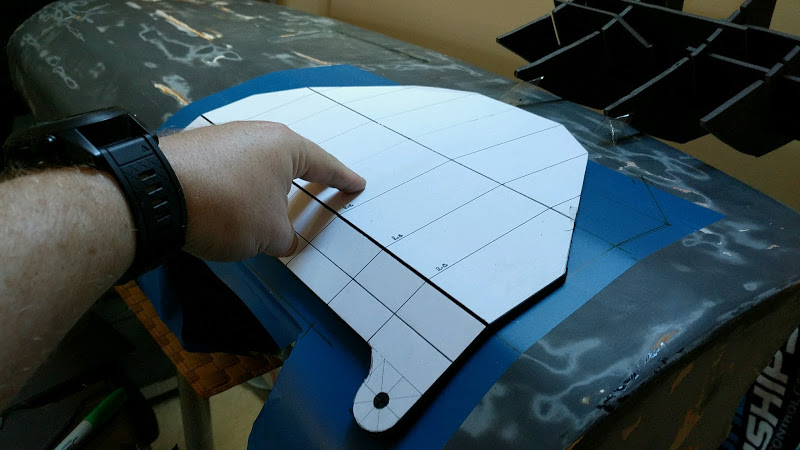
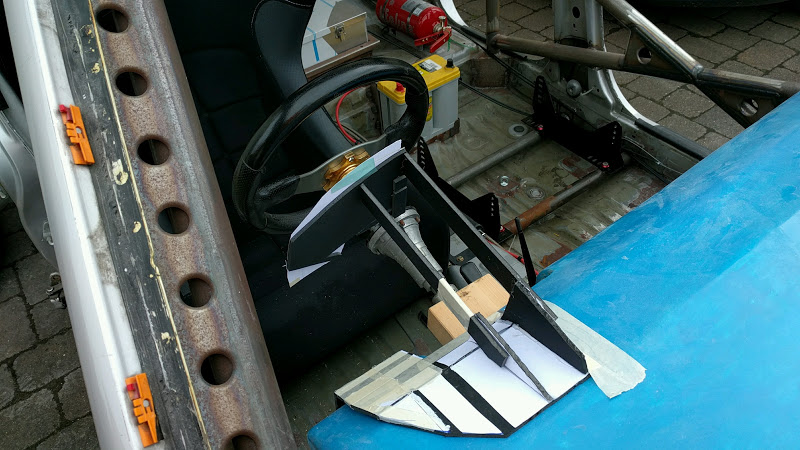
Mock up made in the car from scraps and tape quickly. This one allowed me to read all the dials and I hoped could be made sleeker and smoother. Note I only made half to save time....
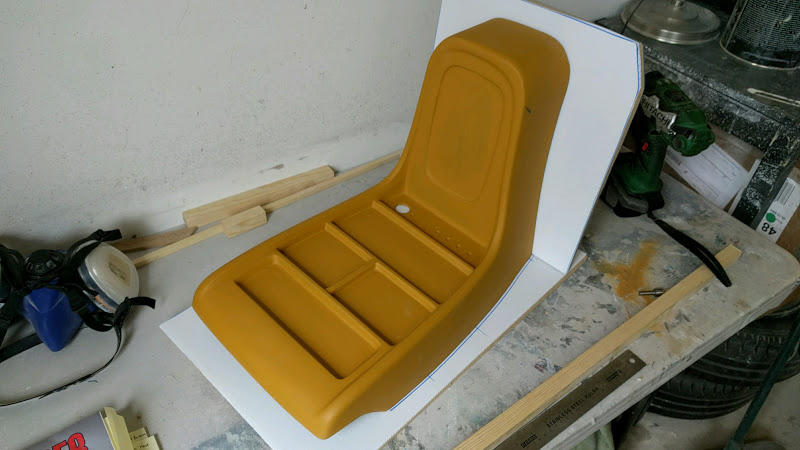
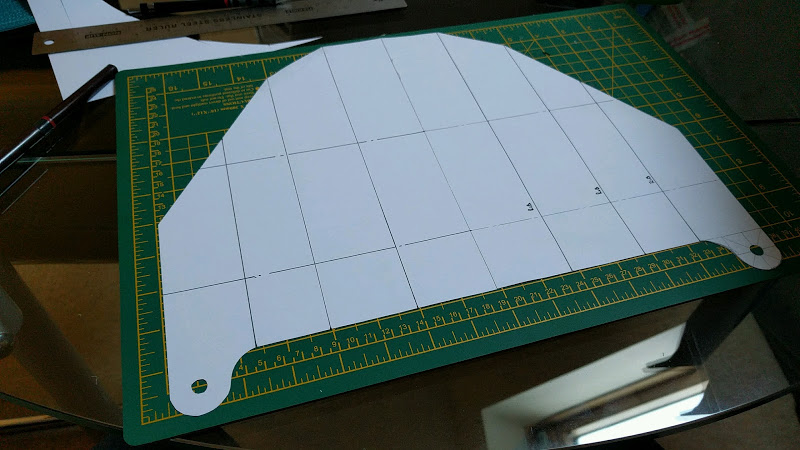
Straight into wood, I'll fine tune as I go.....
Connect the dots.....
Move from templates to wood the next day.....
Prime and look for defects....
A few areas to work on....Still a work in progress.
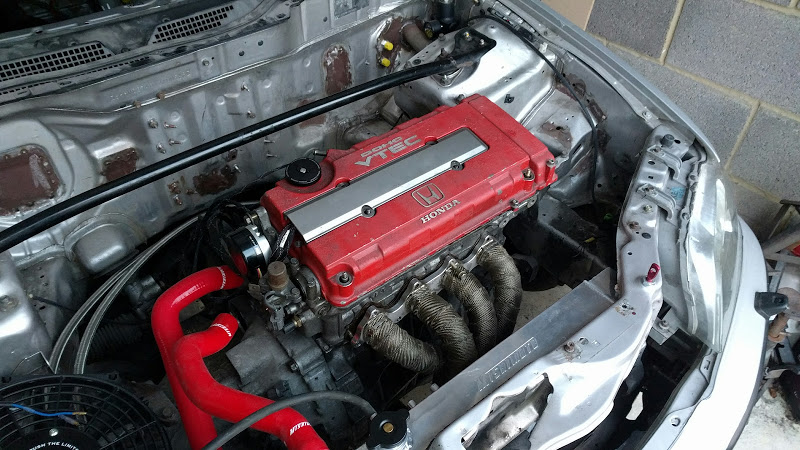
Finally, fitted the COP setup, new steering wheel controls and the intake manifold for the throttle bodies!
-
2
-
-
On 26/04/2016 at 0:21 PM, Grant said:
Liar! Loads has been done! Get some pics up!
Shutup, just because you know where I live
-
1
-
-
On 08/10/2015 at 3:41 PM, VTISmichael said:
Lovely ally brace top work there, nice build dude but isnt that mdf dash much heavier than the oem plastic one ?
The MDF was just a former for the mould tool, this was then turned into a fibre glass mould then finally a carbon fibre dashboard (which is now in the car!)
Sorry for the long absence - working in America for 5 Months and moving my family from one part of England to another has meant I've not done lots to the car. I will try and post the updates over the coming week!
-
2
-
-
-
After a day at Japfest putting more faces to people in the club I've started on the powersteering and oil cooler mounts. Dash has been sanded and filled again after a few last minute design changes and I hope to do the last sanding tomorrow ready for moulding.
I'm going to be giving the roof mould tool to a small carbon part making company a friend runs to make the final panel so if he's up for it once mine is done I'll ask if he'll do more. I haven't got the bits to do resin infusion or work with prepreg carbon
-
Been busy,looks very professional

& need to Pm you
no i wont your inbox is full ??
i need a squib

Sorry, emptied out a few old messages so you should be able to PM me now
-
just read through it all mate and you've done some cracking work fair play!!
and that wiring!! i thought i was doing ok when i tucked most of mine and done the S2K clocks but that is insane!!!!
Cheers mate, wiring is one job I like doing to be fair. Still working through the rest and learning as I go.
Quick update now I'm near a PC.....
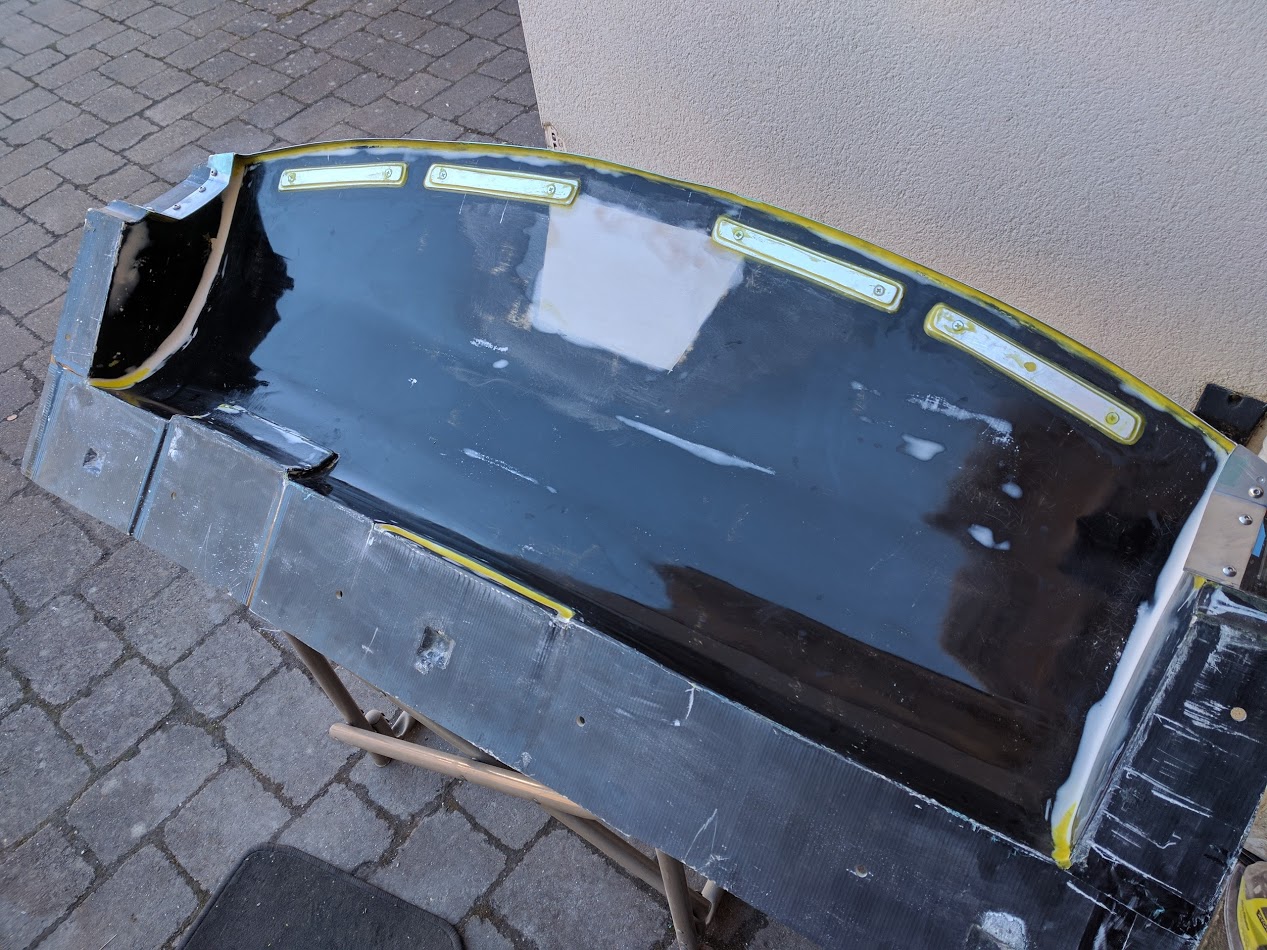
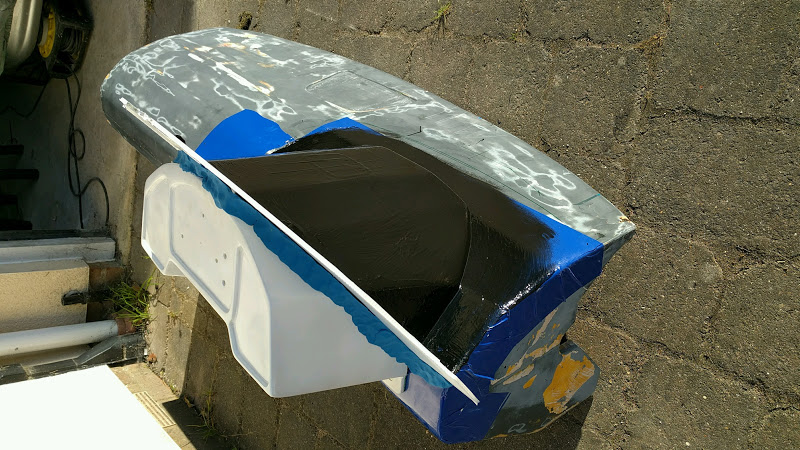
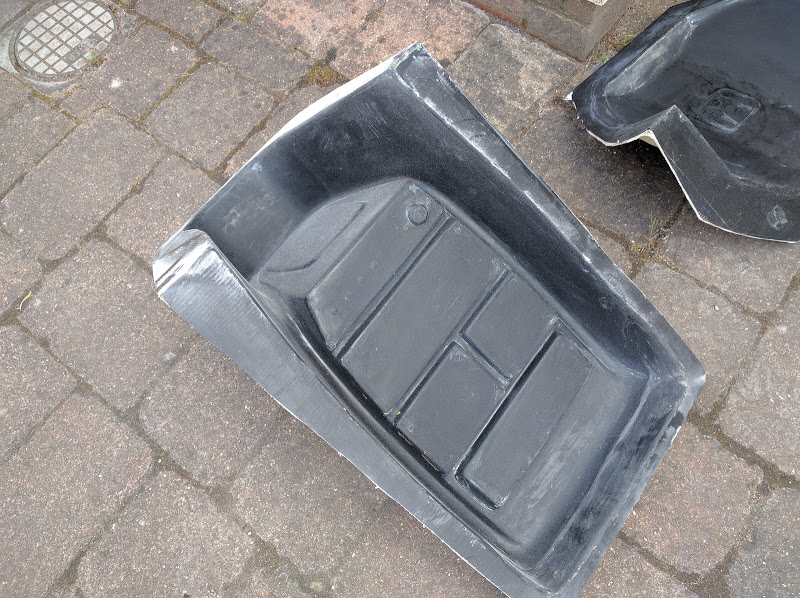
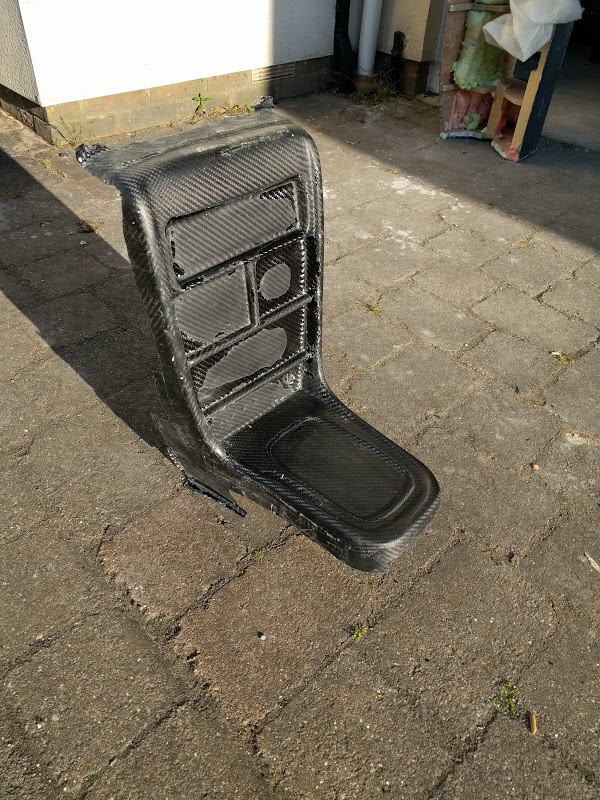
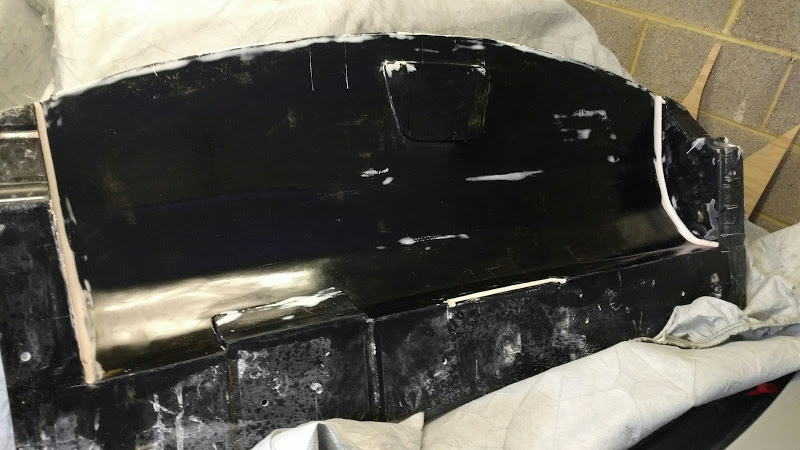
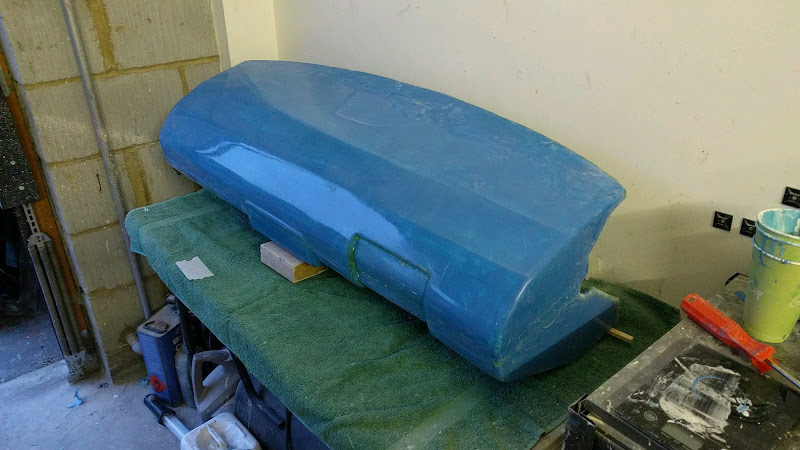
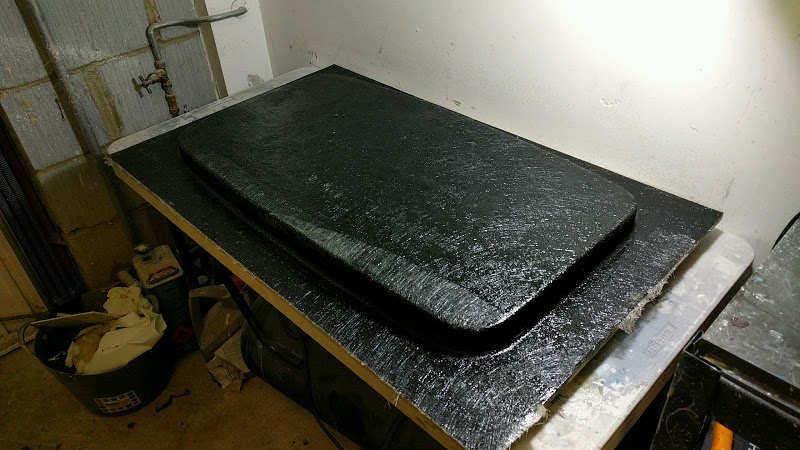
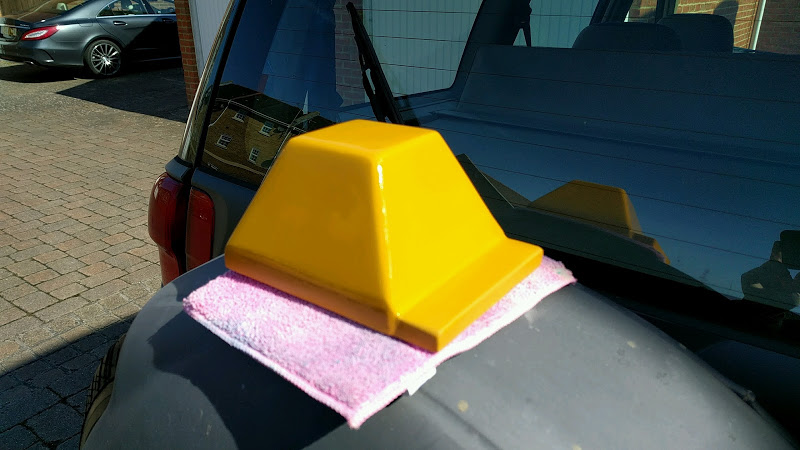
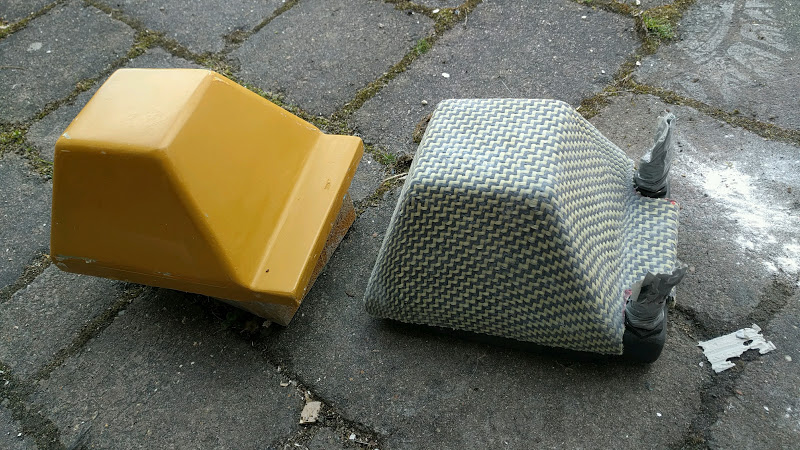
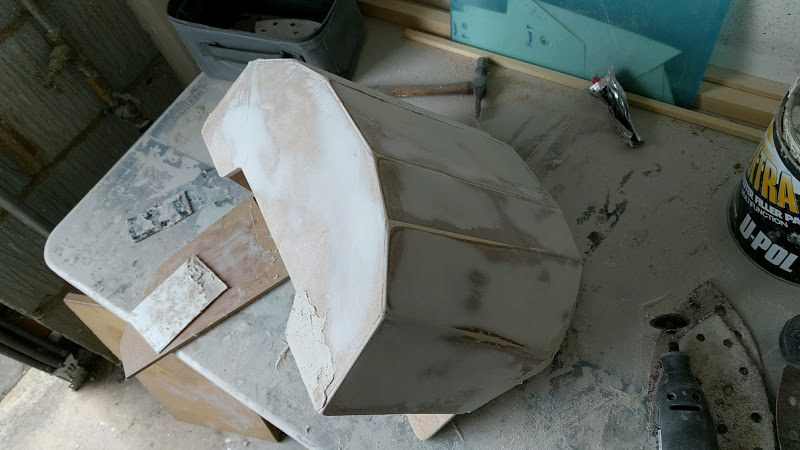
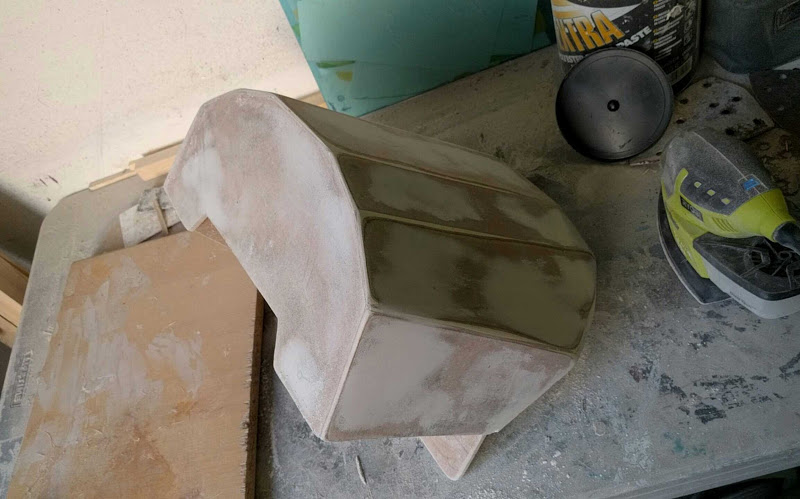
So I've checked the roof bung actually fits in the hole with a tight gap for sealant by using the spare roof I have


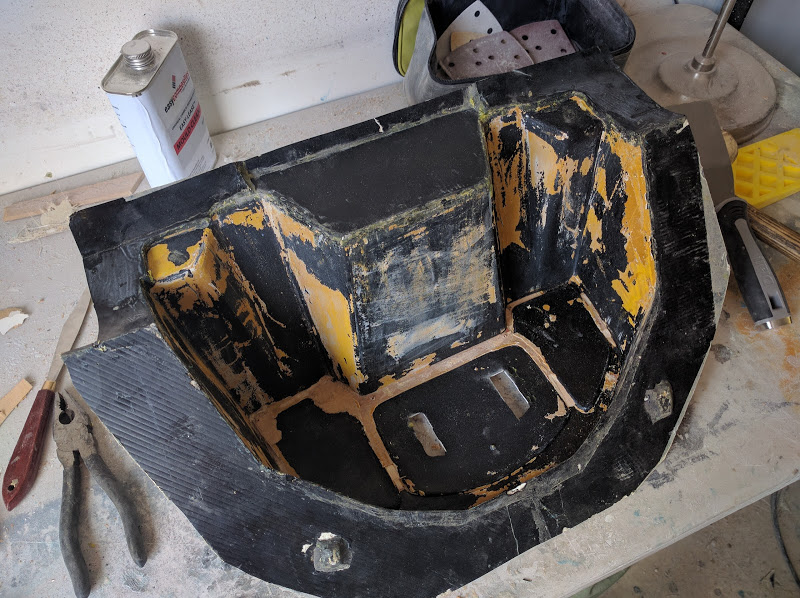
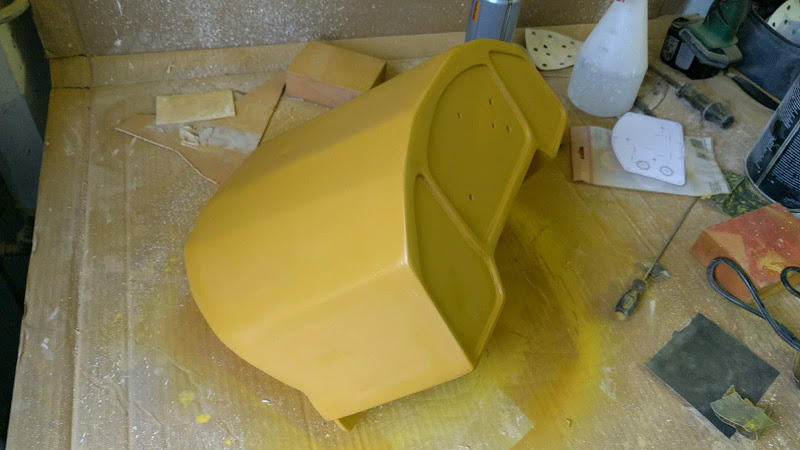
Now time to sand and fill as smooth as possible ready to take the mould from. Filler primer and sanded the sides and covered the flange area with tooling resin to make a smooth surface for the vacuum bagging tape to fix to later.

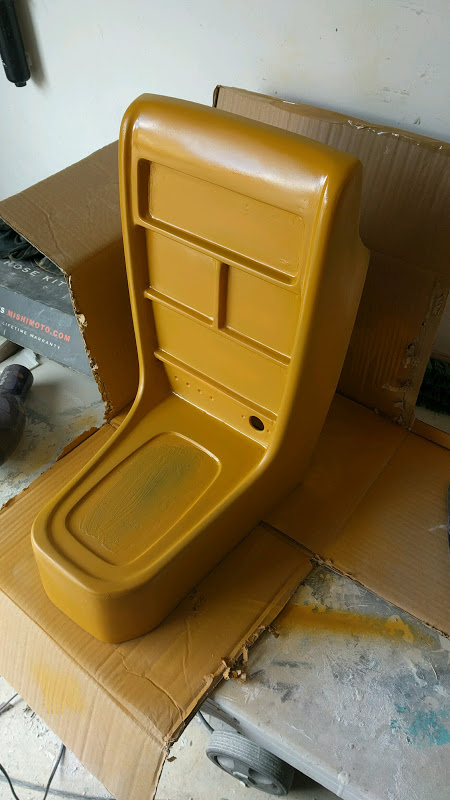
The dash has now gone from this....

To this....

Filler, sand and wood primer to seal everything ready for tooling resin and sanding, lots and lots of sanding!!


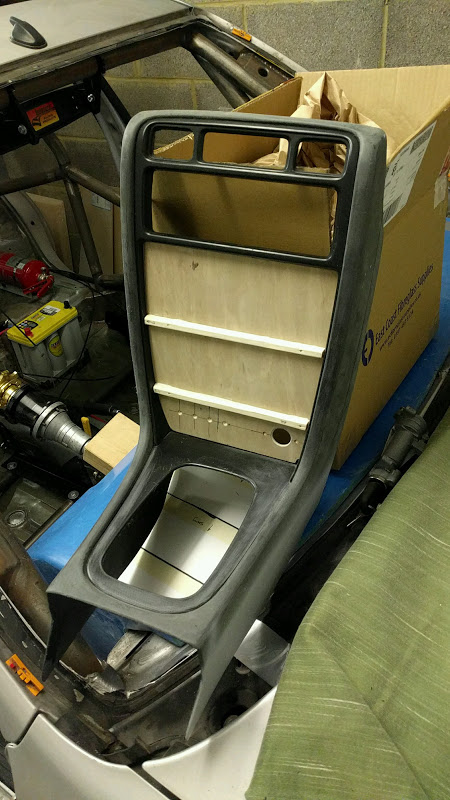
Wasn't sure how to get the centre console to match up the dash, needed to fill that area in somehow


Made up a cover that aligns with the inside of the centre console and glued, filled and sanded. Cover area and areas where I broke through the resin again with more resin.

More sanding, filling and recover in primer


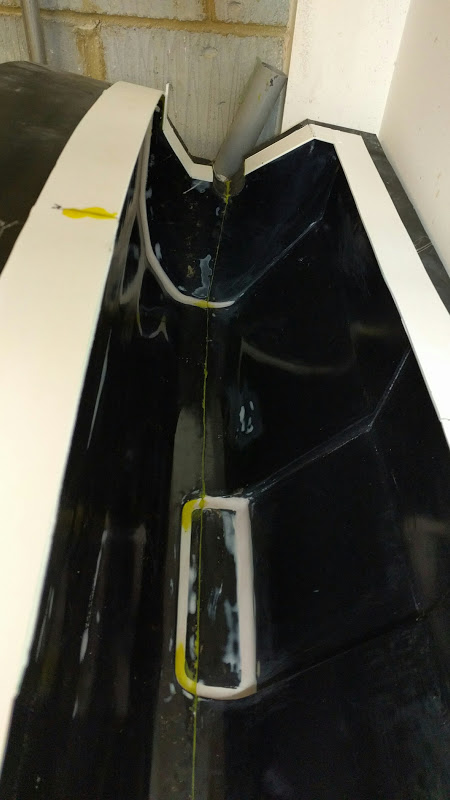
Another sanding session and it's ready to make the split mould. Clamp the tool to a base and build supports for the parting flange. Used a plastic pipe to simulate where the roll cage.


Time to enjoy the bank holiday weekend and chill out
-
Top gorilla engineering!
Notice the percussive maintenance tool in the bottom of the last picture?
-
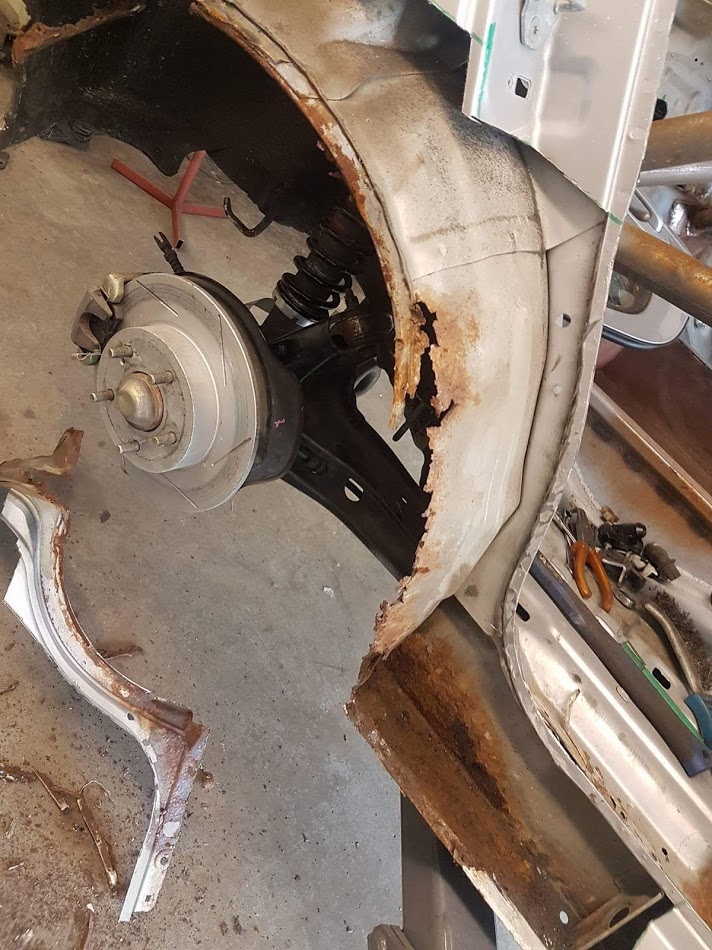
I forgot to update the thread about the rear chassis brace although it was talked about elsewhere on the forum, after a session on the lathe and mill....


Bit that had to be cut away on the chassis to get the brace to fit - now needs a plate welding in


-
2
-
-
Dave's will have more room for the weekly shop though!
Certainly won't have to fold the seats down to fit all the wood for the dashboard, just slide it in around the roll cage!
MC2 Project - Chassis prep
in Honda Civic MA/MB/MC
Posted
Took my Skoda last time to Combe in June. I normally do Goodwood or Combe but I guess now my new locals will be Brands and Snetterton. No more planned until the Civic is done now.