Leaderboard


Popular Content
Showing content with the highest reputation on 06/08/2021 in all areas
-
 Nice pics - good looking MA2 points
 -
Thanks mate! Took a hella lot of work and many hours (and wasted a few consoles trying to get it right!) but overall happy with it so far. Good thing is, If I want to it can all be reverted back to oem dash. Would love to get the console 3D printed but from what I've seen and read would cost a fortune. Might still look into it though.1 point
-
That looks spot on mate! Good work1 point
-
1 point
-
Thankss1 point
-
So, time for a bit of an update! I have started the double din conversion for DD. So, here's where we started! I cut the lower horizontal part of the single din section out of the spare dash I had. With that cut out, I then did the opposite with another spare dash and cut out the upper horizontal part of the dash. Next, the two parts were offered up together with the double din cage that I bought, to see how they fitted together. Pretty good as it goes, although there was a small gap of about 5mm between the two halves. This needed much work with resin and fibreglass to make it strong enough not to break. After fiberglass I used areldite chemical metal to fill over the join. and showing the rear After this, I sanded the filler smooth, and reshaped it to match contours of the dash. Then, sprayed with plastic primer. Once paint had dried, it was onto satin black... even though it can't be seen, I sprayed the rear of the panel too. The black looks shiny as this was straight after painting it so its still wet. It dries to an almost oem satin finish. I noticed on some of the conversions I've seen, the bottom half of the dash is now too long due to adding in the extra din size. This meant the little cubby tray at the bottom sits way down past the bottom of the console. I wanted to avoid that as I didnt think it looked right, so I cut around 5cm from the bottom of the bottom sections uprights (the bit where the heater would originally sit below the original radio). Can see where I've cut it in the first phot below of it fitted to the console... How it looks all roughly fitted together (clock is hanging our lol) Sooo, after fitting it together I have decided that I'm going to go over the joins with a fine filler, to get it absolutely perfect. It's hard to see the joins to be fair, but my ocd knows they are there! So will mask of the sides and then fill it so it matches all contours perfectly. Then just a case of spraying it again. All in all, really happy that I've got the bulk of it done and how it's turned out. Think once I'm finished, you'd be hard pushed to tell it didn't come from the factory like this! Then I need to choose the head unit!1 point
-
Cheers bud Looking forward to seeing the double din.1 point
-
That was a nice easy fix, if only they were all like that! Loving the tablet install mate, looks really good! I'm part way through doing the double din conversion for DD, will post pics soon!1 point
-
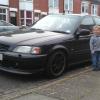
Lovely MA Civic mate, looks sweet!1 point
-
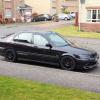
Looking ace bud. Love the feel of a freshly aligned car1 point
-
1 point
-
phew thats a relief then nice easy fix. shes looking good mate!1 point
-
Since I'd got the car back, I'd been a bit worried about the engine as it seemed to have lost to end power - I was having to change gear about 1k to early as the power was dropping off. I've been needing to get my im ported to match the dc2 throttle body, as I'd noticed a bit of a drop off at high revs when I fitted it, but not as bad as recently. I noticed today though, that the intake to the air box wasn't where I'd fitted it - I had installed it so that the trumpet was in the void where the resonator used to be, but when it'd been reassembled, the trumpet was still in the engine bay, half pointing into that void, but also half covered up by the body. Adjusted that, and I now have high rev fun again... Phew. And here's a pic because purple. My camera doesn't show the purple flip very well though.1 point
-
Cheers. Think that with some more magnetic tape on the clips should make it stay, as well as making it sit more vertical as it's quite thick. Also, thinking of some kind of bead along the top line of the console to add the support that the blu tac is.1 point
-
Love the tablet setup that's great idea. Android auto is good.1 point
-
That's one of the things that made me as about not worrying about fitting it in, you can see the big screens on a few new cars sticking out when you go past, and they don't particularly look out of place. Means that I can easily take the tablet out when I'm not in the car as well so no one gets tempted to give me lightweight windows.1 point
-
Its going to be like a Tesla!1 point
-
So after trying the little 7" tablet a few times now, it keeps crashing on android auto mode, but it's quite old and under powered. So I'm going to be trying a bigger and newer affair... Still old, but not as old as the other one. Decided to keep it simple instead of butchering the console - especially now I'm going for the 10 incher - would need a much bigger hole (stop giggling at the back). The blu tac is just while in trying it out. I've got two magnetic clip things, which worked great for the 7" one, but aren't quite up to it for this one. I've stuck some 3m magnetic tape on the back of the tablet, but needs a bit more help. And yes, my headunit isn't in properly, coz I still need to get in the back to do more wiring, and it's a pig to get back out once it's locked in.1 point
-
Haha, triple garage would be awesome!! I'd only end up filling it with more cars though! Was browsing a certain auction site last night looking at MK3 Ford Cortinas of all things...........got a real hankering for owning one again! Never gonna happen unless we win the lottery, but bloke can dream ay! Deffo be worth it mate just to keep her away from the worst of the weather when you're not using her.1 point