Leaderboard


Popular Content
Showing content with the highest reputation on 07/21/2016 in all areas
-
It's @Dave and @Grant in the mini2 points
-
2 points
-
yes mate i can come and bash one off over the car2 points
-
No Dave, the wings are different at the front due to the headlights being a different shape. Yeah it is quite funny to see the swaps. All of the interior has now been swapped over also. The hardest part was swapped the window regulators over as the Rover doesn't have the wiring for electric windows. The front dash was actually not that hard to do, despite it looking very intimidating. And, being that the donor car had a broken centre console, i had to plasti dip it to match. All that's left to do for the interior now is finish drilling holes in the door cards for the window winders. I've put the seats back in already and all the trim has also been refitted.2 points
-
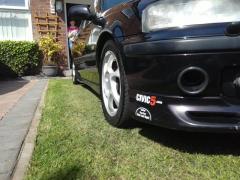
Hi guys, after a great two years of owning MB's, ive now been able to afford to insure something abit special in my opinion. i collected it a week ago to the day, she's a 55 plate nighthawk black premeir ep3 current mods are as follows. meisterR coilovers hardrace camber arms hardrace ball joints K&N induction kit, spoon n1 and remap. already have a few plans. I'll upload pictures later, it's saying my photos are too big.1 point
-
@UnicyclingTom got Hel i think, but had a Hel of a time getting the right ones.... I'll get me coat...1 point
-
The front should not be used as a Jack point. Done this on my old deck it pushed my bonnet out of line with the wings.1 point
-
Caliper refresh complete should be able to put the car back together later tonight1 point
-
It's possible the car may already have had damage if things weren't lining up properly to begin with. I have never used any jacking points at the front, always the ones on the side (wasn't aware there were proper jack points on the front). Did you position the jack on the chassis leg or on the actual slam panel\front valance itself? I wouldn't have thought the valance was strong enough to support the car on.1 point
-
There was some bad rusted on the rear of the roof which has now been fixed. It's not a professional looking job but it works, and it's protected now. Rear ends have been swapped over finally, luckily the tail lights were exactly the same set up. Swapped over the lock mechanism, and the trim is also exactly the same fitting so that worked well also. I have finished the front end. It wasn't an easy task, but considering I decided not to swap over the slam panels, it turned out ok. If I was to ever do this project again (God knows why), I would definitely swap the slam panels over. So, here we have the whole front end stripped down. Next up, we needed to modify the slam panel. The centre had to be cut away to allow the bonnet to close fully. Now we have the bonnet fitted. The sides of the slam panel had to be trimmed away in order for the headlights to fit under. We now have the front end completed. A few mishaps happened during the assembly of the front end. Firstly, I snapped a bolt at the bottom of the drivers side wing, not a major issue but the door now catches on the wing. There might be just enough thread to fit a nut onto it, and hopefully solve that issue. While grinding a rounded torx bolt off the bottom of the radiator to fit the intercooler, I cut into the radiator, so a replacement radiator has been purchased. I won't be able to drive the car until I've changed it. It also comes with an intercooler, so now I have one spare which is always handy I guess. Tomorrows job will involve replacing the drivers side doors, and that will be the exterior completed. I also need to rewire the headlights as the loom is different on the Civic. Once I get hold of a Haynes manual I'll be able to know which wires to join to which.1 point