Leaderboard


Popular Content
Showing content with the highest reputation on 06/09/2015 in Posts
-
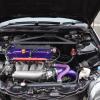
Exhaust manifold ordered3 points
-
If its obd1 then ecu pinout is same for all models. And will be in the download able service manual. Or a Google search for honda obd1 ecu pin out will work.. eg.. http://technet.ff-squad.com/wiring/obd1/obd1.pin.schematics.gif3 points
-
You do a great job. Function before fashion. Making sure it's all working right. Then do ya cosmetics. I have friends who modify a 15 yr old car with stickers and splitters. Thrash it to death then slag it off when it has a little clunk or something. Instead of fixing the clunk keep putting grills and skirts on and still slagging off the clunk 6 months later. Does my head In.2 points
-
Ok then you dawgs .. Been in touch with my printing man about getting some hoodies made up .. Proofs are attached.. There is quite a variant on pricing though.. There are two types, conventional hoodies & zipper type. - I think we should decide on one or the other, not have some pull overs and some zipped. These come in a "basic garment" (cotton poly mix, lightweight, double lined hood, lace draw strings) & a "high end garment" (superdry style, cotton/poly mix, waffle lined hood, fat lace draw strings MP3 pockets. Price wise, basic retail at £20-£22 and high end are £32-£45 .. These are rough prices and will obv be dependent on QTY we order as to how good a price he can do us. So the questions are; Basic or high end ? And what do you think of the graphics he's created? - UPDATE DECALS WITHOUT THE BOTTOM LINE. PRICING: £18 if we get 10 £16 if we get 20 SIZING; Standard Hoody (Chest size) SML - 36" MED - 40" LRG - 44" XL - 48" 2XL - 52" DEADLINE IS THE 25TH OF JULY !! PAYMENT DETAILS - paypal - gbhurry@hotmail.com - sent as a gift plz. Now, postage ... I've spoken to my guy and he's going to have them finished for JF2.. If your not attending or dont know anyone who is that could collect for you, please hold off while i figure out postage costs. Thanks, 1. Grant - MED - ZIPPPER 2. Grant - SML - HOODIE because I'm not manly enough for a bigger size 3. Philgor - XL - ZIPPPPER PAID 4. UnicyclingTom - LRG - Zipper! PAID 5. Powerofdreams - XLRG - HOODIE PAID 6. CrazyMark - LRG - Zipper PAID 7. Roj - LRG - Ziiiiiiiiiiipper PAID 8. Chandler- XLRG- Zipper PAID 9. Dr_broon - lrg - zippy PAID 10. Dexter - MED - ZIPPER PAID 11. phill1975 - large - hoodie PAID 12. Phill1975 - large - zipper PAID 13. Phill1975 - small - hoodie PAID 14. Dave - large - zippies PAID 15. Dave - Large - Zipper PAID 16. Dougie - XL Zipper PAID 17. GIB LRG - Hoodie PAID1 point
-
I managed 185bhp with remap and breather mods etc. Since then I have improved the exhaust so should be around the 190bhp mark. A bigger bore exhaust would probably.get me slightly.more gains but not worth the £££ to get there. You will be lucky at more than 190bhp from a B18c4 unless deep pockets...which I don't have!1 point
-
We need to keep the hover cars as a nod to back to the future! It's 2015 Marty travels to in the second film!1 point
-
Ahhh wish I had more time to work on this but so close to getting it motd. Sorted from brakes out today and serviced it. out with the old... in with the new... put the arch liners etc back in then slapped the mb6 lip back on plastidipped black. Wheels too.1 point
-
Sounds like you got either a s80 or a s4c1 point
-
Cracking idea mate! Yeah, a poll would be the best bet, see which is the most popular then get a list started with that. Count me in!1 point
-
Thanks @UnicyclingTom for the nomination and also massive thanks to everyone who voted for me..Means a lot winning on the first nomination1 point
-
Try all four space savers on the ep that be cool to drive. NOT1 point
-
Okay thanks for the big help guys1 point
-
best bet is pick up a Haynes manual on ebay mate, they have good wiring diagrams at the back of them Not sure if our downloadable PDF has the wiring diagrams also, so worth downloading that from the forum. It's got loads of useful info in it so always worth having1 point
-
Will update this sometime this week lol1 point
-
1 point
-
ha ha it looks really silly like that1 point
-
Should be now1 point
-
But within a month or so, I'll have 2 working M's again Deposit being left on an engine on Thursday, and the rest being paid within a week or two after that Matt1 point
-
this is wat i feared so i bit the bullet n bought an arch roller so i should be alright for clearance1 point
-
Well done maz thats another win chalked up.1 point
-
Very nice MC21 point
-
Congratulations on the cotm win mate. Well deserved1 point
-
Congrats Chap1 point
-
I voted for the winner but the windscreen sticker threw me a little.1 point
-
Well done and we'll deserved I'd say1 point
-
Well done!1 point
-
congrats Maz1 point
-
@ammarbm is the winner, congrats Maz!1 point
-
i haven't used the meguiars wax before so be interesting to see how it turns out like1 point
-
Yeah HKS Hiper-D coilovers for dc2, also have the rear lower control arms for a dc with them to fit it Gonna be doing trackdays with the mb6 normally so I opted for this coilovers over a new set of yellowspeed or bc racing's I'm jappy with all the HKS parts on my s14a so can't go wrong with this imo1 point
-
Taken from the manual1 point
-
Well that's the tyres on the wheels. Just need to fit the front pads and get the them on the car. Then hoping to fix the front lip as not sitting right. Also got a rear silencer to fit then fingers crossed for Wednesday for the mot. Hopefully not fail on anything as usually fix as I'm going.and if it's all good night treat the car to a new modification.1 point
-
soooo heads off again!! was still smoking, been speaking to @Hondapaul and seems like its the stem seals again! so bought some genuine Honda ones and after some research realized there is 2 part numbers, one for exhaust side and 1 for intake side!! so that's new Stem seals and new head gasket, all genuine as I'm not buying cheap crap again!! pictures to come over the weekend!!1 point
-
It wouldn't be me without a silly obscene exhaust Finally decided on a set of wheels today, Klutch KM16, 15x8.5J ET17. I know of one other set in the country, on a bagged 6N2 Polo, so for the moment at least, pretty individual. Matt1 point
-
s**t pic. Phone dying no flash. but plastidipped it. What weird stuff. Hope its hard wearing. looks alreet. Will whack it on when get a chance1 point
-
Just as I hit enter, @ammarbm posted some more pics on facebook, including some of my dash and parcelshelf! So here's a few more Matt1 point
-
Hello fellow upgraders. I'm just in the middle of a simple, some may say useful project. As you know the intermittent wipe means we have ony one option - one set period of time between the wipes and whatever the rain is doing you cant change it. I like things to be controlled a bit more so I'm going to change that to be able to smoothly adjust the range between around one sec to 10 between the wipes. Not sure about the high range thou. I had that in my previous car and I miss that hugely. If somebody interested I can post it all so you can be more in control... Gee that sounded pathetic... Anyway, sorry about my english and let me know if I should continue this topic; pleasure to share.1 point
-
That's awesome! Nice one for doing it and being kind enough to show us too!1 point
-
Here I go again. Time for installing the unit. After soldering the potentiometer and three other connections I went looking for the confirmation of what Haynes says. All the connections were as I expected. First thing I clonnected the earth from my kit to the nearest available bolt; see pic After I realized I have to cut off existing control unit in order for those two not to work simultaneously I stole power from that connection (yel/blu) and chose low motor output (blue) to be used while working intermittently. You can always use the high speed one (blu/yel). Important! I did not cut the motor wire (blue). As you can see in the above pic there are two yellow/blue wires. Confusing isnt it. Counting from the right (the bigger wiper plug) there is blue - low speed, blu/yel - high speed and yel/blu - 12v from the switch. Those 3 are the only wires you are interested in. Almost done, all connected Only the potentiomenter left to be fitted. The position is really all about personal preferences as well as the look. I just picked what I had. And the job done. Two comments I need to make. Only 2 pins on the potentiometer need to be cnnected; the middle and any of the other ones. Whichever side you pick will make the wipers go more or less often depending which direction you turn the knob. Still, a matter of ones prefernces. Secondly, the low end is pretty useless because the magic happens every 1 or 2 sec. Thats it I guess. I hope somebody will make use of this idea. If not at least I contributed a bit. Wish I could do more.1 point
-
Thanks. Let me give you more information how it works. The voltage is fed from intermittent wiper switch conn 3 (see below) and it goes to conn A (my unit) which powers the actual regulator. That means cutting that wire but I will test it tmr. The conn from the wiper motor wether its the low or high speed will be grounded or earthed (not sure whats correct) through the relay when it kicks in ( conn B ) The earth from my unit goes of course to any earth point in the car. All that will happen tmr when my girls are away. I will take some pics and and post explanation about colors of wires needed connecting. I still have some blank pcb left and some acid and since I'm not using it very often I might be able to make one or two pcb's if anyones interested.1 point
-
Hi, again. Lets continue, shall we? I just spent most of the afternoon making the control unit. It required some knowlegde about making the pcb. After designing the pcb and altering the diagram seen below I traced the line on it with nail varnish (best so far). Before I was so fussy I used masking, lasering and sparying it before cooking in acid. Afterwards the pcb looked like this. Not a pretty thing but it works. Then it was time for the best part which is soldering the components. There are a few options for P1/R2C1 relationship but I wont get into the subject of electronics because thats not the case here. I'll just give you the set up that works for me. The relationship between the P1, R2 and C1 gives me the adjusting range 1-29 sec between the wipes. The unit is done and it looks like this All I need to do is connect the potentiometer P1 that adjust the time gap between the wipes and get my hands on the wiring in the car but that will happen tomorrow. The list of components you will need: US1 - SRD-12VDC-SL-C or similar relay D1 - 1N4148 D2 - 1N4001 R1 - 300ohm R2 - 1.2kohm P1 - 100kohm C1 - 470uF C2 - 10nF C3 - 47nF To make a pcb you will need blank sheet like this http://www.ebay.co.uk/itm/Copper-Clad-PCB-Printed-Circuit-Board-305-x-203mm-/291106797937?pt=UK_BOI_Electrical_Components_Supplies_ET&hash=item43c7513971and ferric chloride. However you can always get it made by a professional company for a couple of quid. I can post the layout I worked out if somebody wants to get their hands dirty. Sorry to be so laconic. My daughter needs attention so need to meet the fatherhood requirements I will post progress soon and if you guys need more info PM me or reply here. Back soon1 point