Leaderboard


Popular Content
Showing content with the highest reputation on 06/12/2022 in all areas
-
Top cleaning job matey! I know what you mean, always end up having at least a glance over the shoulder waking away in a car park, and there's just something about the way the lights in a multi storey make them look.2 points
-
Lots of pic taking going on. Actually making an effort to drive it this summer. Definitely a car I look back at. Still loving the mb shape.2 points
-
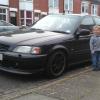
Excuse my ugly mug staring back but gotta love a bit of pirates black! Shame it'll be again by time this is uploaded!2 points
-
yes, I never get tired of the MB/MC shape. To me it's a classic 90's design, simple and classy.1 point
-
Pretty cool experiment buddy, good luck with it. Will be interesting to see how it turns out.1 point
-
Amazing shiny clean,sticky tyres also Cleaned my black bmw today,very windy so covered in dust again,even before i have driven it !!1 point
-
1 point
-
Hey all, been a while! Since I'm quite busy with work and prepping for vacation I figured, why not stress myself out some more, I had been wanting to do this for a loooong time, suddenly, the idea just popped back into my head and I said f*ck it, let's try! I started by sketching up what i had in mind: Usually it takes me a little longer to figure things out but this time I just put on my dancing shoes and sent it. Got straight to cutting up one of the spare tails I had lying around that were collecting dust for years now I started with making cardboard templates for the translucent plastic I was going to use, make sure it all fits. I did change the layout from the original idea a little bit. Bought some regular "bright" LED's, figured i'd string them up in series and power them with 12 volts, (each LED uses about 2 volts, so having six of them evens the voltage out nicely.) The next challenge was getting the "glow" I had in mind. I made this testing base from cardboard and stuck the LED's in, then I made a little reflector plate from a piece of spraycan (ghetto as hell, i know. But it's spraycan, not spraycannot!) Also sanding down the LED's made them give off a more diffuse light. I later sanded down all of them, you'll see why. Okay so now the electronics were partially figured out, and I had a good idea of what I wanted to do. Time to get hacky. Cut away the material where the reflector used to sit. Don't need that! Cut out some translucent plastic and started bending it with some heat. (It's alot harder than it initially sounds, getting the right shape without the plastic warping all over the place is quite difficult. Here I noticed that sanding the LED's down and using the reflector plate created the desired glow. Sanded them all down. Almost there! I really want a nice, even spread of light. This will be achieved by moving the LED's further back into the housing. This is the main thing right now, these leds are not bright enough. I want to use this strip as a brakelight as well, so the idea is to undervolt the LED's when lit normally, and when pressing the brake pedal we will have the LED's at their normal working voltage to increase brightness. I will be using brighter LED's for this, still scavenging the internet for something a little more beefy. Of course sacrifices had to be made in the name science. Poor fella's... Put some rubber material around the metal reflector plate, this will avoid short circuits. More sacrifices... made a new one! This one fit even better! Now, let's focus on the blinkers: Cut the shape once more, since I had warped the other one I was a bit more careful (these take so incredibly long to get right with all the cutting, bending, filing and sanding) Finally managed to get it into a good shape. This was the progress after about 2 days, i have some more ideas that I don't have pictures of yet, but I'll show you all soon!1 point
-
looks the part1 point
-
Just need a set of ronal turbos or deep dish lol1 point
-
So did this in 8 hours lol and tinted rear windows (harder than wrapping the car )1 point
-
Thank you for the reply! I look forward to working on the mb. I Have a few electrics in the car. front windows and sunroof, I also have a few buttons on the armrest but I believe the armrest is from a vti as it's not the same colour as the rest of the interior, I'll be swapping that out for the grey one at some point. I've got to sort out rear passenger door that has a dent, hopefully door cards are not too much of a hassle to remove. and finally the rear bumper isn't correct (wrong colour) so again, hopefully not too much fo a hassle to swap over! I'm also hoping to lower the car too, can't find any lowering springs for an mb though!1 point
-
Nice of you to say so. But it's not all that. Built it just to have fun in and just to tinker with, inevitably gets knocked about a bit in use.1 point
-
Yes, the whole door card has to come off as the speaker cover is part of that. Can't remember for sure, but I think that they can be separated once the door card is off if that's what you want to do, but if it's just too change the speaker it's just the door card that needs to come off. I'm sure there's a how to on here somewhere, but there's a screw to loosen the handle/latch, which then has to slide forwards (or back... Not 100% which but it's obvious when you try to do it). Then there's a little plastic clip that keeps a metal rod in the handle.. Careful not to snap the clip. Then there's two other screws in the grab handle on the door card. Once they're out you'll need to pop out some trim clips around the edge of the card, then Bob's your uncle.1 point