Leaderboard


Popular Content
Showing content with the highest reputation on 03/11/2014 in all areas
-
No problem dude! Had a blast. I've ordered some CREE bulbs for the fog lights now, as well as the same Philips Diamond Vision bulbs you have for my headlights. Should come out as nice as yours I hope. Oh and here's some night time pictures of the new fogs. Cant get over how sweet they look.2 points
-
the answer is yes... they do prefer it, and actually all engines will run better on the higher octane stuff but you will see more of a difference on some. my MB6 loves it and i use it whenever i can afford to, its also more efficient on long runs so in that situation the higher cost of the fuel more or less balances out. the best stuff in the UK is either Shell V-power or (surprisingly) Tesco's high octane stuff which i cant remember the name of. both of them are 99 as apposed to the 97/98 that all of the other high octane fuels are, also Tesco's is usually the cheapest of the bunch and to answer your ECU question, with a standard ECU in the car then it will run fine on normal stuff but it will prefer the super juice.... however if you remap it then you should really be using the high octane fuels2 points
-
Leakless yay! I like 3" or 3.5" on the M series personally, outward rolled2 points
-
looks PHAT! very nice are they 8j?1 point
-
Super tidy. Looks great. Brace very nice too1 point
-
Someone ban him1 point
-
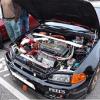
nice engine bay looks very tidy indeed .1 point
-
nice wee mod mate1 point
-
Some of the kei trucks on there are nuts. Here's a nice RX-2.1 point
-
The old girl shines up well these days. I just took this after a very quick wash and drying off with some Last Touch. Shame I only ever seem to take pics at sunset ffs!1 point
-
I always use super not because it makes the car quicker because I think that is a placebo personally but I do believe it leaves less deposits in the fuel system. And maintains healthy fueling1 point
-
Busy old day. What a pig of a job. Thought it would be easier. Mainly held up by 2.5 hrs of scraping the old gasket off. Still not up and running though I need some coolant and pcv hose. Need to extend all the wiring as it don't reach annoying!! And set up the tps. Not 100 percent how to route some of the vac lines. Think I'm gonna take the evap system off. Tidy things up a bit.1 point
-
I only put Shell V-Power and Tesco Momentum in my MB6. My MB3 I run on regular Asda unleaded, they have some additives in the fuel which helps clean the engine. Useful when your car is approaching 130,000 miles.1 point
-
Nice it's the little bits that finish engine bays1 point
-
Nice dude! Looking forward to seeing the wheels done!1 point
-
And my brothers deck1 point
-
My old deck. Won car of the month with it a while back lol1 point
-
ordered some h&r springs 35mm and sent payment for mgzs shocks cant wait1 point
-
Love it. Such a tidy bay1 point
-
My new shiny bits (oil cap, solenoid cover and flush washers) arrived yesterday so they've been added and after a quick spruce up in the bay here's the better photos as promised. And wheel refurbishment is finally underway.1 point
-
No, you need 1 channel per speaker or set of components. Eg if the amp is 2x150w it will supply a pair of speakers/component set with 150w each or it can be bridged (taking the + feed from one channel and the - feed from the other) to make a single channel of 300w. If you want to amp a set of component speakers and a sub you really want a 4 channel amp with one pair of channels to the front components and the other pair bridged to the sub.1 point
-
Yeah get yours sealed. If it fixes your leak and saves you buying boot trim then happy days1 point
-
No, frankly, you can run the front speakers using both channels of that amp or as you have it at the moment bridged to run the sub. To amp both you need another 2 channel amp or a 4 channel one to replace that. (2 channels running front speakers and the other 2 bridged to run the sub).1 point
-
Yes I'm am being greedy! Need to make sure I have every reason to keep this one1 point
-
No mate! They actually advise spraying vertically (you can obviously still remove wheels if you want or do the old bag trick!)1 point
-
Love it dude looks amazing. Probably my favourite style wheel ever.1 point
-
as far as I'm aware its exactly the same, its MA's that are different cos on the MB's its attached to the bonnet and on the MA's its on the bumper, so yeh you should be fine Anyone else feel free to correct me1 point
-
ordered some nuts form germany of all places on ebay. Saw a great spot today, a forest layby with sun shining through, i thought great on the way back ill stop and do some pics, that was short lived lol bloody weather!1 point
-
Think it's to vent any petrol fumes too from the tank hence it's on the fuel Filler Side I think ?1 point
-
Uuhhhhhh!!!! Those wheeeeels....... You really know how to make our jaws drop Absolutely amazing wheels, good choice James! My oleman just said my face was a picture looking at the monitor1 point
-
Wow!!! That's amazing! Completely transformed the look! Love it!1 point
-
I would say the Rota's were quite light compared with the fan blades! No idea of the weights though, think the Rota ones are around 5kg each without the tyre! I had a set in gun metal before! These aren't staying white but they are going on as they are for now as they are mint and would be a shame to hide them away, plus they are the show/summer wheels and I can't see us getting snow so once the nuts come they'll go straight on1 point
-
Nice one on the vent! I'm going to check mine, can't hurt to seal it! Need to bin the broken CD changer that's in the boot, it annoys me!1 point
-
Personally I don't like castrol, it seems to make the top end noisy. I use 10w40 mobil1.1 point
-
VIP MEMBER BABY!1 point
-
Hiya I have a very annoying problem with my vtis at moment well it's been happening for a while now Basically when the car is cold it holds back majorly when driving pretty much at any revs I'm any gear, holds back and slows down just backfires constantly then if I put foot down a bit more it clears but then will do it again just a few seconds later, when engine is hot it doesn't happen and it's always at like half throttle, still does it even with new engine although I did use my old dizzy? Could it be that? Leads? Ecu? I've no idea it's very very frustrating It's like it's over fuelling does it at idle too when cars not hot, any ideas please? Would be much appreciated thanks very much!1 point
-
It is possible to do without removing other window but i suggest doing it the way Naz suggests.. But this is the other method from my build thread.. Got this today from my mechanic/rover breaker £5.00 Lovely.. A Bit Of A Clean Later So off to work fitting it.... Removed door card and was told by my mechanic it is possible to fit without removing the main window so this is how i did it... Pictures are after removing but make it clearer to see how to Remove Window Winder.. Pic shows clip you need to shift to pull it off You Need A Medium Sized Cross Head Screwdriver Then The Door Handle A Smaller Cross Head Screwdriver And Then Slide To The Left Carefully Here You See How It Was Mounted And The Rear Of The Handle Showing The Clips Undo The Two 10mm Bolts To Release The Centre Bar Pull Back The Rubber Seal At Top To Reveal Hiiden 8mm Nut Now Push Centre Bar All The Way To Bottom Of Door (its tight but it does go) Bottom Of Centre Bar Now push The Weather Strip As Indicated In Pic Or Centre Bar Will Still Be In The Way (be gentle not to break the clips i did not thankfully) Then pull out old broken window and ding it LOL It is awkward to get the new one in requires a bit of fiddling and then pulling the rubber over the inside part of the door but it does go I Would Suggest You Heat The Rubber Seal Of The New Window With A Hair Dryer Before Fitting. (i did not as it was raining and i needed to do it in a hurry so i messed my rubber up visually a little bit but still water tight) Ensure that the centre bar is still on the window inside the door and facing the correct way at the top when fitting new window Then refit window seal at top slide the centre bar back up into place and refit in reverse.. And You Get This Look At The Mess Poor Little Car Twenty Mins Later However Although this method worked and had i used a hairdryer i prob would not of made the inside rubber look untidy if you have time i would remove the main window and then it just slides into place1 point
-
always liked these two, they belong to a couple of mates of mine in Inverness1 point
-
Lol 😂Here's how I find it easier to do Put window down 1) Pull seal out 2) Remove doorcard 3) Remove plastic waterproofing wrapper 4) Remove the quarter glass frame/bar Has a screw under the door seal at the top and one on the door skeleton 5) Lower window until you can see the two 10mm bolts holding glass on to rail, whilst holding the glass remove the 10mm bolts. 6) Pull the glass out 7) Now the quarter glass can be pulled out to. fit in reverse, DON'T over tighten the two 10mm bolts, just firm. spray wd40 or gt85 down the tracks and slide the rubber in last it will go. Been a while since I have done one, I think thats everything Hope that helps1 point